POC - Part 2: Creating the VM - Deploying the VHD Using VirtualBox
Welcome back! I see you are not easily discouraged.
Here are our assumptions:
- You are running Windows 7
- You are running VirtualBox
- You have downloaded and extracted the VHD for Fast Search Server 2010 for SharePoint
Let's hook up VirtualBox and the VHD.
The Short Version
Creating the VM
Start Virtual Box. Notice the friendly animals vying for your attention.
Clicking on New (upper left hand corner) will open the Create New Virtual Machine dialog. Click Next.
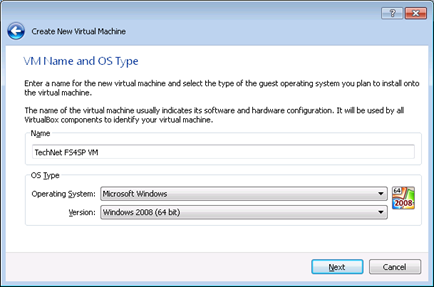
VM Name and OS Type
- Name: TechNet FS4SP VM
- Operating System: Microsoft Windows
- Version: Windows 2008 (64 bit)
Click Next.
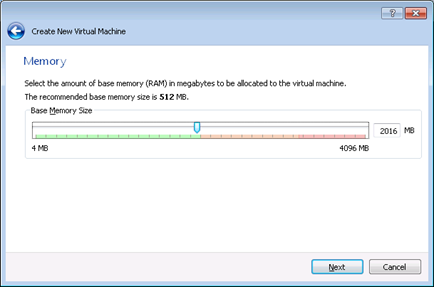
Memory
Enter 8192 in the input field to the right of the slider (or half of whatever memory you do have available).
Click Next.
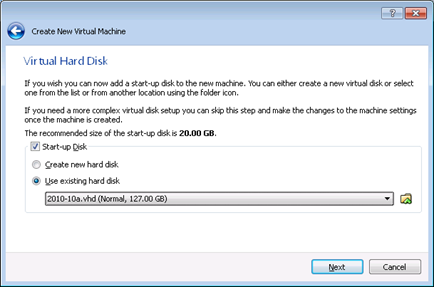
Virtual Hard Disk
Start-up Disk: checked
Select Use Existing Hard Disk
Click the folder icon to the right of drop down and navigate tothe location of the VHD. It should be on your desktop in the fast-technet-files\2010-10a\Virtual Hard Disks folder.
Click Next.
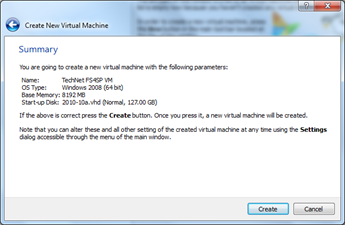
Summary
Check the information and, if all looks well, click Create.
The VirtualBox management console should appear with various configurations listed.
Select the TechNet FS4SP VM (click on it once).
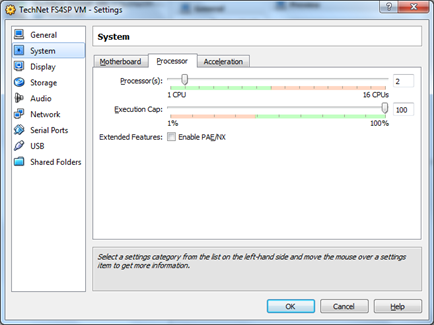
Settings --> System --> Processor
If you havea quad-core box then be a nice guy and give the VM 2 CPUs.
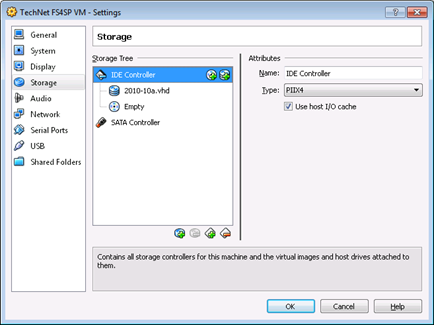
Settings --> Storage
Note that the 2010-10a.vhd is under SATA Controller.
Right-click on 2010-10a.vhd and select Remove Attachment from the popup menu.
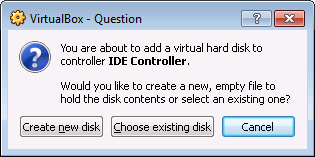
Right-click on IDE Controller and select Add Hard Disk. When the VirtualBox - Question dialog opens click on Choose Existing Disk.
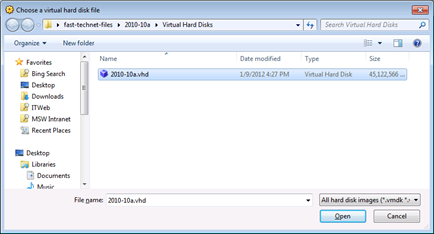
The File dialog should open in the folder with the 2010-10a.vhd file. Select it and click Open.
The VHD should now appear under the IDE Controller device. Click OK to accept all of the changes.
Initializing the VM
Click Start (the big green arrow above the VM entry list).
As the VM starts up a series of dialog boxes will open. Read them and close them. The VM does take a few minutes to start up.
When the VM finally says Press Ctrl+Alt+Del to Login...don't. From the VM main menu bar select Machine --> Insert Ctrl + Alt + Del. That will bring you to the login screen.
The default password for the TechNet Fast Search Server 2010 for SharePoint VM is pass@word1. Drivers will install, a Warm Up script will execute, Lync will open a window and eventually the Warm Up window will close (I promise it will take a long time, but it will finish).
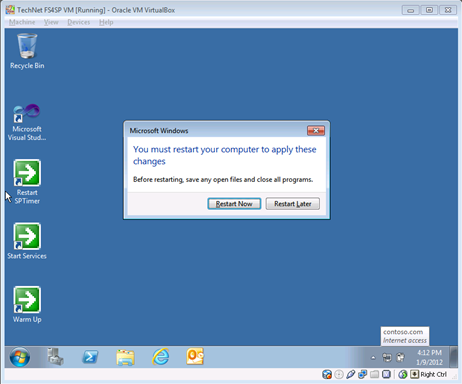
A Windows dialog has now opened saying you must restart your computer. Click Restart Now and watch your VM reboot.
When the VM has completed rebooting does the Warm Up window give you an error message in bright red letters complaining about the Forefront Identity Manager Service? If it does you can safely ignore it.
Install the Guest Additions
- In the VM window's main menu bar select Devices --> Install Guest Additions. That mounts an ISO image.
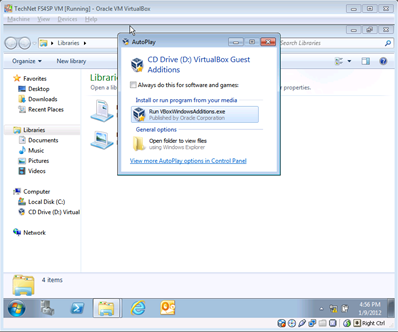
- Within the VM open Windows Explorer. An AutoPlay window will open; Click on Run VBoxWindownsAdditions.exe.
- When the Welcome dialog open click Next.
- Choose Install Location: click Next.
- Choose Components: I suppose you can check Direct 3D support if your machine supports it, otherwise click Install.
- Would you like to install this device software? Always click Install (you will need to do this 2 times) .
- With Reboot Now selected, click Finish.
- Get more coffee while you wait for the reboot to complete.
In the VM edit C:\Windows\System32\drivers\etc\hosts.
At the bottom of the file add:
10.0.2.15 intranet
10.0.2.15 intranet.contoso.com
Check the SharePoint install on the VM.
- Open IE within the VM.
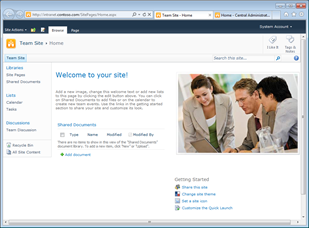
- It should automatically open on https://intranet.contoso.com (look don't touch).
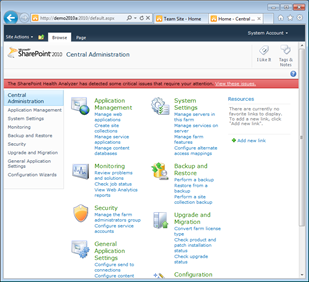
- Go to https://demo2010a:2010 for the SharePoint administration pages (look don't touch)
The Long Version
Hooking up the VHD to VirtualBox is pretty straightforward. As you would expect, the more resources you can allocate to it the better, but I have it set up with minimum CPU and memory.
Creating the VM
Start Virtual Box. Notice the friendly animals vying for your attention.
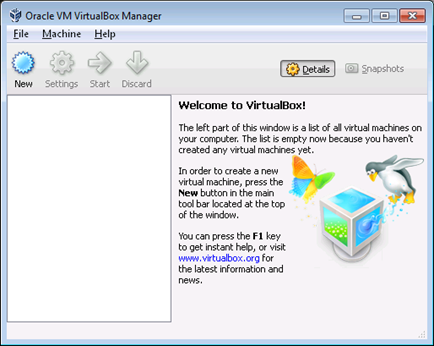
Clicking on New (upper left hand corner) will open the Create New Virtual Machine dialog. Click Next.

VM Name and OS Type
- Name: TechNet FS4SP VM
- Operating System: Microsoft Windows
- Version: Windows 2008 (64 bit)
Click Next.
Memory
Enter 8192 in the input field to the right of the slider.
Click Next.
Virtual Hard Disk
Start-up Disk: checked
Select Use Existing Hard Disk
Click the folder icon to the right of drop down and navigate tothe location of the VHD. It should be on your desktop in the fast-technet-files\2010-10a\Virtual Hard Disks folder.
Click Next.
Summary
Check the information and, if all looks well, click Create.
The VirtualBox management console should appear with various configurations listed.
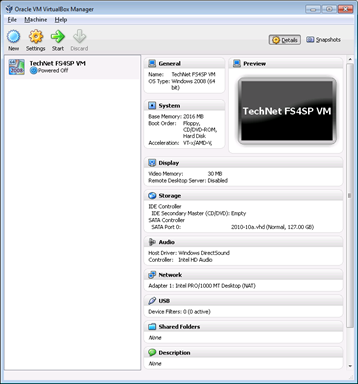
Sadly, we are not finished.
Select the TechNet FS4SP VM (click on it once).
Settings --> System --> Processor
If you havea quad-core box then be a nice guy and give the VM 2 CPUs.
Settings --> Storage
Note that the 2010-10a.vhd is under SATA Controller.
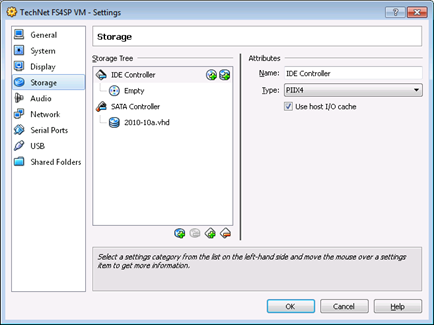
Right-click on 2010-10a.vhd and select Remove Attachment from the popup menu.
Right-click on IDE Controller and select Add Hard Disk. When the VirtualBox - Question dialog opens click on Choose Existing Disk.
The File dialog should open in the folder with the 2010-10a.vhd file. Select it and click Open.
The VHD should now appear under the IDE Controller device. Click OK to accept all of the changes.
Let's check the condition of the VM.
Initializing the VM
Click Start (the big green arrow above the VM entry list).
As the VM starts up a series of dialog boxes will open. Read them. Also, if you feel comfortable enough, click the check box that says Do Not Show This Message Again and click OK. The VM does take a few minutes to start up. Be patient.
When the VM finally says Press Ctrl+Alt+Del to Login...don't. From the VM main menu bar select Machine --> Insert Ctrl + Alt + Del. That will bring you to the login screen.
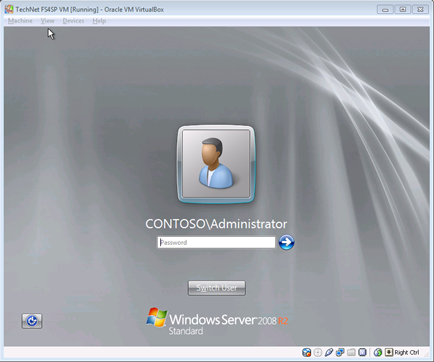
The default password for the TechNet Fast Search Server 2010 for SharePoint VM is pass@word1 (don't tell anyone, it's a secret). Entering the password and pressing Enter or clicking in the blue and white arrow will (eventually) bring you to your desktop. Drivers will install, a Warm Up script will execute (and will display a warning, multiple times, that it is Waiting for service 'Windows Update(wuauserv): to finish starting… ), Lync will open a window (that you can safely Setting icon --> File --> Exit) and eventually the Warm Up window will close (I promise it will take a long time, but it will finish). Go get some coffee if you feel anxious while you wait.
The Warm Up window finally closed? Not done yet.
A Windows dialog has now opened saying you must restart your computer. Click Restart Now and watch your VM reboot. Did I mention going for coffee or some other comforting beverages?
When the VM has completed rebooting, and you have logged in, does the Warm Up window give you an error message in bright red letters complaining about the Forefront Identity Manager Service (perhaps yellow?)? If it does you can safely ignore it.
Feeling good ?
Stop celebrating. One more thing to do.
Install the Guest Additions
In the VM window's main menu bar select Devices --> Install Guest Additions. That mounts an ISO image.
Within the VM open Windows Explorer. An AutoPlay window will open; Click on Run VBoxWindownsAdditions.exe.
When the Welcome dialog open click Next.
Choose Install Location: click Next.
Choose Components: I suppose you can check Direct 3D support if your machine supports it, otherwise click Install.
Would you like to install this device software? Always click Install (you will need to do this 2 times) .
With Reboot Now selected, click Finish.
Get more coffee while you wait for the reboot to complete.
In the VM edit C:\Windows\System32\drivers\etc\hosts.
At the bottom of the file add:
10.0.2.15 intranet
10.0.2.15 intranet.contoso.com
10.0.2.15 is the static IP of the VM. If you are lucky enough to run this under Windows Server 2008 R2 and Hyper-V then you will not need the above. Running under Windows 7 and VirtualBox requires it.
Check the SharePoint install on the VM.
Open IE within the VM. It should automatically open on https://intranet.contoso.com (look don't touch).
Go to https://demo2010a:2010 for the SharePoint administration pages (look don't touch)
That's it!
Congratulations! You may now celebrate.
This might be a good time to take a snapshot of the VM in its current pristine state so you can restore it if things really go south (Machine --> Take Snapshot). I highly recommend it (in other word: please take a snapshot so you can restore your VM to a clean starting point. I called mine TechNetVM-clean-install. You can find it under C:\Users\[user alias]\VirtualBox VMs\TechNet FS4SP VM\Snapshots not under %DESKTOP%\fast-technet-files\2010-10a\Snapshots).
Shortcuts:
- How to log on to the machine: From the main menu: Machine --> Insert Ctrl + Alt + Del
- Right Ctrl + F: expand the VM window to full screen.
- The Right Ctrl key will release the mouse from the clutches of the VM so you can use it on your desktop (the VM sometimes grabs the mouse when you click in the VM window and it cannot escape from the VM window. The default behavior is to allow you to move the mouse in and out of the VM window unencumbered).