Customize your TFS test hub test artifacts
If you have been using TFS 2013 you know about the ability to print test artifacts from the test hub. Many of my customers love this functionality as it gives them the ability to print out those test artifacts and hand them to stakeholders. I have learned recently that you can modify the output and incorporate your own custom styling such as a company header and footer.
In this post we are going to add our company logo and change some of the styling.
Customize //
First let's add our company logo image to TFS. We need to put the image into the following folder:
"C:\Program Files\Microsoft Team Foundation Server 12.0\Application Tier\Web Services\_static\tfs\12\_content"
Next we need to modify the "TestSuite.xsl" file. That file is located in the folder:
"C:\Program Files\Microsoft Team Foundation Server 12.0\Application Tier\Web Services\_tfs_resources\TestManagement\v1.0\Transforms\1033"
Open the file in Notepad and modify it. Here we are going add the image as part of the header with the following html.
| <div style="align:center;"> <img src="../../_static/tfs/12/_content/companylogo.png" /> </div> |
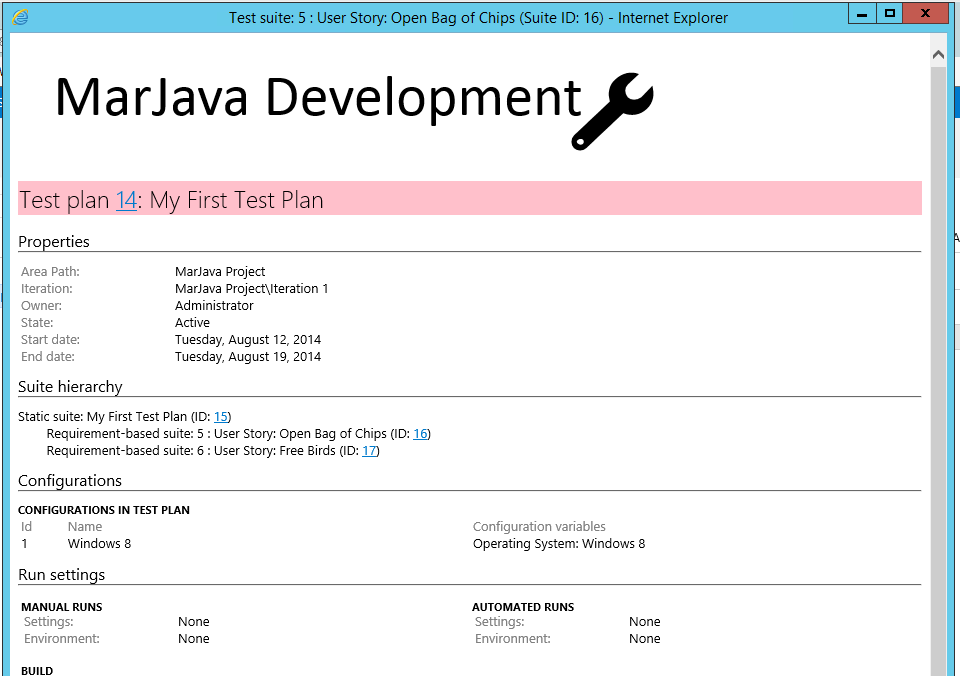
Obviously you can modify the style in the rest of the document as you see fit. To view the changes, open a test plan from the test hub and click the icon to "Email or print test artifacts".
Things to Remember //
- You can only customize the template on an on-premise instance of TFS
- You should copy and rename the xls file to something like "TestSuite-Original.xsl". If not, when you upgrade your TFS, the changes you made in the TestSuite.xsl file may get overwritten.
- You wont be able to customize the style per project, the style changes will effect all projects in your TFS instance