Converting a VBA Macro to C# 4.0
I've talked a lot about improved COM interop in C# 4.0 and how much easier it is now to work with Office applications. This time I want to share some tips and tricks on how you can convert Visual Basic for Applications (VBA) macros to C# 4.0 by using Office 2010 and Visual Studio 2010.
You can either watch a video or read this post: it’s the same scenario and the same code, only I tried a different medium this time. If you for some reason decide to take a look at both, let me know which one you liked more and why.
One common scenario for people working on Office applications is to record a macro in Office and then use the results in their code. It's often much faster and easier than looking up all the methods and properties.
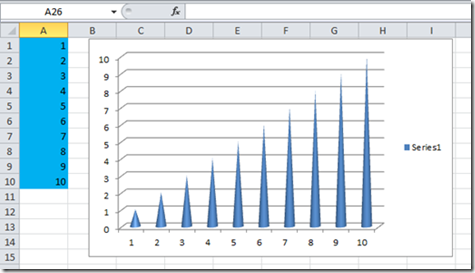
To try this out, record a macro in Excel 2010: create a new workbook, fill a column with numbers from 1 to 10 by using the Auto Fill feature, change the color of the column, and then create a simple graph.
Here's the VBA macro you'll get as a result:
Sub Macro1()
ActiveCell.FormulaR1C1 = "1"
Range("A2").Select
ActiveCell.FormulaR1C1 = "2"
Range("A1:A2").Select
Selection.AutoFill Destination:=Range("A1:A10"), Type:=xlFillDefault
Range("A1:A10").Select
With Selection.Interior
.Pattern = xlSolid
.PatternColorIndex = xlAutomatic
.ThemeColor = xlThemeColorAccent1
.TintAndShade = 0.399945066682943
.PatternTintAndShade = 0
End With
Range("A1:A10").Select
ActiveSheet.Shapes.AddChart.Select
ActiveChart.ChartType = xlConeColStacked
ActiveChart.SetSourceData Source:=Range("Sheet1!$A$1:$A$10")
End Sub
Now open Visual Studio 2010, create a new project, and add this reference to the project: Microsoft.Office.Interop.Excel. Then copy the VBA script inside the following code:
using Excel = Microsoft.Office.Interop.Excel;
class Program
{
static void Main(string[] args)
{
var excelApp = new Excel.Application();
excelApp.Workbooks.Add();
// Insert VBA code here.
excelApp.Visible = true;
}
}
Of course, the VBA code is all highlighted as an error. Here are the steps that you can use to convert that code into C# code:
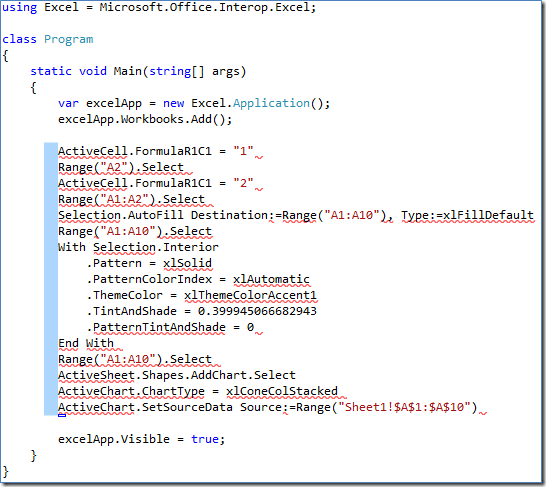
In this macro, all the objects are in fact properties of the Excel application object. Basically, you need to add excelApp to the beginning of each line.
Press ALT and select an area at the start of the lines, as shown here:

Now type excelApp. and notice that it appears at the start of all the lines at once.You can use the same trick to add Selection.Interior to all the lines in the With block. Then delete the first and the last elements of the block (With and End With).
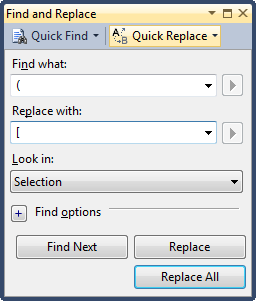
For all the Range objects, you need to replace the parentheses with square brackets. This is because in C# you need to use indexed properties, and their syntax requires, well, square brackets. In this piece of code all of the parentheses should become square brackets, so you can use the Find and Replace feature. (The keyboard shortcut for this is Ctrl + H.)

The next step is to replace the syntax for the named parameters. VBA uses the ":=" operator, while in C# 4.0 it's simply ":". Once again, simple find and replace can help.
Now you need to add semicolons to each line, and add parentheses after each method call. You could probably find a converter that would do this for you, but here you have such a small piece of code that you can do it manually.
Update:
You can use the multi-line editing for adding semicolons as well. You can select a column in a so-called “virtual space”, where no characters were typed in.

So, you can type several semicolons at once and then reformat the document. Thanks to Jan B and David Nelson for the tip.The last thing to fix is the constants. Press Ctrl+Alt+J to open the Object Browser, and then search for each constant. You should find a class that contains this enumeration:

All you need to do is to add the name of the class to the beginning of the constant.excelApp.Selection.AutoFill(
Destination: excelApp.Range["A1:A10"],
Type: Excel.XlAutoFillType.xlFillDefault);
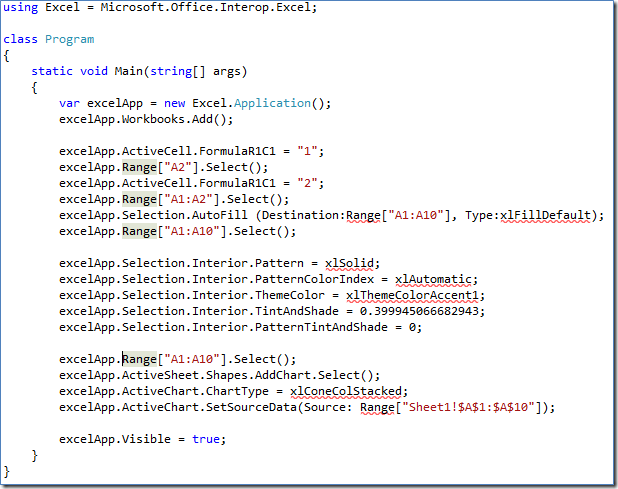
That’s it. Now you can compile and run the program and get exactly the same picture that you saw at the beginning of this post. Here's the final version of this little program.
using Excel = Microsoft.Office.Interop.Excel;
class Program
{
static void Main(string[] args)
{
var excelApp = new Excel.Application();
excelApp.Workbooks.Add();
excelApp.ActiveCell.FormulaR1C1 = "1";
excelApp.Range["A2"].Select();
excelApp.ActiveCell.FormulaR1C1 = "2";
excelApp.Range["A1:A2"].Select();
excelApp.Selection.AutoFill(
Destination: excelApp.Range["A1:A10"],
Type: Excel.XlAutoFillType.xlFillDefault);
excelApp.Range["A1:A10"].Select();
excelApp.Selection.Interior.Pattern = Excel.Constants.xlSolid;
excelApp.Selection.Interior.PatternColorIndex = Excel.Constants.xlAutomatic;
excelApp.Selection.Interior.ThemeColor = Excel.XlThemeColor.xlThemeColorAccent1;
excelApp.Selection.Interior.TintAndShade = 0.399945066682943;
excelApp.Selection.Interior.PatternTintAndShade = 0;
excelApp.Range["A1:A10"].Select();
excelApp.ActiveSheet.Shapes.AddChart.Select();
excelApp.ActiveChart.ChartType = Excel.XlChartType.xlConeColStacked;
excelApp.ActiveChart.SetSourceData(Source: excelApp.Range["Sheet1!$A$1:$A$10"]);
excelApp.Visible = true;
}
}
If you've read all that and still feel like you missed some steps, watch the video: How Do I: Convert Visual Basic for Applications Macro to C# 4.0
P.S.
Thanks to Mads Torgersen and Alex Turner for reviewing this and providing helpful comments, to Mick Alberts for editing.


