What’s new in Universal Resource Scheduling for Dynamics 365 February 2018 Update
Applies to Universal Resource Scheduling solution (version 2.4.0.47), Field Service application (version 7.4.0.74), Project Service Automation application (version 2.4.0.48) On Dynamics 365 version 9.0.x)
Continuing our theme for our update releases, Universal Resource Scheduling February Update focuses on our customers, with improvements in user experience, feature discoverability, stability, and highly requested scenarios. For a list of bug fixes, read this post.
Scheduling Enhancements:
New User Experience for Resource Sorting on Schedule Board
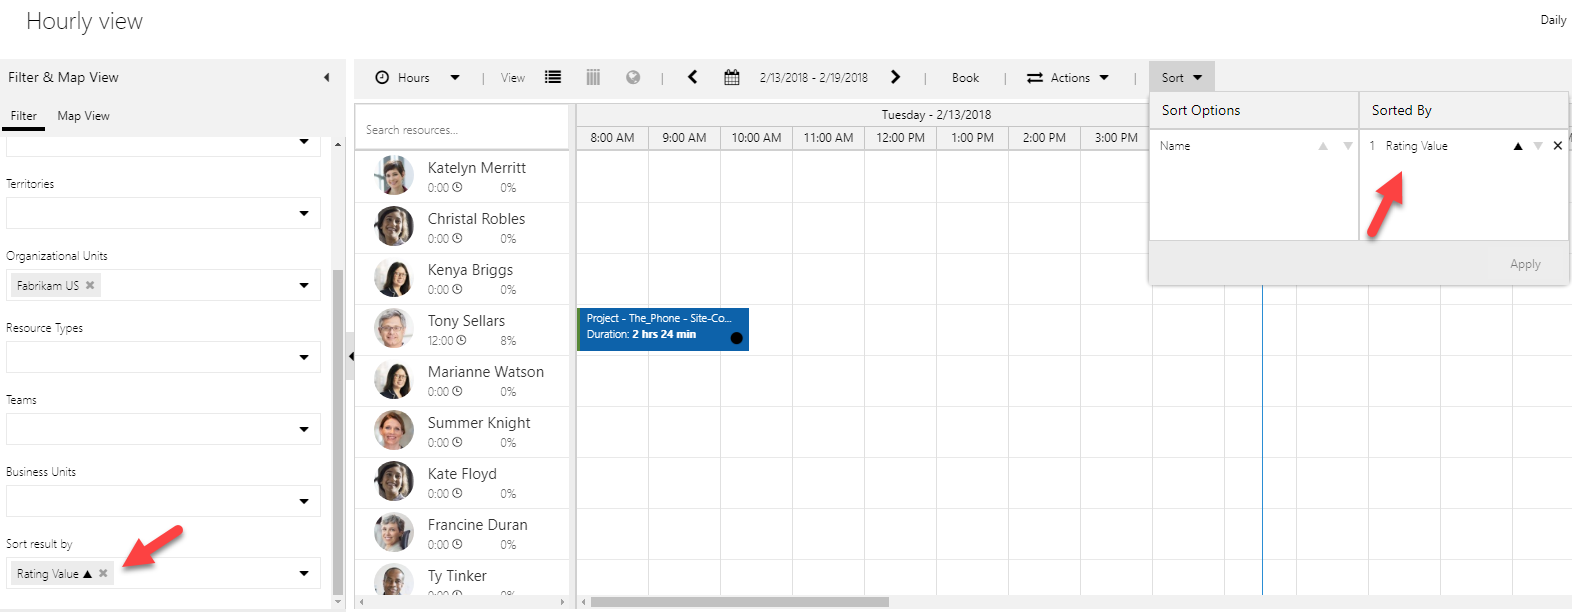
You’ll notice a new sort button on the Schedule Board ribbon. Clicking this button allows you to easily select one–or multiple–sort options for sorting resources on the Schedule Board.

These sort options are the same as those available in the filter control.
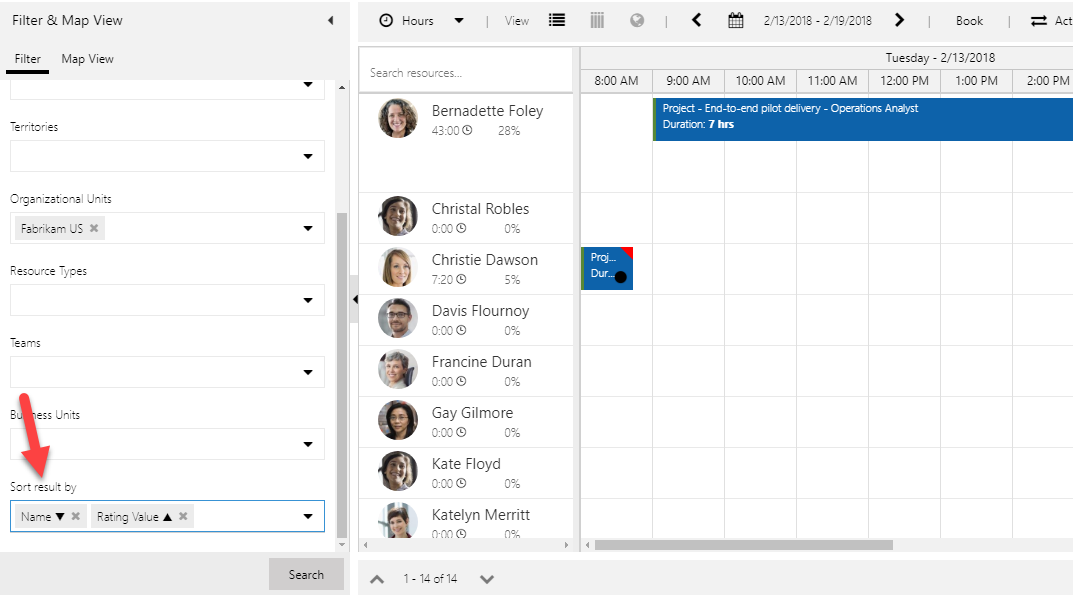
However, it’s now much easier for a user to interact with the sort options by adding a control for sorting to the Schedule Board toolbar.
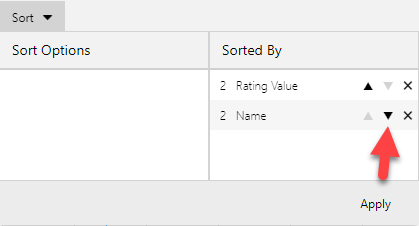
In addition to better placement, you can also reorder your sort extremely easily! Previously, you’d have to remove and re-add sort options if you wanted to reorder your sorting in the filter control, but we made this really simple with the February ’18 update.
Let’s take a quick walkthrough on how the new sort control works.
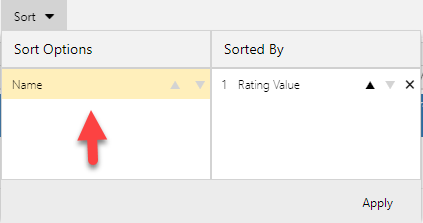
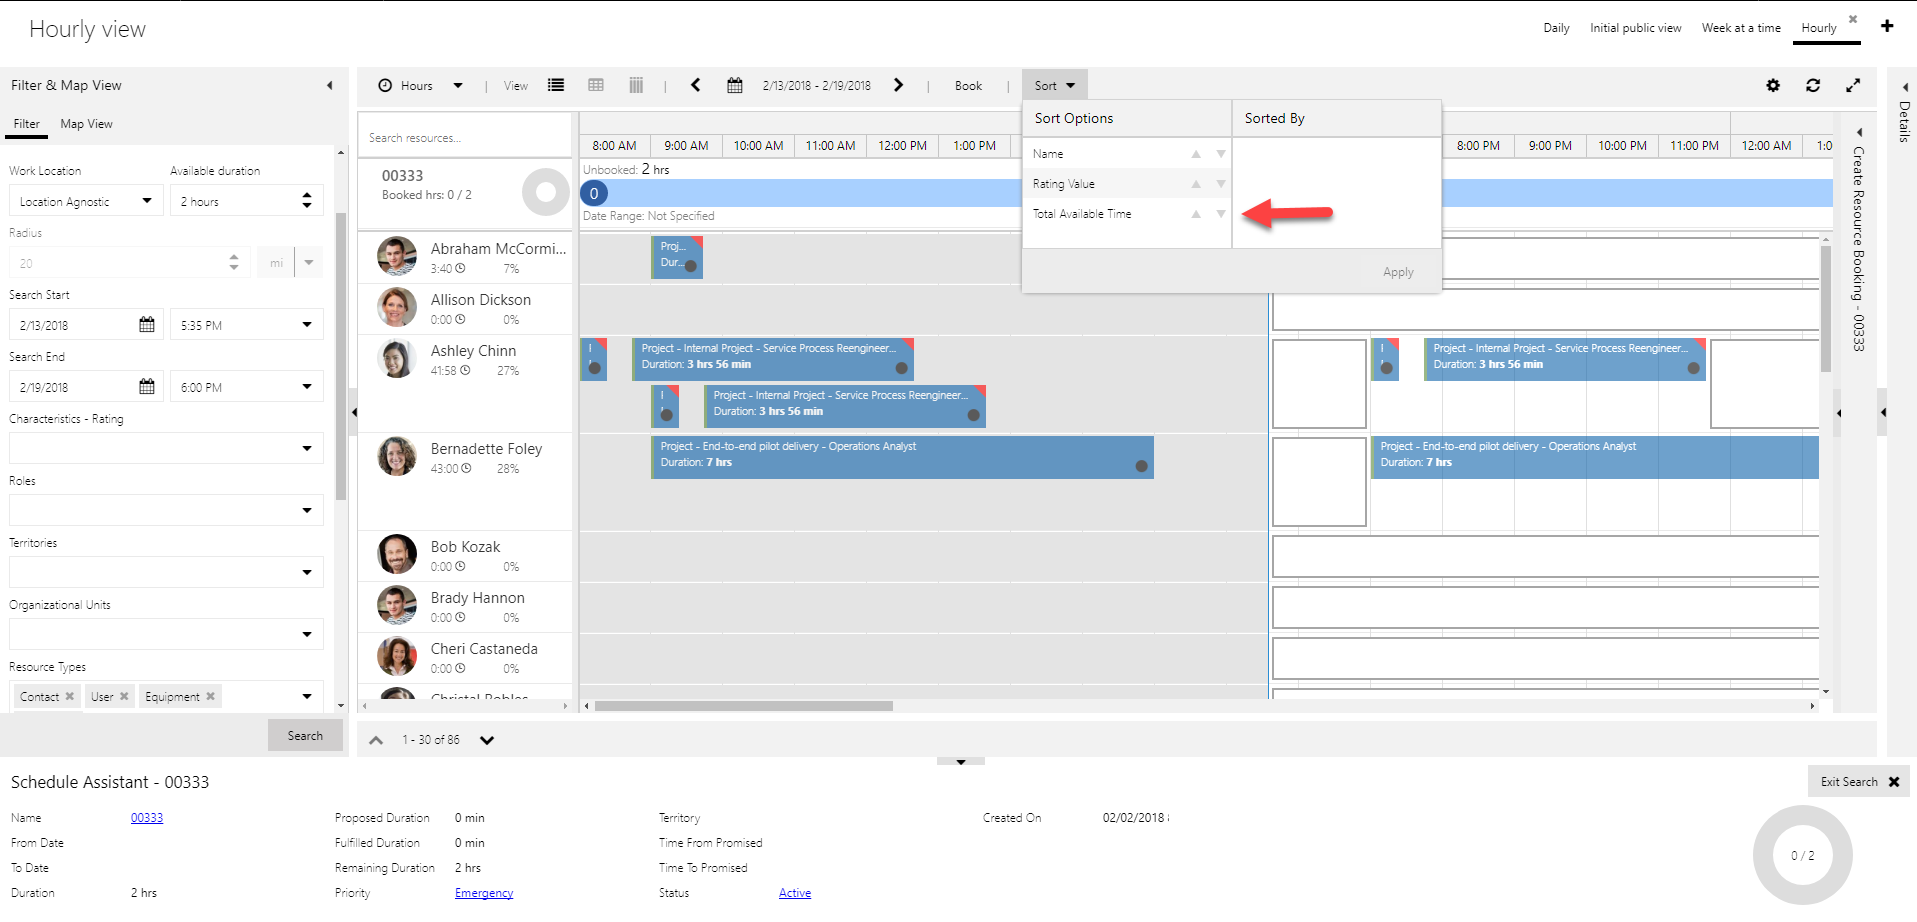
The left-hand side of the sort panel represents the sort options you can choose from:
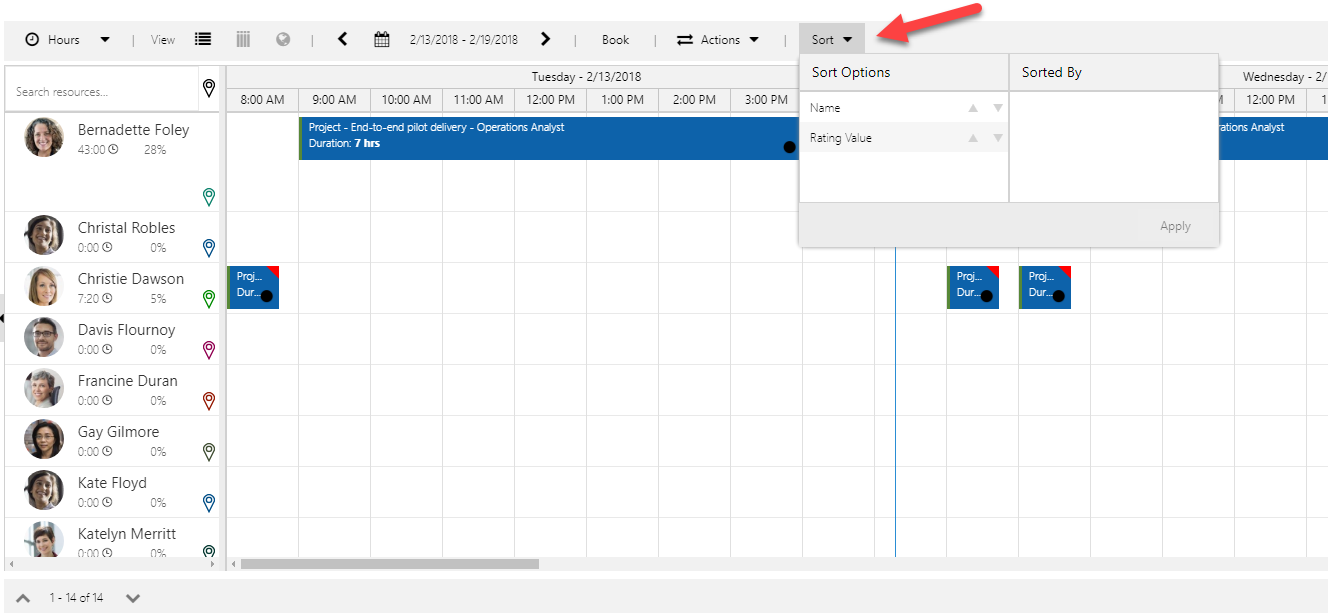
You can double click on a sort option which will move it to “sorted by” column on the right-hand side of the sort panel. The default sort order will be ascending.
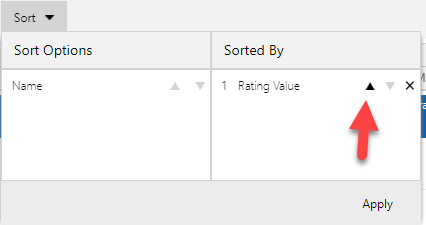
Instead of double clicking to select a sort option, you can also click the ascending or descending arrows, which will add the sort option to the “sorted by” section, in that respective sort order.
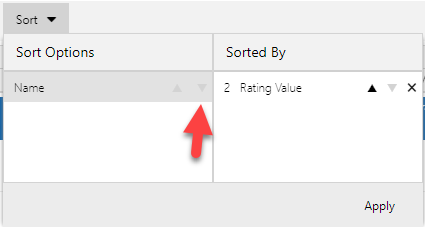
To remove one of your sort options, you can hover over a selected sort option and click the “x” to remove.
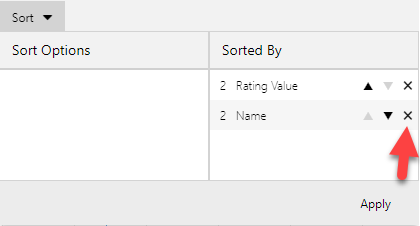
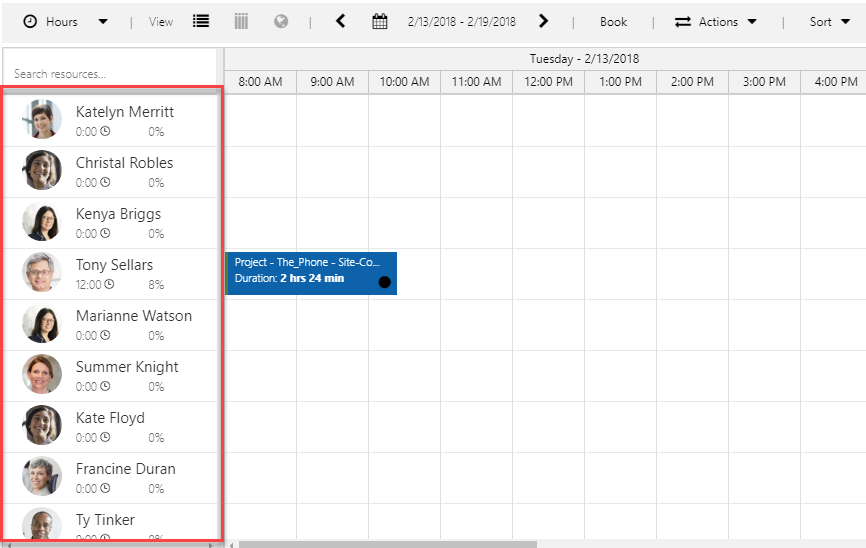
At any point, click “apply” to execute your sort options, and the Schedule Board will reorder your resources based on your sort order.

Once you’ve applied your sorting from the new sort control, or the filter panel, the two are kept in sync to support both user flows.
Note that you may notice different sort options when you search for availability on the Schedule Board.
Remember, using Universal Resource Scheduling extensibility, you can add your own sort options! To learn more, see this post.
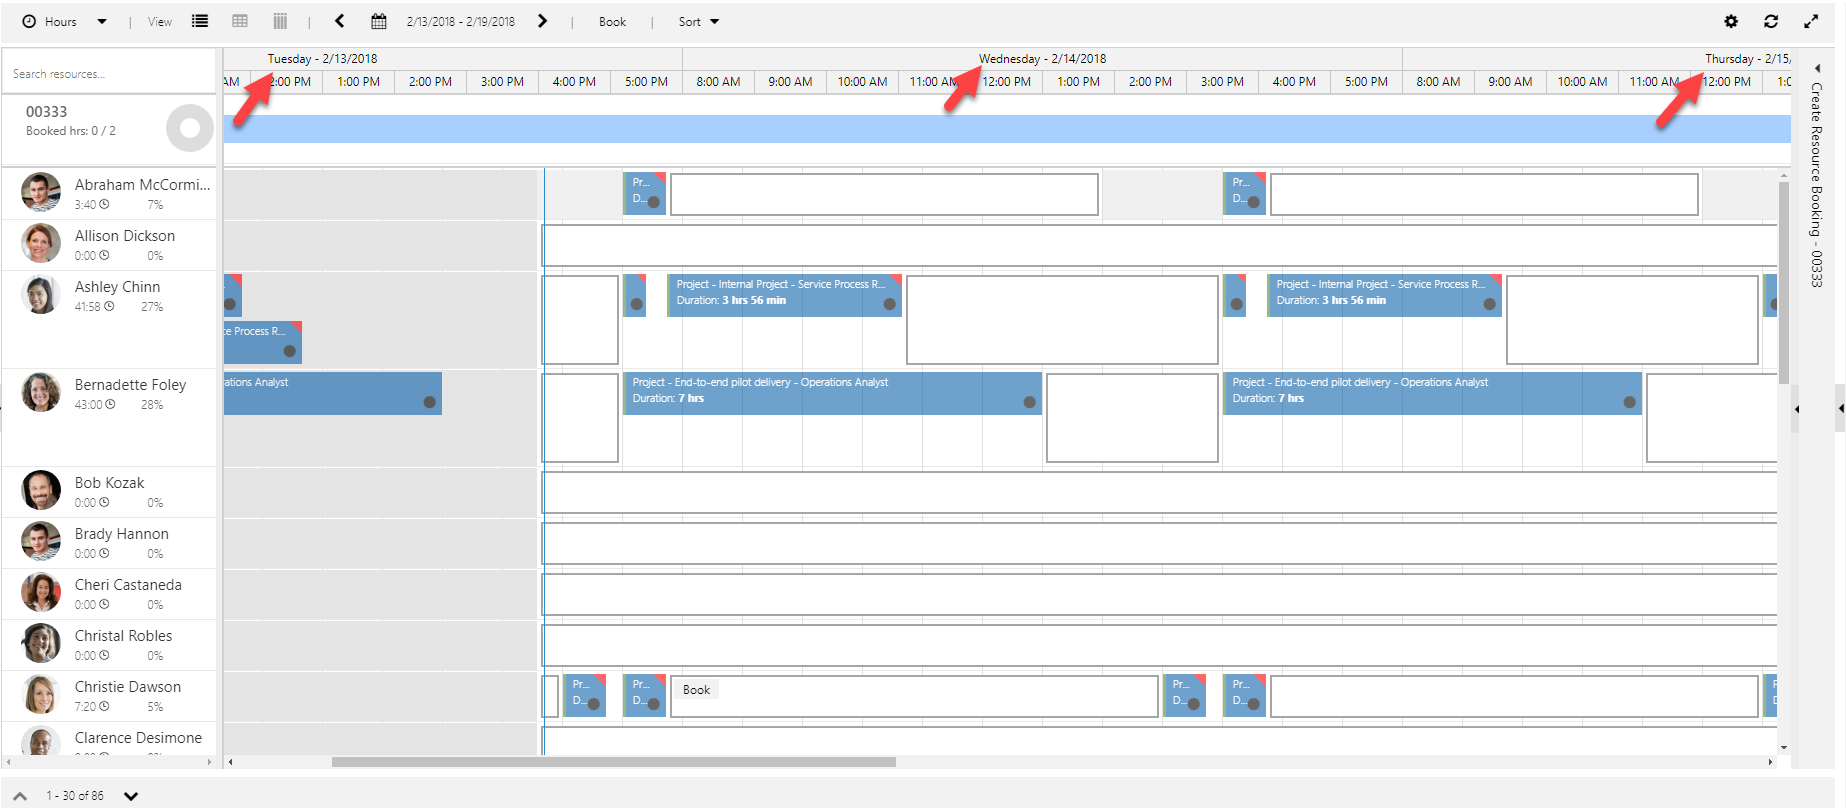
Day of week added to horizontal hourly Schedule Board
When we observed our customers using the hourly horizontal Schedule Board, we learned that it would save users a good deal of time if they could easily see what day of the week each date was. Something so simple, yet so beneficial to our customers. Day of the week now precedes the date. So here it is!
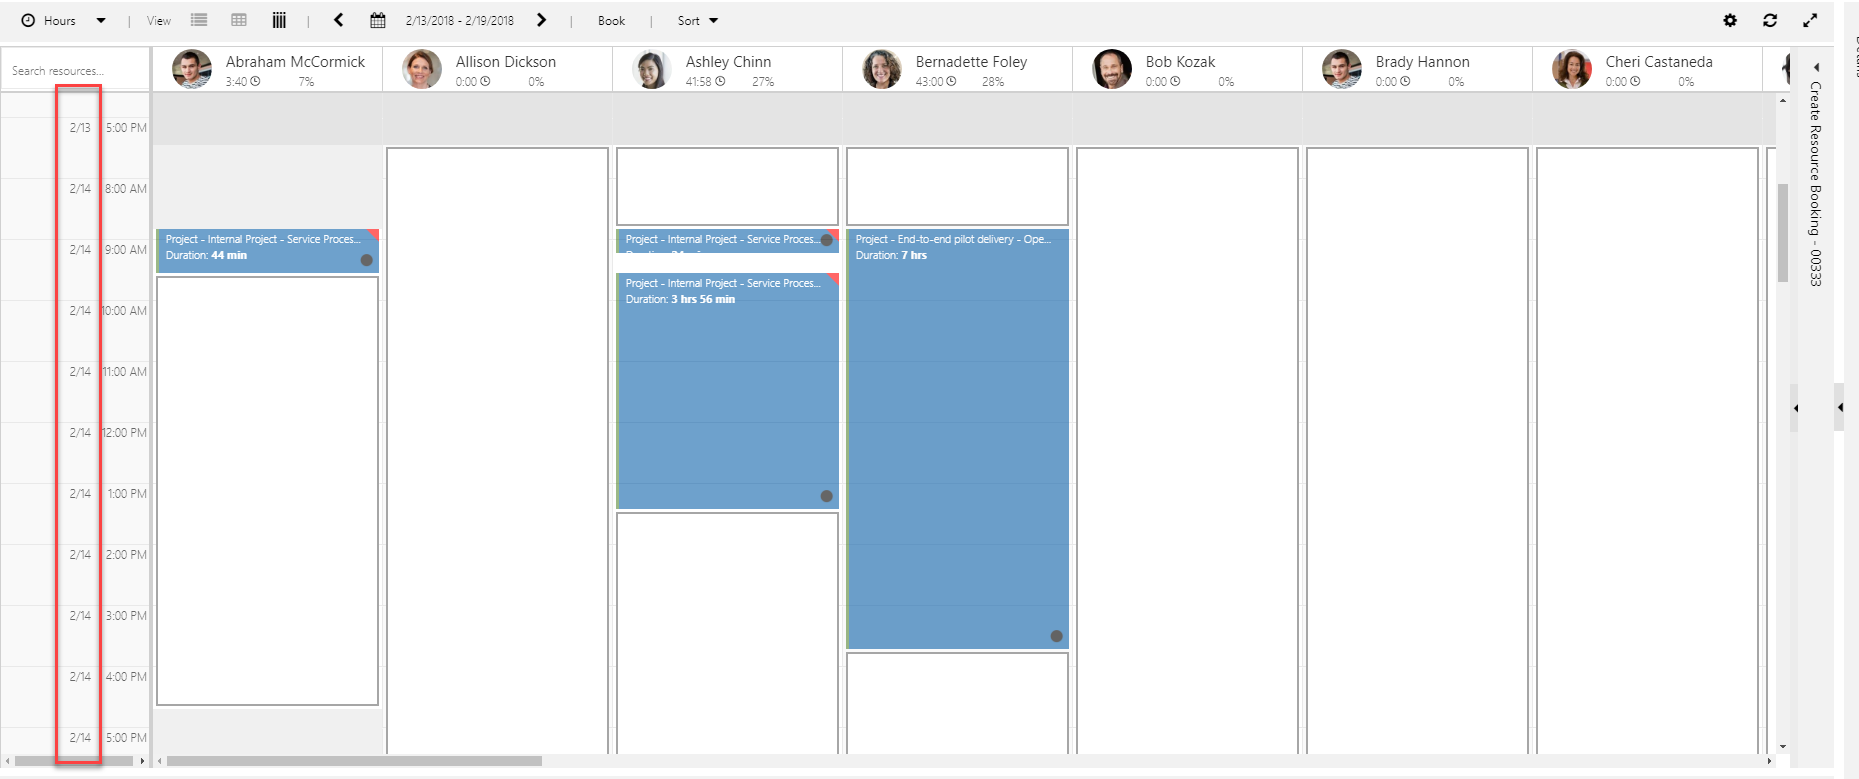
Date added to hourly vertical Schedule Board
Similarly, we had requests to add the date to the vertical Schedule Board instead of only displaying time. So we did! And we’ll look to add the day of week to this view as well in future update.
Onsite Resource Substitution
We have opened up a tremendously valuable process for onsite bookings. Consider a scenario: a resource is scheduled to visit a customer location, but due to unforeseen circumstances, that resource can no longer make the appointment. Previously, you would be able to “rebook” the appointment, which searched for any NEW appointment time that fit within the parameters of the requirement. This is perfect in a scenario where the customer is flexible and isn’t counting on a resource to arrive at the originally committed time. But what happens if your customer isn’t so flexible on the original committed time?
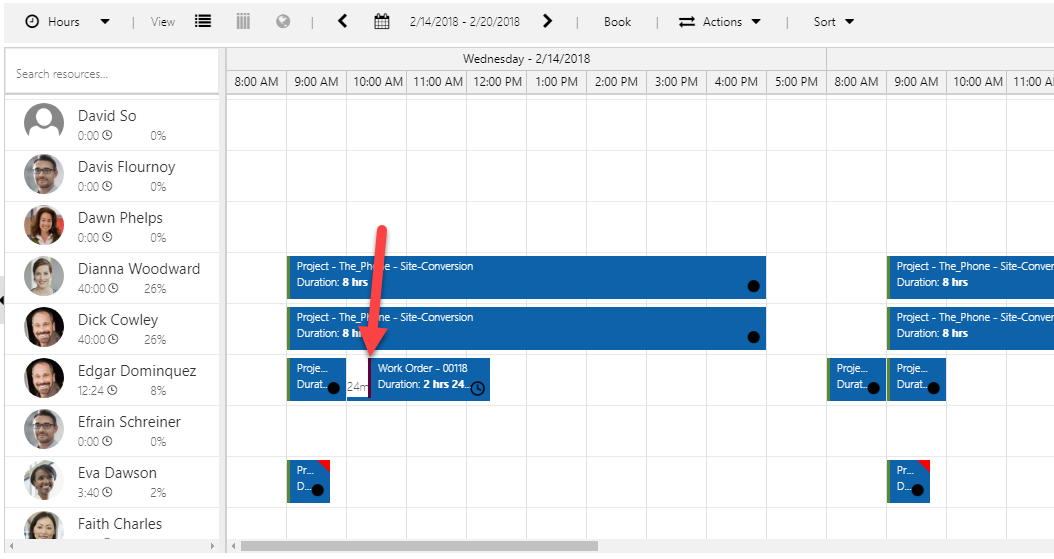
Just right-click on the booking, and find a substitute.

The schedule assistant will run and search for a resource with the initial requirement attributes (characteristics, territory, etc). In addition, it will now search for a resource that can travel and arrive at EXACTLY the same time the previous resource planned to arrive at the customer. Some of the suggested slots may look like they start earlier, which happens because it’s adjusting for the extra travel time needed to arrive perfectly on time.
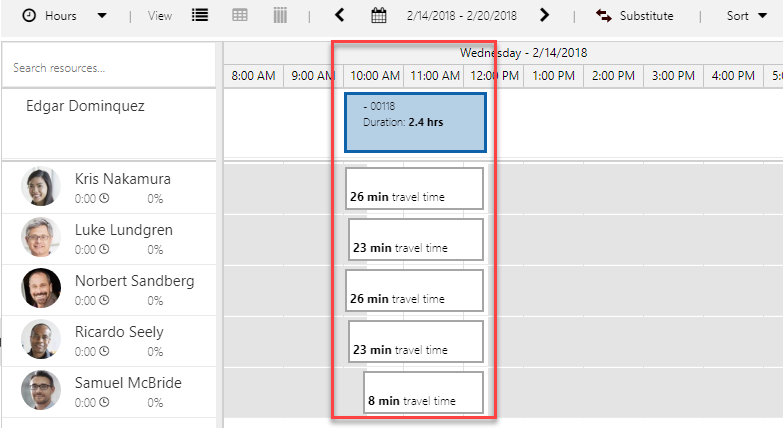
To complete the substitution, hover over the recommended slot, and click substitute:


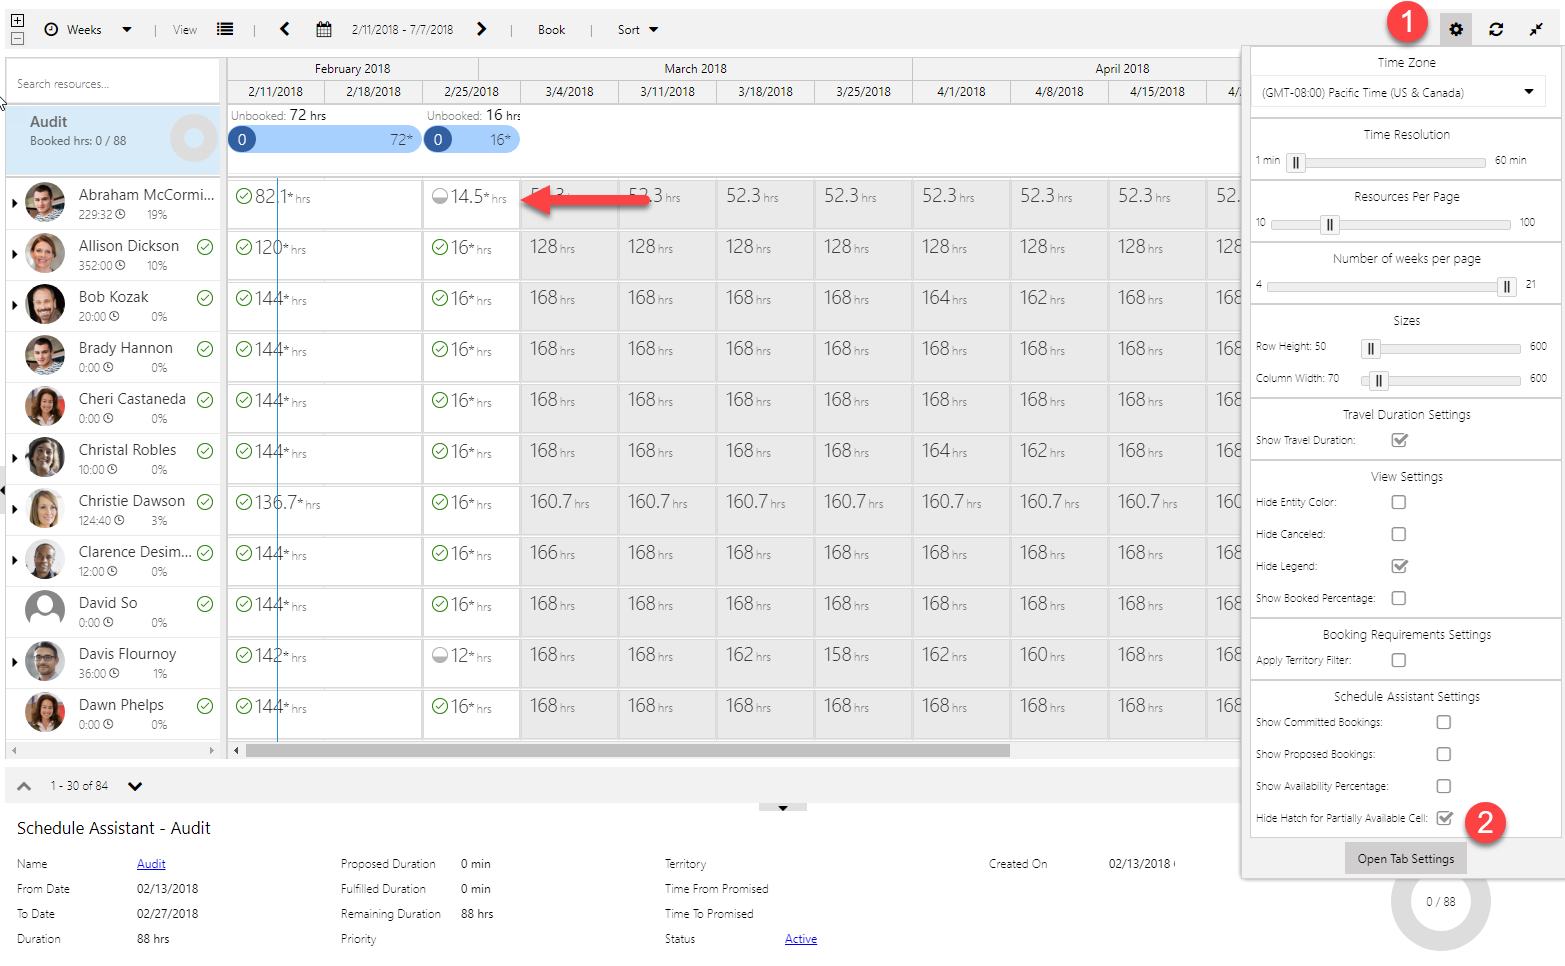
Option to remove hatch design from partially available cells
When talking to our customers about searching for availability, we received mixed feedback as to whether we need both a hatch and a partial icon to represent resources that have some of the requested hours, but not all the hours needed. There was passion on both sides of the debate!

We didn’t have the heart to choose sides, so here’s an option for a whitespace look!
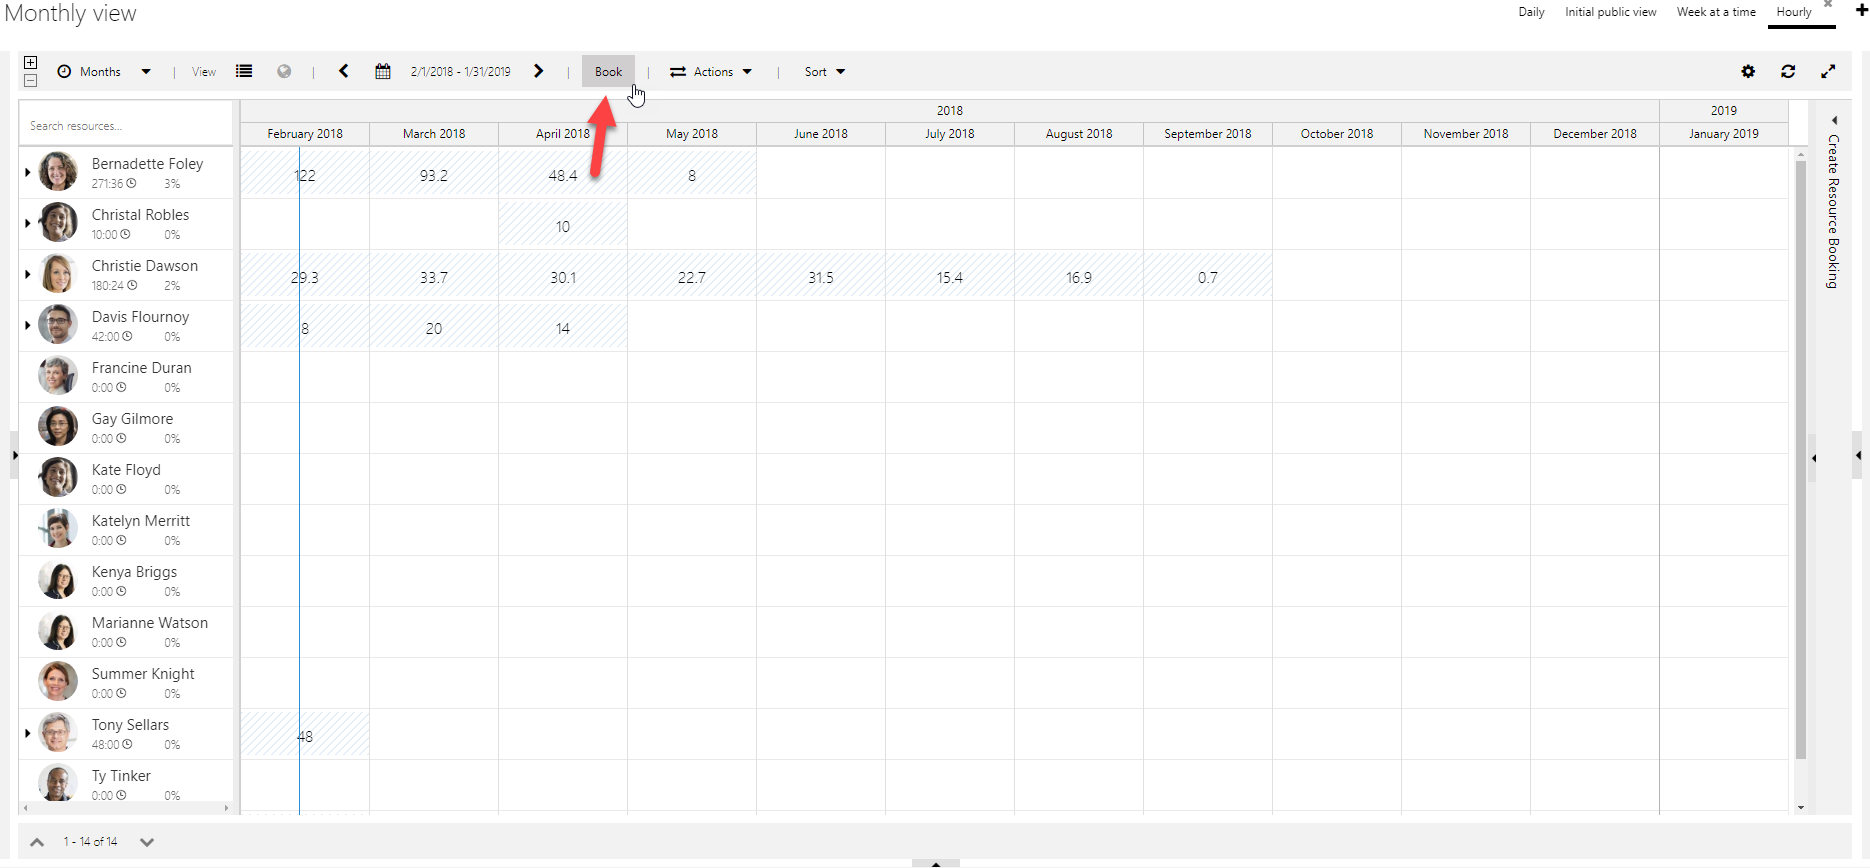
Slide up booking requirement grid when user clicks book on top ribbon
For users who leverage the book button on the top toolbar, we wanted to make the flow more discoverable. If you click the book button prior to selecting a requirement, we inform you that a requirement needs to be selected to book. Now, we also expose the booking requirements grid, making it simple to learn this usage path.

Asterisk in multiday Schedule Assistant to identify overlapping bookings
In the multiday Schedule Assistant, available hours are calculated by checking how many hours fall within the resources’ working hours, that also fall within the requirements’ hours. But sometimes, resources have bookings that overlap. For example, in an 8-hour work day, there may be a booking from 9 to 1 and an overlapping booking from 9 to 11. On the Schedule Board in the hourly view, it would look like the resource has 4 free hours (1 to 5); in reality, there are 6 hours already booked in an 8-hour day because of the overlapped bookings. This leaves only 2 free hours.

When displaying the number of hours a resource has for a given requirement, we take these overlapped hours into account, only showing 2 hours of availability. However, we’ve added an asterisk to indicate there is something unique about these available hours. If a user right clicks the cell with the asterisk and clicks “view details,” that user will see the reason for the asterisk–in this case, the fact that there are overlapped hours.
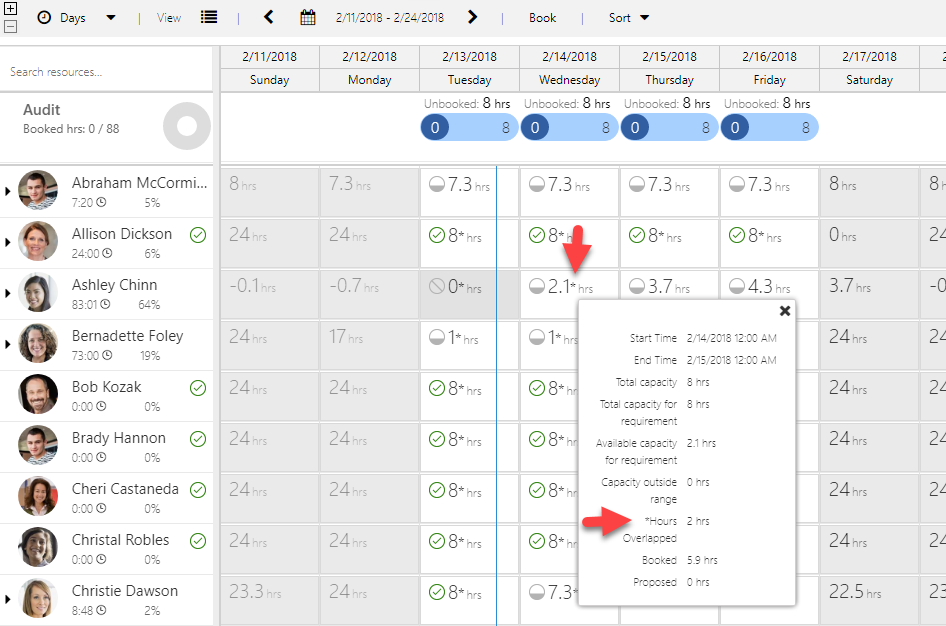
As a side note, sometimes the asterisk is used to indicate that the resource has additional capacity not accounted for in the available hours, since the capacity falls outside of the requirement time range. The details elaborate on what the asterisk indicates.
Mapping enhancement to calculate travel (even if mapping service is down)
Out of the box, we contact the Bing mapping service for travel calculations when a user searches for onsite requirement availability. Believe it or not, once in a while, we may encounter an issue reaching the service. We want to make sure that under all circumstances, this does not affect your users’ ability to schedule. Therefore, if we ever have an issue reaching the mapping service, we will instead calculate the distances using a mathematical calculation, sometimes referred to as “as the crow flies.”
Specify Pattern Enhancements:
Specify Pattern UI now uses the same design as the demand panel on Schedule Board
When selecting to “specify pattern” on one or many requirements, we changed the UI to be identical as when you search for availability.

Matching design on Schedule Board:

Specify Pattern Top Section UI
Additionally, we revamped the top section of the specify pattern experience to be clearer and easier to understand.
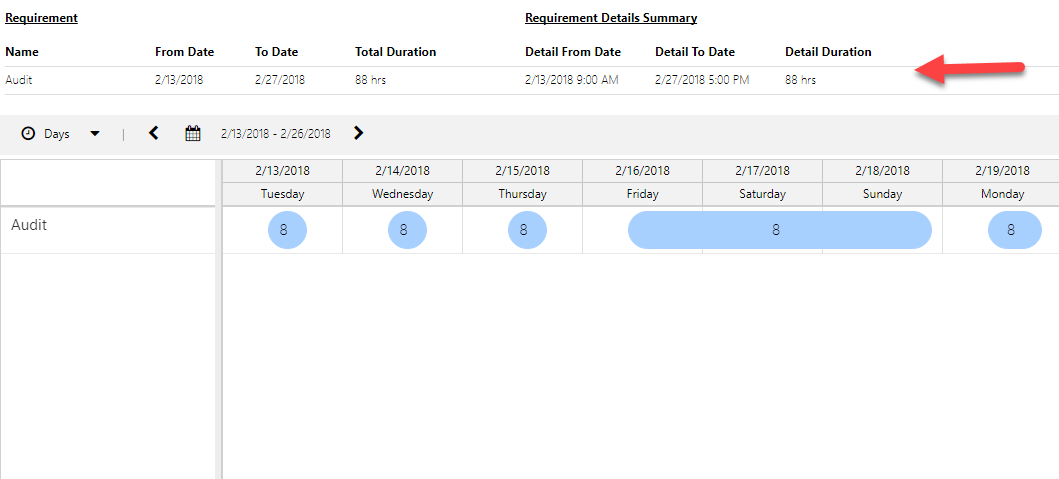
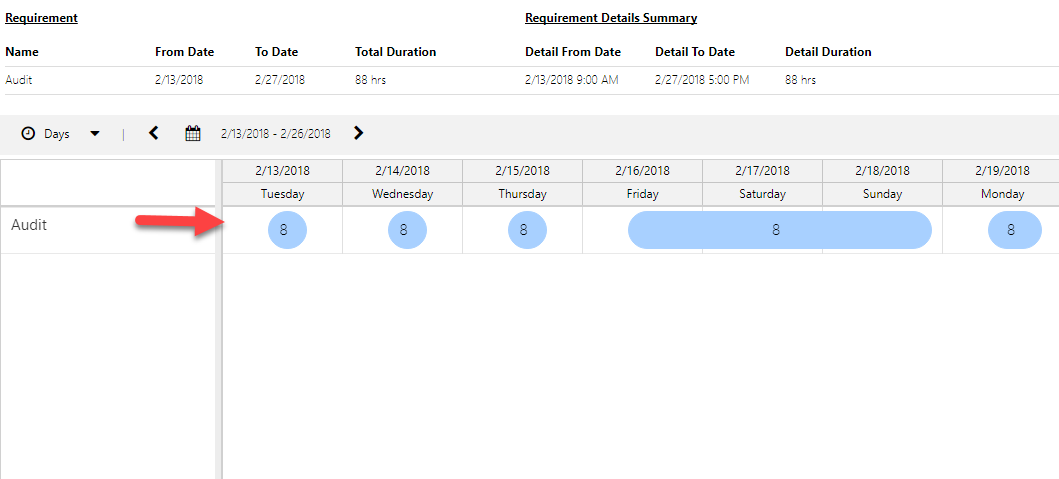
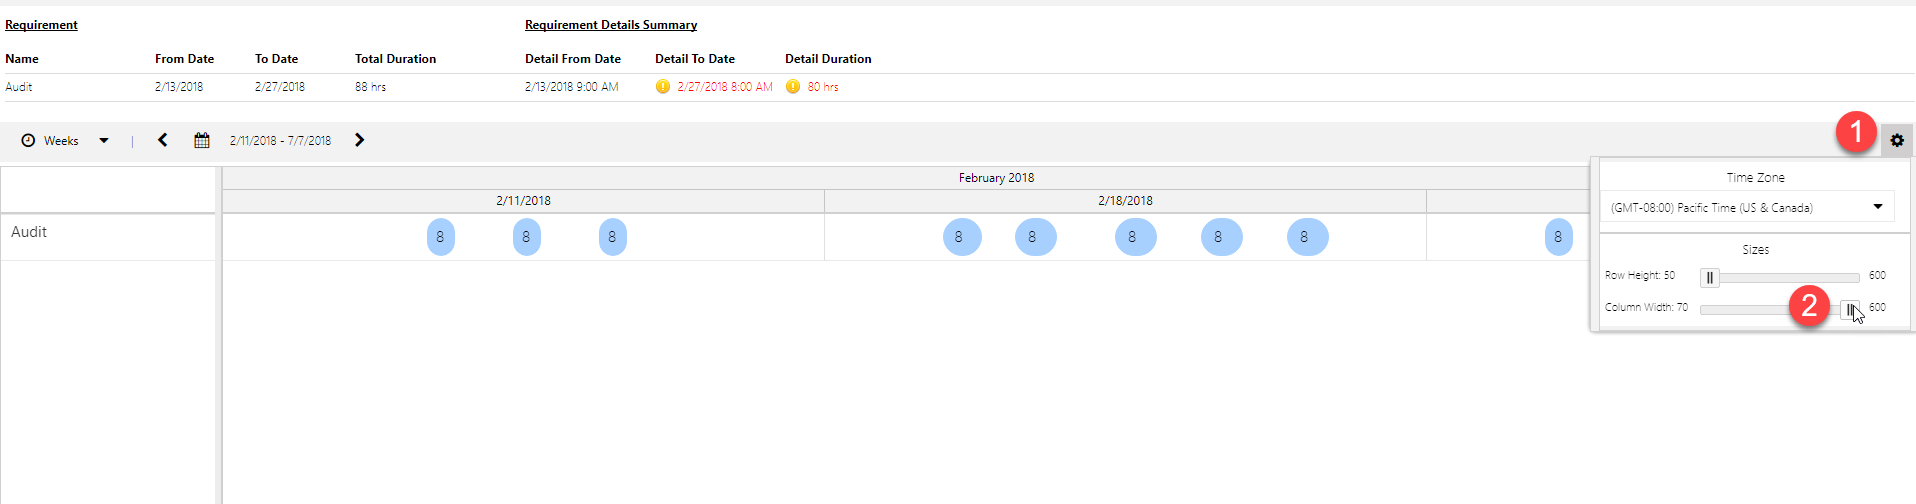
Specify Pattern – Contour Requirement with more space
Sometimes you may have a requirement contoured at a low granularity (perhaps daily), yet you would like to see the entire picture of the requirement. This would require you to contour further in a different view, perhaps the weekly view.
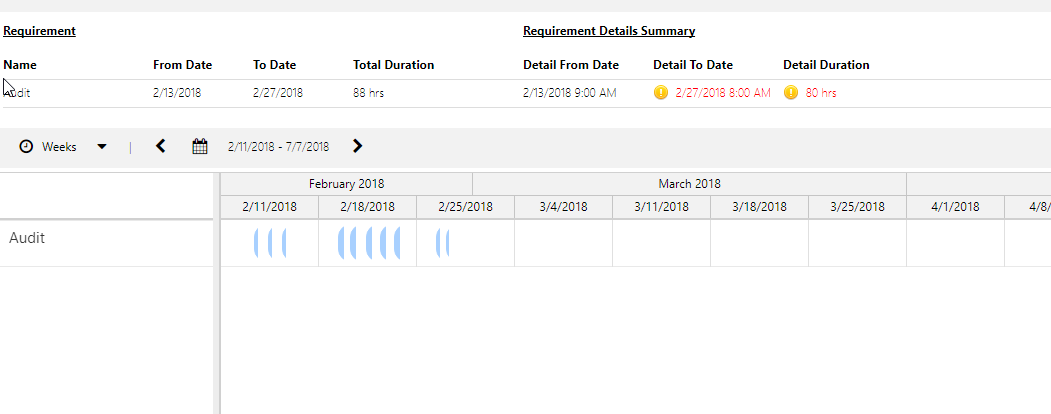
Now, you can change the width of your columns to create a more workable experience.
Ignore or consider proposed bookings
Sometimes it’s necessary to soft-book a resource, perhaps because you’re planning an upcoming, not-yet-sold project, but cannot yet totally commit that resource’s time. We’ve now made it possible to consider (or ignore) resources’ proposed hours when searching for availability!
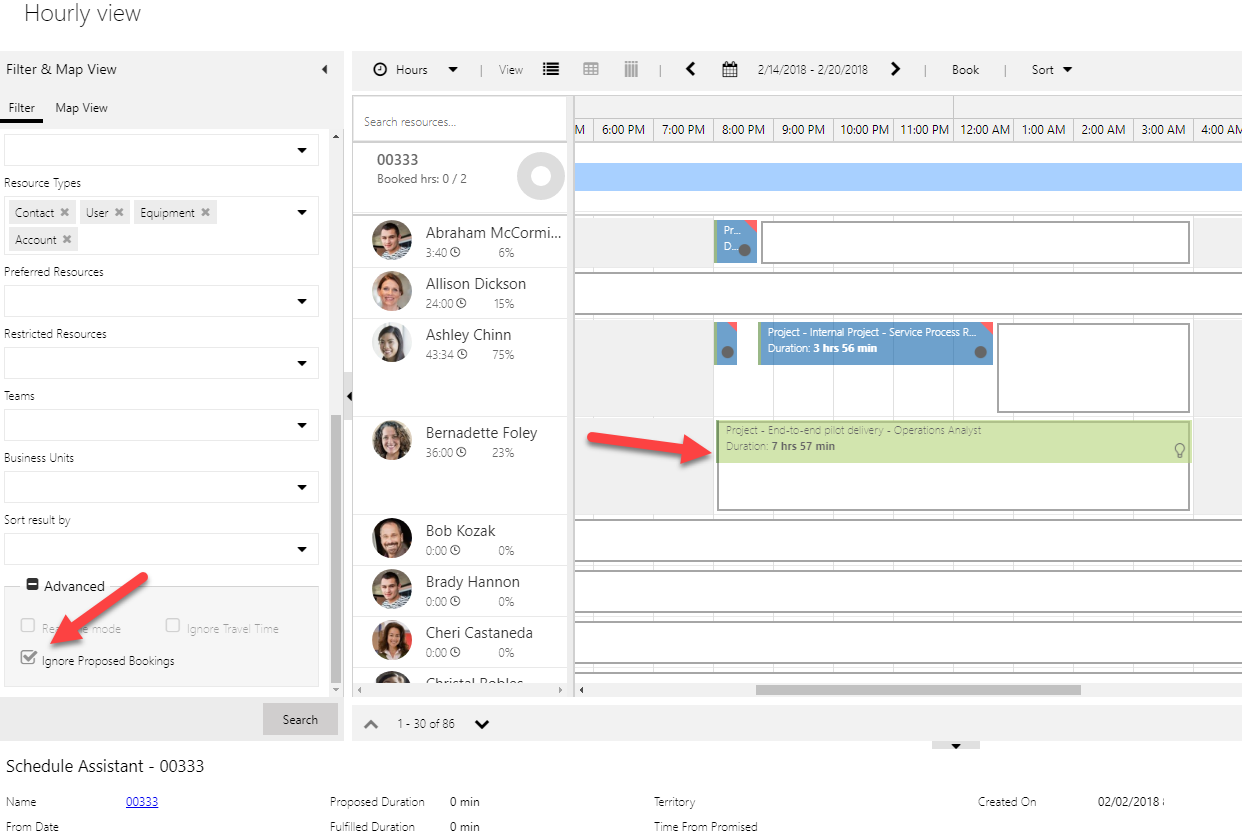
You can see here that although the proposed booking exists, the schedule assistant is still recommending this as a time that the resource manager can book. You can see the gray border indicating this slot as available.
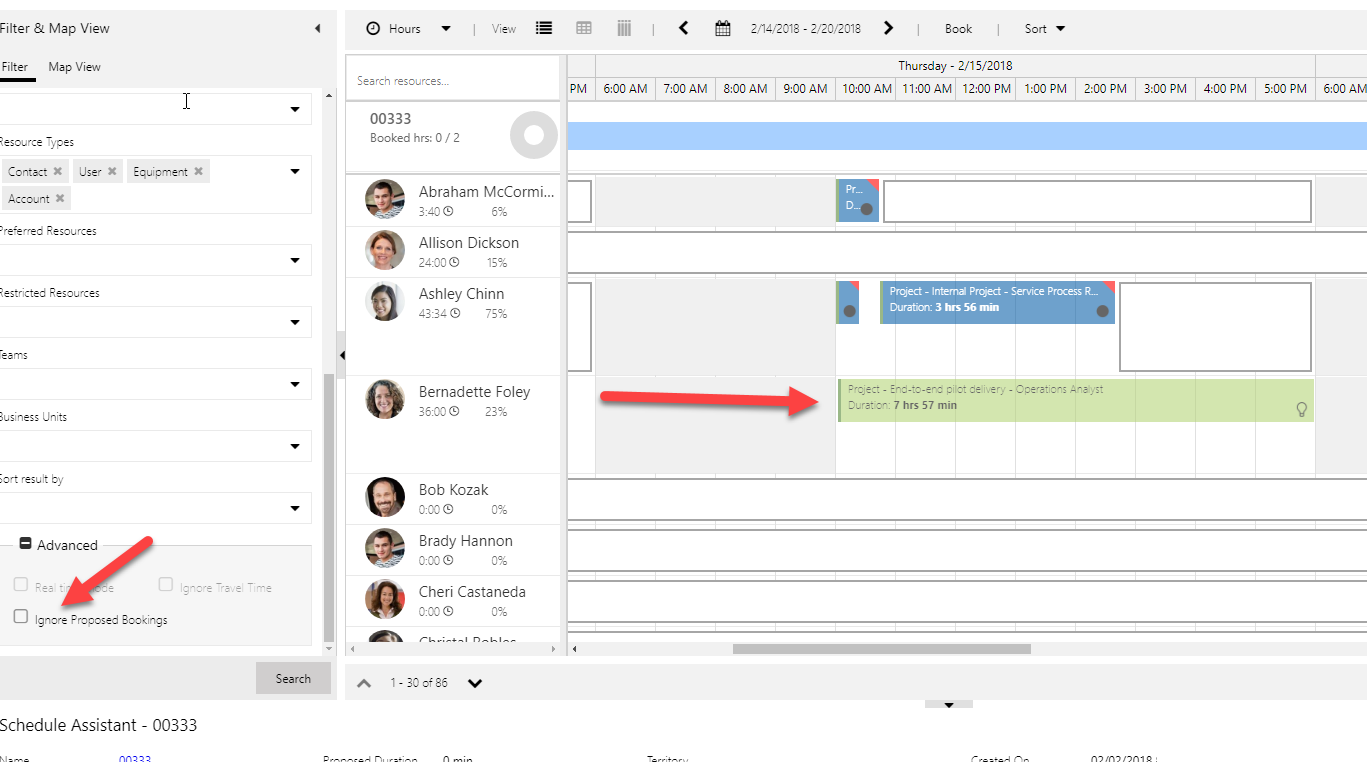
Now that we’ve added the option to consider proposed bookings as booked, you can uncheck the box in the advanced section of the filter control, and you’ll now see that the time where there is a proposed booking is no longer recommended:
Note that when searching for availability in the daily, weekly, and monthly views, the behavior is the same in that this flag is used to determine whether a proposed booking should count towards the resource’s total requested availability. However, when we display the number of hours available in the summary cells, we will still consider proposed bookings as available. We’ll look to enhance this further in a future update.
This is great! How do I get it!
Well, I thought you’d never ask! If you haven’t made customizations to the default schedule assistant filter layout shipped out of the box, then this new feature will automatically appear when you apply this update.
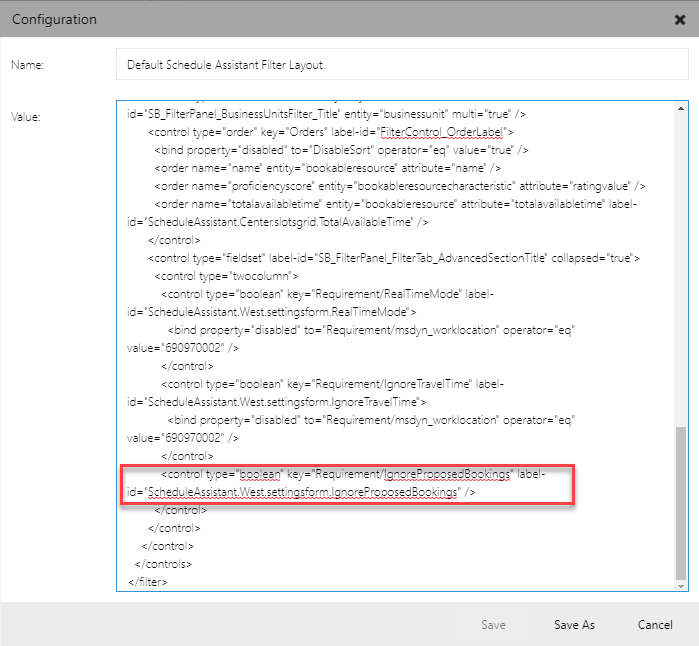
If you have made customizations, all you need to do is insert a few new lines into your modified msdyn_configuration record. Check out this blog post that reviews how to check if you customized your schedule assistant default filter record, and how to add a new sort option if you have customized. The steps are identical; you’ll just add the text outlined below instead of the sort option the referenced blog discussed.
Once you open up the Schedule Assistant Filter Layout you’d like to modify, just insert the following:
<control type=”boolean” key=”Requirement/IgnoreProposedBookings” label-id=”ScheduleAssistant.West.settingsform.IgnoreProposedBookings” />
How do I change the default value from ignore proposed to not ignore proposed?
Another excellent question! For now, this isn’t possible, but we do have it in our backlog.
We hope you enjoy these enhancements, as they are driven from your feedback!
Happy Scheduling!
Dan Gittler, Sr. Program Manager, Dynamics 365 Engineering