
Microsoft Dynamics 365 for Field Service and Project Service Automation sample data
Applies to: July 2017 update for Dynamics 365 (online)
To become familiar with Dynamics 365 for Field Service and Project Service Automation, it’s useful to have a pre-configured environment to explore. For this purpose, we’ve created a separate sample data installation package (English-language only at this time) that makes it easier to learn about these solutions. The installation package is available on the Microsoft Download Center here:
Running the Package Deployer install performs the following actions:
- Creates or sets default parameters that drive behavior of Field Service and Project Service
- Imports sample data such as Bookable Resources, Roles, Sales and Cost Price lists, Organizational Units, relevant sales process records, Work Orders and Projects
Important: There is no way to un-install this sample data. Therefore, you should only use this package on demonstration, evaluation, training and test systems.
Install the sample data
The installation protocol assumes the following about your target installation instance (org):
- Org is a “July 2017 update for Dynamics 365 (online)” instance (version 9.0)
- Org has a base language of English and base currency of “US Dollar” (USD,$)
- Org has both Field Service (FS) version 7.0 and Project Service (PSA) version 2.0 installed
- Org has no FS or PSA data or only barebones default data that comes with a new org
If your instance does not have both of these solutions, you can install missing items as follows:
- If you have a paid subscription that includes these first party solutions, go to the “Dynamics 365 Administration Center” in your tenant, select your target org, select the “Solutions” manager option, and then find and install the FS and PSA solutions.
- If you have a trial subscription, from within your target org, go to Settings > Dynamics Marketplace to search for, select and then try the Trial editions of FS and PSA.
Note: If you wish to install sample data on top of existing FS and PSA content, you will need to suspend safety pre-checks performed by the installer. Details are available in the Technical Notes section.
Prepare for installation
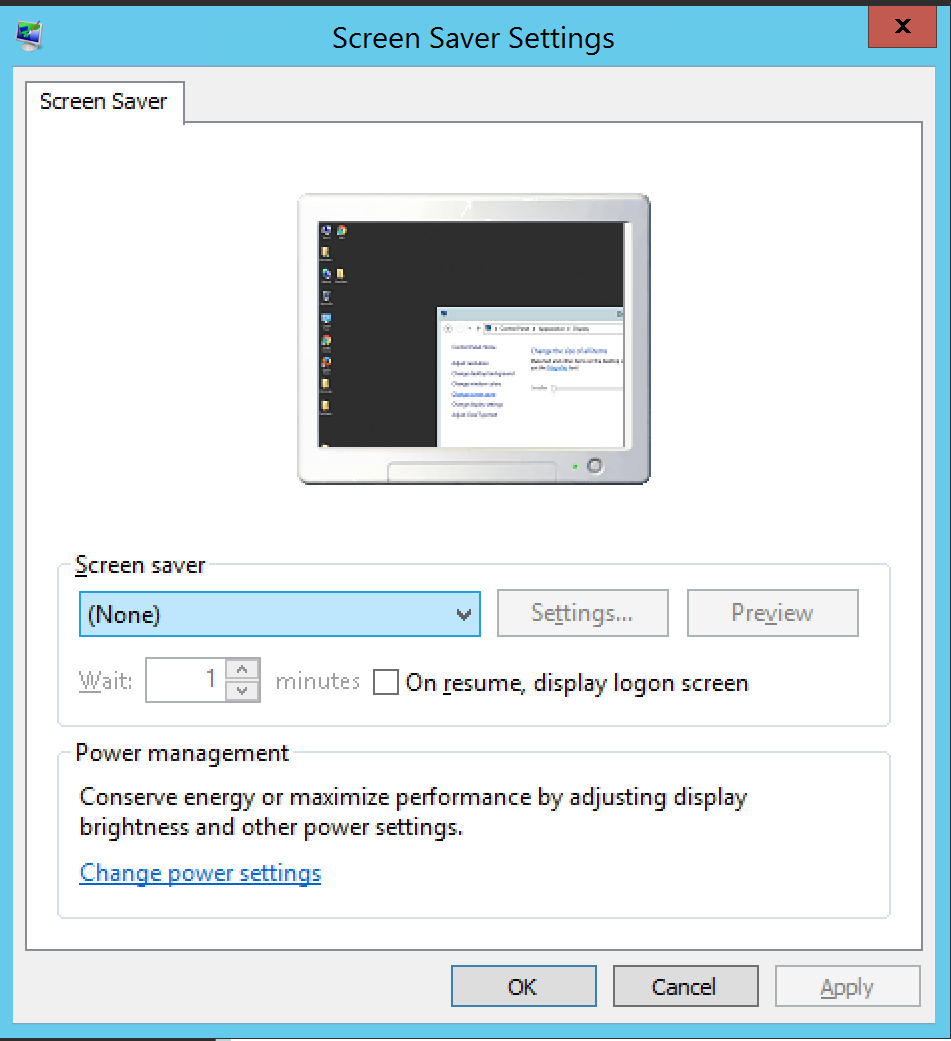
The installation process must run from a device running a recent Windows Operating System (Windows 10 preferred). This device should have the “Screen saver” function turned off as session credentials for the installation process can be lost when the screen saver engages (you will otherwise need to keep your session active throughout the installation). You should also plan for the device to remain connected to the network and for the installation to run for as long as 4 hours.
Download and unpack
We distribute the Field and Project Service (FPS) sample data installer via the Microsoft Download Center (search for “Dynamics 365 for Field Service and Project Service Automation Sample Data” or follow this link) as a self-extracting FPSDemoData_v2_0_0_2.exe. After downloading to a machine running a recent Windows operating system, run the EXE and accept terms and conditions to unpack the compressed “PackageDeployer_FPSSampleData.zip” file. You will then need to extract contents of that file to a folder on your machine. Depending on your operating system and security settings, you may need to perform the following steps after unpacking the zip:
- Find and right-click on the “FPSDemoData.dll” file in the “PackageDeployer_FPSDemoData” folder
- Choose “Unblock”
- Click “Apply”
- Click “Okay”
Create and configure Users
We designed FPS sample data to enable exploration of role-specific service delivery experiences. To install correctly, you will need to create (or temporarily rename) Users in your Dynamics 365 organization (via Settings > Security > Users) to match the incoming sample data configuration, as follows:
- UserFullname=”David So” à Field Service Technician
- UserFullname=”Jamie Reding” à Customer Service & Field Service Dispatcher
- UserFullname=”Molly Clark” à Account Manager
- UserFullname=”Spencer Low” à Practice Manager and Project Manager
- UserFullname=”Veronica Quek” à Consultant
- UserFullname=”William Contoso” à General Manager
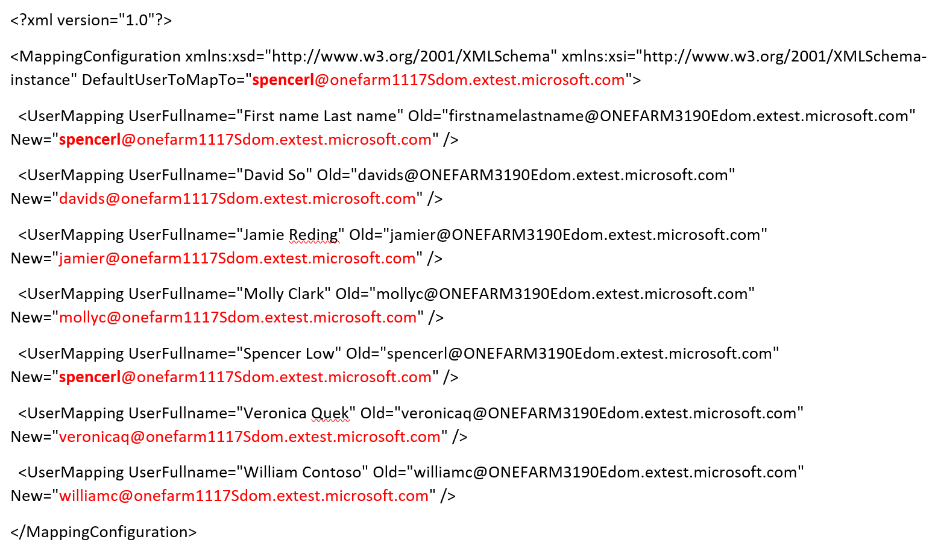
You will also need to update a mapping file with email addresses of these users in your system. To do this, open the “PkgFolder” then find and open the ImportUserMapFile.xml file with Notepad (or Visual Studio or another XML editor). Within the file, set the DefaultUserToMapTo= field to the email address of your “Spencer Low” User, and the New= fields to the email addresses of corresponding Users in your system. As per the pictured example, the “First name Last name” user should also map to your “Spencer Low” User.
Go to Settings > Security > Users and select each of the above 6 Users, then click on the “Manage Roles” option in the menu bar. Find and select the “System Administrator” role and click “OK” to grant full admin rights to these users. This is necessary to ensure that sample records are created with the correct User ownership and thereby populate views appropriately.
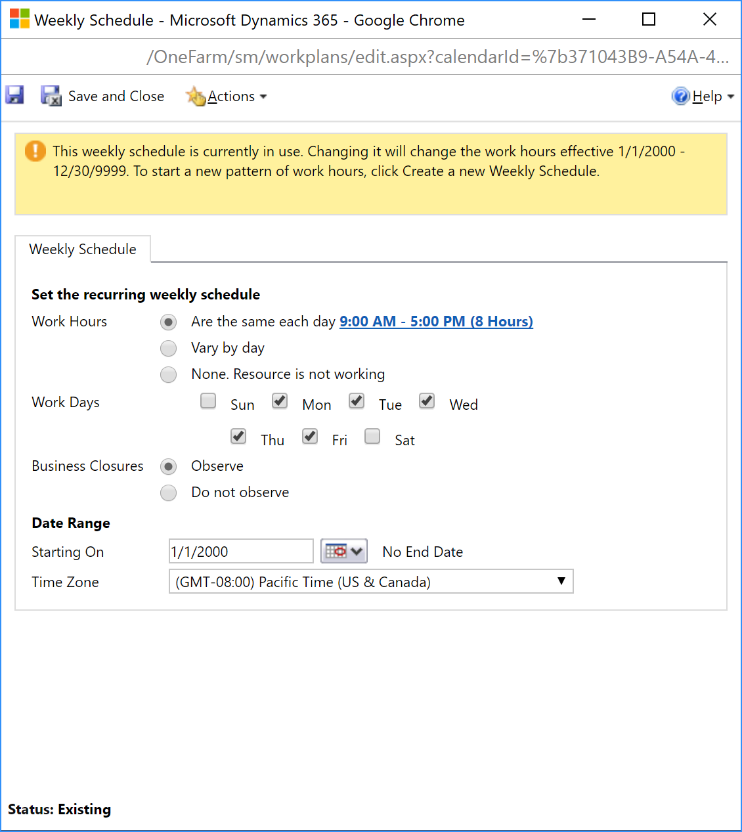
Finally, in the Enabled Users view, select and open the System Administrator whose credentials you will use for the sample data installation (“Spencer Low” suggested). Go to the navigation bar at the top of the page and open the “Work Hours” option.
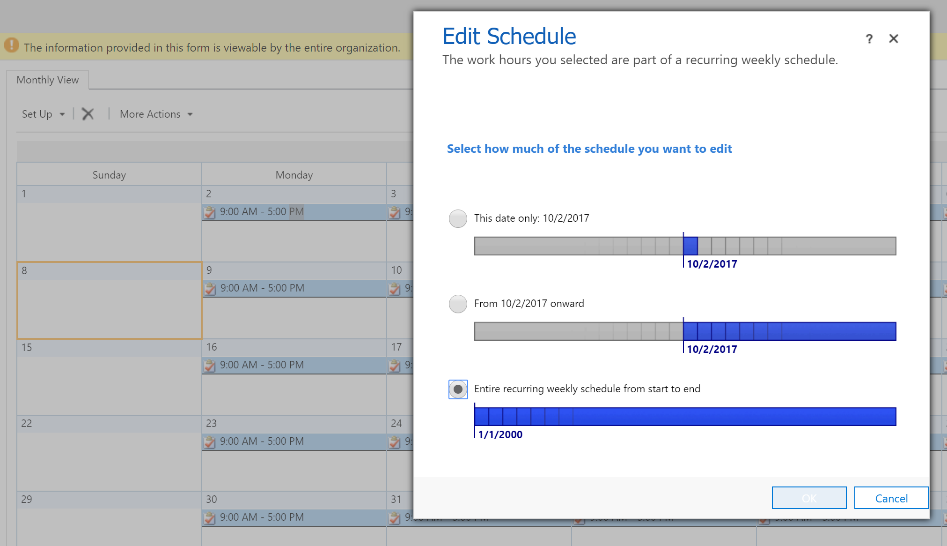
Edit the existing Work Hours, schedule, selecting the “Entire recurring weekly schedule from start to end” option, and make sure that the work hours are set to “9:00 AM – 5:00 PM (8 Hours)” with Monday through Friday and the Time Zone set to “Pacific Time (US & Canada). This is required to ensure that Schedule Board settings and already schedule Work Order and Project work appear correctly post installation.
Recommendation: At this point, consider creating a Backup of your Org so you can revert to your starting point if something goes wrong during the sample data installation (online instructions here).
Run the Package Deployer installation
- Find and run the exe in your PackageDeployer_FPSDemoData folder.
- Agree to terms.
- On the next window:
- Select deployment type Office 365.
- Use the user and password of the system administrator configured above.
- Make sure Display list of available organizations is checked.
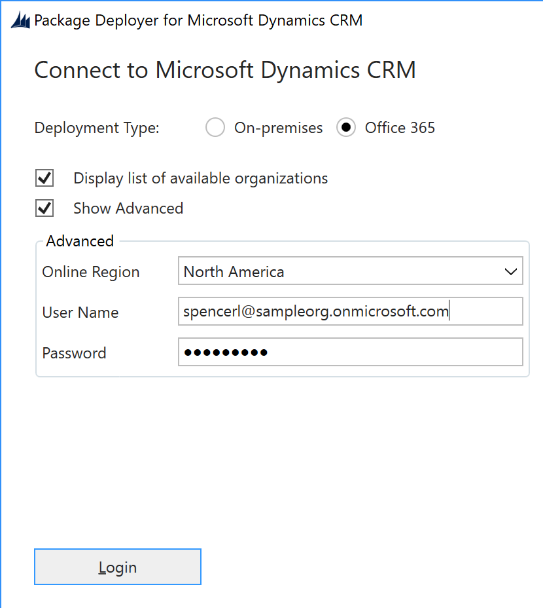
- Select the appropriate Dynamics 365 organization.
- Click Next You should see something like the following:
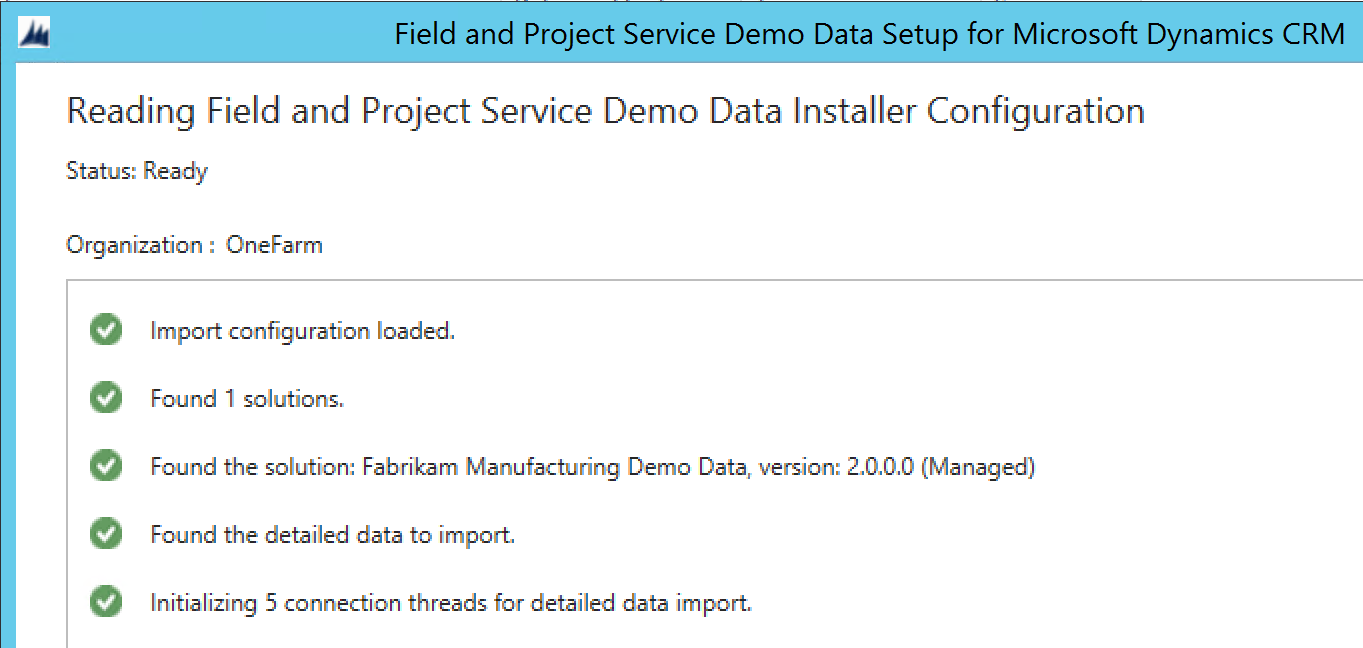
- Click Next to start the sample data installation process. Load of sample data can take up to 4 hours to complete. Ensure your client computer remains on and connected to the Internet during the process and that your session remains active.
- After loading completes, click Finish to exit the package deployer.
Verify the install
After the demo data completely loads, log in as the “Spencer Low” User defined in the “Modify Users” step above, and confirm the following:
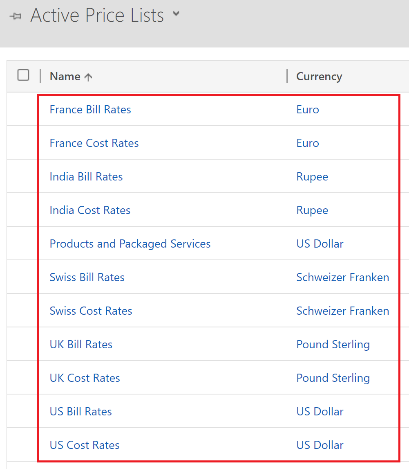
- Go to Project Service > Settings > Price Lists and confirm that Bill Rates and Costs Rates exist, with the appropriate Currency, for each country/region in the data set.
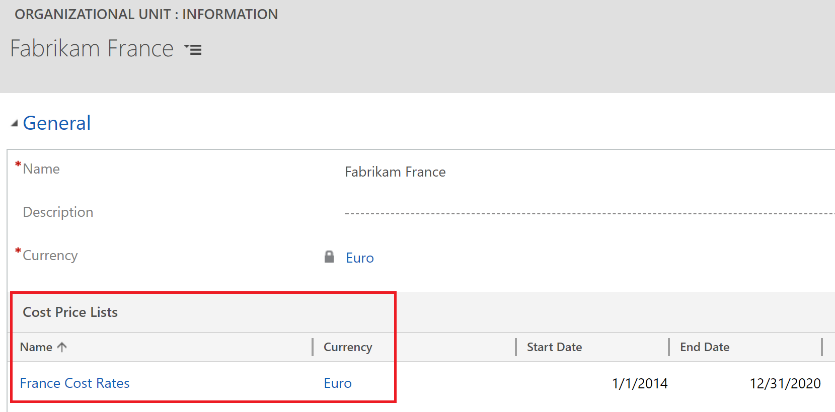
- Go to Project Service > Settings > Organizational Units and for each Org Unit (excluding city entries), confirm that a Cost Price List with the appropriate Currency has been associated. If any are missing, find and associate the correct Cost Price List.

How to Setup Demo Data for Resource Scheduling Optimization
NOTE: If you have Resource Scheduling Optimization deployed on your Dynamics365 organization, follow below instructions to setup sample data for exploring Resource Scheduling Optimization
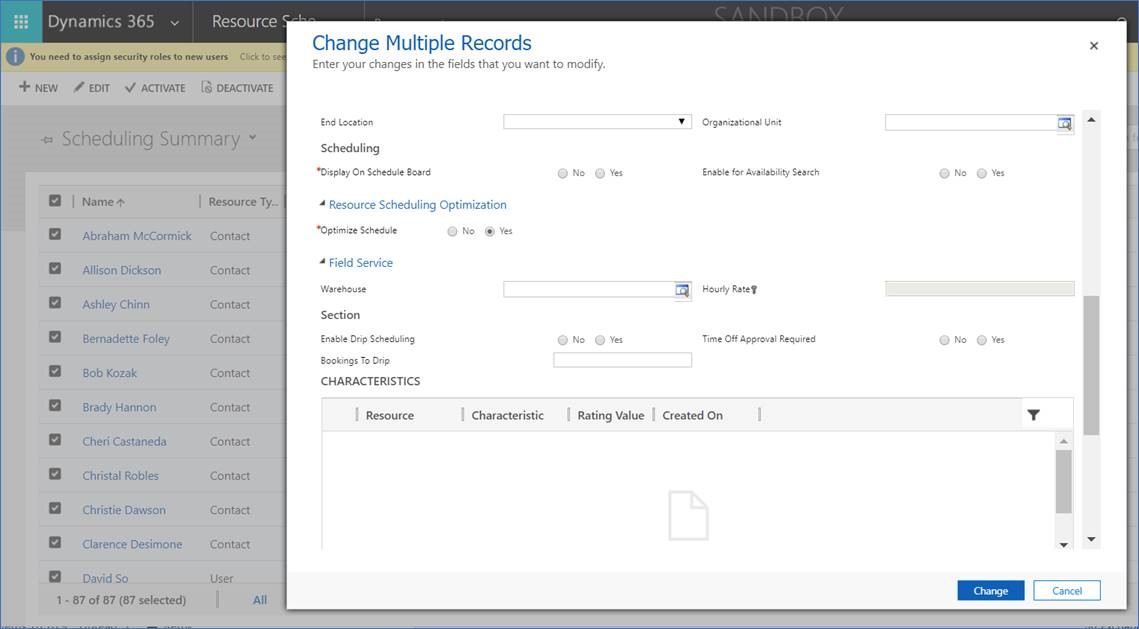
- Update ‘Optimize Schedule’ to Yes for Resources: Go to ‘Resource Scheduling Optimization’ -> ‘Resources’ -> Navigate to ’Scheduling Summary’ view-> select one or more resource records, click ‘EDIT’ to bulk edit ‘Optimize Schedule’ field to ‘YES’
- Update Resource Requirements Scheduling Method: Go to ‘Resource Scheduling Optimization’ -> ‘Resource Requirements’-> navigate to ‘Unscheduled Work Order Requirements’ view, select some or all records, click EDIT, to bulk edit ‘Optimize Schedule’=’YES’
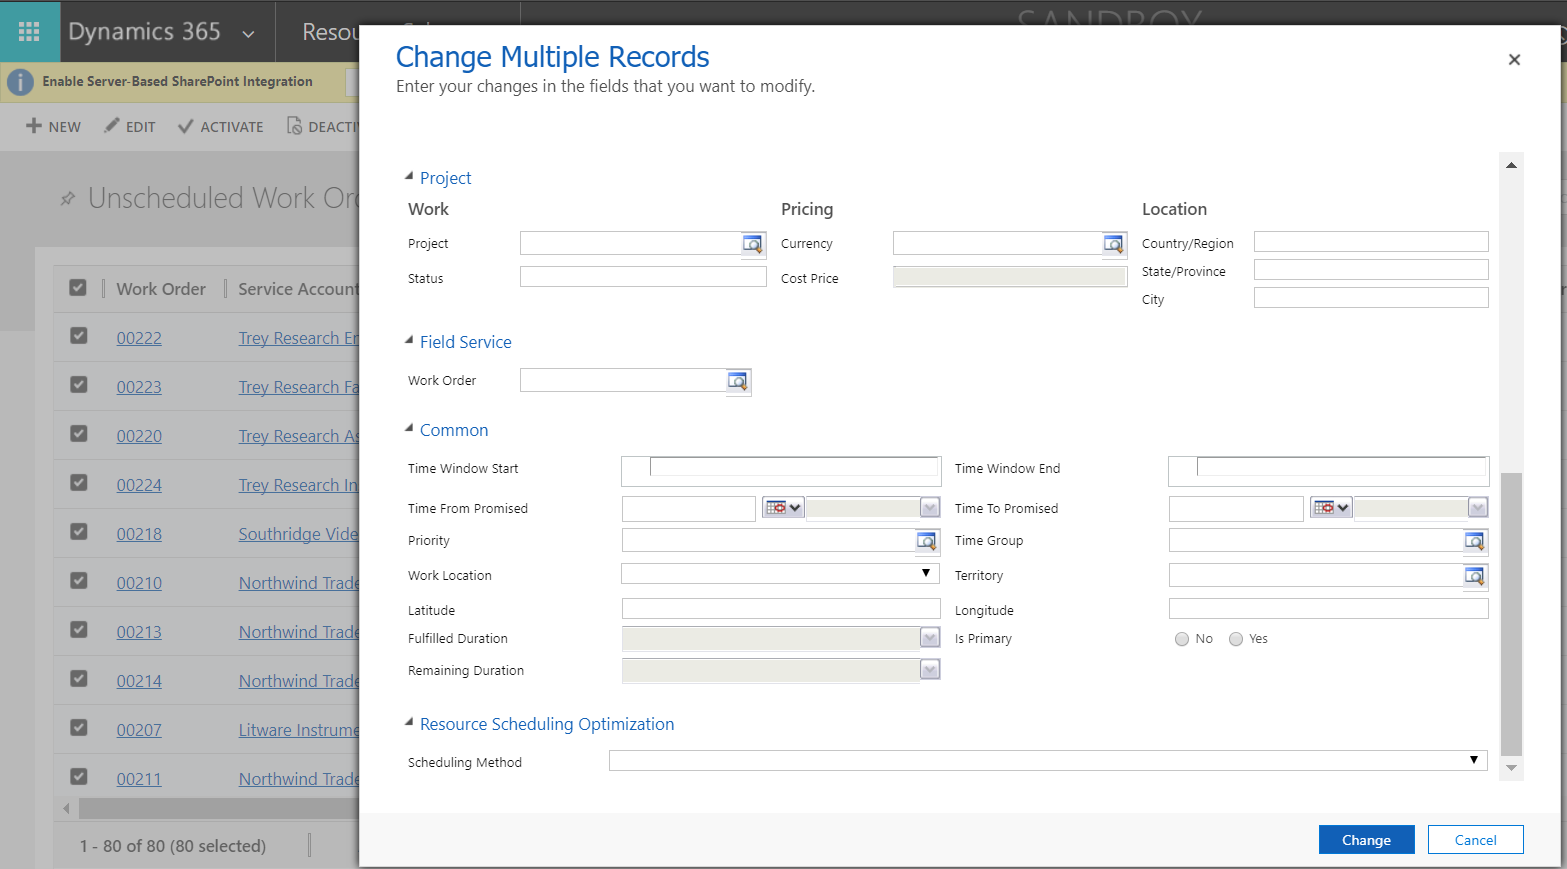
- Double check ‘From Date’, ‘To Date’ for Resource Requirements to make sure it falls into the window you would like to schedule, you can use bulk edit feature to update values for selected records as well

- Create Optimization Schedule for ‘WA’ territory, then happy scheduling
About the sample data
The Field and Project Service sample data package installs the “Fabrikam Manufacturing Demo Data” (v2.0.0.2) solution along with approximately 50K records across 148 entities.
Our fictional hero company, Fabrikam Robotics, is a manufacturer of electronic device assembly line robots and is known for their product quality, innovation and solid customer service, including installation planning and implementation as well as ongoing maintenance services. Fabrikam is headquartered in the United States (Fabrikam US) and has project-based service operations in France, India, the United Kingdom, and Switzerland. Field service operations are US-centric and largely centered around the greater Seattle area. The company is undergoing a digital transformation effort, leveraging Internet of Things connectivity to monitor customer asset performance and deliver increasingly proactive onsite services.
A high-level overview of sample content is as follows:
- Common or cross-solution elements
- 6 Users
- 71 Accounts
- 137 Contacts
- Various Transaction Types & Categories
- 50 Products with 1 Product Price List
- 38 Price/Cost Lists
- 18 Opportunities and Quotes with 34 Respective Lines, and 24 Orders with 22 Lines
- 87 Bookable Resources in 16 Bookable Resource Categories (Roles)
- 31 Characteristics (resource skills) in 1 Rating Model with 3 levels (rating values)
- 300+ Resource Requirements with 4.5K+ Requirement Details
- 180+ Booking Headers with ~10k Resource Bookings
- Field Service
- 4 Territories
- 5 Work Order types
- 22 Customer Assets
- 9 Incident Types each with a range of associated Resource Characteristics (9), Services (13) and Service Tasks (35)
- 4 Agreements
- 179 Work Orders
- 128 Work Order Incidents and Booking Dates
- 1 RMA and Receipt
- Project Service
- 8 Organizational Units
- 6 Role-specific Utilization levels
- 8K+ Role-price specifications
- 54 Projects and 4 Project Templates with 1.2K+ Project Tasks associated Project Estimates and 1.5K+ Estimate Lines
- 209 Resource Assignments with 1K+ Assignment Details
- 30 User Time Entries, 1 Delegation, and 1 Time Off entry and 26 approvals
- ~10K Project Actuals and Facts
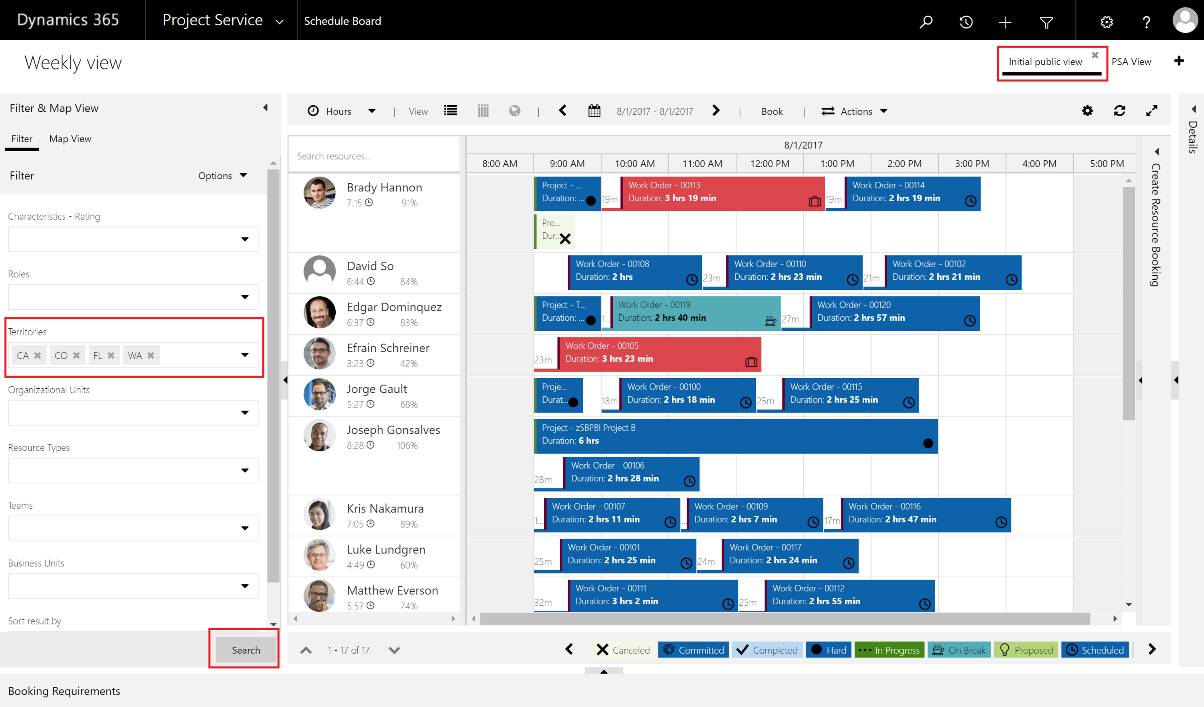
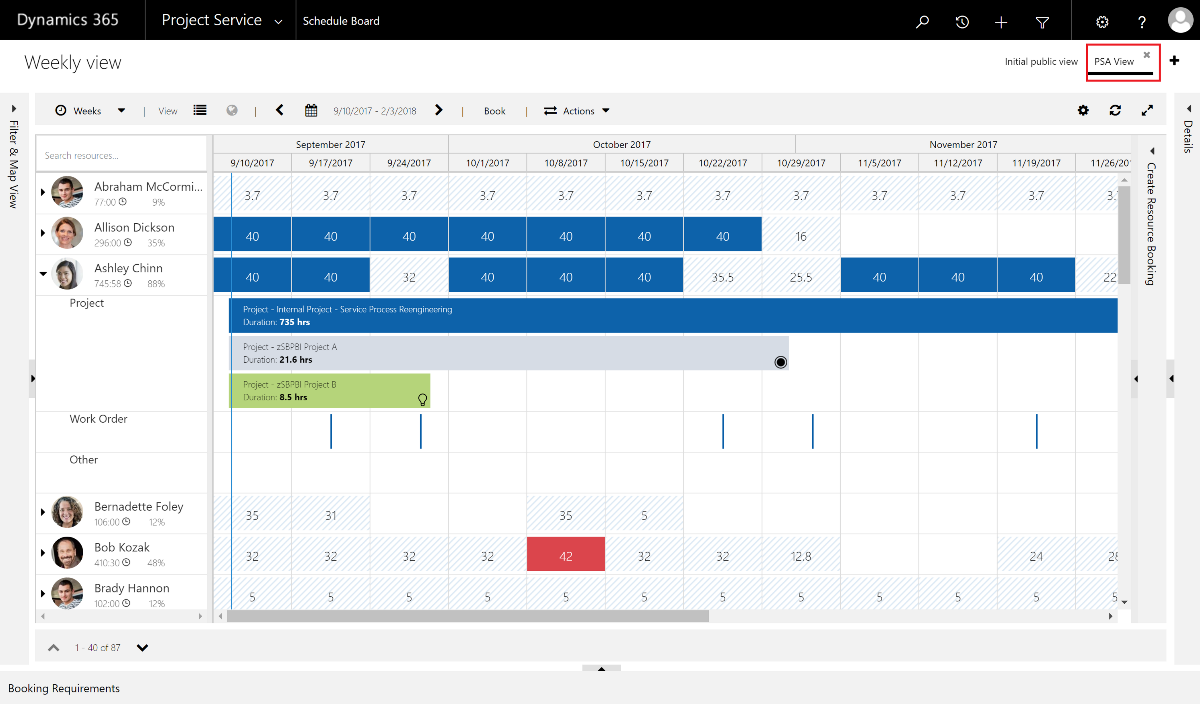
The above data enables a number of rich exploratory experiences, including Schedule Board views with pre-booked field service entries (on 10/2/2017 in the data set) and project service bookings.
Sample data aligned demo scenarios and scripts (forthcoming) publish separately.
We are working on improvements to the sample data package and installation experience. If you have requests or recommendations, please email: fpsdemodata@microsoft.com
Technical Notes
If you wish to install sample data on top of existing FS and PSA content (not recommended), you will need to suspend safety pre-checks performed by the installer. To do this, go to the PkgFolder folder to find and open the DemoDataPreImportConfig.xml file with Notepad (or your preferred XML editor).
Find the following value and change the setting from true to false:
<TerminateOnPreCheckFailure>true</TerminateOnPreCheckFailure>
This will bypass a number of safety checks, including:
- Confirm there are no or only one Organizational Unit entries and then rename that entry to “Fabrikam US”
- Confirm there are no or only one Work Template entries
- Confirm there are no or only one Project Parameter entries and then rename any singular entry to “Parameters”
There are a number of other configuration components in this pre-import configuration file. For technical users, some of these include:
- <RequiredSolutions> specifies prerequisite solution installations and their version numbers.
- <InstallSampleData> controls whether out-of-the-box sample data for the Dynamics 365 for Sales and Service apps is installed.
- false – skips installation of this built-in data (which is removable)
- true – installs the built-in data concurrent with installation of the FS and PSA sample data
- <PreImportDataCollection> specifies flat-file Data Maps and associated Records to be imported ahead of the main sample data installation.
- <EntitiesToEnableScheduling> specifies which entities should be enabled for Booking in Microsoft Dynamics Scheduling (aka Universal Resource Scheduling).
- <UsersToCreateAndConfigure> specifies Bookable Resources that will be created (if they don’t exist already) before the sample data import executes. Please note that the source system sample data Bookable Resource match with the target system Bookable Resource records on the FullName of each resource. Therefore, it is NOT possible to change the names in this pre-configuration file unless you first import sample data into a target system using these names, then rename the Bookable Resources to your desired name set along with the Enabled User records, and then export the data again for import into your final destination system (updating the xml Old and New entries accordingly).
- <PluginsToDisable> specifies discrete line-item plug-ins that must be disabled during the sample data import and then re-enabled afterwards.
For more information see:
– Elliott Ichimura