
Managing Email notifications in Microsoft Dynamics CRM Online
- For CRM 2015 org:
- For CRM 2013 org:
- For CRM 2011 org:
- Microsoft Dynamics CRM Notification Requirements
For CRM 2015 org:
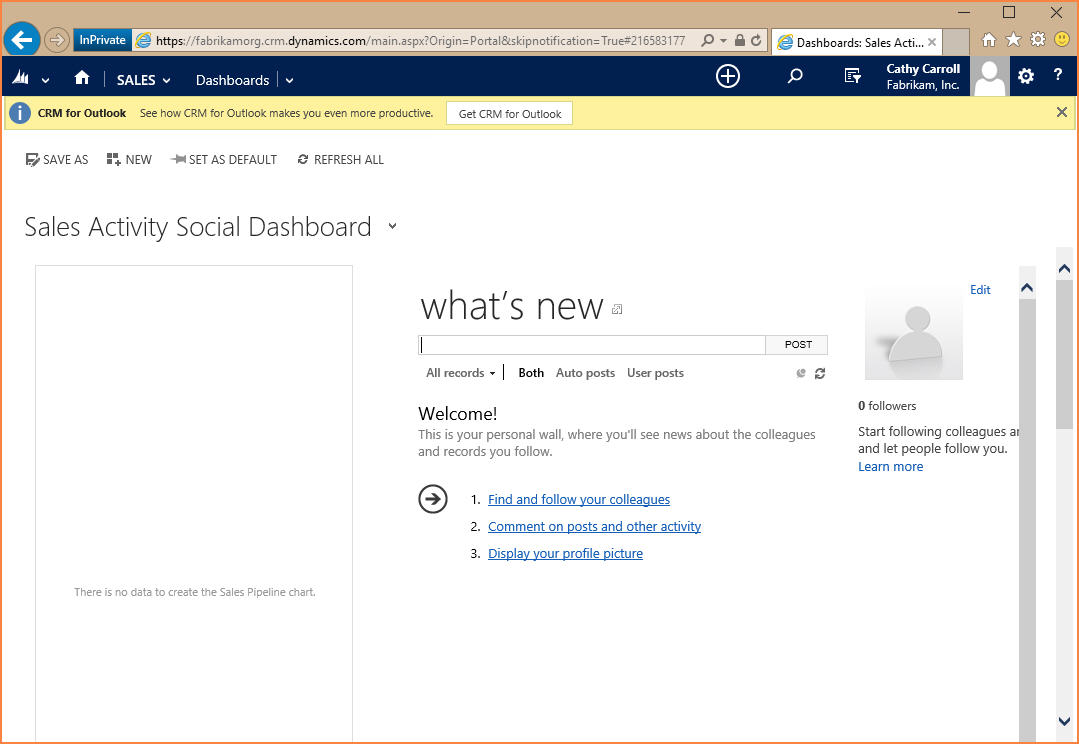
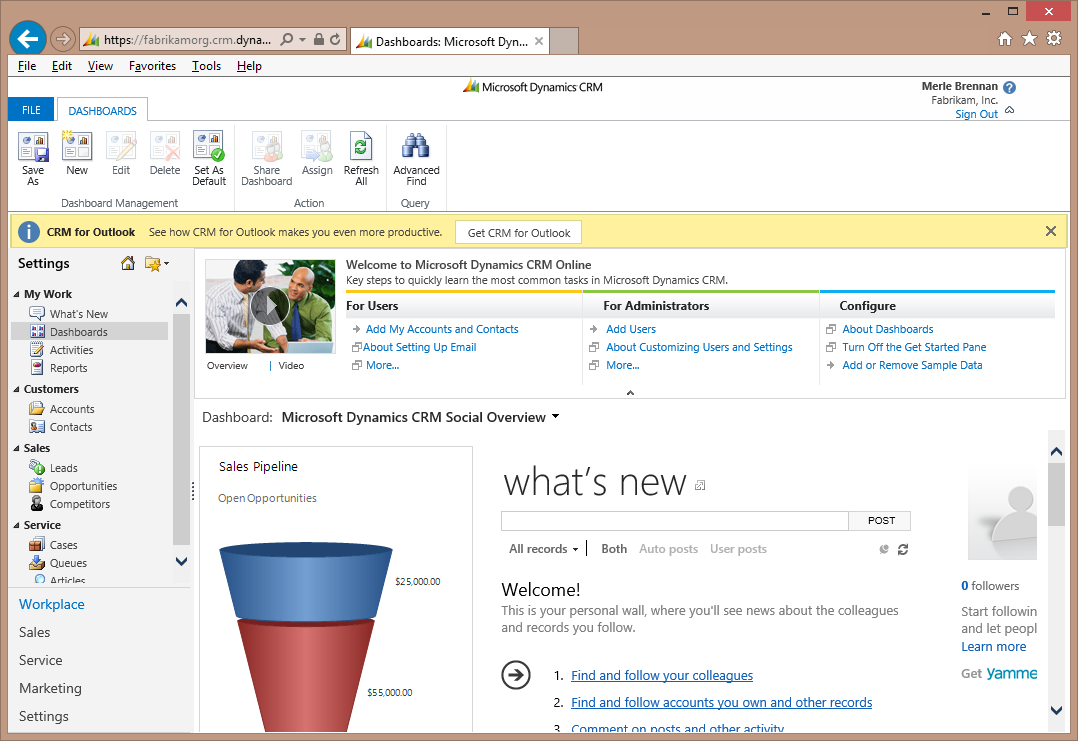
Step 1:Login to your CRM organization (as shown below)
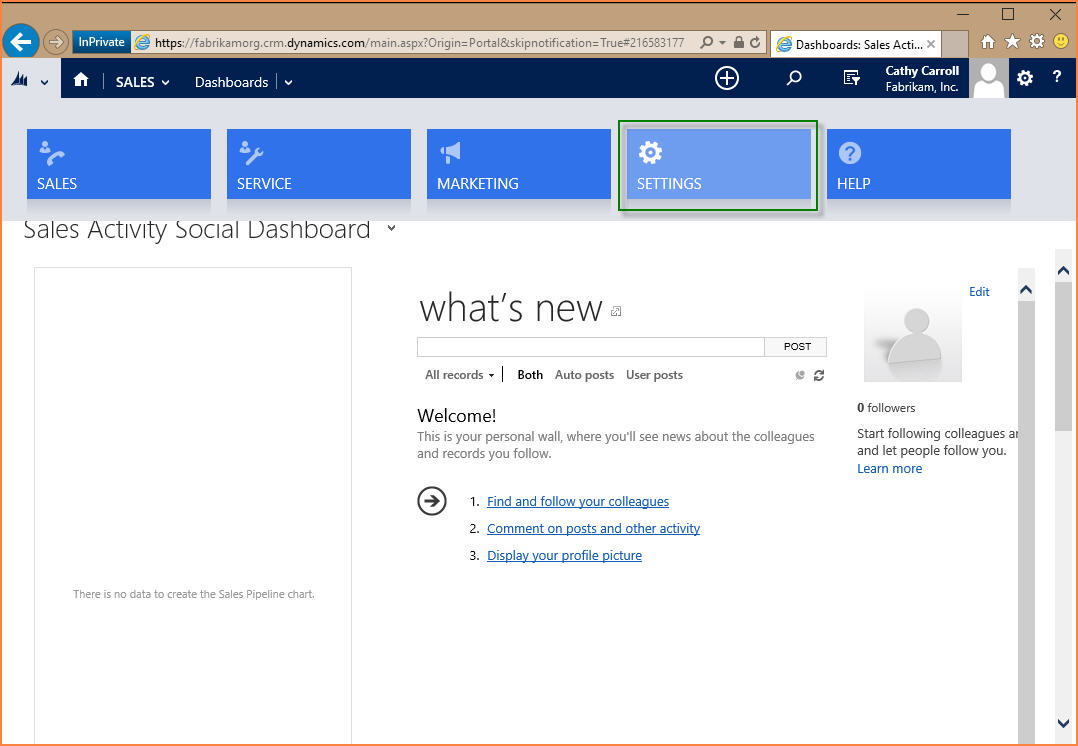
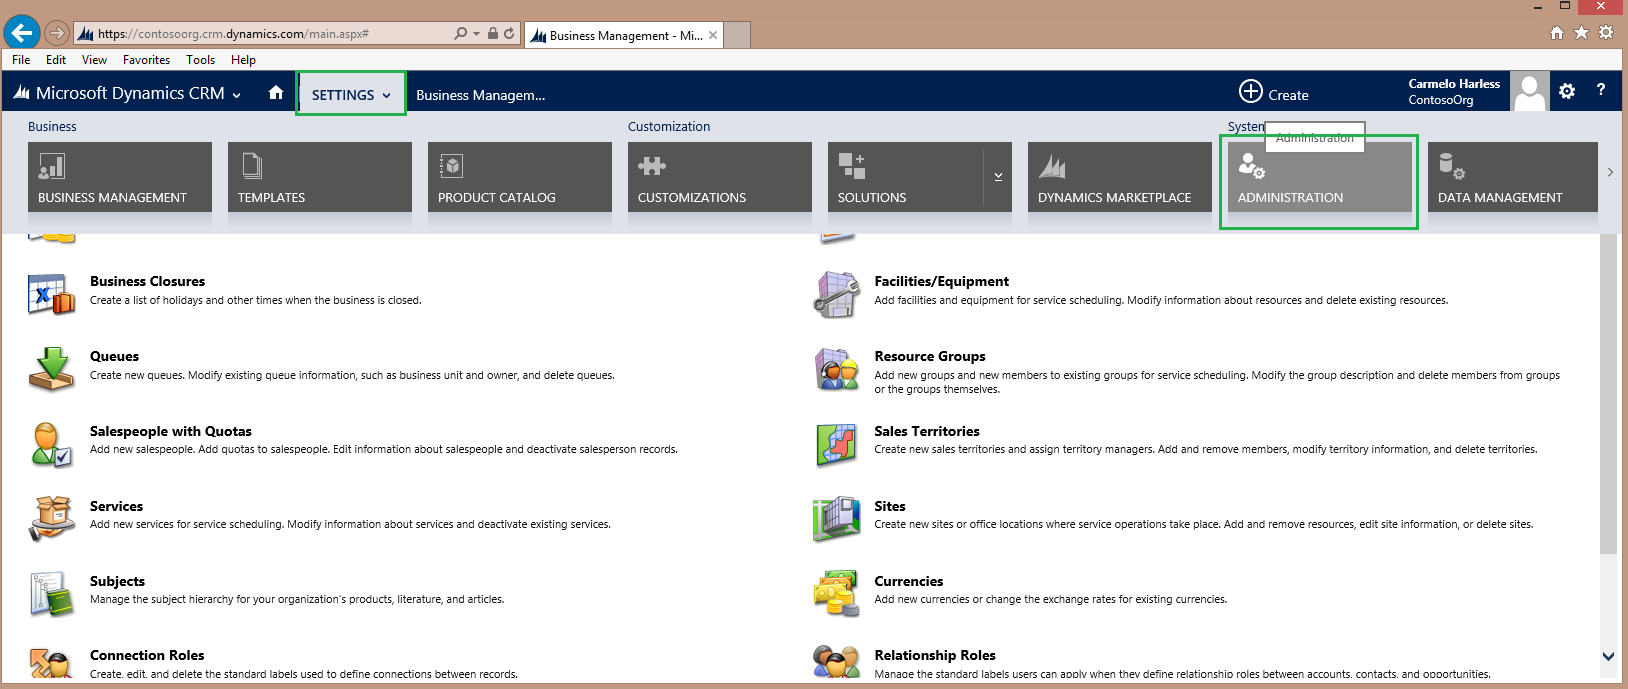
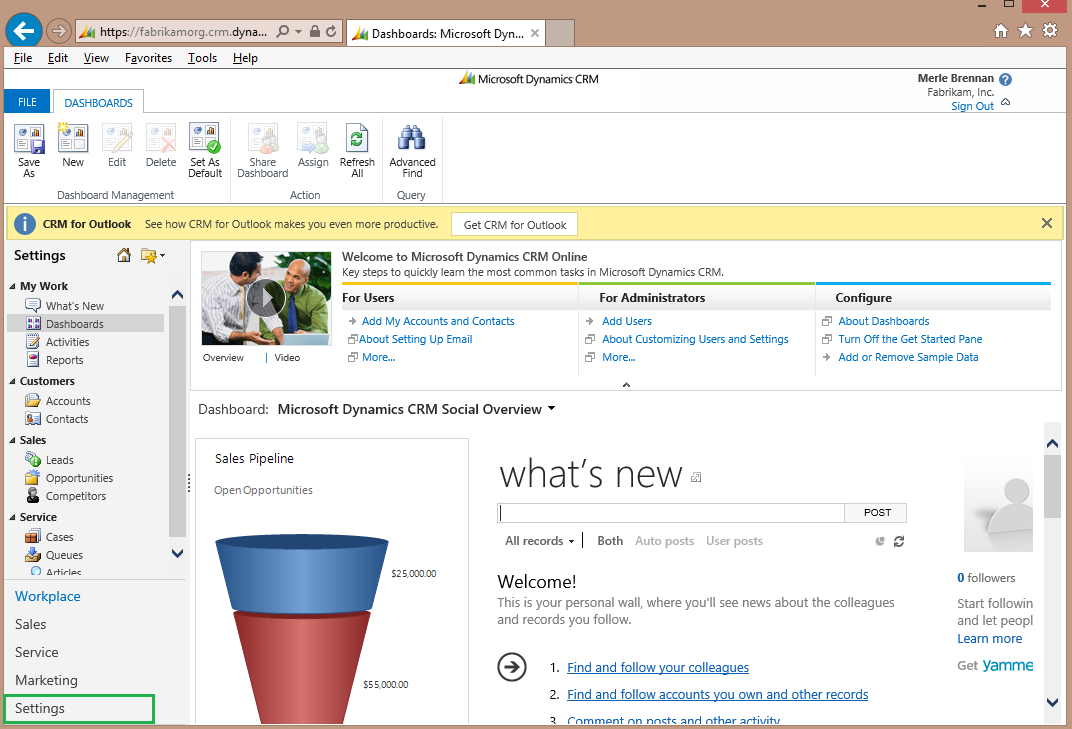
Step 2: On the left hand top corner, click the drop down icon (next to the Microsoft Dynamics logo), then click Settings.
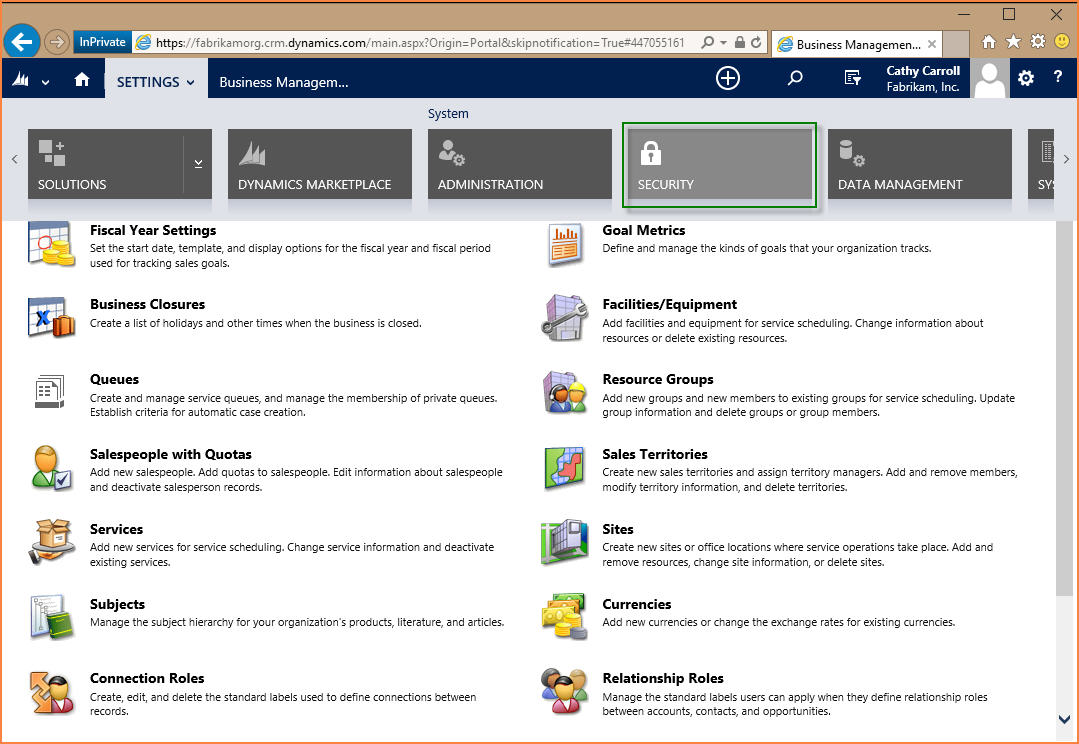
Step 3: On the Settings page, click Settings drop down as shown below. From the given options, click Security
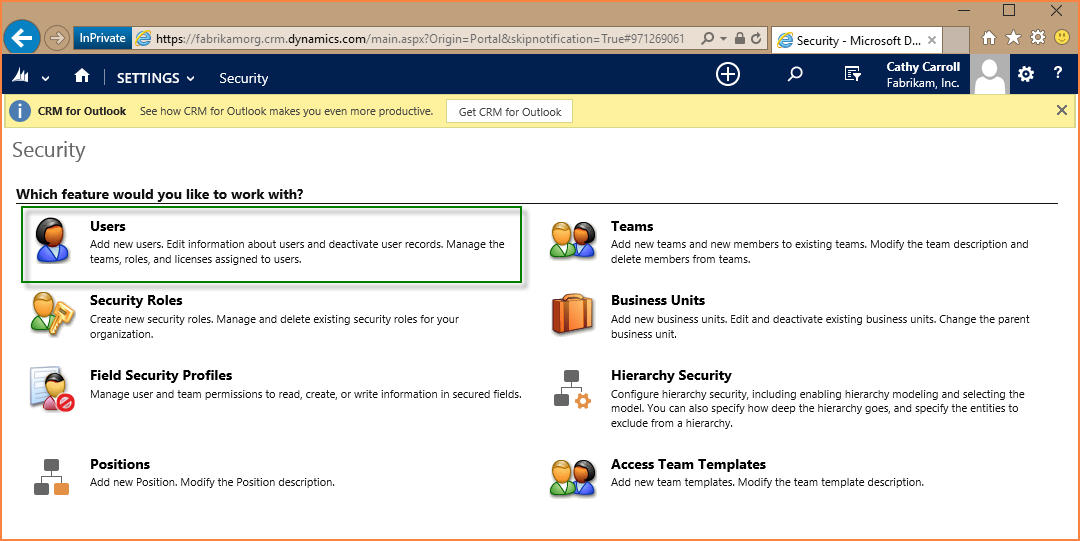
Step 4: On the Security page, Click Users (as shown below)
Step 5: On the Users page, select the Enabled Users drop down from the list of user types and then check the box next to the user that needs to be added as System Administrator to start receiving the communication/notification about the org. (For Example: Vern is the user to promote as shown below)
Ensure the user (Vern) is selected and then click Manage Roles on the Enabled Users toolbar

Note You may have to click the ellipsis (…) icon to see Manage Roles.
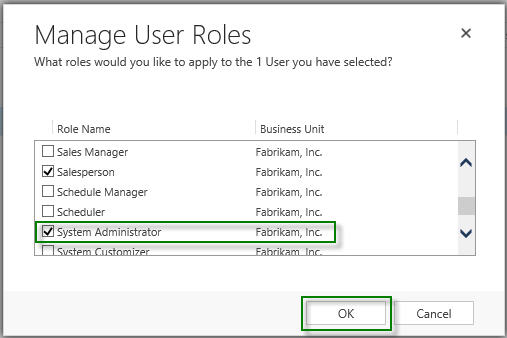
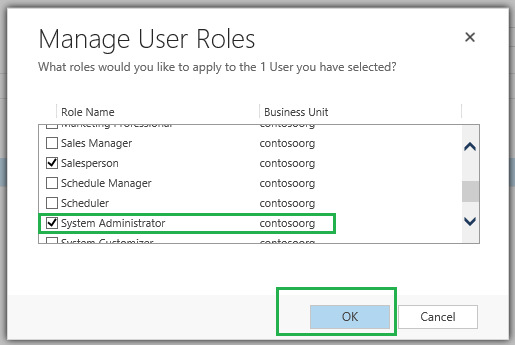
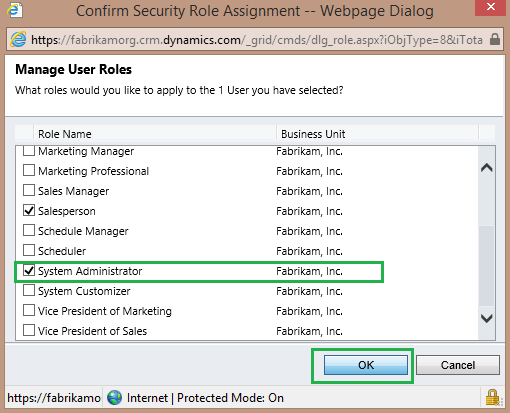
Step 6: On the Manage User Roles page, you will find all of the assigned roles for the selected user(s). Scroll down till you find the System Administrator role, select the role by checking the box next to the role, then click OK button to save your changes
For CRM 2013 org:
Step 1: Login to your CRM organization (as shown below)

Step 2: On the left hand top corner, click the drop down icon (next to the Microsoft Dynamics logo), then click Settings.

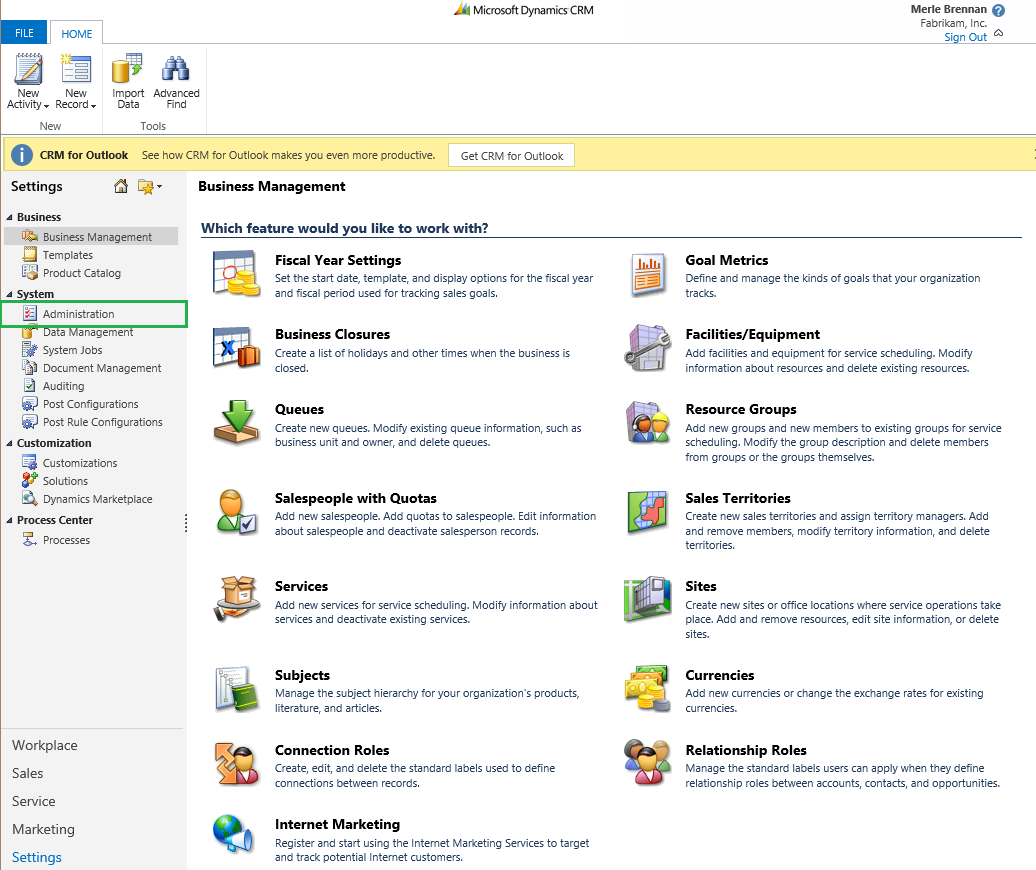
Step 3: On the Settings page, click Settings drop down as shown below. From the given options, click Administration
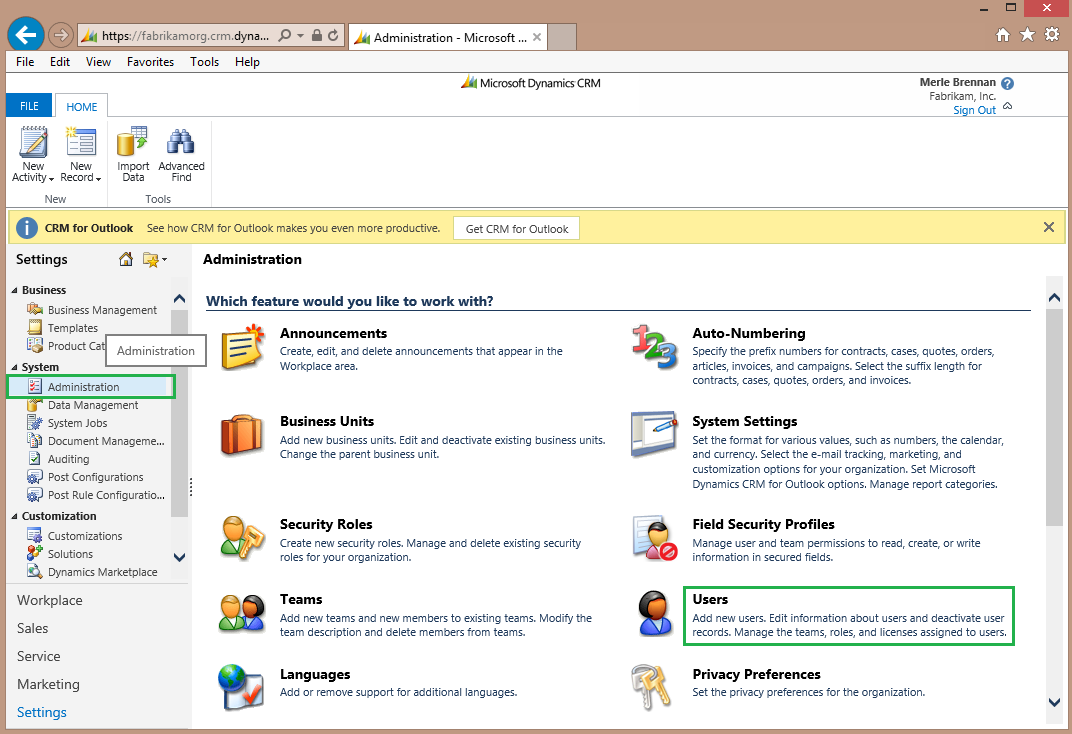
Step 4: On the Administration page, towards the right hand side, Users option will be found. Click Users (as shown below)

Step 5: On the Users page, select the Enabled Users drop down from the list of user types and then check the box next to the user that needs to be added as System Administrator to start receiving the communication/notification about the org. (For Example: Travis is the user to promote as shown below)
Ensure the user (Travis) is selected and then click Manage Roles on the Enabled Users toolbar

Step 6: On the Manage User Roles page, you will find all of the assigned roles for the selected user(s). Scroll down till you find the System Administrator role, select the role by checking the box next to the role, then click OK button to save your changes
For CRM 2011 org:
Step 1: Login to your CRM organization (as shown below)
Step 2: In the bottom left Workplace pane, you will find an option called Settings. Click on Settings as shown below:
Step 3: On the Settings page, in the left hand pane under System, click on Administration
Step 4: On the Administration page, towards the right hand side, Users option will be found. Click Users (as shown below)
Step 5: On the Users page, select the Enabled Users drop down from the list of user types and then check the box next to the user that needs to be added as System Administrator to start receiving the communication/notification about the org. (For Example: Vern is the user to promote as shown below)
Ensure the user (Vern) is selected and then click Manage Roles on the Users toolbar

Step 6: On the Manage User Roles page, you will find all of the assigned roles for the selected user(s). Scroll down till you find the System Administrator role, select the role by checking the box next to the role, then click the OK button to save your changes
Microsoft Dynamics CRM Notification Requirements
Microsoft Dynamics CRM communications will be sent only to the users who are assigned the ‘system administrator’ role within their organization. For any changes that occur to your organization, communication will be sent from the email address: crmoln@microsoft.com.


