How To: Creating Custom Report with Microsoft Dynamics CRM 2011 BIDS Fetch Extension
Today’s guest blogger is CRM MVP Frank Lee from Workopia who provides us his insights about another way to create custom reports.
The Microsoft Dynamics CRM 2011 architecture enables report developers to create and customize reports even more than before. Prior to this release, reporting was usually created by using the report wizard within the CRM application. It was not as customizable or flexible as the new version. Here are the steps to create a custom report with Microsoft Dynamics CRM 2011 via the Microsoft SQL Server Business Intelligence Development Studio (BIDS) Fetch Extension:
Requirements:
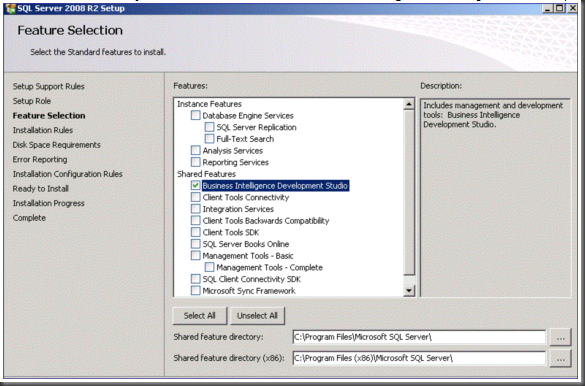
- Microsoft SQL Server 2008 or 2008 R2 Business Intelligence Development Studio (BIDS) installed
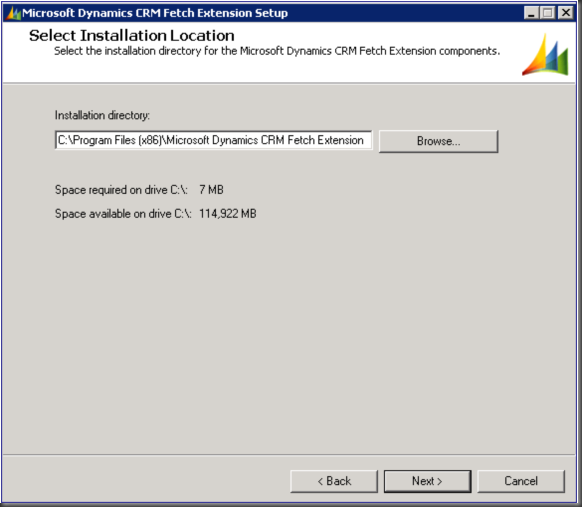
- Microsoft Dynamics CRM 2011 BIDS Fetch Extension installed
- Microsoft Dynamics CRM 2011 Online account
Part A – Setup a Microsoft CRM 2011 FetchXML Custom Report development environment
- Setup a Windows 7 32 bit or 64 bit PC ~ Other supported OS: Vista, Windows Server 2008 or Windows Server 2008 R2
- Install the Microsoft SQL Server 2008 or 2008 R2 Business Intelligence Development Studio (BIDS) feature
- Install the Microsoft Dynamics CRM 2011 Fetch Extension and run the “CRM2011-BIDSExtensions-ENU-i386.exe” installation program.
Part B – Create a Microsoft CRM 2011 FetchXML Report
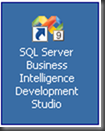
- To start creating the report, you need to open the Microsoft SQL Server Business Intelligence Development Studio (BIDS):
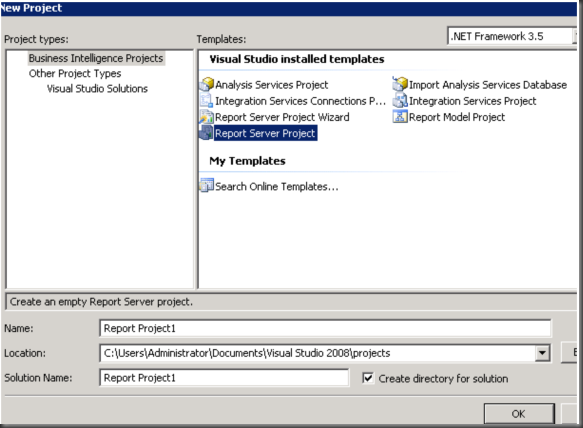
- Create a new project and select the Report Server Project from templates; be sure to include a name and the location to store the project:
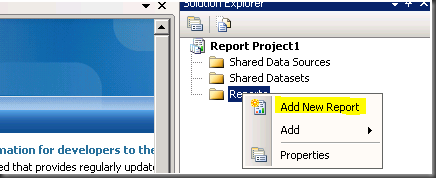
- You should have a Reports folder within your project; right click and Add New Report, this should start the Report Wizard:
- Click next until you see the page with the Data Source options. You need to select a new datasource (do not save or make as a shared) – this is important because you want the datasource information local within the file you upload to CRM. Referring to a saved data source will not work because the information will not be available when uploaded to the CRM server
- Select Microsoft Dynamics CRM Fetch for type and fill in the connection string in the following format: ServerURL;OrganizationName;HomeRealmURL
-
- only ServerURL is required, this would be the url to your CRM server like: https://someserver.crm.dynamics.com
-
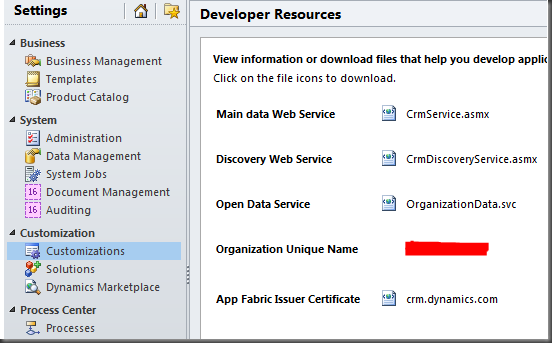
- The optional OrganizationName should also be included if you have multiple CRM environments, it will use the first organization otherwise – you will find this value within the Developer Resources area in the CRM client located within Settings > Customizations (refer to the red mark).
-
- The HomeRealmURL, also optional, it will be a registry value from HKLM\SOFTWARE\Microsoft\MSCRMBidsExtensions\HomeRealmUrl
- Next you need to enter in the credentials for you connection, it should be your Windows LiveID (WLID) – usually the email that you use to sign-in the CRM Online along with its password. Click Credentials to fill in this information and afterwards you can click next
- If successful, you will move onto the next page where it will ask for a FetchXML type query. Since this is a report, a query is important to obtain the information you want in the report
-
- One way to obtain a FetchXML query is to start by using the CRM Online web client and creating an Advanced Find query.
-
- A query usually involves asking for the columns of data you want to retrieve also, make sure you click Edit Columns so that you can select the data you want to see in your report
-
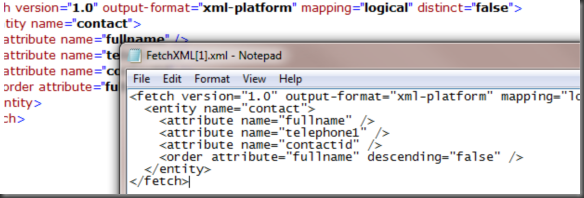
- Lastly, click Download Fetch XML and you should be able to view the xml file with the supplied query. I usually just open it with a browser and then view Page Source to copy the text:
- Up to this step, most of the work has been done and the remaining steps of the wizard will guide you through and offer ways to customize the layout and appearance of your report
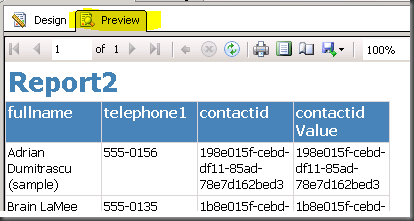
- Once you have finished using the wizard, I suggest previewing (Preview tab) the report before uploading – this will connect directly to CRM and give you the actual report. One advantage about creating a report this way is you can edit the report within Visual Studio (Design tab) and modify or add items to the report to make it more presentable:
- The report should be an .RDL file that gets created; this file will need to be uploaded into the CRM environment
-
- Open the web client and navigate to Reports, normally found in the Workplace section. Once there, create a new report by clicking New at the top left
-
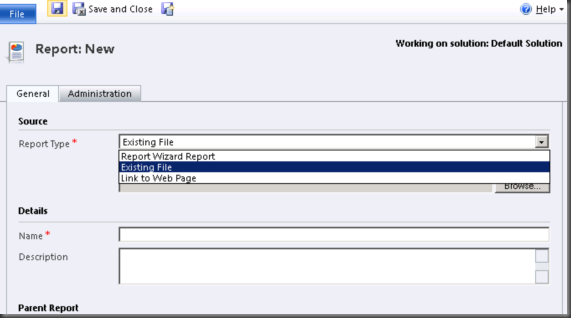
- Select Existing File as the Report Type, the File Location should now be enabled:
-
- Browse to that .RDL file that was created by the project and upload it
- You have now completed your report and uploaded it to the CRM system, you can click Save and test it out by opening the report.
