
Use Workflow To Set The Primary Contact
Welcome Matt Wittemann, CRM MVP and today’s guest blogger. He is the director of the CRM practice at Customer Connect and has been working with CRM since it was first released. Matt has a passion for helping businesses get more profitable and efficient through the effective use of CRM tools and improved processes.”
It is often a business requirement to have a Primary Contact designated on every Account, but it’s easy for users to create Account records and Contact records at different times which can lead to Accounts that have no Primary Contact set.
In CRM 4.0, the powerful new workflow functionality can ensure that every Account has a Primary Contact. The simple workflow rule described below is run whenever a Contact is created. It checks to see if the parent account has a Primary Contact set. If it doesn’t, it sets the new Contact as the Primary Contact for the Account.
Note: Making the Parent Customer field required on the Contact form would help to close this loophole in data entry.
1. To create this workflow, go to Settings > Workflows and click the “New” button. Name the workflow rule “Set Primary Contact” and choose the Contact as the entity for the rule.
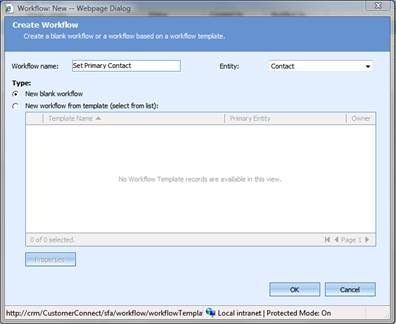
Click OK to launch the Workflow editor.
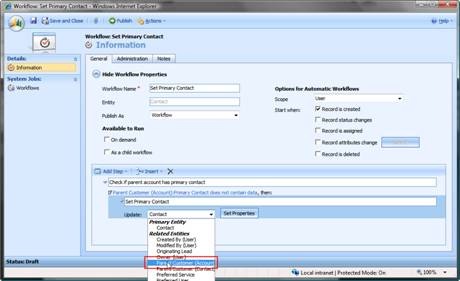
2. Leave the default settings for the “Scope” and the “Start When” options and click where it says “Select this row and click Add Step.” Add the step “Check Condition” as shown below:

3. For the step description, type “Check if parent account has primary contact.” Then, in the “If” clause, click the link to configure the condition. Check to see if the related “Parent Customer (Account)” Primary Contact field Does Not Contain Data.
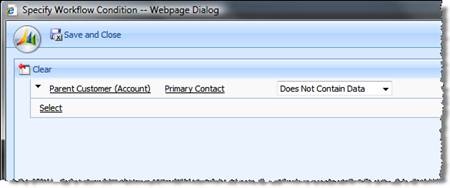
Save and close this window.
4. Next, click the second row of the If statement, and click Add Step > Update Record. Let’s give this one the description “Set Primary Contact.” In the Update drop down, choose “Parent Customer (Account)” under the Related Entities.
5. Click the “Set Properties” button and the Account form will open. Place your cursor in the Primary Contact field, and in the form assistant on the right you’ll notice that CRM has set the Operator and Look For values to Contact. Leave these as they are and click the “Add” and “OK” buttons to add this value to the Primary Contact field.
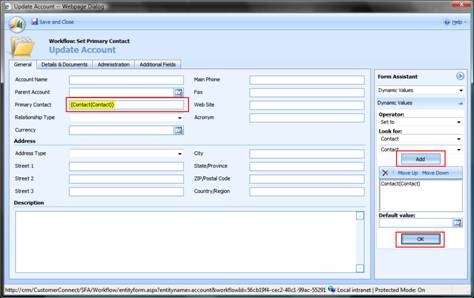
Save and Close this window, and then publish your workflow.
To test the rule, create a new Contact for an Account that has no Primary Contact. When creating your new contact be sure to fill in the Parent Customer field on the Contact form. Save the contact and navigate to your Accounts list view and open the Account. Your new Contact should now be set as the Primary Contact for the Account. (You may need to wait a minute or so, since CRM’s workflow runs in the background and may take a moment to process.)


