
Data Migration: Fundamentals on Data Map
The following information acts as a continuation to the brief introduction and demo of Data Migration Manager (DMM) available at: http://blogs.msdn.com/crm/archive/2008/01/04/microsoft-dynamics-crm-4-0-data-migration-manager-with-john-o-donnell.aspx. To make the most out of the following discussion, please make sure that you have seen the previous content at least once.
Data Map:
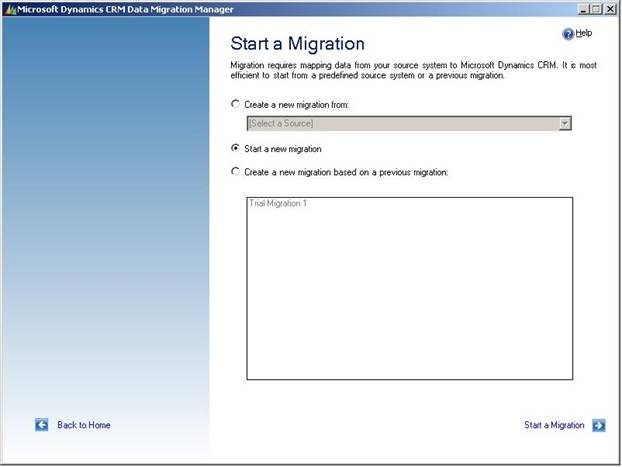
DMM uses a data map during Migration. A Data Map is a collection of information that contains details about how the data from a source system corresponds to the data in Microsoft Dynamics CRM. Meaning, it will have information like: data in which of the files will go into which of the MSCRM entities, what columns map to which of the attributes in the MSCRM entity, etc. When you start a migration with “Start a new Migration” option (which can be seen in Screenshot 1 added below), you would be starting a migration with no data map. In such scenario you would be expected to provide all necessary information as to how your source data corresponds to the entities and attributes in MSCRM.
DMM internally creates a data map with the information you provide during the migration process. A data map once created for a migration is reusable. It would be available for re-use in the same DMM under the third radio button (as can be seen in Screenshot 1 added below). If the user intends to re-use the map created, in some other DMM instance then the user needs to export the map from this system and import the same in another DMW instance. A few sample maps are available Out of Box in the dropdown under the first radio button option. You can begin migration with these maps if any of these maps are suitable for your needs.
Screenshot 1: Start a Migration Screen
Exporting and Importing a Data Map:
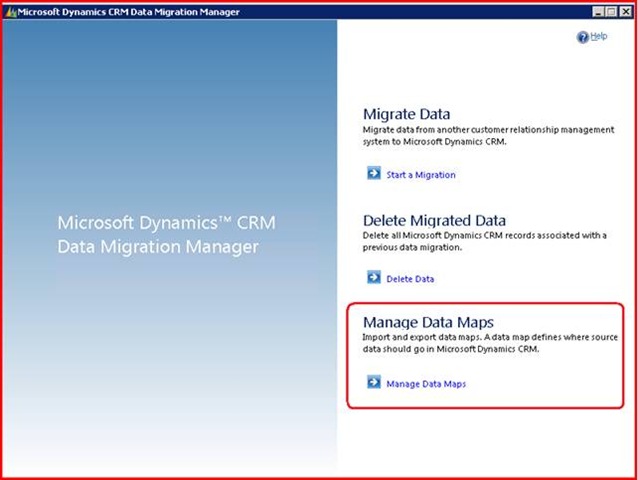
To export/import Data Maps, click on the Manage Data Maps link on the DMM Home screen shown below.
Screenshot 2: DMM Home Screen
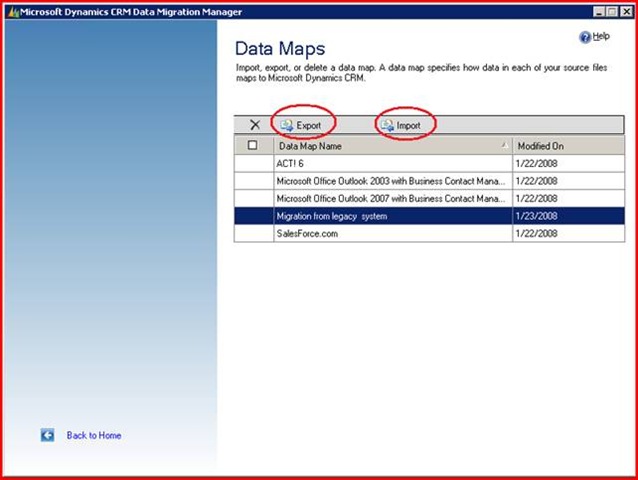
You will then be taken to the Data Maps screen shown below. You can select the map that you want to export and then click on the export button. You can save the Data Map as an xml file in the location of your choice. You can then re-import this map in another instance of DMM by using the import button present on the Data Map screen of that DMM.
Screenshot 3: Data Maps screen
Note:
The imported Data Map will be shown in the “Create a New Migration From” section (this section can be seen in “Screenshot 1” added above) if the Map had “Source” information in it, else it will be displayed in the Grid under the third radio button option on the same screen. You can add a source name to the XML being imported by editing the XML and inserting a source name as highlighted below:
<?xml version=”1.0″ encoding=”utf-8″?>
<Map Name=”Migration from legacy system” Source=”This is the Source Name added”>
<Description />
<EntityMaps>
Related upcoming blogs in this space:
- Pick list and Bit Data Migration using DMM.
- Record Owner Information Migration using DMM.