New install or Upgrade to Microsoft Identity Manager 2016 SP1– Synchronization Service
In this post we will walk through an upgrade scenario of MIM 2016 to MIM 2016 SP1, note this is not an in place upgrade and it requires the current version to either be uninstalled first if installing on the same server that your current version of MIM 2016 is installed on or installing in a “side by side” scenario. In a “side by side” install scenario you would perform the install of Microsoft Identity Manager 2016 SP1 components on “new” servers but you would point to the existing Synchronization Service Database and FIMService Database.
Before you Begin
- Be sure you back up your encryption ( See the Section on Backing up Encryption Keys for assistance )
- Be sure to have Fresh backups of the FIMSynchronizationService Database ( See your SQL Administrator for assistance )
- If installing in a "Side by Side" scenario you will want to have a copy of your existing Synchronization Service DB on another SQL Server / or instance to use.
- If running a VM I would also do a snapshot ( Although this is not necessary it may be good to have in case of emergency break glass kind of thing )
- Verify that any current synchs have completed and stop and disable any Scheduled task for your synchronization Service.
- Verify that all necessary updates have been applied to your server that the Install of MIM 2016 SP1 will be performed on.
- Verify you have all necessary Accounts / Passwords that will be needed to install MIM 2016 SP1
- When you believe you are ready take a breath get a fresh cup of coffee and lets begin….
If you have upgraded FIM in the Past most of these steps will be familiar to you if not all of them.
Navigate to the location of the Installation files for MIM 2016 SP1 Synchronization Service (Synchronization Service.msi)
Right click on Synchronization Service.msi and click on Install
.
If you receive the following error, then you are attempting to install the MIM 2016 SP1 Synchronization Service on a server that has a previous version of the Synchronization Service still installed.

Click on OK, uninstall the Synchronization Service, if it has been previously uninstalled you may need to reboot the server before installing MIM 2016 SP1
If you don’t get the above error, you should be presented with the following welcome screen.

Click on Next
The next window is the End User License Agreement

If you accept click on the check box next to “I accept the terms in the License Agreement”

Click on Next
You are now presented with the Custom Setup window.

Unless you need to change the destination of the install, click on Next.
NOTE: Do not be alarmed that the installation location still contains “Microsoft Forefront Identity Manager\2010\”
The next window is where we will identify the location of the Existing “FIMSynchronizationService” Database or if this is a new install where the Database will be created.

If you are installing MIM 2016 SP1 on a server in a DEV Environment and the Server also has SQL installed than you will leave “This computer selected” as well as “The default instance” selected unless there is another instance previously defined.
If your installing in an environment that does not have SQL co hosted on this server than you will need to define what the sever name or alias of where the SQL Server / cluster is located as well as what the name of the instance that the existing Database is located or where you will be creating the Database at.

Click on Next.
If you typed in incorrect information or for some reason the SQL Server or instance can not be located you will receive the following error.

If you received the above error click on OK and locate one of your SQL Admins and verify the SQL Server information.
If your SQL Information was correct you will be presented with the Synchronization Service Account Configuration window.

Verify information you entered is correct and click on Next
The next window you will need to enter the names of the Admin Groups used by FIM / MIM

NOTE: By default these groups are prepopulated with the suggested Group names but you could use what ever you like just make sure it is entered correctly in this window. I usually recommend using the recommended names as well as prepopulating these Groups in Active Directory prior to installing FIM or MIM. Additionally if you used the FIM / MIM Preparation Script these groups can be created for you.
When entering the names of the groups or if using the prepopulated names of the groups you will need to prefix each name with your domain\ or these groups will be created locally to the server your installing the Synchronization Service.

Click on Next
The next window is the Firewall configuration window.
Unless you have a reason not to, click on Enable firewall rules for inbound RPC communication.

Click on Next
We are now ready to begin the install

Click on Next
The next window will display status information and “progress of the install and configuration”

If you are installing the Synchronization Service using a existing SynchronizationService Database you will receive the following message.

Click on Yes
Installation will continue
When the installation completes look over the next window
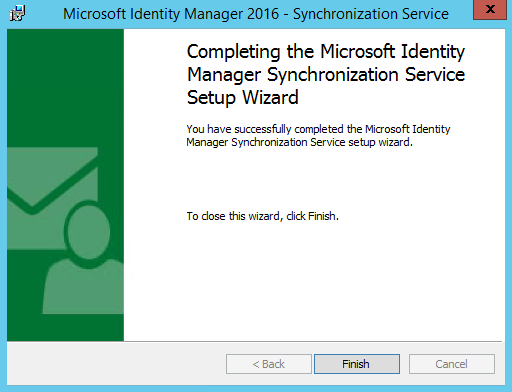
Verify that the install completed successfully.
Click on Finish
Verify information on Synchronization Service
Open the Synchronization Service and click on Help

Questions? Comments? Love FIM so much you can’t even stand it?
EMAIL US!
>WE WANT TO HEAR FROM YOU<