Understanding Group Management - Outbound Group Synchronization
This is the next post in a series of postings for Group Management. it may be helpful to read the following post:
- Understanding the FIM Service Management Agent (FIM MA)
- Configuring the FIM MA
- Introducing Synchronization Rules - Part 1
- Introducing Synchronization Rules - Part 2
- Understanding Group Management - Inbound Group Synchronization
Much like users, we can generate groups (security or distribution) in the Portal and then flow those groups back out to AD (including any members we assign to them). However, as with users, we must first create an outbound group synchronization rule (and associated management policy rule and workflow).
To begin, navigate to the Portal home screen: 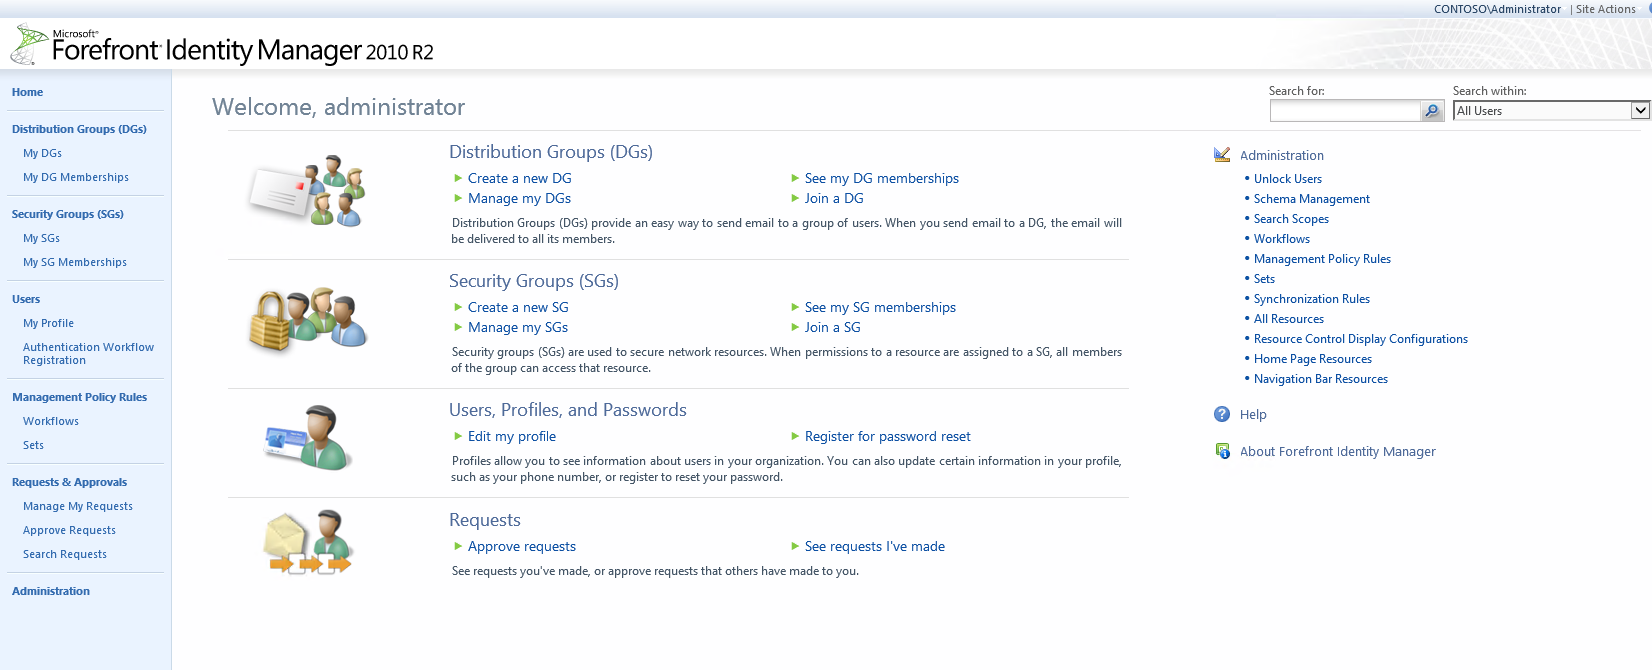
On the right-hand menu, select “Synchronization Rules” 
This will open the Synchronization Rules Page.
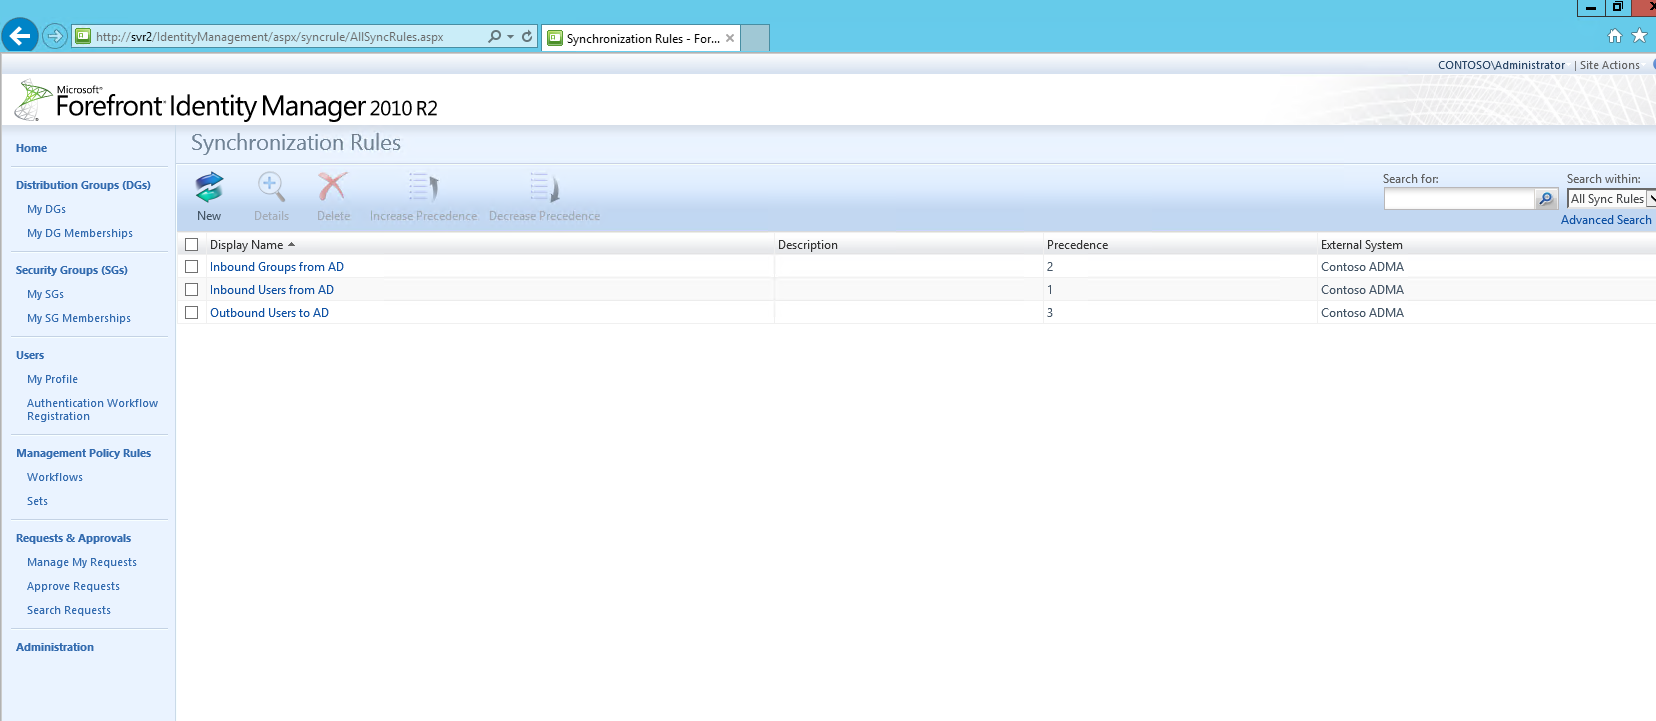
This page displays all currently configured Sync Rule and the following information.
- Display Name – This is the name of the Sync Rule which is entered on the General Tab when configuring the Sync Rule

- Description – Any additional information which was added during the configuration of the Sync Rule which is entered on the General Tab when configuring the Sync Rule

- Precedence
- External System
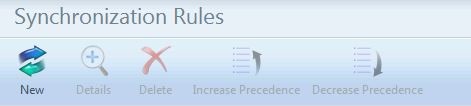
In the top of the menu bar, select “New”
You are now presented with a window which has 6 tabs by default .
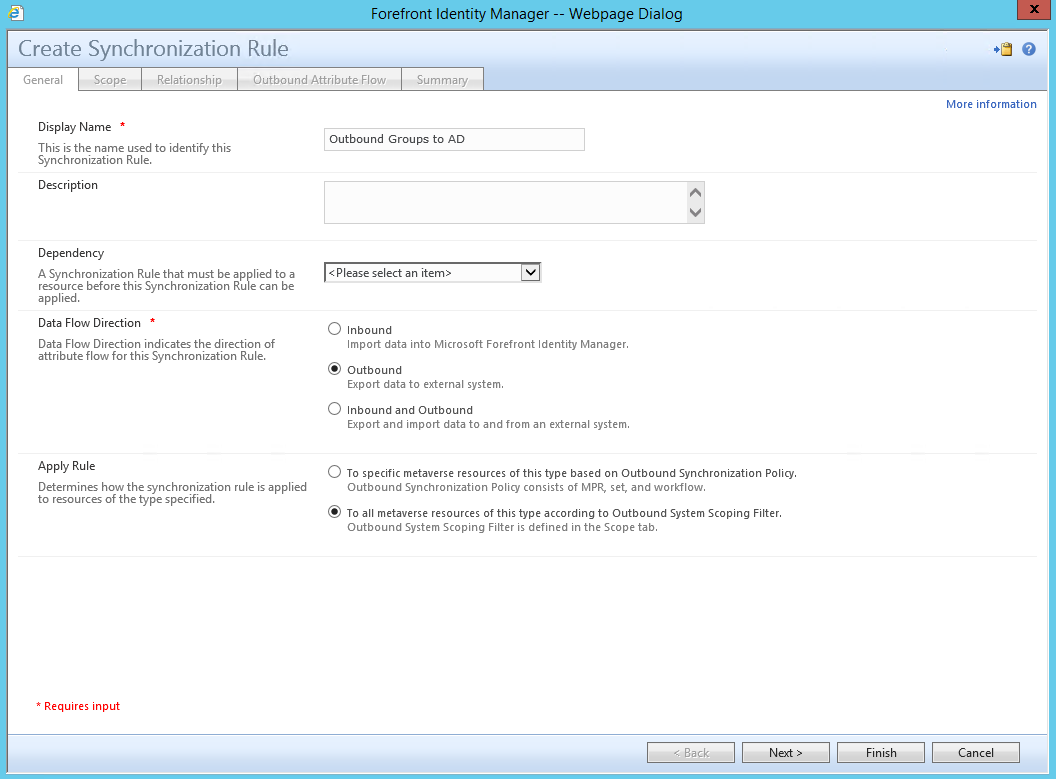
The First tab which is the “General” Tab is what the New Synchronization Rule Window opens up with. This presents you with 5 attributes that can populated or modified.
- Display Name – This is the name of the Sync Rule (This attribute is required by default)
- Description – Information entered can be used to assist in the understanding of what Specific Sync Rules are used for without exploring the Sync Rule.
- Dependency – Gives you the option to select another Outbound Sync Rule that would need to be processed first prior to the Sync rule from being processed.
- Data Flow Direction – Gives you the option to Select 1 of 3 Data Flow Direct types (What direction the Data will be synchronized with the connector space and the Metaverse.)
- Inbound – Brings Data into the Metaverse from the connected connector space
- Outbound – Sends data to the connected Connector Space from the Metaverse.
- Inbound and Outbound - This is a Bi-Directional Sync Rule which is used to Sync Data into the Metaverse and out to the connected connector space
Note: This is just my opinion and I have no Solid evidence either way but I never use the Bidirectional Sync Rule as I feel it is harder for management to understand when during High Level Over views of the environment and how it is configured. Additionally I believe there is less chance for Sync Rule Corruption in the Metaverse. THIS IS JUST AN MY OPINION and I have no solid evidence of the statement noted.
- Apply Rule – This is used to determine how the Sync rule will be applied to objects in the Metaverse. (If further information is needed please review the sections for understanding sync rules.)
- To specific metaverse resources of this type based on Outbound Synchronization Policy.
- To all Metaverse resources of this type according to Outbound System Scoping Filter.
The Second Tab which is the “Scope” Tab
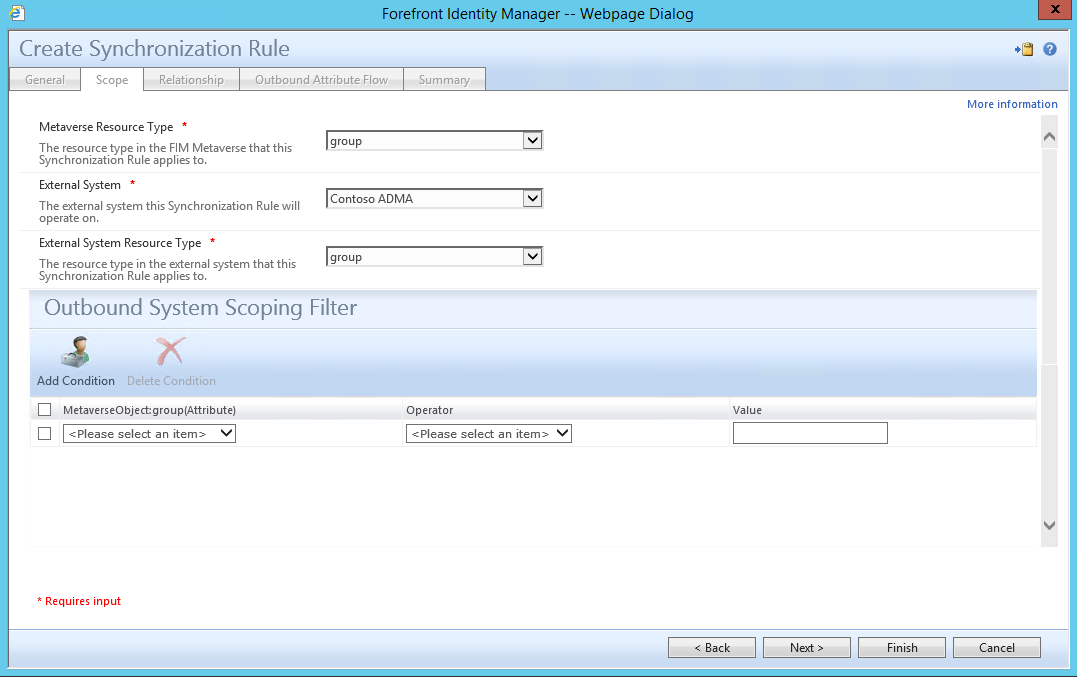
Under the “Scope” tab select the following
- “Metaverse Resource Type”, use the drop-down menu to select “group”.
- For “External System”, select the name of the Management Agent you wish to connect to, In this example this will be used as the Target MA as this is Sync Rule is an Outbound Sync Rule.
- “External System Resource Type”, choose “group”.
For “Outbound System Scoping Filter” select the following
- MetaverseObject:group(attribute) use the drop-down menu to select objectType
- Operator use the drop-down menu to select equal
- Value type Group
Note: I would recommend defining the Scope to be a little more exclusive because this will allow any object type in the Metaverse that has the objectType set to Group. Additionally if you wanted this Scoping Filter Sync rule to apply to all groups in the Metaverse you could also leave this section empty as the first layer of scoping is done in the above section when you selected the Metaverse Resource Type and External System Resource Type.
Click “Next” to continue.
The Third Tab which is the “Relationship” Tab (Will be required if configuring a Traditional Sync rule)
For “Relationship Criteria” you could populate this field but once the Outbound System Scoping Filter based Synchronization Rule has been completed whatever was populated as the Relationship Criteria will be removed for Outbound Sync Rules. “Relationship Criteria” is only available to be populated for Inbound Sync rules or the classic method of managing objects via Sync Rules which required MPR, SET’s and Workflows.
If you will be using this Synchronization Rule to provision groups be sure to check the box next to “Create resource in external system”, then click “Next” to continue.
If you wanted to set up
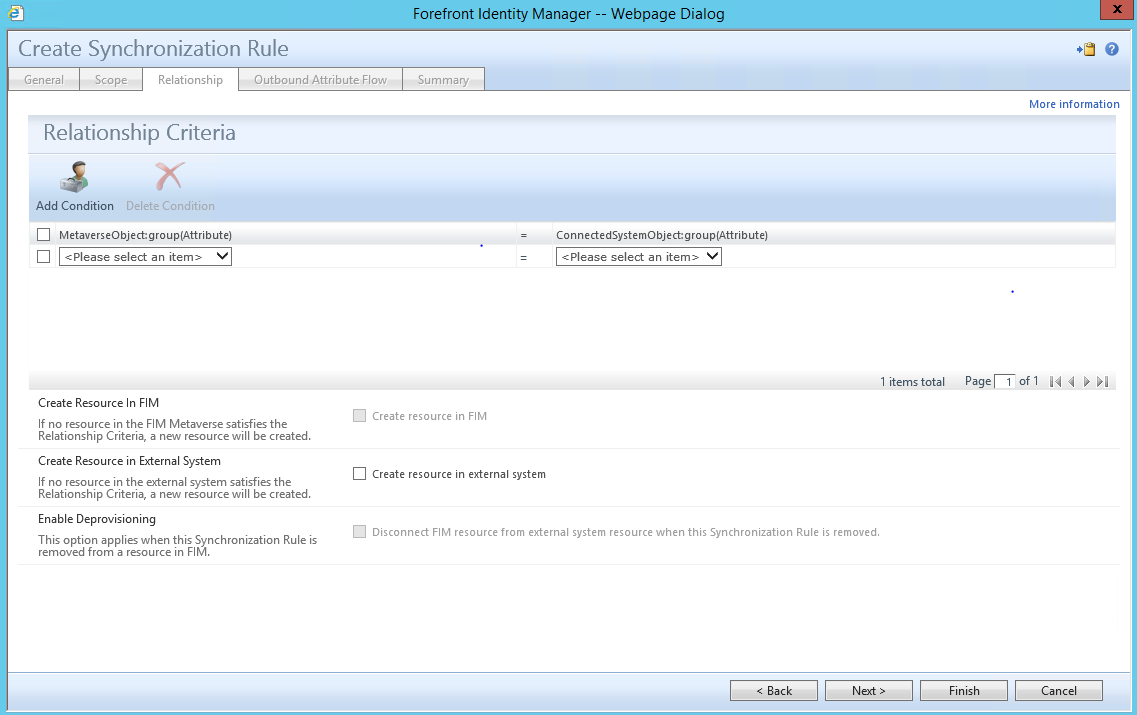
Note: You would only check the Create resource in external system check box if this Synchronization Rule will be used to provision Groups to the Connector Space that this Synchronization Rule connects to, in this Guide this Synchronization Rule connects to the ADMA which was defined in the External System section a few slide back.
The Forth Tab which is the “Workflow Parameters” Tab (Is not displayed if using an Outbound System Scoping Filter)
In the “Workflow Parameters” tab, click “Next” to continue. (Because we are using a Scoping Filter to apply this synchronization rule in the Metaverse this option is not functional, anything you type here will disappear after you save the Synchronization Rule. Upon clicking on this synchronization rule for any additional attribute flow or other editing you will find that the Workflow Parameters tab is no longer available to click on.
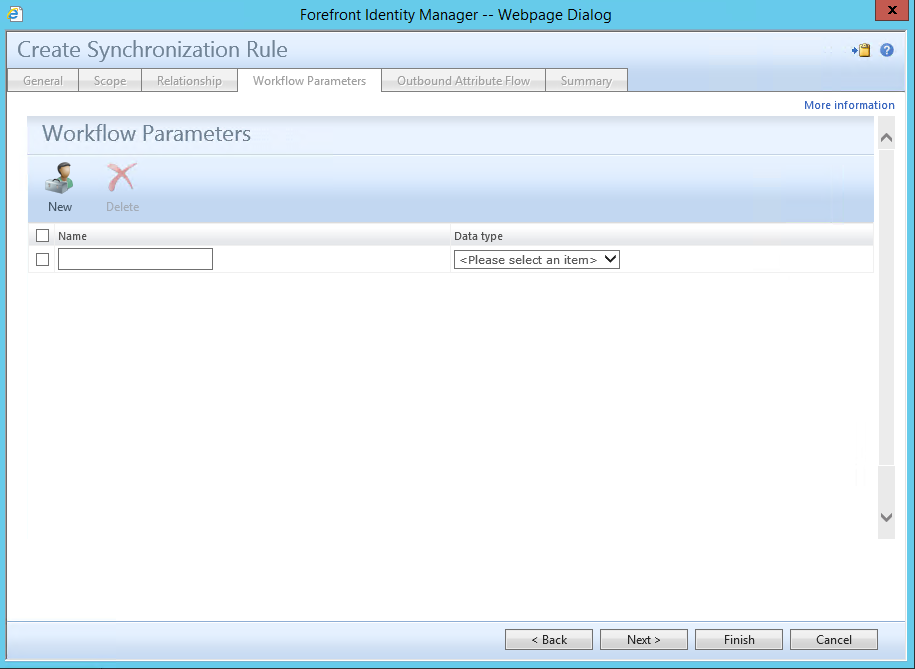
Note: In case you were wondering the Workflow Parameter Tab is only functional for traditional Synchronization Rules that require ERE’S (Expected Rules Entry) objects associated to the object being synchronized. Workflow Data is a way to pass values from workflows to the Sync rule for a user.
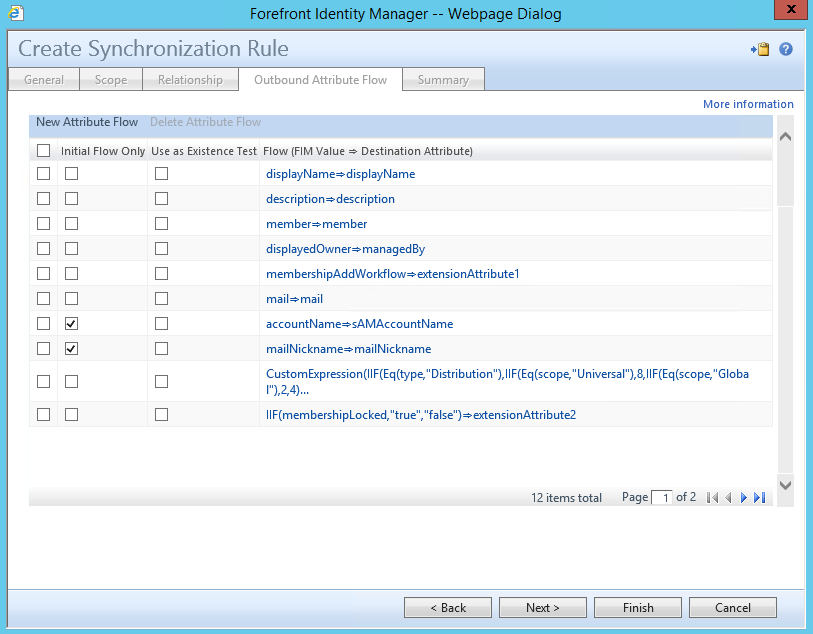
The Fifth Tab which is the “Outbound Attribute Flow” Tab (Technically this is the fourth tab if configuring an Outbound System Scoping Filter Sync Rule)
Under the “Outbound Attribute Flow” tab, we will configure the outbound flows to sync and provision groups if this Sync rule will be used for Provisioning. These are all fairly standard, with a few exceptions.
Suggested Attribute flow Environment Dependent: Direct Attribute Flows
Note: Any Attribute that will be managed by the FIM Portal such as MembershipLocaked and MembershipAddWorkflow which are used to determine the type of group must have a supporting attribute flow configured on the FIMMA. Please see referenced links at the beginning of this post.
| Source (Metaverse) | Destination (Connector Space) |
| displayName | displayName |
| description | description |
| Member | member |
| displayedOwner | managedBy |
| membershipAddWorkflow | extensionAttribute1 |
Suggested Attribute flow Environment Dependent: Direct Attribute Flows (Initial Flow Only)
| Source (Metaverse) | Destination (Connector Space) |
| accountName | samAccountName |
| mailNickname | mailNickname |
Suggested Attribute flow Environment Dependent: customExpression Attribute Flows
| Source (Metaverse) | Destination (Connector Space) |
| IIF(Eq(type,"Distribution"),IIF(Eq(scope,"Universal"),8,IIF(Eq(scope,"Global"),2,4)),IIF(Eq(scope,"Universal"),-2147483640,IIF(Eq(scope,"Global"),-2147483646,-2147483644))) | groupType |
| IIF(memmbershipLocked,”true”,”false”) | extensionAttribute2 |
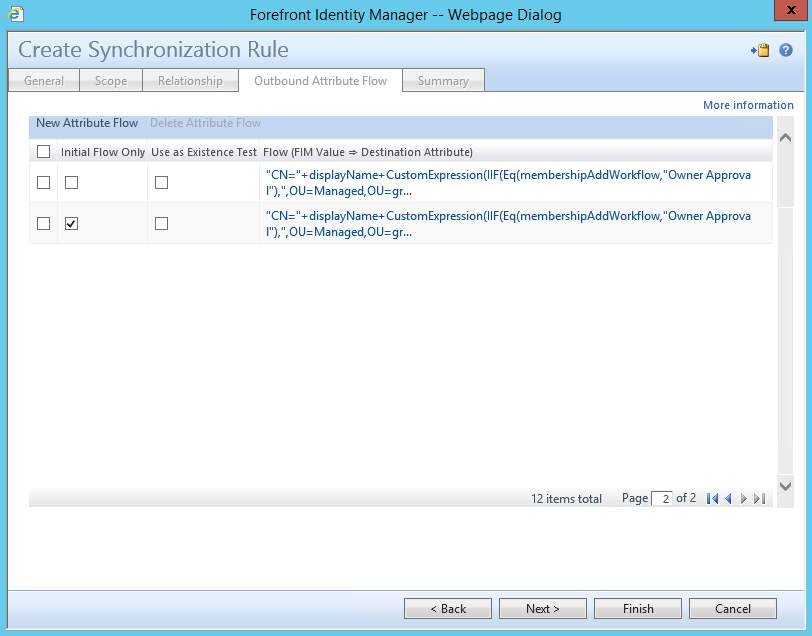
| “CN=”+displayName+ IIF(Eq(membershipAddWorkflow,"Owner Approval"),",OU=Managed,OU=groups,OU=FIMObjects,DC=contoso,DC=com",IIF(Eq(membershipLocked,"false"),",OU=Open Enrollment,OU=groups,OU=FIMObjects,DC=contoso,DC=com",",OU=Dynamic,OU=groups,OU=FIMObjects,DC=contoso,DC=com")) | dn |
Suggested Attribute flow Environment Dependent: customExpression Attribute Flows (Initial Flow Only)
| Source (Metaverse) | Destination (Connector Space) |
| “CN=”+displayName+ IIF(Eq(membershipAddWorkflow,"Owner Approval"),",OU=Managed,OU=groups,OU=FIMObjects,DC=contoso,DC=com",IIF(Eq(membershipLocked,"false"),",OU=Open Enrollment,OU=groups,OU=FIMObjects,DC=contoso,DC=com",",OU=Dynamic,OU=groups,OU=FIMObjects,DC=contoso,DC=com")) | dn |
Note: The Custom Expression used to build the DN in the above suggested Attribute flows has requirements for specified OUs and Domain information which will be different for every environment
After the Attribute Flows have been entered click on Next to continue to the Summary Page or click on Finish which will also take you to the Summary Page.
The Last Tab is the “Summary” Tab
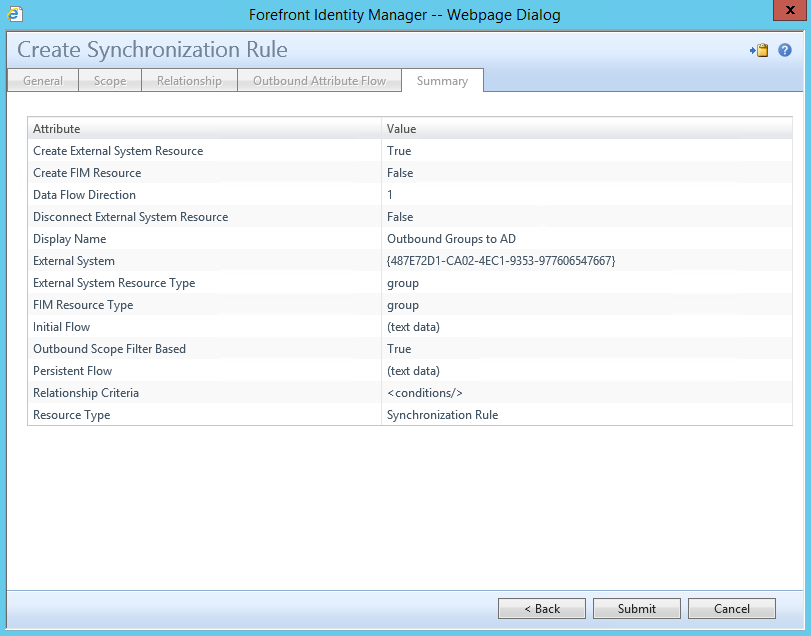
Review Displayed information and click on Submit when completed and are ready to finalize the creation of the Sync Rule.
Note: some information such as the Attribute Flows will not be displayed in detail on the Summary Tab.
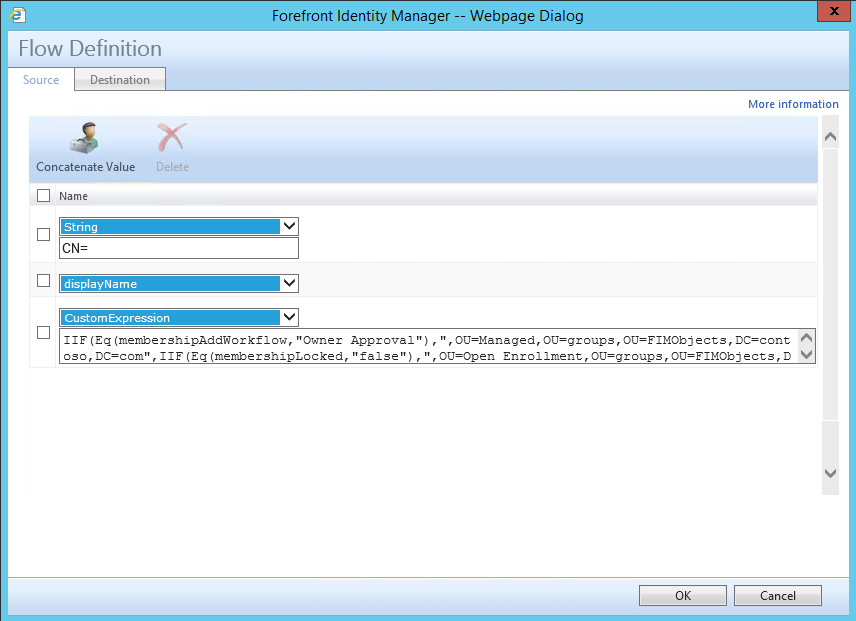
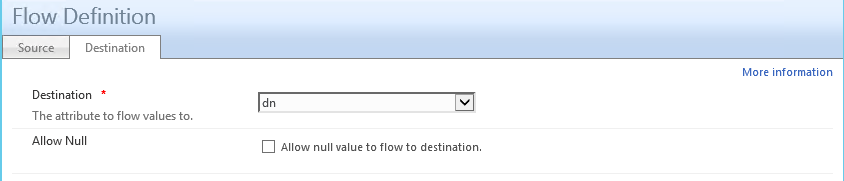
Building the DN
The below image shows the “Origin” flow for destination “dn”. In this scenario, the resulting DN would look like this:
“CN=”+displayName+“,OU=groups,OU=FIMObjects,DC=Contoso,DC=com”
In order for groups to join or provision into AD we must somehow specify where they are to go. In this case, by setting the “description” attribute to mirror the OU in which they reside, we can intelligently provision them.
Destination is DN
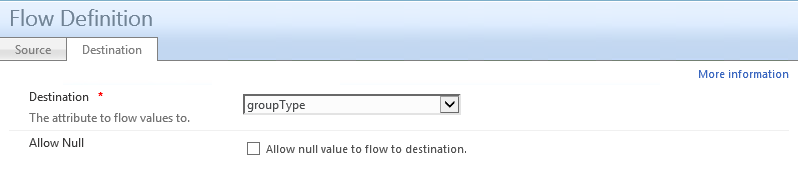
Understanding groupType
The other flow that must be somewhat custom relates to “Type”. Within Active Directory, “type” is a bit-mask, therefore we cannot do a 1:1 flow. This is because the information about the type and scope of a group is located in a single attribute based on bit values. For “Origin”, we must select “Custom Expression”, and in the text field, enter:
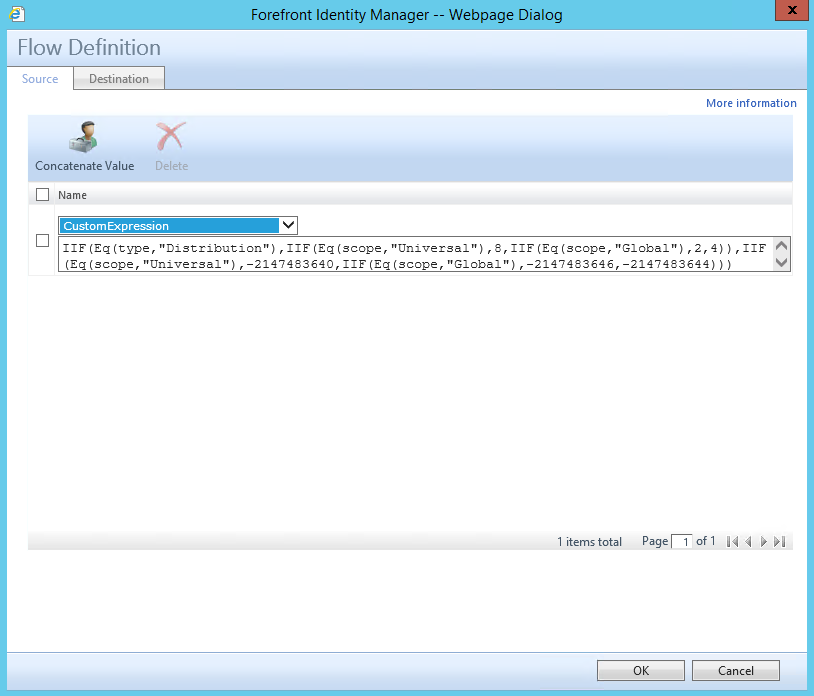
IIF(Eq(type,"Distribution"),IIF(Eq(scope,"Universal"),8,IIF(Eq(scope,"Global"),2,4)),IIF(Eq(scope,"Universal"),-2147483640,IIF(Eq(scope,"Global"),-2147483646,-2147483644)))
Destination is groupType
Additional Group Type Information
Within AD, there are two types of groups, Distribution and Security. For each, there are also three scopes: Global, Domain Local and Universal. With the above custom expression, we are providing the flow an intelligent way of determining what class and type a group needs to be provisioned as. The numbers above correspond to:
Distribution Global: 2
Distribution Domain Local: 4
Distribution Universal: 8
Security Global: -2147483646
Security Domain Local: -2147483644
Security Universal: -2147483640
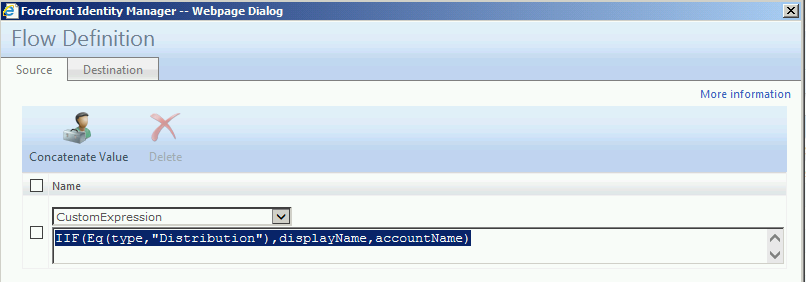
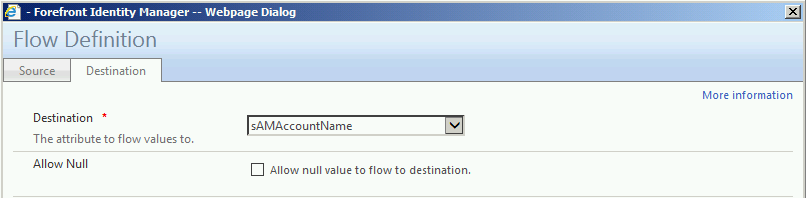
Account Names
One additional CustomExpression that you may wish to add is to populate the Account for Distribution Groups which by default in the Portal is not created nor is there a place to populate a value for the Display Name of a Distribution Group when created in the Portal.
You may wish to consider what the Display Name looks like, does it contain invalid characters? Which would prevent the group from being provisioned in Active Directory. It may be best to consider a workflow to create the Account Name for Distribution Groups instead of trying to handle it in with the Synchronization rule.
Destination sAMAccountName
Thank you for visiting