RCDC - Session 2 - Adding a new Attribute to an Existing TAB.
- Required: Understanding
- Understanding of Schema Management - Creating new Attributes within the FIM Portal Schema.
- Understanding of Schema Management - Binding Attributes to Portal Resources.
- Understand how to Back up the Current RCDC Configuration files.
In this Blog Posting We will Discuss Adding a newly created and bound attribute to the RCDC that is used to view, and manage the resource that the attribute has been bound to. For example if in the previous Schema Management Series we created a new attribute called "Employee Status" which we than bound to the user resource, In this post we will be editing the RCDC for the Create User Resource. (Configuration for User Creation)
- After we verified that the attribute does exist and it is of the correct desired attribute type and in fact has been bound to the desired resource we can proceed to updating the Create User RCDC.
- Back up the RCDC files either manually or Script in case we make a major mistake and need to fall back, Any questions on backing up the RCDC please review the Post within this Blog Series RCDC - Session 1 - Backing up your RCDC Files
Now that we are ready it is strongly recommended to use a good Text Editor to modify the XML Files of your RCDC Files, It is possible to use note pad or word pad but these options are sometime more difficult to read and some of the other editors have s method built in that understands XML and will let you know if your missing a statement, bracket etc.
- Before We begin to Edit the RCDC Configuration file locate the most recent RCDC Configuration file (The one you wish to edit) and copy and paste it in another folder called RCDC In Progress, You may also wish to rename the file to include some detail about the potential change.
- Using your Desired Text Editor open up the Copy of the RCDC Configuration file you wish to edit (Preferably a copy of your most recent file)
- Now Before we continue we need to consider the following
- What type of attribute are we adding, Reference, Indexed, Boolean, etc ?
- Where in the User interface would you like to add this attribute?
- What will you be using this attribute for?
- The First question is easy to understand as its pretty strait forward, the type of attribute you wish to add will determine how you modify the RCDC Configuration file. (More information will be provide in followup RCDC Postings)
- The Second question is more of a cosmetic thing or rather 60 % Management 30 % Cosmetic and 10 % Technical.
- The last question is really the meat and potatoes of what we are doing when updating the RCDC, If the attribute will never be viewed by a user or have any user interaction than why add it. I am a firm believer in the Out of site out of mind philosophy, for example if you have workflows that will build the value for the attribute and a user will never be able to update this attribute or shouldn't than adding it to the RCDC may only confuse people who do use the User Interface. Often someone would click on the New User or even Modify an existing user usually their own and they would see and attribute with a value that they dont know what it is, where it came from etc and decide to change this attribute which in turn could be problematic. Yes you could put things in place such as Approvals but lets learn how to crawl before we walk.
- Once you determined the location you wish to add this attribute lets open up the RCDC Configuration.
- Now locate the section the represents the Work Info Tab, this is represented with the line <my:Grouping my:Name="WorkInfo" my:Caption="%SYMBOL_WorkInfoTabCaption_END%" my:Enabled="true" my:Visible="true">
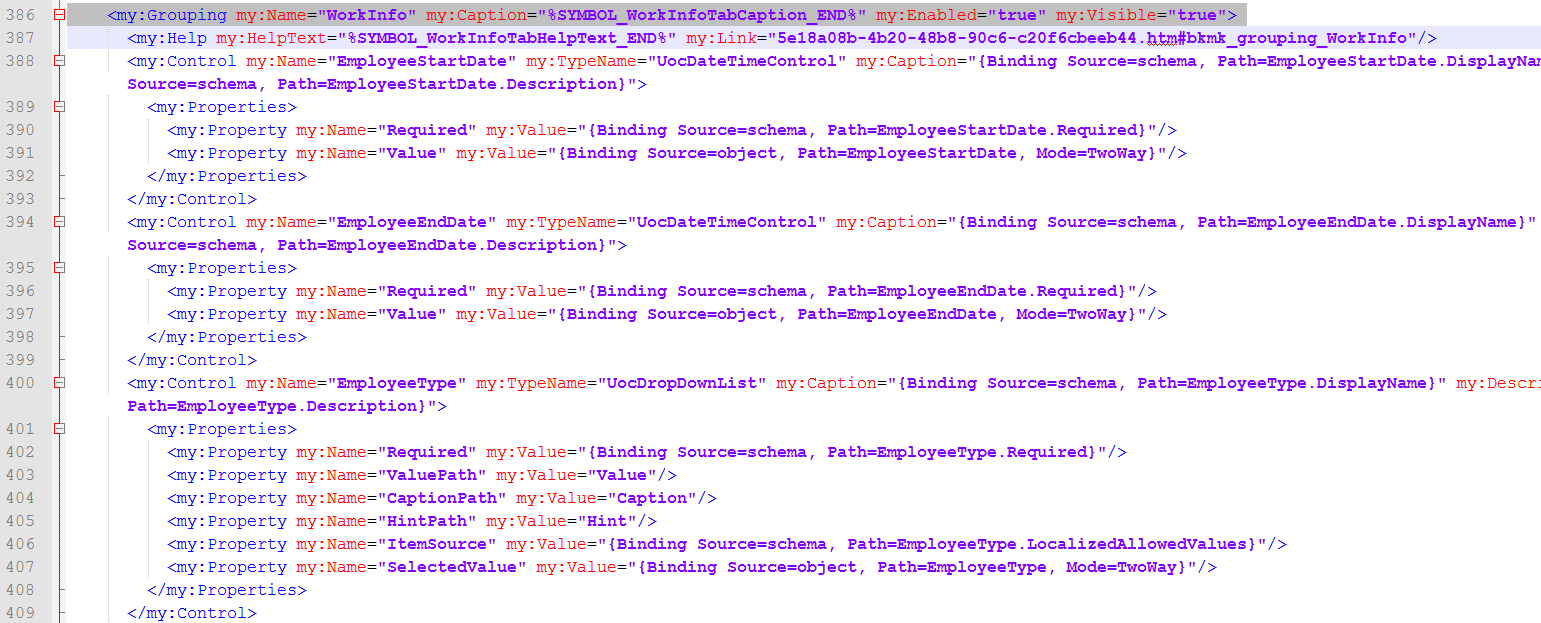
- Now locate the section that represents the Attribute "Employee Type"

- At the End of the Employee Type Attribute Section put some space between the Employee Type and the Employee ID attribute sections.
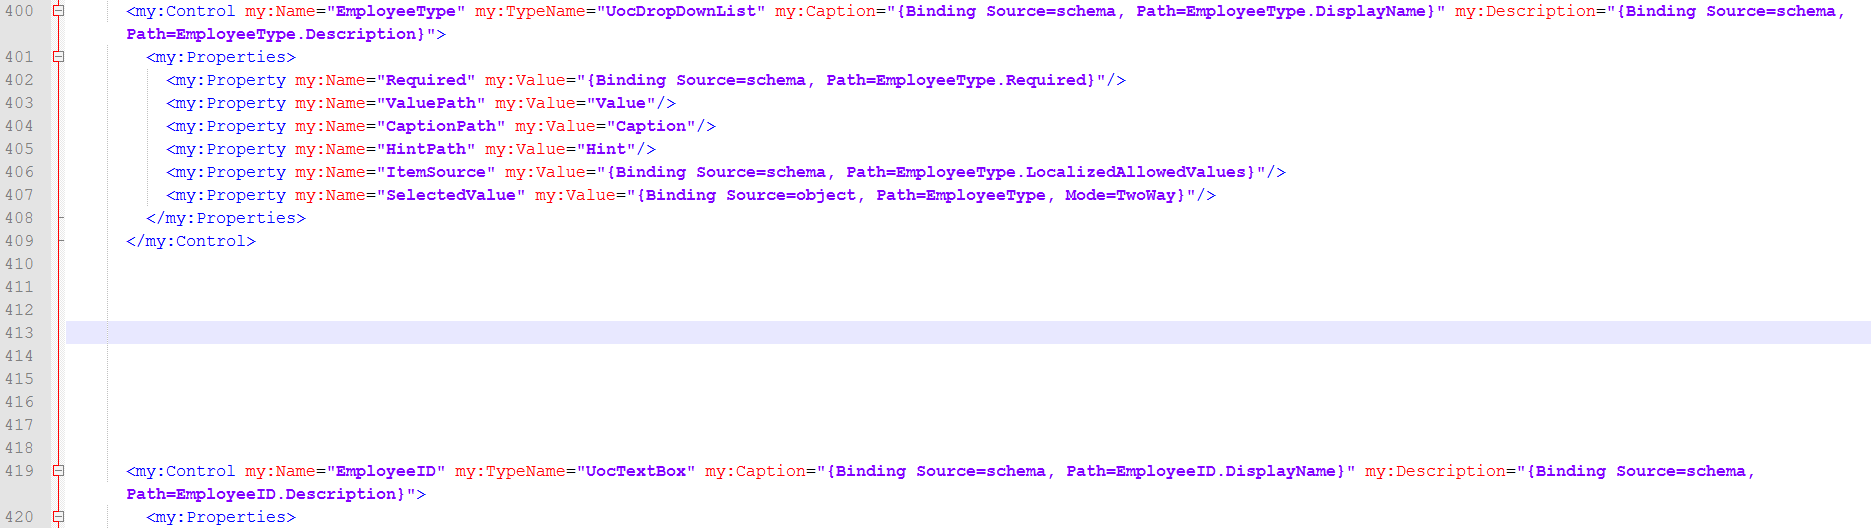
- In the space between the 2 attribute sections copy and paste the Employee Type Attribute section, it is easier to begin with a format that we know is working.
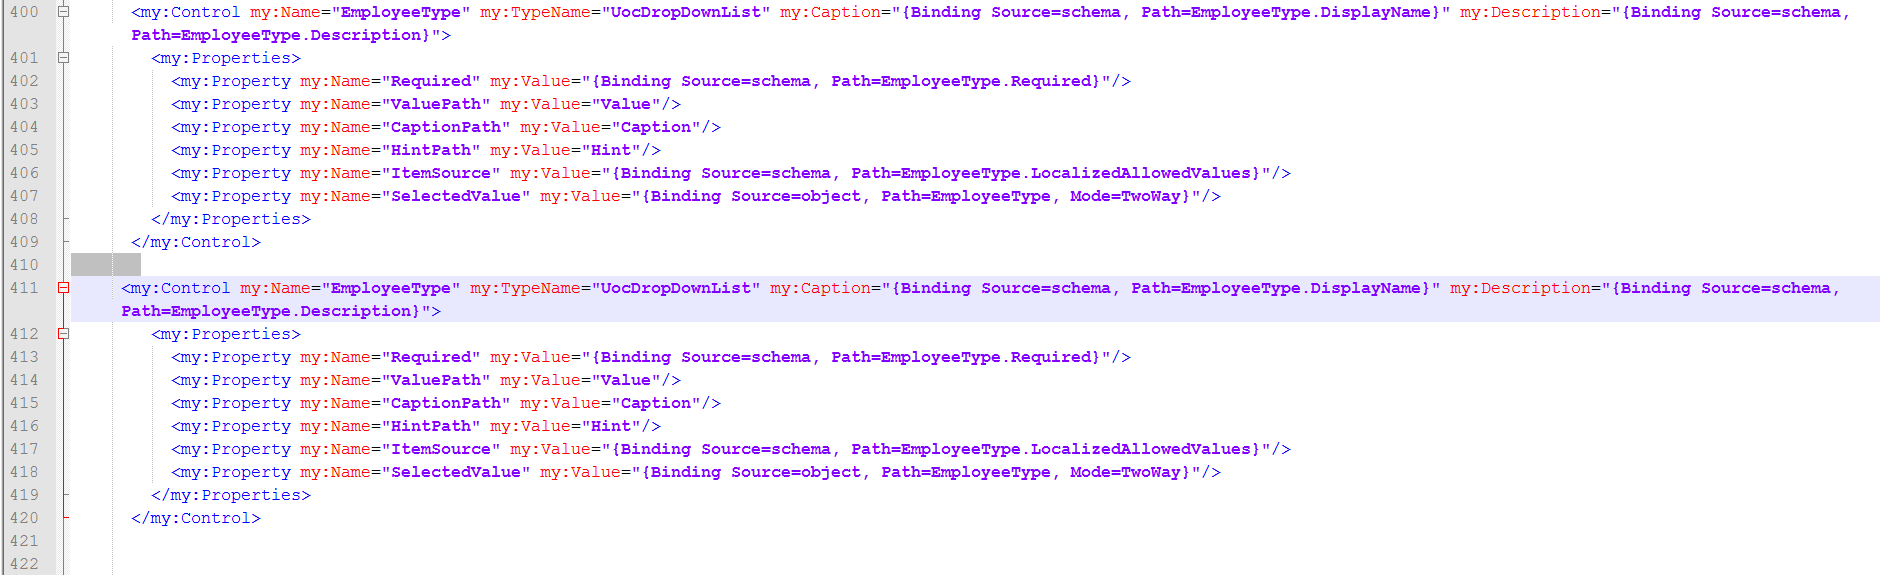
- Now you should see 2 sections that are identical, on the newly pasted section replace Employee Type with Employee Status
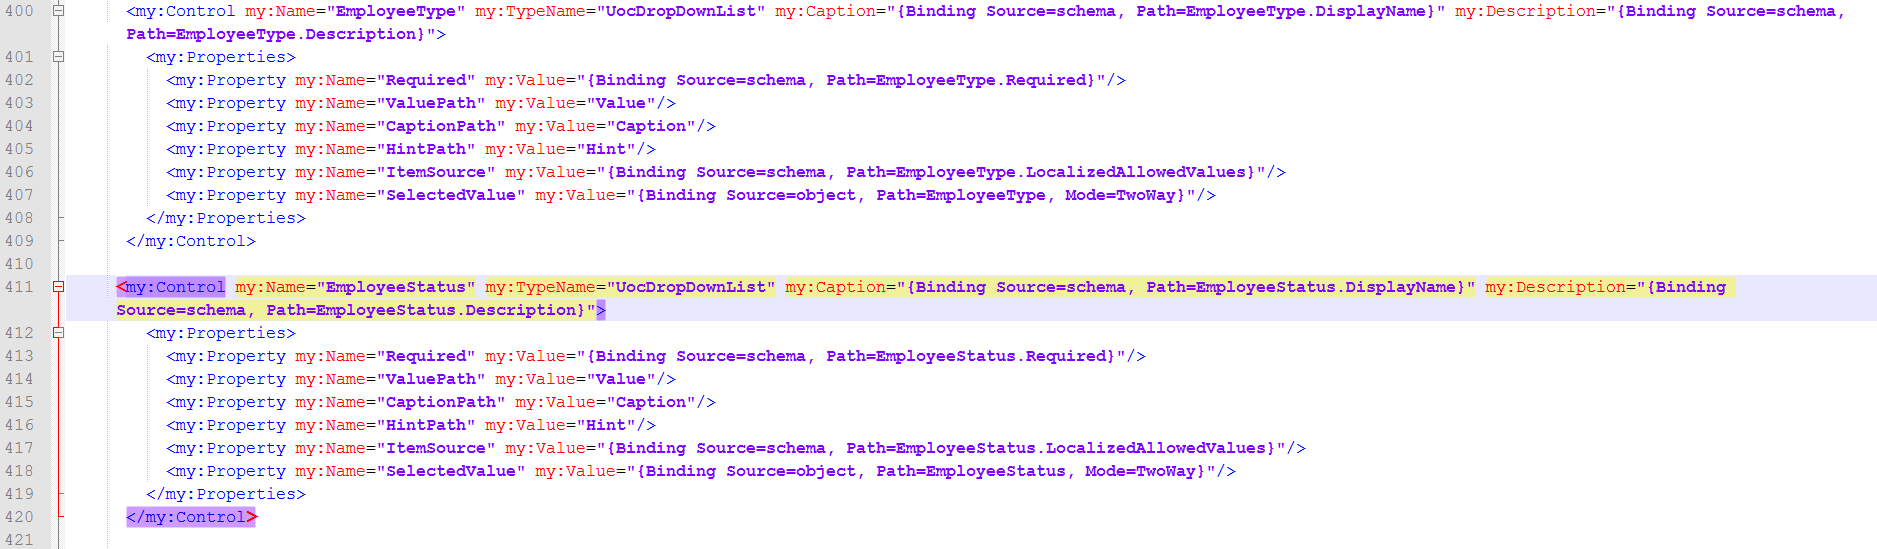
- Continue replacing Employee Type with Employee Status until you have 2 completely separate Attribute sections and remove all extra space.
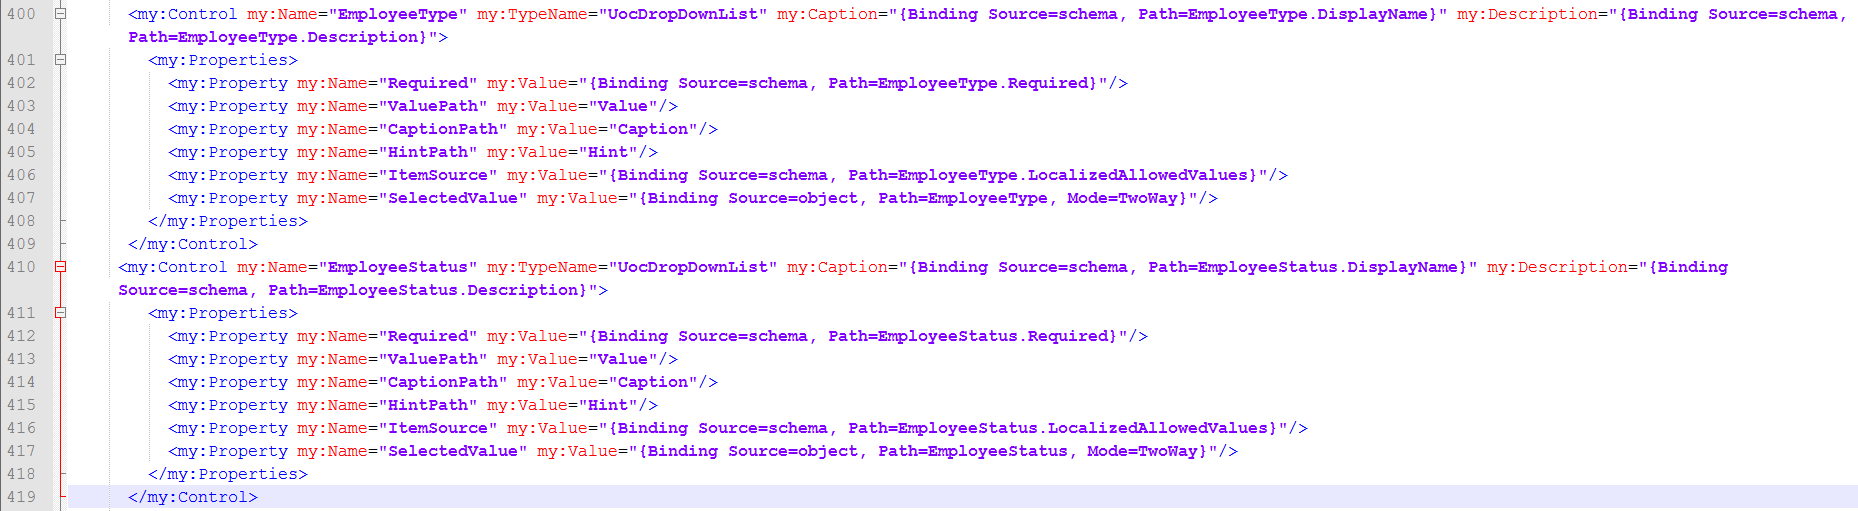
- Now lets change the type of the Attribute in the configuration file Replace my:TypeName="UocDropDownList" with my:TypeName="UocTextBox" , We could leave this section with the UocDropDownList but I would like to first show you the difference between the Text Box and a Drop Down List when editing the RCDC.

- It would be a good Idea to name the file some that follows the format that we used when backing up the RCDC File manually or feel free to name according to any naming standard you may have. Just note I would name the file in a format that details what type of RCDC File it is, when the file was modified and what it was modified to include.
- In This example I named the new file "User Create_Employee Status 1262014_1800"
- Save a copy of the file in a location that you keep the rest of your RCDC Files and are easy to locate when needed.
Import the Modified RCDC Configuration File.
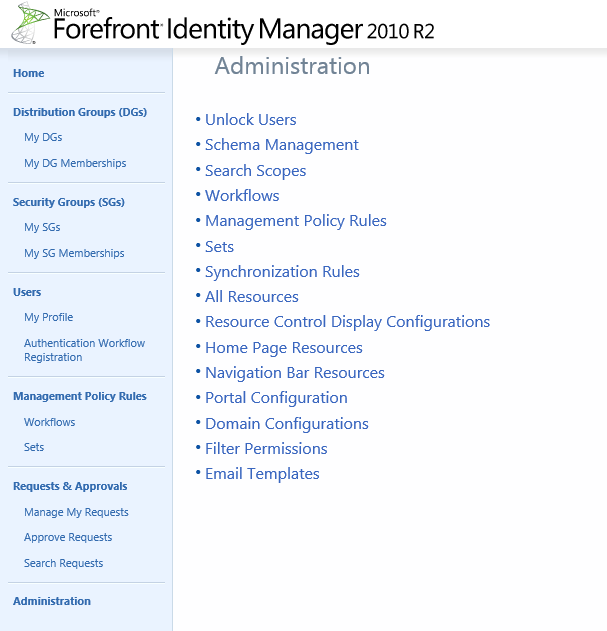
- From the Administration Page Click on Resource Control Display Configuration
- Once the RCDC Page is loaded lets locate grab the most current XML file for the Configuration for User Creation RCDC, If you already have a copy of the Current XML File for this RCDC you can skip to the step of Editing the RCDC section of this post. Be careful not to click on the wrong link, it is extremely easy to accidentally grab the wrong XML file which you would then edit and upload to the intended RCDC file. The XML information contains information about the type of attributes and resource that the RCDC is for so it is easily broken,
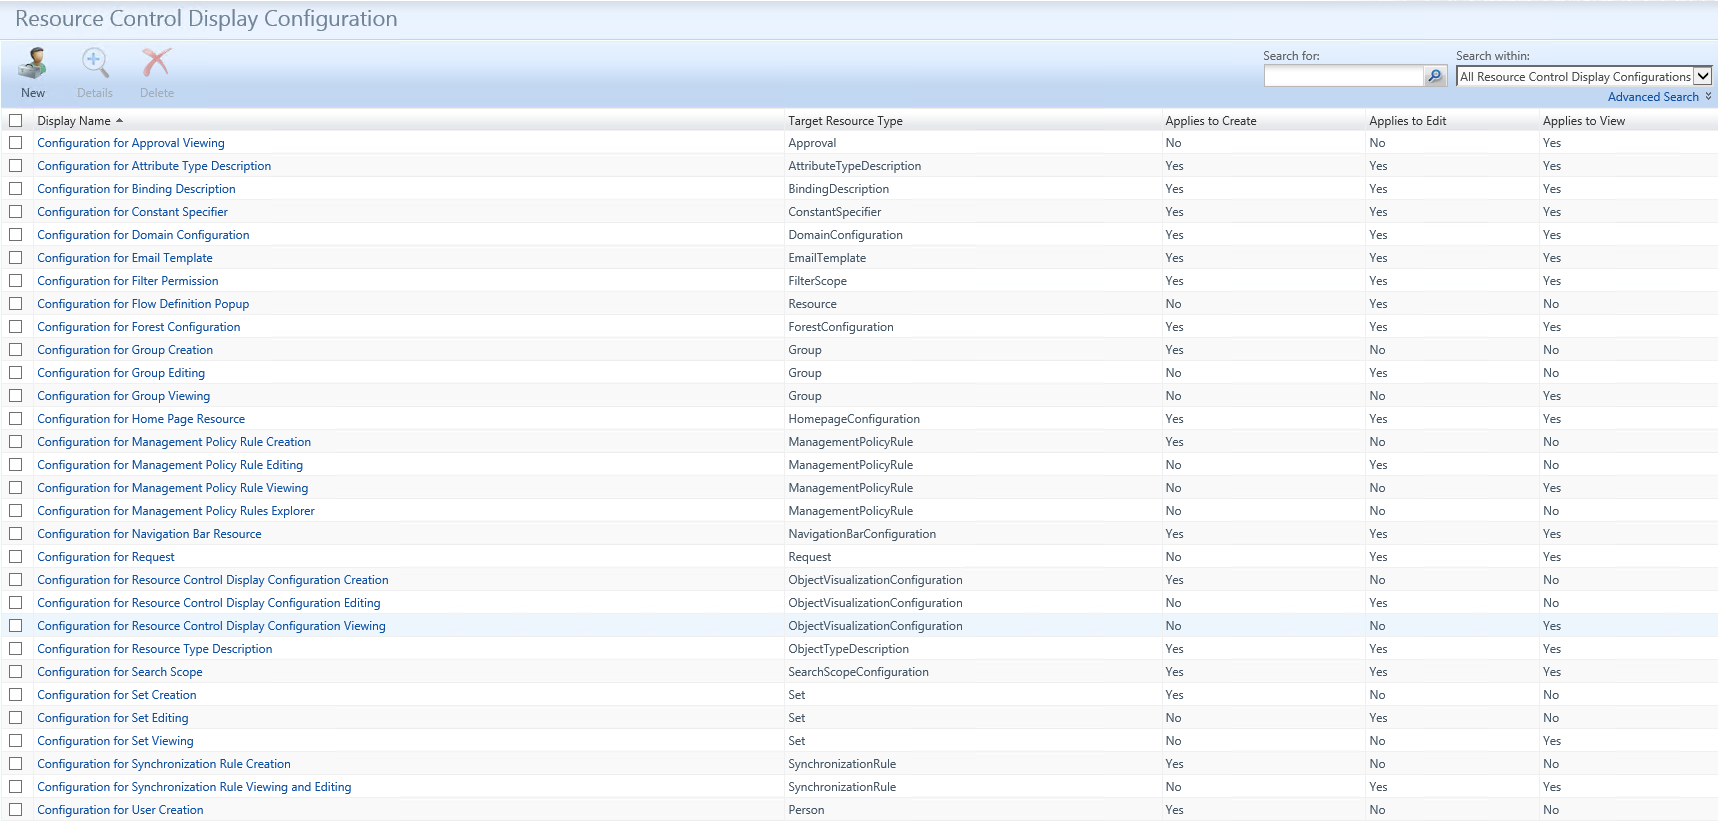
- Once you locate the RCDC Configuration for User Creation, Notice the 2nd column which represents Target Resource Type tells you what resource this RCDC is for.

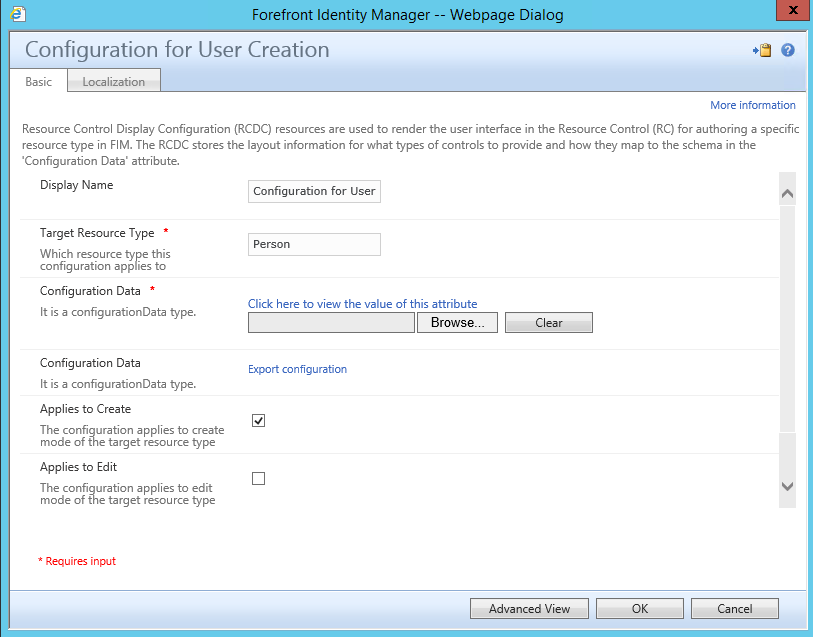
- After you click on the RCDC "Configuration for User Create" take a look at your options within the RCDC Window.
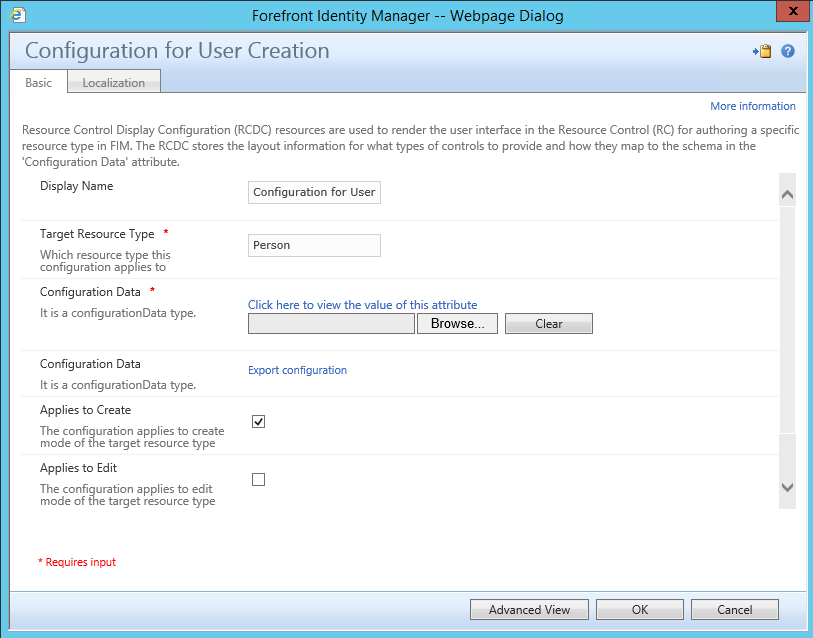
- Within this window you could change the Display Name and Target Resource Type if desired but i would strongly not recommending changing the Target Resource Type section which essentially binds this RCDC to the User resource with in the FIM Portal. It may also be important to note that you should only ever have 1 RCDC set for each resource type and action. (Another words do not change the following 2 options)

- Notice that there are 2 Configuration Data sections.

- The first Configuration Data section is where we will upload the newly modified RCDC Configuration File.

- Click on Browse, a window will pop up and give you the option to browse and select the file you wish to upload.
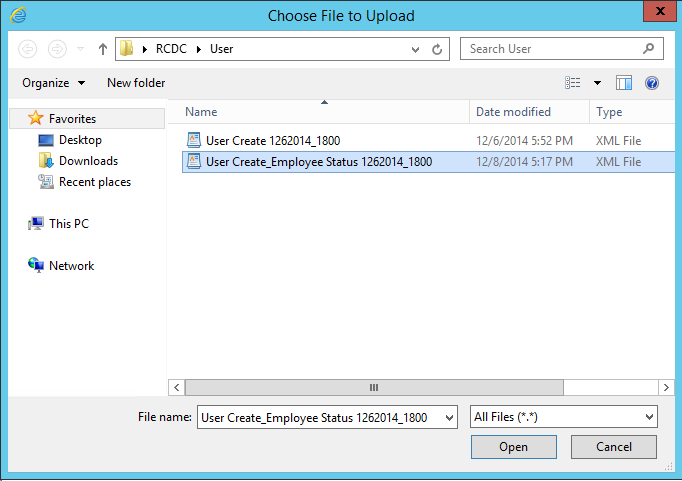
- Once you located the correct file click on the Open button, this will show you the screen below, it may display the uploaded file for a brief moment and it will disappear. This is Normal do not panic and there is no need to re upload the file.
- Click on Ok
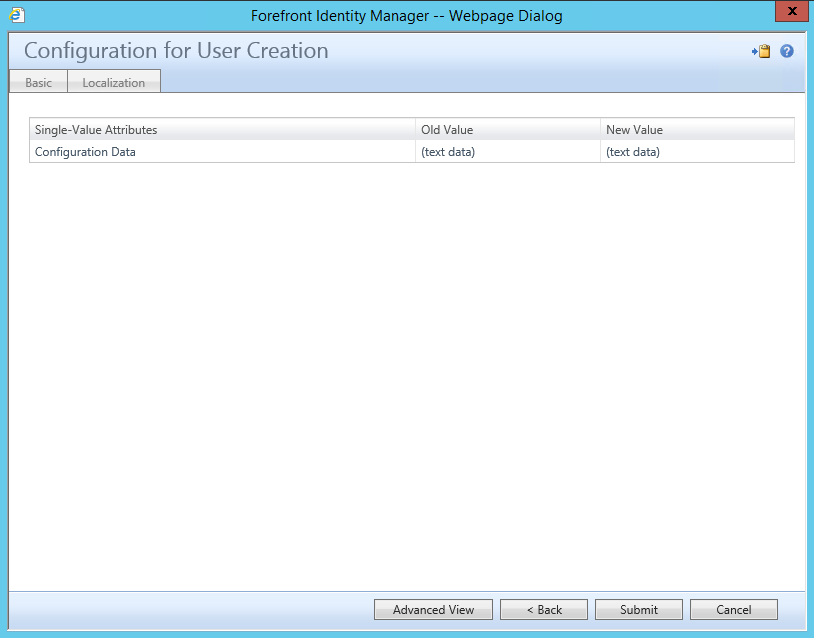
- Verify the RCDC That you are updating is correct and you should see (text data) under New Value, It doesn't show you what the data you uploaded is but if has been uploaded. Click on Submit
- You have now successfully uploaded the RCDC Configuration File.
IIS RESET
- Before we continue open up PowerShell or a command prompt as an Admin, Type IISRESET
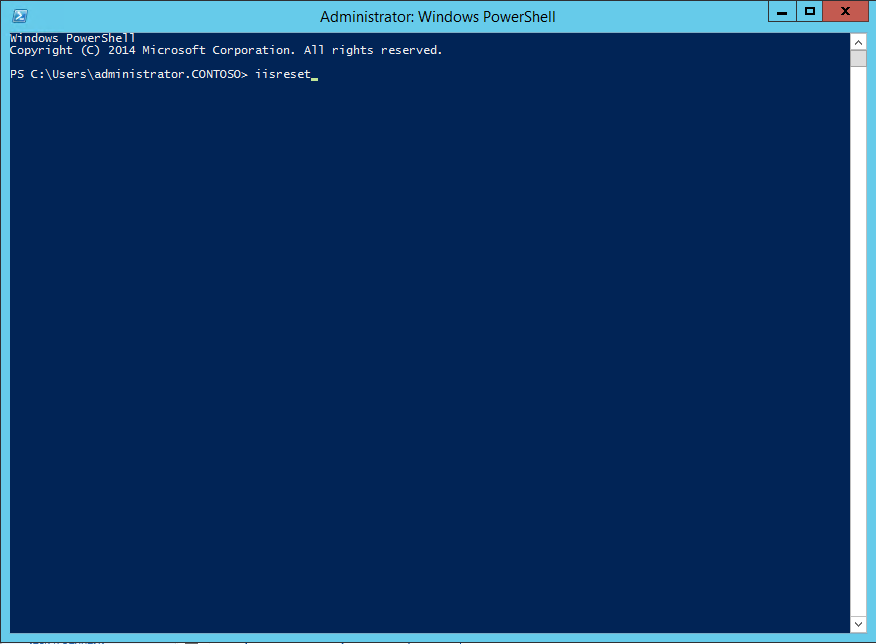
- After a few moments you will notice that the Service is stopped and restarted.
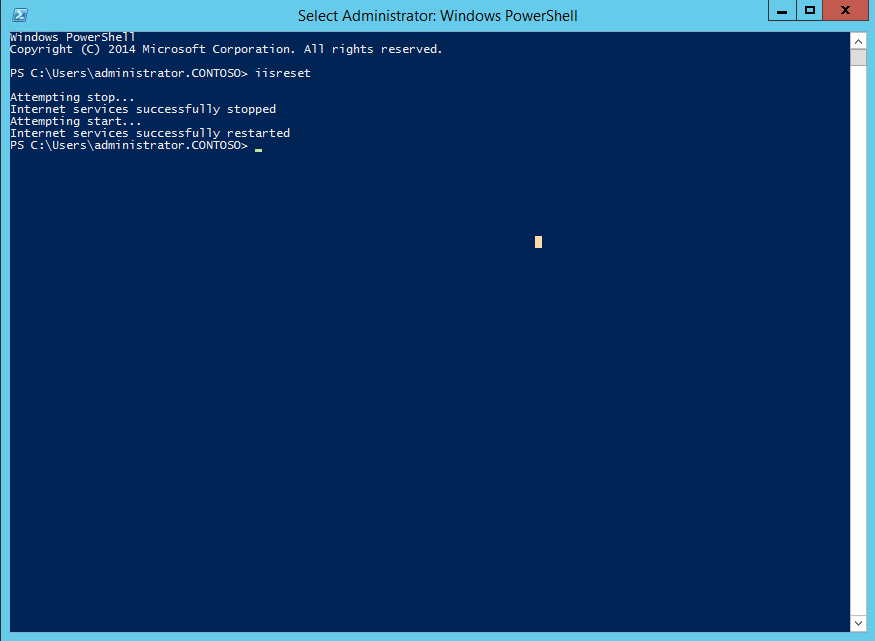
- Once complete close out PowerShell
- Now go back to the FIM Portal Page, notice it may take a few extra moments to load the page, this is normal behavior after an IISRESET
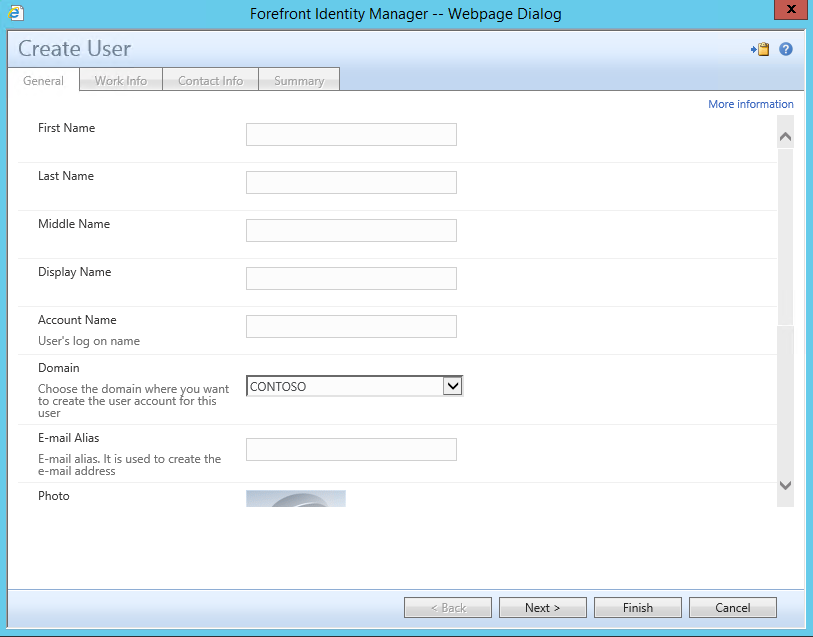
- Now open up the New User Interface from the FIM Portal, the window should now load normally.
- Click on Next to view the Next Tab which is where we will find our new attribute.
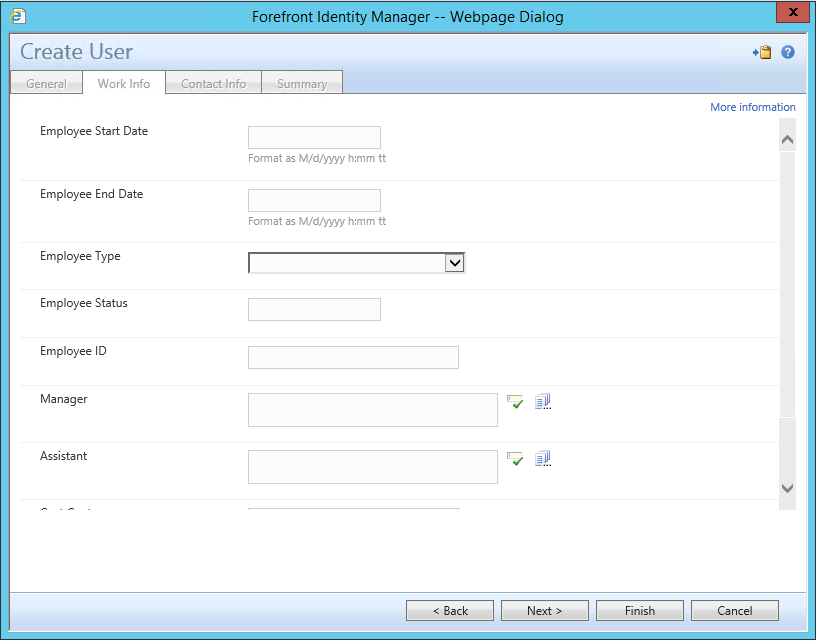
- Examine the new Attribute, click on cancel
- Stay tune for the follow up Post where we will update:
- Employee Status Attribute into a drop down with specific values.
- Add a Boolean Attribute
- Add a reference attribute
- Manage RCDC Permissions
https://blogs.msdn.com/b/connector_space/default.aspx?wa=wsignin1.0