Using Mercurial on CodePlex
There’s ton of documentation out there on how to use Mercurial and its various clients. For this blog post, you’ll see me use a popular client called TortoiseHg. (Hg is the chemical element symbol for Mercury, hence Tortoise ”Hg” in case you’re wondering.) If you’re already familiar with TortoiseSVN, this will be very straight forward.
Step 1: Install TortoiseHg
You can install TortoiseHg from https://tortoisehg.bitbucket.org. Note: TortoiseHg is an extension of the Windows Explorer shell, so there is no application to launch.
When prompted for your personal information, the username you specify will not be associated with your CodePlex account. This username is only used for your local commits. We advise you to put in the same username as your Codeplex username.
Step 2: Create a new CodePlex project
In the Create a Project wizard, select Mercurial for Source Control.
Step 3: Clone the repository
Now you’ll want to create a local clone of the repository. You must do this step; otherwise, you cannot push code (i.e. check-in) to CodePlex.
First, create a new folder on your local machine where you want to download (or clone) the repository.
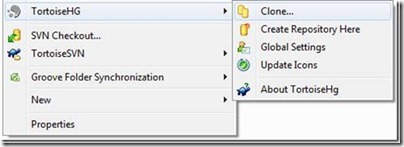
Next, use TortoiseHg to clone the repository in the newly created folder, as shown in the illustration.
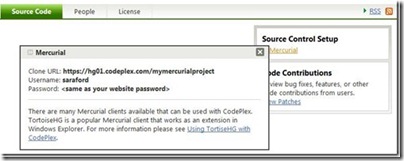
You’ll be prompted by TortoiseHg for the Source path. You’ll need to get this URL from CodePlex. Go to the project, click on the Source Code tab, and under Source Control Setup, click Mercurial. You’ll see a window appear with the Clone URL.
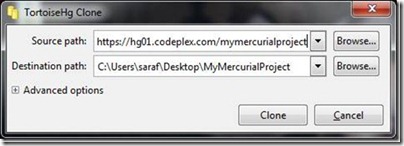
This is the URL to insert into TortoiseHg Source path, as shown in the below.
Press Clone.
Once the clone is completed, the dialog will close and you’ll see a green checkmark indicating this is sync’ed with the Mercurial project on CodePlex.
Now let’s look inside the folder containing the cloned repository. Since the repository is empty, there is only the .hg folder, which stores the Mercurial repository. DO NOT MODIFY THIS FOLDER unless you know exactly what you are doing.
Step 4: Add your files to your local repository
Now you can simply add your files to this folder. In this example, I only have one file that I’m going to add.
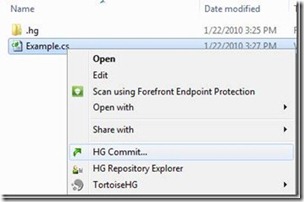
Now right-click to bring up the Windows Explorer context menu, and select HG Commit. The HG Commit command will commit to local repository.
In the HG Commit dialog, fill out the description of the commit. (again this is just for local repository).
Make sure to check to commit all files (or whatever files you want to commit), as illustrated in red below.
Press the Commit button, accept any warnings, and you’ll be prompted with a status/success window.
Step 5: Push to CodePlex
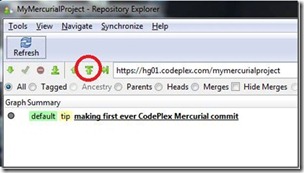
To push the code to CodePlex, you’ll need to open the HG Repository Explorer as seen on the Windows Explorer context menu.
On the menu, you’ll see the Push icon. Press this to start the push to CodePlex.
You will be prompted for your CodePlex credentials at this point . Once you have typed in your CodePlex username and password, you’ll see a success dialog.
Now you can go to your CodePlex project and view the source code tab.
