Windows 8 Graphics - Fun with gradients
This post is mainly for fun. You will see part of the code (such as button's style) in the next version of Story Creator. But this post will go beyond Story Creator. We'll explore Windows 8's gradient brushes, including XAML, HTML, and DirectX.
In this post:
- Why do we need gradients
- Gradients in XAML (related prototype: Button styles)
- Gradients in CSS 3 (related prototype: CSS gradient button)
- Gradients in SVG (related prototype: SVG Color Picker)
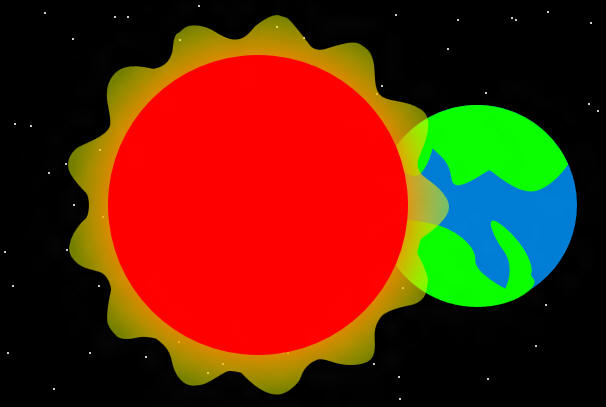
- Gradients in HTML 5 canvas (related prototype: Canvas Star and Planet)
- Gradients in Direct2D (related prototype: Direct2D Star and Planet)
- Gradients in math and physics
Well, the last part has nothing to do with programming. But I think it will be fun to talk about it, as the name is also gradient. :)
Why do we need gradients
Before diving into the details, you need to understand why do we need gradients. Well, a strong reason may be it is fun to learn them. That's enough for personal interest. But we need a stronger reason for production.
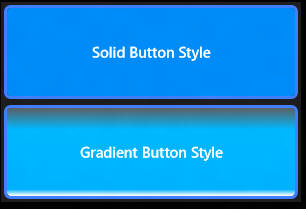
In most cases, gradients are used to improve user experience, to create a smoother UI. Let's compare a solid style button with a gradient style button:
I think most people will prefer the second style. In particular, when you click a button, you need to show some indicators. Without using a gradient, usually you change the background color, increase the border thickness, make the button a bit smaller, etc. This gives user a flat experience. But with the power of gradient, you can simply change the gradient stops' color to show some 3D bevel effect:
Now you may wonder if the same effect can be achieved using bitmap images. To some extent, yes. But you need to be aware of the advantage of gradient compared to bitmap images:
- Gradient supports animations. For example, you can smoothly change one stop's color during half a second. This can be difficult to achieve using bitmap images.
- When available, gradient is hardware accelerated. This is true no matter you choose XAML, HTML, or DirectX.
- Gradient is used on vector graphics. This means you can scale a graphic without losing quality.
- Unless your graphic is extremely complex, using vector graphics with gradient takes smaller disk space to store the graphic asset. Bitmap is usually bigger, especially if you need higher resolution.
- To reduce the package size, you may want to put the bitmap on the web instead of embedding it in the package. But then client has to download the bitmap. If you have a bitmap for normal style, another for clicked style, client has to download two bitmaps. In most cases the result will be cached by Windows, but this is still some extra web requests. Since vector graphics are usually small, you can safely embed them in the package.
So gradient usually gives you better performance and allows you to easily animate the content.
However, abuse the usage of gradient is a bad practice. It is generally expected to create a nice UI. But sometimes a nice gradient button will distract the user. For example, if you put a lot of gradients with bright colors in app bar, users may intentionally or unintentionally focus on the app bar rather than the application's content. So usually in app bar, it is recommended to use some simple (but not ugly) styles, without gradient or animations.
So use gradient when you want to obtain user focus. Use it when you need to highlight some content, when you need to let users focus on an input form. If there's no content to focus (such as a start screen of an app that contains some links to take user to different pages), using gradient will also make the experience smoother. But do not use gradient if it can potentially distract users.
Of course, when appropriate, gradient can also make a game much more beautiful. But I won't talk about games today.
Gradients in XAML
OK. Now that you see why do we need gradients, let's put it into action. All kinds of Metro style applications support gradient. Let's start with the simplest: XAML. Most of you should already be familiar with XAML's gradient, if you've worked with WPF or Silverlight.
Using gradient in XAML is very easy. Below is a code snip for a LinearGradientBrush. All you need to specify is its start/end point and a collection of gradient stops.
<LinearGradientBrush EndPoint="0.5,1" StartPoint="0.5,0">
<GradientStop Color="#FFEBF9FF" Offset="0"/>
<GradientStop Color="#FF008BC7" Offset="1"/>
<GradientStop Color="#FF00B8FF" Offset="0.249"/>
<GradientStop Color="#FF00B3FF" Offset="0.93"/>
</LinearGradientBrush>
You can also use Expression Blend to design gradients. Expression Blend offers a very powerful gradient editor. If you haven't played with it yet, I recommended you to watch this video by Dante. Sometimes a video is worth a thousand of words. :)
You can also use code to construct a gradient. LinearGradientBrush is just a normal WinRT object.
Like in WPF/Silverlight, you can use a gradient brush to paint almost everything: A control's background, text, etc. And a brush can be reused by multiple elements.
There's a limitation, though. Currently for Metro style applications, only linear gradient brush is supported. WPF/Silverlight also support radial gradient brush. One reason why radial gradient brush is not supported in Metro is it takes more computation power compared to linear gradient brush, even when hardware acceleration is available. In addition, at least in UI design, linear gradient brush is far more common than radial gradient brush.
If you do need radial gradient, you can still use it, but with some coding. You can use DirectX interop (which is supported in XAML but not in HTML). Later in this post, I'll talk about how to use radial gradient in Direct2D. But today we don't have time to discuss XAML/DirectX interop. I plan to discuss that topic in a future post. Meanwhile, if you want to explorer on yourself, check out this official Windows team's blog post. You can also find several SDK samples related to this topic. After downloading the samples, check out those named Direct***.
Gradients in CSS 3
Now I'd like to switch your attention to HTML. Even if you're a XAML developer, one day you may have to deal with HTML (for example, creating a web application targeting a mobile device that does not support Silverlight). So it's essential to at least build up some basic HTML skills. If you're already an HTML developer, but hasn't looked into CSS 3, SVG, HTML 5 yet, now is the perfect time to start. Eventually you have to upgrade to newer standards.
In HTML, there're at least 3 methods to create gradients. You can use CSS 3, SVG, or canvas. For now let's focus on CSS 3. CSS is ideal for UI styling.
Using gradient in CSS is also very easy. For example, below is a linear gradient:
-ms-linear-gradient(top, #EBF9FF 0%, #00B8FF 24.9%, #00B3FF 93%, #008BC7 100%);
Note many features in CSS 3 are still in draft status. So you can't just write linear-gradient. You have to put a -ms- prefix. If you wish to use the same style in browsers, you need to write multiple lines with different prefixes. For example:
-ms-linear-gradient(top, #EBF9FF 0%, #00B8FF 24.9%, #00B3FF 93%, #008BC7 100%);
-webkit-linear-gradient(top, #EBF9FF 0%, #00B8FF 24.9%, #00B3FF 93%, #008BC7 100%);
-moz-linear-gradient(top, #EBF9FF 0%, #00B8FF 24.9%, #00B3FF 93%, #008BC7 100%);
-o-linear-gradient(top, #EBF9FF 0%, #00B8FF 24.9%, #00B3FF 93%, #008BC7 100%);
This ensures your application works in all major browsers, as long as they support gradient. Gradient is supported by most major browsers, including IE 10. If you are sure you only need to support Metro but not browser, you can safely remove all other -***- prefixes.
Just like XAML, CSS gradient is also very flexible. For example, in order to assign the gradient to a button, all you need to do is to assign it to background-image. Well, a background image can be either a bitmap image or a vector image. In this case, we're using a vector image with gradient.
background-image: -ms-linear-gradient(top, #EBF9FF 0%, #00B8FF 24.9%, #00B3FF 93%, #008BC7 100%);
The result is similar to what you've seen in the XAML version.

The downside of CSS compared to XAML: is in most cases you have to type the rules manually. Expression Web/Blend can help to some extend. But you still need to manually fine tune the styles. Fortunately, you can at least use Blend to design a gradient in XAML, and then refer to the colors to translate them to CSS.
Like all CSS rules, you can also use JavaScript code to dynamically apply/modify gradients.
A good news of CSS gradient is it also supports radial gradient, even in a Metro application.
For more information about CSS gradient, please refer to https://msdn.microsoft.com/en-us/library/windows/apps/hh441198.aspx...
If you run the prototype, you may notice some animations when clicking the button. You may also notice the button is centered in the screen. Here I use some other CSS tricks: CSS animation and CSS grid layout. All of them are new features in CSS 3. Without them, you'll have to write some JavaScript code to create those seemingly simple animations/layouts. We don't have time to go into the details today. Just to let you aware how easy it is to create animations in CSS, here's the code. Compare it to a JavaScript/jQuery solution, you'll see how simple CSS is. CSS animations are also hardware accelerated, while JavaScript code based animations are usually not.
-ms-transition: 0.5s;
-ms-transition-timing-function: ease-out;
As you can see, CSS 3 has simplified HTML development, to make it almost as simple as XAML (and in some cases, even simpler).
Gradients in SVG
You can also use SVG to create gradients. Remember CSS is usually used to style existing UI elements. SVG, on the other hand, is usually used to create complex UI elements that require user interaction (think of custom controls).
SVG offers an xml based mark up similar to HTML/XAML. You can think SVG as an extension to HTML. It allows you to use markup to define shapes like rectangles and ellipses. If you've never used SVG, you can refer to https://en.wikipedia.org/wiki/SVG to get started.
To define a gradient in SVG, you use a gradient element, and put it in the defs section (kind of similar to XAML resources). For example:
<defs>
<linearGradient id="gradient1"
x1="0%" y1="0%"
x2="0%" y2="100%">
<stop offset="0%" stop-color="#00ff00" stop-opacity="1"/>
<stop offset="100%" stop-color="#0000ff" stop-opacity="1"/>
</linearGradient>
</defs>
To use the gradient, you assign it to an element's style property:
<rect x="0" y="0" width="100" height="100" style="fill:url(#gradient1);" />
What's nice about SVG is every element is a DOM element. For example, you can handle the onclick event in the above rect, and do whatever you like. That's one of the major reasons why SVG can be used to build interactive controls.
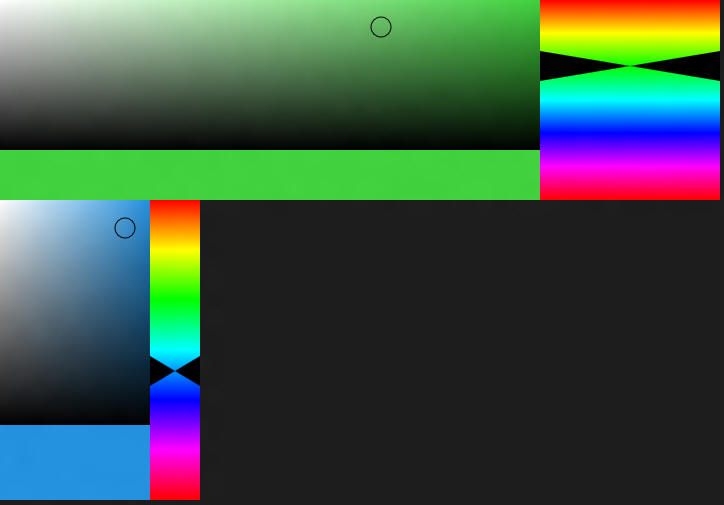
You can also use JavaScript to create SVG elements. As a practice and a future component in the HTML version of Story Creator, I've ported the Windows Phone Color Picker from an earlier post to SVG. I've tried to make it compatible with modern browser applications as well, so I didn't use WinJS (although I used some ECMAScript 5 features, such as property getters and setters, so it may not work in old browsers). This also demonstrates how easy it is to port some Metro components to the web. You may notice this prototype doesn't have any SVG markup. Everything is created in JavaScript.
SVG is not only supported in Metro, but also supported on all major browsers. IE has native support for SVG since IE 9. Even on earlier versions of IE, you can find third party plug-ins that allows the browser to render SVG.
Gradients in HTML 5 canvas
One final gradient in HTML is the canvas's gradient. In recent years, canvas has become a hot topic. But keep in mind that canvas is not needed for every application. Actually for most applications, you don't need canvas. Canvas gives you an intermediate rendering mode, which is completely different from the remaining of HTML. When using canvas, there's no DOM. So you have to take care of redraw and hittest yourself. You can compare HTML/SVG to XAML, while compare canvas to Direct2D. Usually you use canvas when you create games or other applications that require advanced graphics.
To use gradient in canvas, you use JavaScript. Fortunately the code is much simpler compared to Direct2D. The following code snip creates a radial gradient brush (which is also supported in the HTML version of Metro applications):
var outlineBrush = drawingContext.createRadialGradient(95, 95, 0, 95, 95, 95);
outlineBrush.addColorStop(0.72093, '#FF7A00');
outlineBrush.addColorStop(1, 'rgba(235, 255, 0, 136)');
drawingContext.fillStyle = outlineBrush;
The last line assigns the brush to the canvas's drawing context (obtained from canvas.getContext('2d')).
As you can see, using gradient in canvas is not difficult. But a lot of code is required to create and draw shapes.
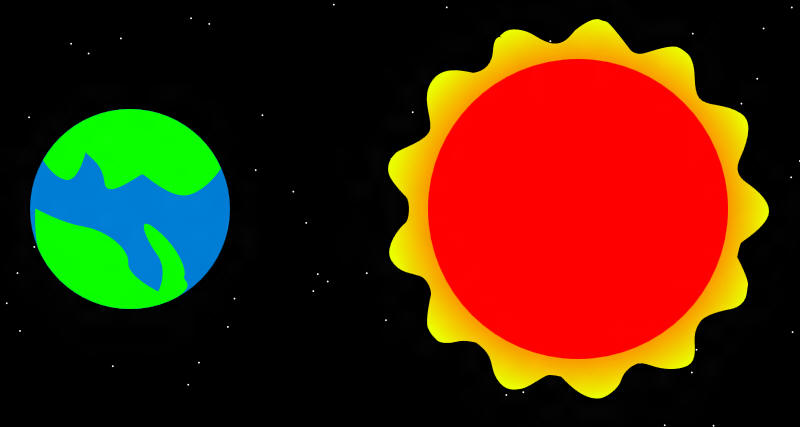
Some of you may have seen this C++ Direct2D 1Code sample I created a few years back for Windows 7 (and the related C# and VB version). Actually around that time, I also created an HTML version using canvas. Today I ported it to Metro, and found I don't need to change a single line of code! This won't always happen. But porting HTML applications to Metro is really not too difficult. This demo also shows it is possible to create graphics completely from code, without bitmaps.
Gradients in Direct2D
If you're a XAML developer, you may be disappointed that you can't use radial gradient brush. However, starting from Consumer Preview, you can now integrate DirectX contents directly into your XAML application. So actually you will get even more power compared to an HTML developer. However, the power comes with a price. DirectX does not natively support .NET. You have to use C++, or use a .NET wrapper for DirectX. The Windows API Code Pack for .NET is an official wrapper for Windows 7. It is not a part of Windows, but the code quality is very good. However, I don't know if it will work for Metro applications.
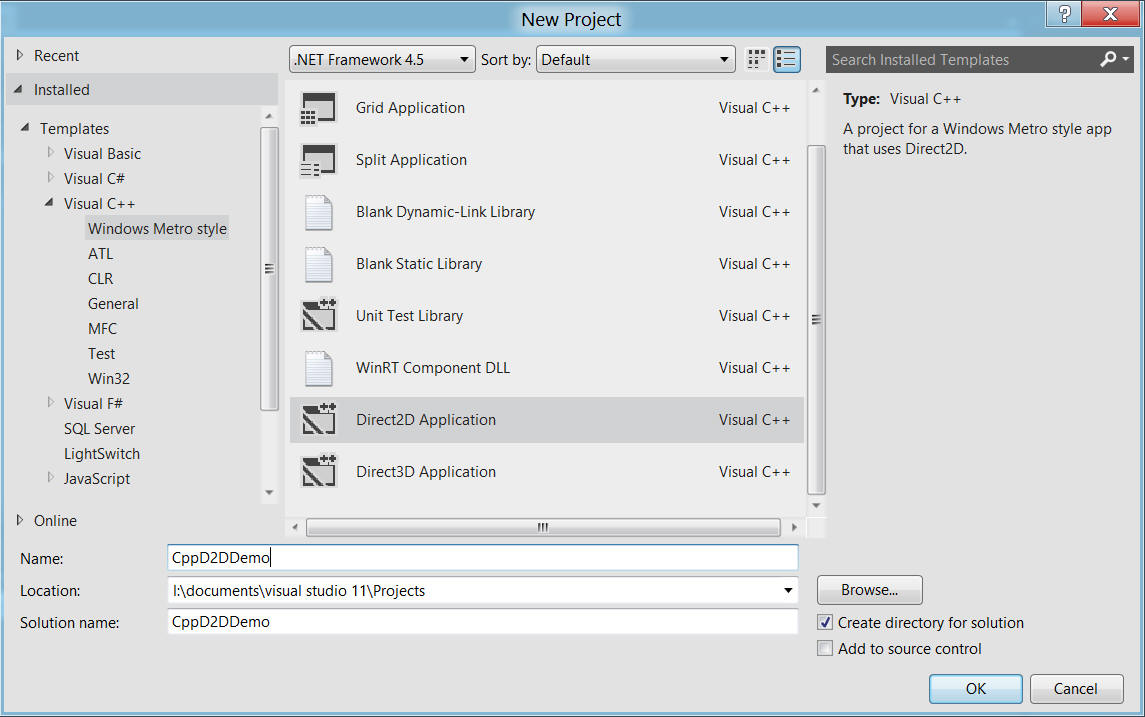
Anyway, in this post, I'll use C++. Traditionally, using DirectX requires a lot of code just to setup the infrastructure. Fortunately, now we have a project template that automatically generates all infrastructure code for us. This is supported when you create a "Direct2D Application" or a "Direct3D Application".
Since this post is about gradient, I don't want to go into the details about DirectX. If you are new to Direct2D, it is highly recommended to get started from https://msdn.microsoft.com/en-us/library/windows/desktop/hh780340(v=vs.85).aspx.
If you have experience with Direct2D on Windows 7's desktop applications, you'll notice while the majority code can be reused in a Metro application, there're some differences.
First of all, a Metro application doesn't have a window handle. You don't get access to HWND. So you cannot use CreateHwndRenderTarget to create a render target for a window, and then draw to the window. Instead, you have to draw to a DirectX Graphics Infrastructure surface (DXGI surface). And instead of creating a render target, you create a device context. Below is the automatically generated code that associates the DXGI surface to the Direct2D device context. As you can see, the code creates a Direct2D bitmap from a DXGI surface, and then call SetTarget to tell Direct2D to render to this bitmap (instead of a window):
// Get a D2D surface from the DXGI back buffer to use as the D2D render target.
DX::ThrowIfFailed(
m_d2dContext->CreateBitmapFromDxgiSurface(
dxgiBackBuffer.Get(),
&bitmapProperties,
&m_d2dTargetBitmap
)
);
// So now we can set the Direct2D render target.
m_d2dContext->SetTarget(m_d2dTargetBitmap.Get());
This means you have to create a Direct3D device, device context, swap chain, and a DXGI surface, even though you're working with 2D. Fortunately, if you use the above Visual Studio project template, all those code are automatically generated for you. The generated code also contains infrastructure for DirectWrite and WIC (If you're an existing Windows 7 C++ developer, you should be familiar with all those concepts). Even if you don't use the template, you can still copy the generated code to your own project.
Similarly, many methods (such as Begin/EndDraw) that were once available on the render target is now available on the device context.
Other Direct2D code can usually be reused across desktop and Metro.
In addition, when creating Metro style applications, you usually use the Microsoft::WRL::ComPtr smart pointer, instead of ATL's CComPtr. They are very similar, though. Using a smart pointer, and you don't need to worry about memory management.
Also note in the past, it is recommended to return an HRESULT for each method. And then write something like CheckHR to check the HRESULT. If something goes wrong, you return an error code. For historical reasons, Direct2D is designed with this pattern. In Metro, you're encouraged to throw exceptions instead of returning error codes. The automatically generated code provides a ThrowIfFailed helper method, which checks HRESULT, and throws an exception if something goes wrong:
inline void ThrowIfFailed(HRESULT hr)
{
if (FAILED(hr))
{
// Set a breakpoint on this line to catch DirectX API errors
throw Platform::Exception::CreateException(hr);
}
}
This method is defined under the DX namespace. To use it in your code, you simply warp a method in it. For example:
DX::ThrowIfFailed(
this->m_d2dContext->CreateGradientStopCollection(gradientStops, 2, &gradientStopCollection)
);
In general, exceptions are better than error codes. For example, when an exception is thrown, you can configure Visual Studio to break right away. If you use an error code, you may have to manually walk through the code to figure out where is the problem.
Well, there're a lot to say about C++ and DirectX. But for today's topic, let's just see how to create a gradient. Creating a gradient in Direct2D (like other C++ code) requires more code compared to .NET and JavaScript. Below is a sample that creates a radial gradient brush:
ComPtr<ID2D1GradientStopCollection> gradientStopCollection;
D2D1_GRADIENT_STOP gradientStops[2];
gradientStops[0].color = D2D1::ColorF(0xFF7A00);
gradientStops[0].position = 0.72093f;
gradientStops[1].color = D2D1::ColorF(0xEBFF00, 0.5f);
gradientStops[1].position = 1.0f;
DX::ThrowIfFailed(
this->m_d2dContext->CreateGradientStopCollection(gradientStops, 2, &gradientStopCollection)
);
DX::ThrowIfFailed(
this->m_d2dContext->CreateRadialGradientBrush(
D2D1::RadialGradientBrushProperties(D2D1::Point2F(95, 95), D2D1::Point2F(0, 0), 95, 95),
gradientStopCollection.Get(),
&this->m_pStartOutlineBrush
)
);
Using the brush, however, is much simpler. All you need to do is to use it when rendering a primitive:
this->m_d2dContext->FillGeometry(this->m_pStarOutline.Get(), this->m_pStartOutlineBrush.Get());
I've also ported the C++ version of Star and Planet to Metro. This takes longer than porting the JavaScript version. But most of the code can still be reused.
You may wonder why do we spend so much effort to use DirectX, while we can create nice graphics in XAML and .NET. Well, most XAML applications probably do not need DirectX at all (although Windows uses DirectX under the hook to render all Metro applications), just like most HTML applications do not need canvas. But when you need to render extremely complex graphics with advanced effects and high performance, you have to use DirectX. Using XAML will either make it impossible to achieve the desired effect, or make the performance very bad. DirectX even allows you to create custom shader effects. The latest Shader 5.0 model is supported.
Today I used DirectX without XAML. But you can also combine DirectX with XAML. For example, you can create a custom WinRT component in C++ that uses DirectX to render graphics, and then use the component in a C# application. In general, it is recommended to use XAML and C# to create UI, because it will save you a lot of efforts (the code is much simpler). When you need advanced graphics, you can use C++ to create a WinRT component. If I have time, I'll discuss this scenario in a future post.
Gradients in math and physics
Finally, just for fun, let's discuss another concept that happens to have the same name: The gradient in math.
In math, a gradient is a vector. It represents the rate of change of a function.
If you remember what you've learned in your calculus class (well, I guess most of us have forgot that :)), you know we use derivative to represent the rate of change for functions of one variable.
Consider a simple function: y = x. It's derivative function is y' = 1, because as x changes, y changes at a constant rate: 1. Similarly, for y = x2 , the derivate function is y' = 2x. This time, as x changes, y doesn't change at a constant rate. Instead, it changes at a different rate with different values of x. So we need a function instead of a constant.
The geometry interpretation of derivate is a function representing the tangent line of the original function.
When it comes to functions of more than 1 variables, it is more complicated. Consider the function z = x + y. When x is increased for 1, y may increase for 1, but y may also decrease for 1, increase for 3.5, or remain unchanged. And for each case, the change of z may be different. So usually we consider y as a constant, and try to find how z changes when x changes. This is called a partial derivative. For z = x + y, if y is regarded as a constant, the partial derivative with respect to x is: zx = 1, because z changes at a constant rate as x changes. Similarly, if x is a constant, zy = 1 (partial derivative with respect to y), because z changes at a constant rate as y changes.
Now we want to know how z changes whenever x or y changes (not just when x or y is constant). To begin, let's suppose on the surface z = x + y, we want to find how a particle moves at a particular point x0,y0,z0. It makes sense to say the particle moves along a direction, and a direction can be represented by a vector. It turns out that this vector can be found using partial derivatives:
zx0, zy0, z0
Here zx0 and zy0 are partial derivatives of z = x + y at the point x0,y0,z0. Remember a vector can be written as xi + yj (this is high school knowledge so hopefully you still remember). Now to find how z changes at every point, we need a function similar to the derivative function.
z' = zxi + zyj
This z' can also be denoted as ∇f(x,y), which is called gradient. It is a vector function. So the gradient of z = x + y is ∇= i + j. Gradient of z = x2 + y2 is ∇ = 2xi + 2yj.
Pure math is not fun. So let's try to find some practical applications of gradient.
One of the major applications of gradient is in electromagnetic. Today let's discuss something very simple: Electrostatic. In electrostatic, we have a concept called electric potential. It represents the negative of the work electric field does on a unit charge, when the charge is moved from A to B. Well, what is electric filed? To make it simple, it is electric force exerted on a unit charge. And a unit charge is, well, a charge whose unit is 1. Hopefully you still remember what is a charge from your high school lessons.
You can also remember work is defined as force multiplies displacement:
W = F.S
Here . can be interpreted as multiply, or dot product, because both force and displacement are vectors.
In a space, usually both force and displacement are not constants. Thus to find the work, we need to divide the space into extremely small fragments. Within each fragment, we can say both force and displacement are constants. So we can use a simple dot product to find the delta work with that fragment. Finally we add them together to obtain the total work. If you still remember, this is the process of integral. But I don't want to talk about integral today...
Anyway, when F is the electric force exerted on a unit charge, we call it electric filed and denote it E. So when we consider the work done on a unit charge, we use W = E.S
The electric potential is the negative of the work. So it is: V = -E.S
I'll have to point out usually E and S are not constants, and an integral is required to find V.
Now let's consider the opposite. When we know V, how do we find E? If both E and S are constant, we can simply use E = - V/S. But since usually we don't have nice constants, we have to use a function to represent E. If the function of V is a function with respect to S (suppose it is V = xi + yj, where xi + yj is the vector representation of S), it turns out that function of E is exactly the negative of the gradient of V:
E = -∇V
So if V = x + y, E = -i-j.
That is, electric filed represents the change rate of the electric potential. If electric potential does not change along a particular path/surface, we call the path an equipotential path/surface.
Similarly, the gravity field is the gradient of gravity potential. You can find applications of gradient in several other physics concepts as well.
OK. I'd like to stop here. The last section is merely for fun. If you want to learn more about math and in particular calculus, I recommend Paul's Online Math Notes. It is a series of very detailed textbook style tutorials. If you want to learn more about electromagnetic, you may want to check out this free course on MIT Open Courseware. It does not only provide detailed textbook style notes, but also gives you a series of training videos.
Of course, you don't need those knowledge in everyday life and work. But who knows? Software is everywhere in the world. Perhaps one day you need to write a software for math and physics!
Conclusion
This post discussed gradients support in Windows 8 Metro applications. In most cases, linear gradient is enough, and no matter you use XAML or HTML, it is very easy to use linear gradients. In HTML, it is recommended to use CSS 3 gradient when you want to style existing UI elements, and use SVG gradient when you want to crate complex custom UI controls. If you need advanced graphics, you can also use HTML 5 canvas and Direct2D. Using those features are more difficult than XAML, CSS, and SVG, but they allow you to create advanced graphics. In particular, the power of DirectX allows you to create extremely complex effects using shader effects, which is not possible even in HTML canvas. There's also a concept called gradient in math, which is a vector function that represents the rate of change of another scaler function. It has a lot of applications in physics, such as in eletric and gravity.
Next time I plan to talk more about DirectX, to show how to integrate DirectX with XAML, and how to create custom shader effects.