Storage Account Replication with Functions and Event Grid
In this blog post we're going to take a look at how we can create a serverless solution to enable a custom replication capability in Azure Storage. We're going to be storing data in an Azure Blob Storage Account, and will use the newly released Event Grid service to enable replication using an Azure Function.
Here's the scenario, let's imagine we have an application that will be writing images to a storage account. We'd like to replicate this data to another storage account in another region, and would like to have a backup of each file that we'll keep for recoverability. We'd like to facilitate this in near real-time, and would like to maintain a serverless architecture. To accomplish this we're going to use a few of the relatively newer Azure services:
- Azure Blob Storage Account - this type of storage account differs from a general purpose account in that it can only store blobs. This does unlock the ability to use features such as tiered storage and event grid, so it makes sense to leverage since we're only storing blobs.
- Azure Event Grid - this is a newly announced service (currently in preview) that allows actions to be triggered by an event occurring on an Azure resource. In this case, we're specifically interested in events when a blob is created, updated or deleted.
- Azure Functions - a key component of serverless computing on Azure, this allows us to run custom code without having to deploy, manage and maintain servers. In this case we'll be deploying custom C# code to handle the file replication.
Take a look at the diagram below, and let's walk through how this will work.
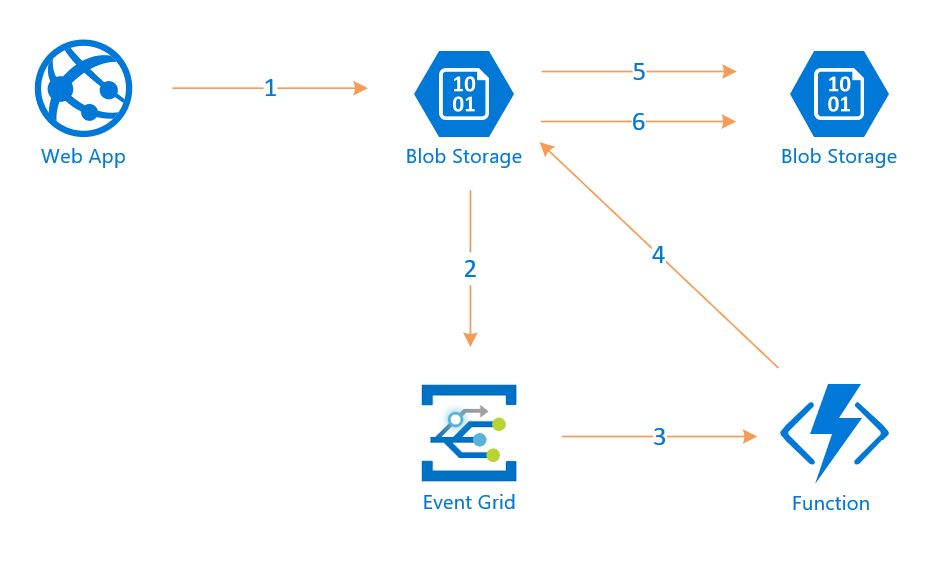
- A web app (could be an Azure Web App or any other web application) will write, update or delete an image in a blob storage account.
- That event will be sent to Event Grid
- Event Grid will trigger a Function via a webhook.
- A Function will handle this event and determine which action to take based on the type of event
- If it's a new or updated blob, it will copy the blob to the replica storage account. If it's a delete, it will delete the replica blob.
- If it's a create or update, a versioned copy of the blob will also be made in an archive container, giving us a full history of the file.
Now that we have our architecture lined up, let's get step through how to set this up. We'll go through the setup in the Azure Portal, but there's no reason this couldn't be fully automated and deployed through PowerShell, CLI or templates.
One thing to note is that as of this writing Event Grid is in preview and is only available in the West US 2 and West Central US regions. For this exercise we'll create all resources in West US 2 with the exception of the replica storage account, which can be located in any region.
Storage account setup
First, we'll need to create our two storage accounts. In the Azure Portal, select + Create a resource, search for "Storage account - blob, file, table, queue" and click Create. This will be our primary storage account, so give it a name, create a new resource group (we'll locate all resources in this resource group) and take the defaults with two exceptions: you'll want to make sure that you select "Blob storage" for the Account kind, and for location select either West US 2 or West Central US so we can use Event Grid. 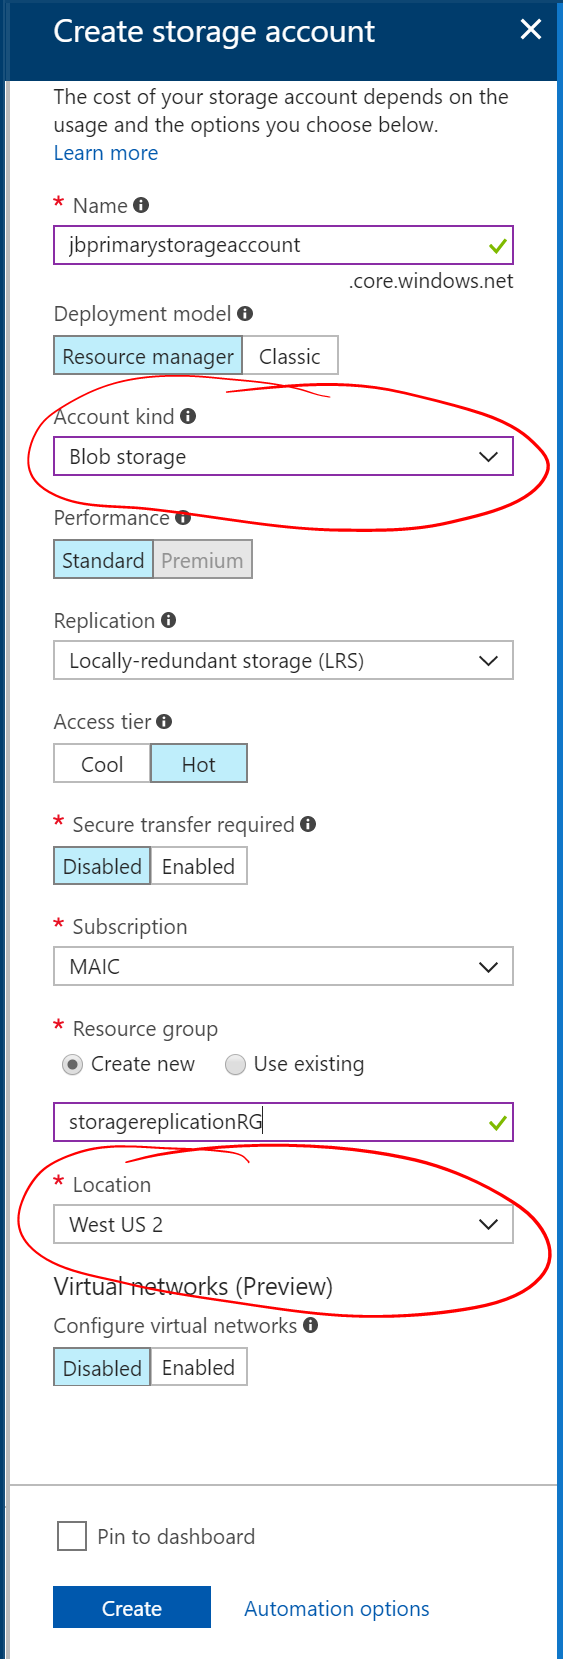
Click create to create the storage account. We'll refer to this storage account as the primary storage account. Go ahead and create a second storage account with the same guidelines, but feel free to locate it in another region. We'll refer to this storage account as the replica storage account.
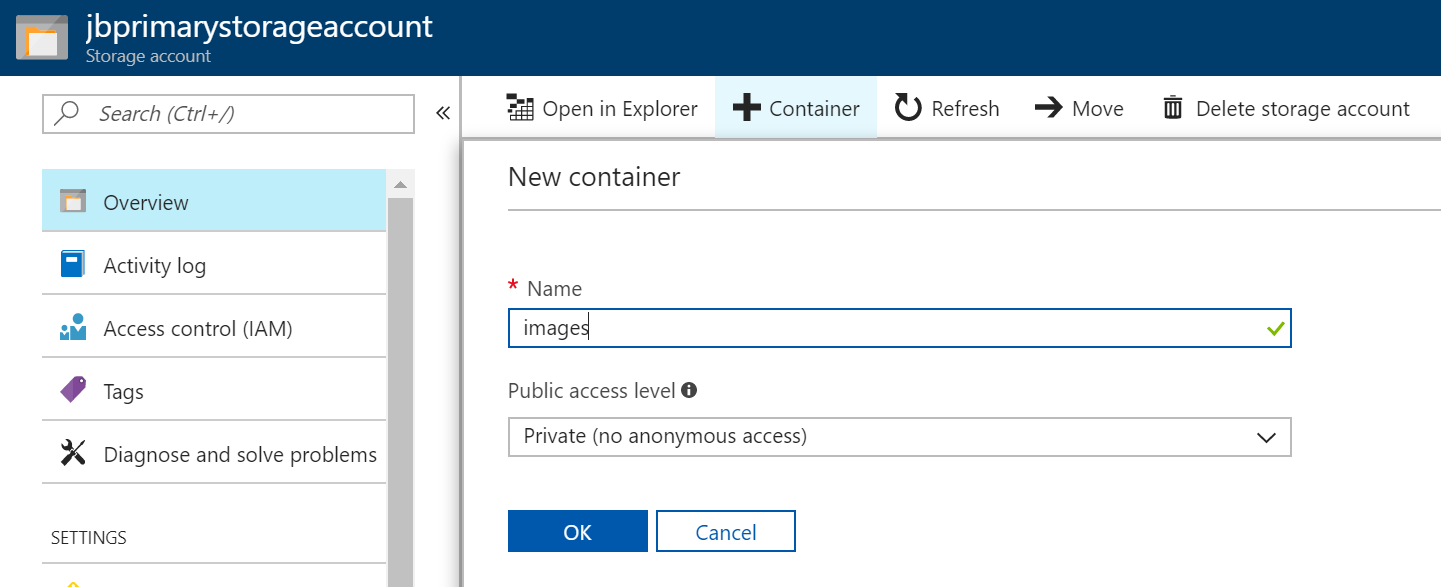
Once your storage accounts are created, let's create a container in the primary storage account for the files to be stored in. In the portal, go to the primary storage account and on the Overview panel, select + Container, give it a name and leave the public access level at Private. Don't worry about creating a container in the replica storage account, as our function will take care of this for us.
We'll come back to the storage account to get the access keys and set up integration with Event Grid in a bit.
Function setup
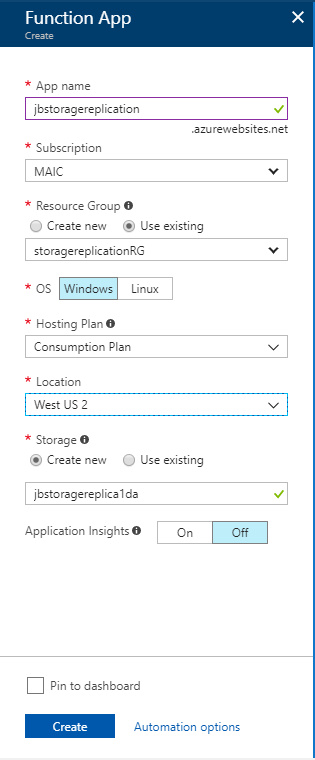
Now let's get our Azure Function set up. Once again, in the Azure Portal click the + Create a resource link and search for Function App, then click Create. Give your function a name, select your existing resource group, use a Consumption Plan and go ahead and put it in the same region as your primary storage account. Leave the default values for the storage option and click Create to create the Function App.
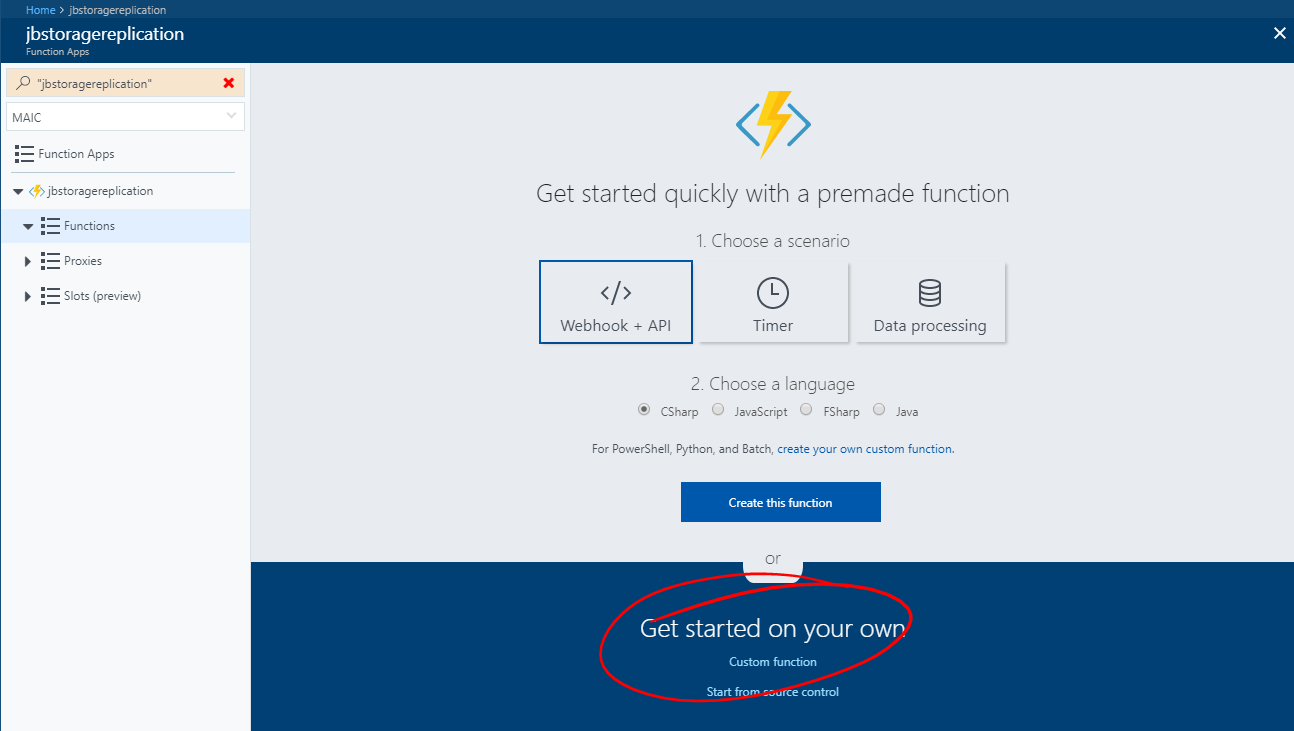
Once that's created, go ahead and go to your new Function App and we'll add the code that does the heavy lifting. Within your function app, select Functions and click the + to start the dialog to create a new function. We want to customize our function, so in the "Get started on your own" section, select Custom Function.
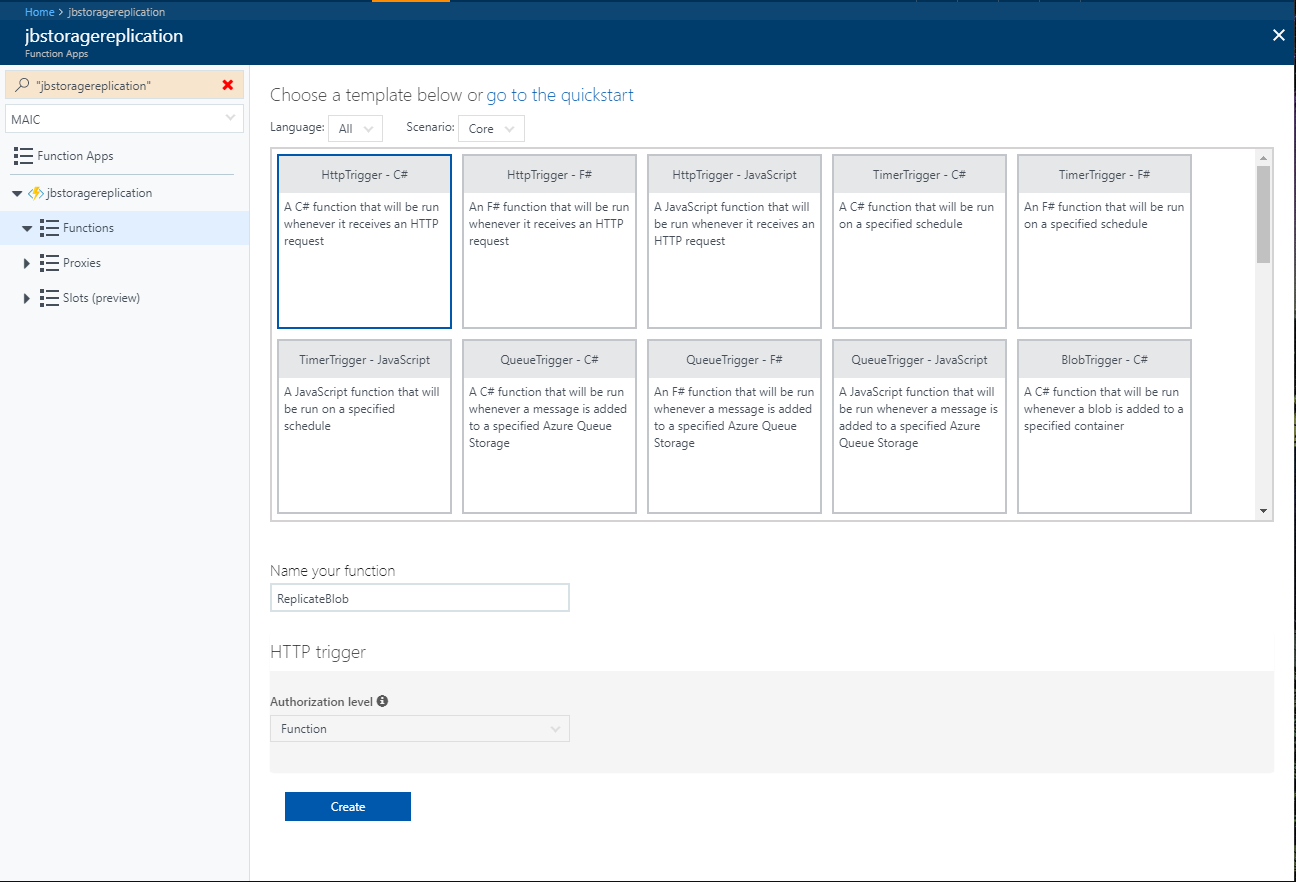
On the subsequent screen, select HttpTrigger - C#, give your function a name and click Create.
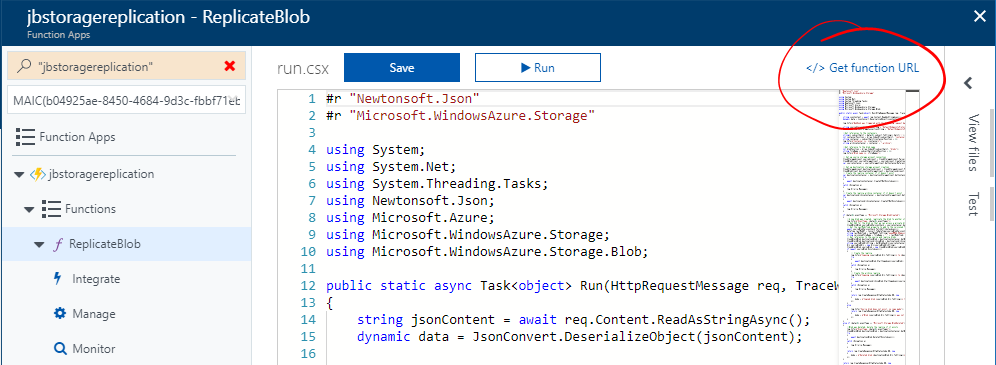
This will land you in the run.csx C# script for the application. Let's update this with the necessary code. Copy this code from my GitHub repo and replace the existing code in your function with this and click Save. Once that's done, we need to get the connection strings for the storage accounts and update lines 19 & 20 in the script.
 string sourceStorageConnectionString = "<replace with your connection string for source storage account>";
string destinationStorageConnectionString = "<replace with your connection string for destination storage account>";
Browse to your primary storage account and select the Access keys panel. Click the link to copy the connection string for key1, and paste it inside the quotes in the sourceStorageConnectionString. Then repeat the same process for the replica storage account and put that connection string in the destinationStorageConnectionString. These values should look similar to this.
 string sourceStorageConnectionString = "DefaultEndpointsProtocol=https;AccountName=jbprimarystorageaccount;AccountKey=PUVVRJc3W6NM+kkiq1I+3JHU5VWURx5oZGPebC4divZmTaoSxDiZm20EUHX0A2fzw+i/RSL9to88ARfeXJb/QA==;EndpointSuffix=core.windows.net";
string destinationStorageConnectionString = "DefaultEndpointsProtocol=https;AccountName=jbreplicastorageaccount;AccountKey=NLAWgcSsFSyUCsTpmj0InCXXAvRxkrTOCm9Vf3x24LTmFSY7n/01hgrt2fD7+uQWf45s16kho0dOPUeQRlhtlg==;EndpointSuffix=core.windows.net";
Make sure you save your function, and once that's complete we'll need to go set up the integration with Event Grid.
Event Grid setup
To set up the integration with event grid we first need to get the function URL. In the top left of your function editor window there's a link to Get function URL. Click that and copy the the URL that is displayed.
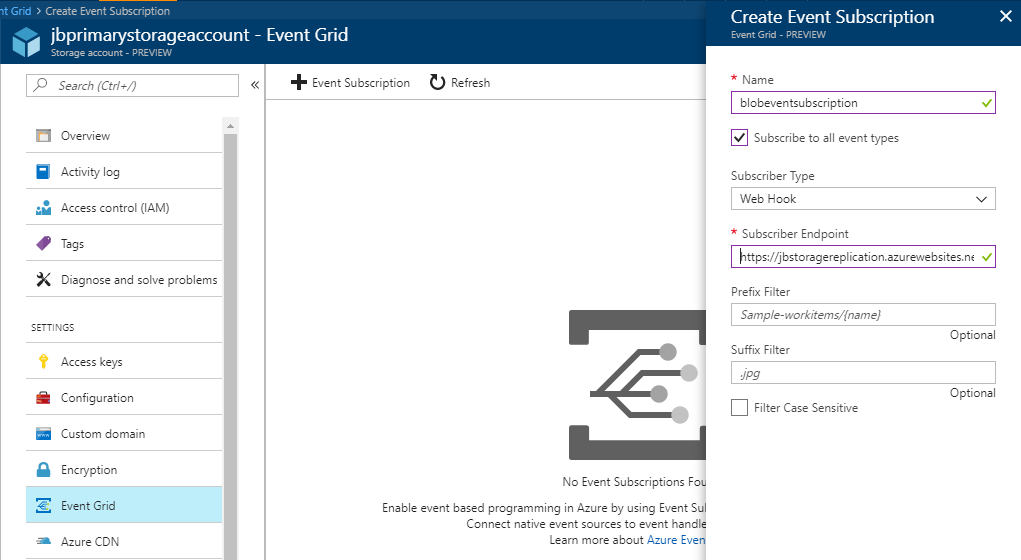
Now, head over to your primary storage account, select the Event Grid panel and click + Event Subscription. Enter a name, and in Subscriber Endpoint enter the full URL for your Azure Function you just copied. Leave all the other options at their default and click create.
That should be it, now let's test it out and go through how this works.
Test scenarios
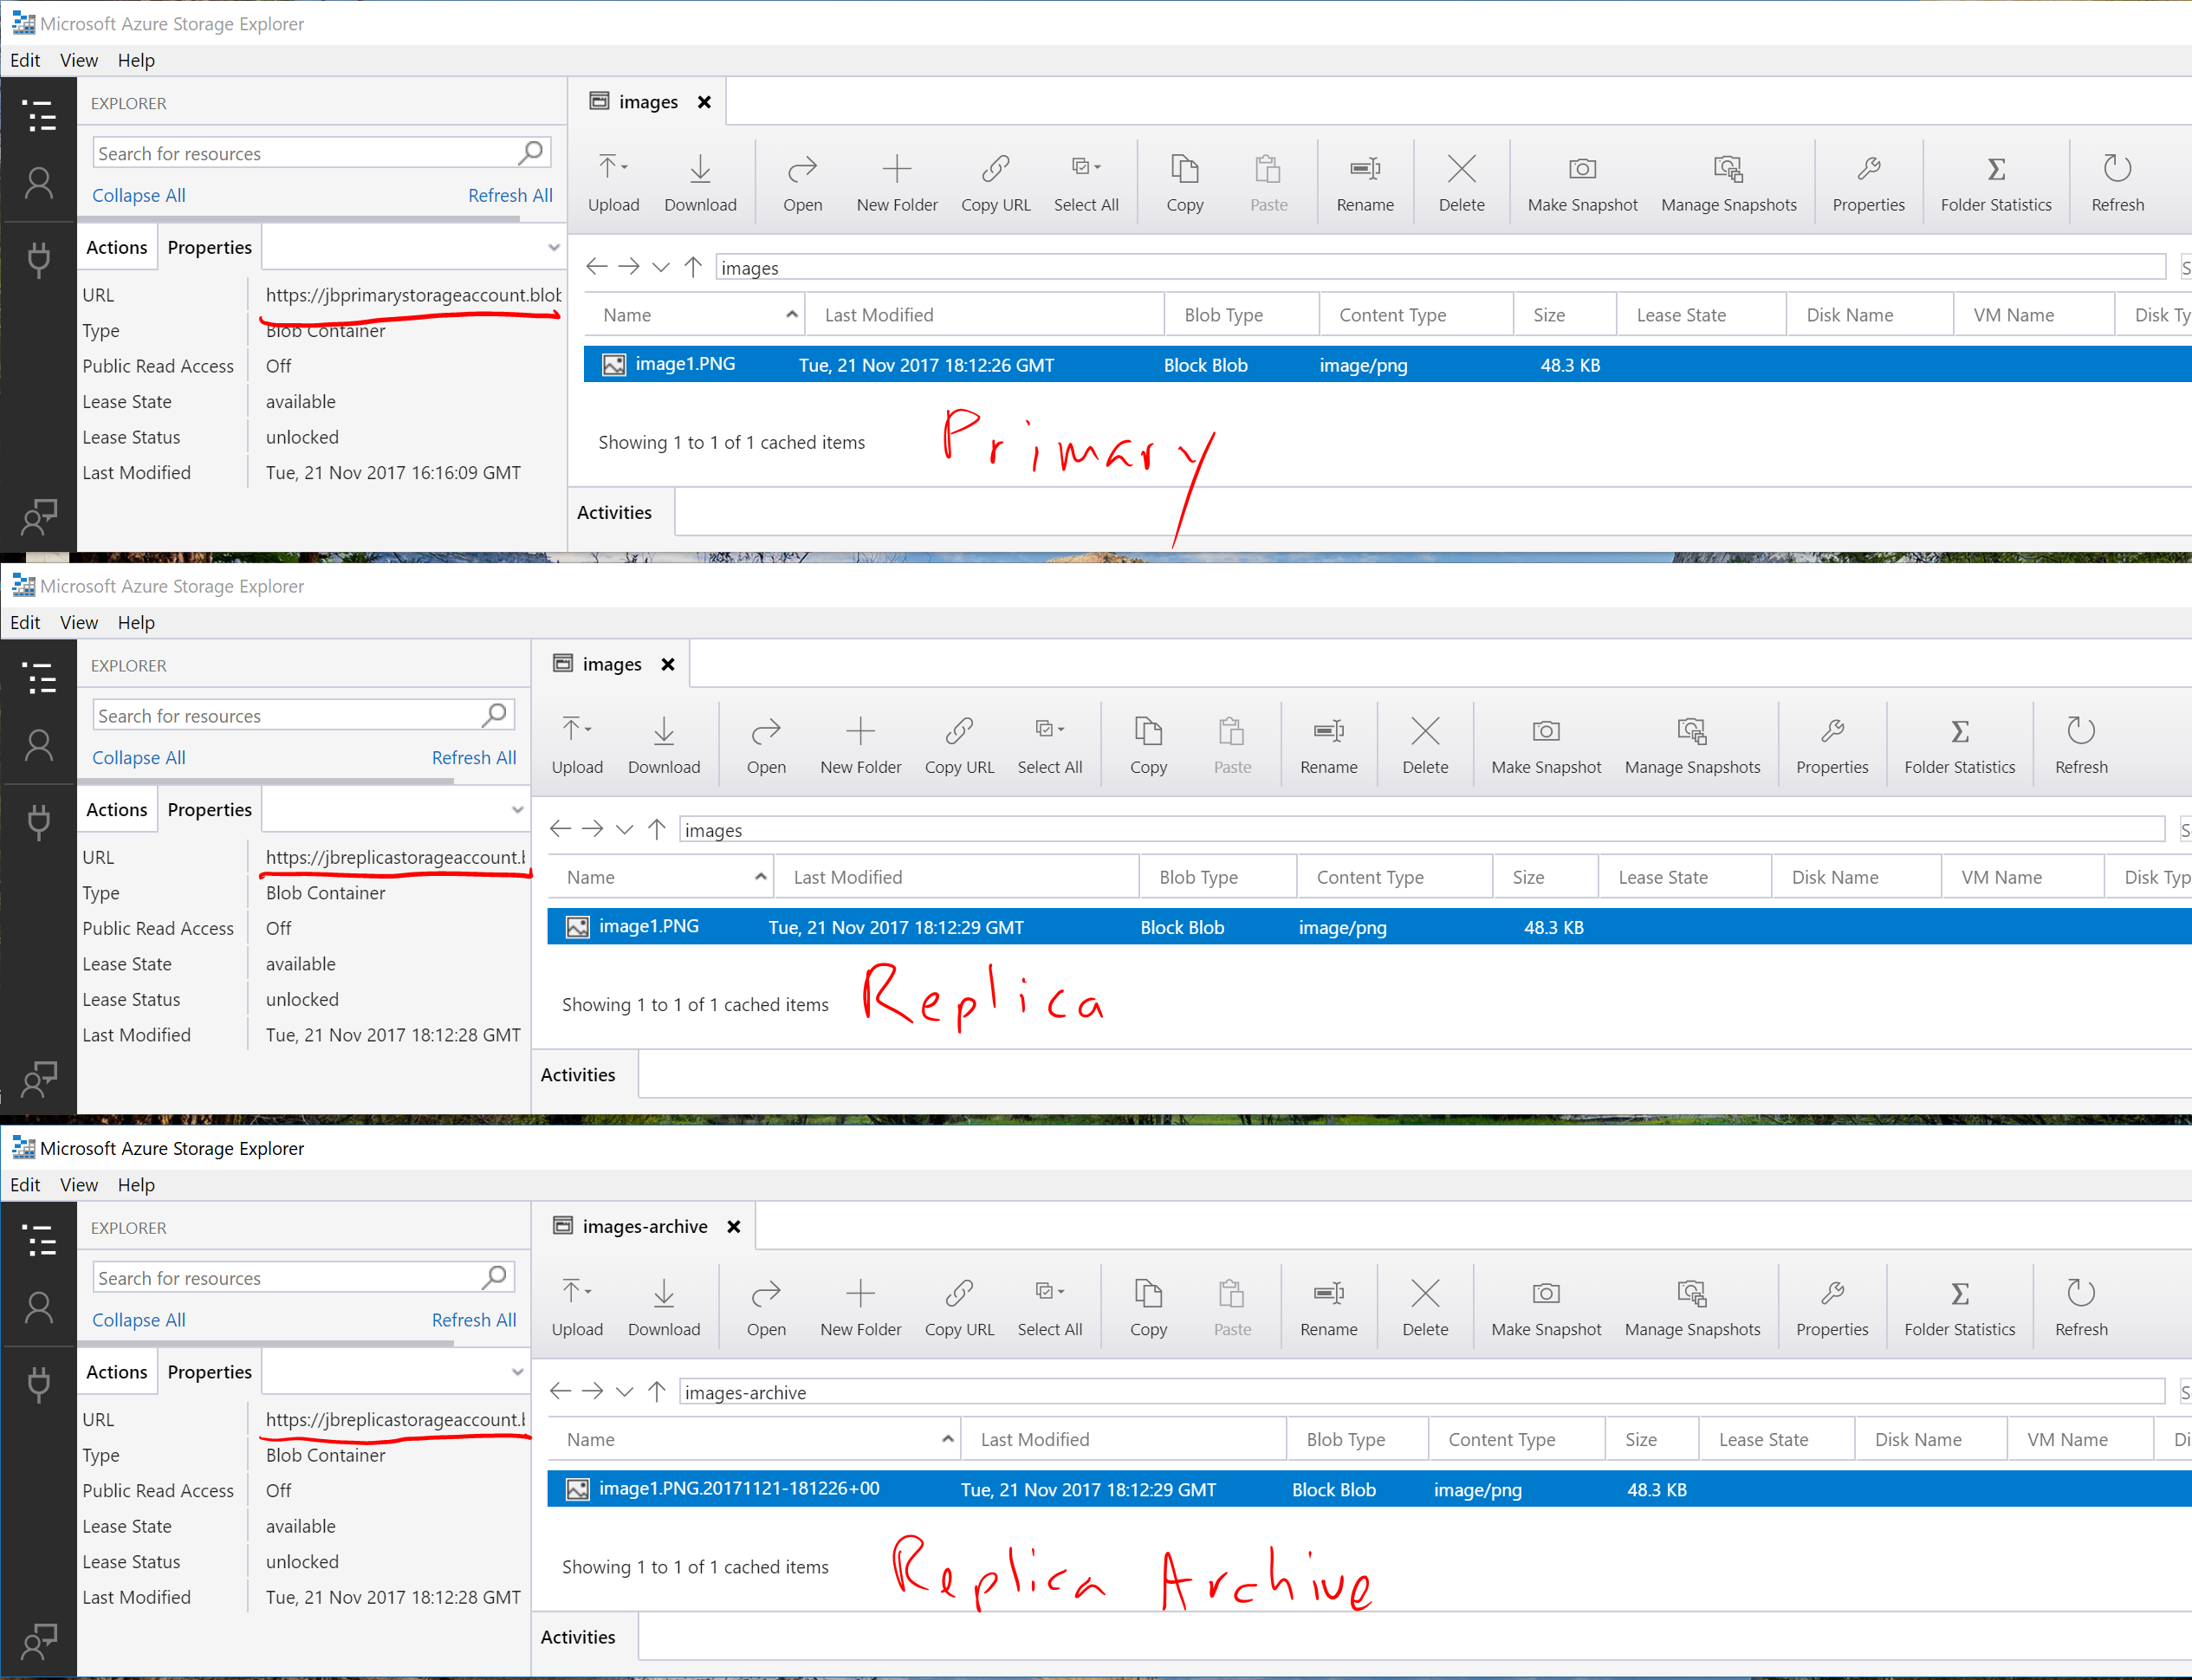
To test it out, go into the container you created in the primary storage account and upload an image. Once you've done that, head over to your replica storage account and you should now see two new containers, in our case images and images-archive. Inside the images container you should see the image file you uploaded, and in the images-archive container you should see the same file but with a date/time at the end so we have a historical version of the file. Upload the same image again (which will overwrite the existing image) and you'll see an additional copy in the images-archive folder. Finally, delete the image in the primary storage account and you should see the image deleted from the images container in the replica storage account, but the copies will remain in the images-archive container. If you take a look at the image below taken after the initial file upload, I've got 3 instances of Azure Storage Explorer up showing the content of each of the containers, where you can see the original, the replica and the date/time versioned replica. Apologies for the chicken scratch!
Under the hood
So how does all this work? Let's dig through the details. When a blob is created/updated/deleted this triggers Event Grid to call the webhook that we specified when we set up that integration. Event Grid will send a POST to the function URL with a JSON body that contains details about the event. It will look similar to below:
 [
  {
    "topic": "/subscriptions/xxxxxxxx-xxxx-xxxx-xxxx-xxxxxxxxxxxx/resourceGroups/storagereplicationRG/providers/Microsoft.Storage/storageAccounts/jbprimarystorageaccount",
    "subject": "/blobServices/default/containers/images/blobs/image1.PNG",
    "eventType": "Microsoft.Storage.BlobCreated",
    "eventTime": "2017-11-08T18:40:58.9313908Z",
    "id": "1fee3a63-001e-0087-71c1-581cf0065943",
    "data": {
      "api": "PutBlockList",
      "clientRequestId": "63d12711-b4ed-41a8-a5af-a8a0c86ff00f",
      "requestId": "1fee3a63-001e-0087-71c1-581cf0000000",
      "eTag": "0x8D526D841125053",
      "contentType": "image/png",
      "contentLength": 49508,
      "blobType": "BlockBlob",
      "url": "https://jbprimarystorageaccount.blob.core.windows.net/images/image1.PNG",
      "sequencer": "0000000000001C3200000000000CCB7A",
      "storageDiagnostics": {
        "batchId": "dedefcbf-5cb7-4e3c-b64e-f43f1dcc3ee1"
      }
    }
  }
]
The function accepts this request, pulls out this JSON content and parses through it to get information such as the container and file names. It sets up the containers in the replica storage account if they don't already exist, and then evaluates if we have a BlobCreated or BlobDeleted event.
If it's a BlobCreated event (which would also include an update as it's actually just an overwrite) we make a copy of the blob in the replica storage account in the same container name (images in this example) and a duplicate copy in the archive container (images-archive in this example). The archive copy will have the LastModified property added to the filename in the format yyyyMMdd-HHmmsszz so that we have a unique copy for every iteration of the file. This allows us to retrieve copies if a file is updated or deleted accidentally and gives us a bit of backup protection for our images.
If it's a BlobDeleted event, we simply delete the replica in the replica storage account and container, but leave the archive copy so that we have it in the event that we need to restore it.
Also of note is that we use a method called GetBlobSasUri to get a SAS URI for the StartCopyAsync method call. This was something that took me a bit to figure out, as it was failing when just passing a CloudBlockBlob object as the source for this function call. It turns out that since this is a server-side copy, you have to pass it a full URI with a SAS token since the Azure storage resource provider doesn't have the storage context to successfully access the source file. Passing it a URI gives it the access token it needs in the URL so that it can access that file and successfully complete the copy. One of the fun things I learned along the way!
Wrap up
In this post we've take a look at how you can leverage the new Event Grid service to call an Azure Function to replicate blob data between storage accounts, giving us the ability to have our images in another region if necessary as well as a historical archive of each image as it's added. We could easily enhance this to do a regular clean up of old images, and could take advantage of cool storage or the new archive storage tier to drive costs down further. This was an entirely serverless solution, so we have very little we have to do from an operational administration standpoint. Have a read through the documentation below if you'd like to learn more about all these services, and I've also linked to the repo with the code. I hope you learned as much as I did!
- Azure Blob Storage documentation - /en-us/azure/storage/blobs/storage-blobs-introduction
- Azure Event Grid documentation - /en-us/azure/event-grid/overview
- Azure Functions documentation - /en-us/azure/azure-functions/functions-overview
- Generating SAS - /en-us/azure/storage/common/storage-dotnet-shared-access-signature-part-1
- GitHub repo with Azure Function code - https://github.com/jboeshart/ReplicateBlobAzureFunction
Take a look at my follow-up post where I update this solution to use Managed Service Identity.