Enabling Web Deploy for Windows Azure Web Roles with Visual Studio
Last week the Windows Azure SDK team released the Windows Azure SDK 1.4.1 refresh. This refresh adds support for Web Deploy to the Visual Studio tools for Windows Azure. This is huge. Web Deploy lets developers deploy iterative code changes to a web role in Windows Azure in seconds. If you’ve ever had to wait more than five minutes for a code change to be updated so you could test it, this is for you. You can see the feature in action in this Channel 9 video.
Web Deploy enables developers to quickly push incremental changes to a web role running in Windows Azure during development and testing. Changes are made directly on the target role without creating and deploying a new package (.cspack). This is a great way to tweak your code and configuration in the cloud before creating the final package that you deploy to your production environment.
There are a number of constraints regarding the use of Web Deploy:
- Your web role must only have a single running instance.
- The changes that you make with Web Deploy are temporary. When the role instance is restarted, your changes will be gone.
- Can only be used for development and testing. Not intended for updating applications in production.
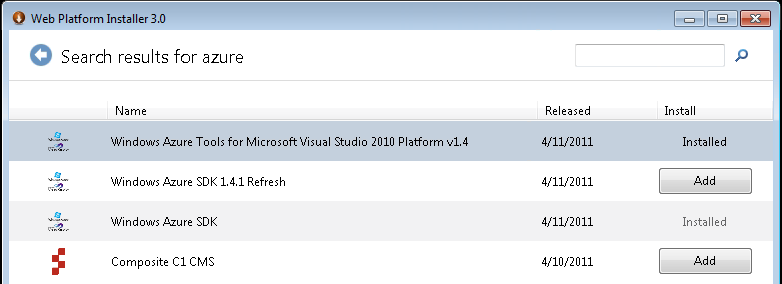
You can download the SDK refresh using the Web Platform Installer:
The Visual Studio Tools for Windows Azure have built in support for enabling Web Deploy. The tools also automatically create a publish profile so you can make incremental updates using the web application publish wizard.
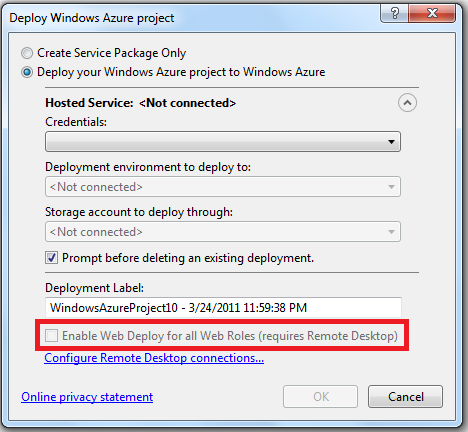
When you install the Web Deploy plug-in a new option will appear in the Cloud Tools publish dialog with the title “Enable Web Deploy for all Web Roles (requires Remote Desktop)”:
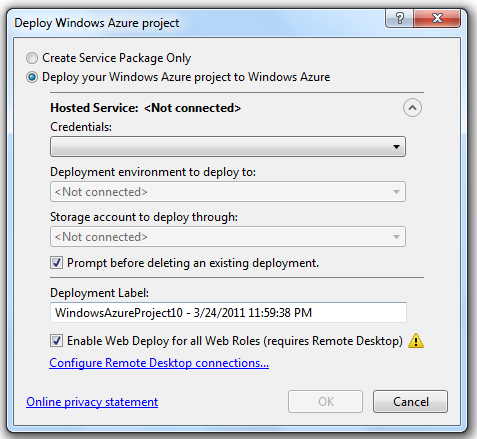
In order to enable the feature you must first setup remote desktop. Follow the instructions here to set up remote desktop. Once remote desktop is enabled, you can set the check mark to enable Web Deploy.
Notice: Web Deploy is set up to use a self-signed certificate for SSL encryption by default. You can change the certificate in the IIS Manager on the web role.
Now publish your Windows Azure project as usual. That is all you have to do to enable Web Deploy from Visual Studio. Under the covers Visual Studio will include the Web Deploy plug-in and define an input endpoint in the ServiceDefinition. These changes are made as a part of the publish process and do not affect your design time files.
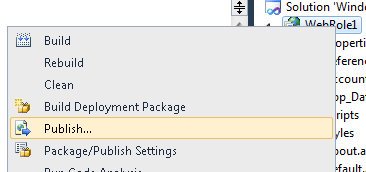
Once deployment is complete, right click on the Web Application Project and choose “Publish”:
The Cloud Tools automatically created a publish profile with the right settings for you:
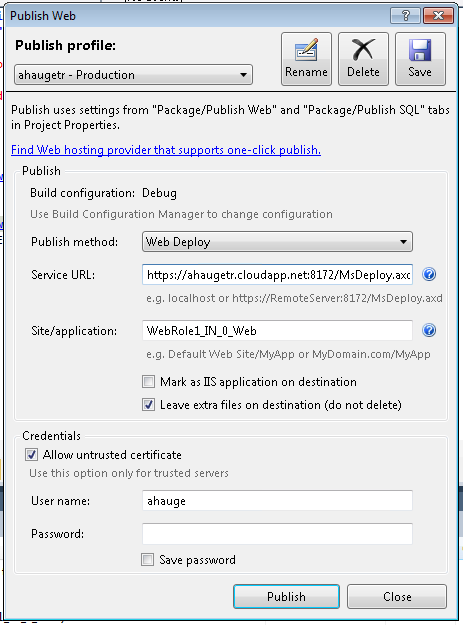
Web Deploy uses the same credentials as Remote Desktop. Type your password and click “Publish”. Web Deploy will now update your Web Role instance in a fraction of the time it normally takes to re-deploy to Windows Azure.
Happy Web Deploying...
Changing Web Deploy port number
By default Web Deploy uses the Web Management port number 8172. In most cases this is fine. However, in some IT environments it is not possible to make SSL connections using this port. In such cases you will have to customize Web Deploy to use a different port. The Visual Studio Cloud Tools can be configured to setup the input endpoint for Web Deploy to a custom port number. Ask your IT department if they can recommend a port number. Otherwise you can configure Web Deploy to use port 443 which is the standard SSL port and therefore open in most environments. To manually configure the port number, you have to edit the cloud project file (.ccproj) by hand.
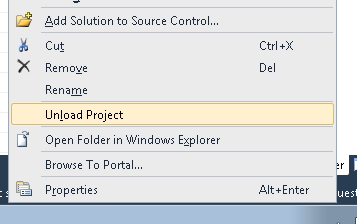
1) Unload the project:
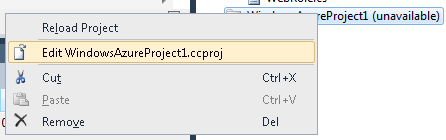
2) Edit the project file:
3) Add this setting to the project properties (replace 'WebRole1' with the name of your web role): <WebDeployPorts>WebRole1:443</WebDeployPorts>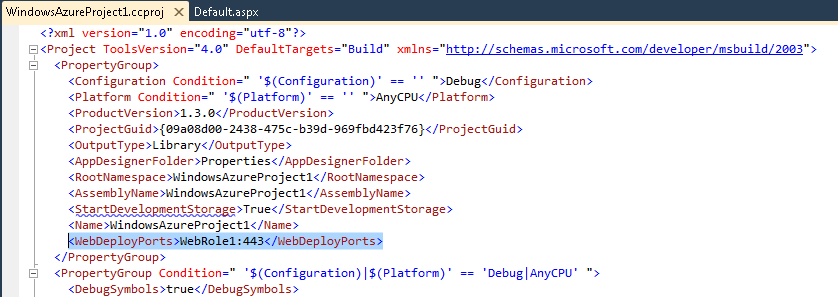
You can add multiple Web Roles by separating them with '|' in the project setting: <WebDeployPorts>WebRole1:443|WebRole2:444</WebDeployPorts>
4) Reload the project and deploy the cloud project to Windows Azure
Troubleshooting Web Deploy for Windows Azure
Here are some of the most common problems with Web Deploy on Windows Azure:
Symptom: I get this error message when I try to update my Web Role instance using Web Deploy:
"Error : Web deployment task failed. (...) The response header 'MSDeploy.Response' was '' but 'v1' was expected."
Problem 1: In some IT Environments it is not possible to make SSL connections on port 8172, which is the default port for Web Deploy and the Web Management Service.
Solution 1: Change the Web Deploy port number. (see above)
Problem 2: The Web Deploy service isn’t running correctly on the Web Role instance.
Solution 2: Log into the Web Role instance with Remote Desktop and make sure that the Web Management Service and Web Deploy Service are both running. Try to restart both services.
Symptom: I checked the Web Deploy checkbox when I published my Cloud Project but there is no publish profile in my Web Application project.
Problem: In some cases the publish profile gets deleted in Visual Studio 2010 RTM.
Solution: This problem is solved in Visual Studio 2010 SP1.