Data refresh from PowerPivot
In a series of articles I explored the different scenarios around SQL and data refresh. One of the scenarios that I have not covered is how to create a data refreshable diagram from Analysis Services. If you do not already know this, Visio and Visio Services cannot refresh directly from Analysis Services, however we could use PowerPivot as a middle man. Imagine a scenario…
where the Visio diagram is data connected to a pivot table in an Excel workbook and the data for that pivot table is refreshed on a schedule by PowerPivot’s data refresh feature in SharePoint 2010. Visio Services supports refreshing data from Excel Services so as long as PowerPivot’s data refresh schedule is configured our diagrams will stay up to date.
Setting up PowerPivot
First, you need to make sure to install the PowerPivot add-in for Excel 2010 ( which can be downloaded from www.powerpivot.com ). This is a simple add-in installation.
Second, you will need access to a PowerPivot SharePoint site.
If you do not have PowerPivot installed for SharePoint 2010 you can review the installation detailed in this article, How to: Install PowerPivot for SharePoint on an Existing SharePoint Server. Before you do this however I suggest you review this article which explains a workaround for a common installation error which cost me a few hours I will not be getting back ![]()
Create your workbook and Pivot Table
With PowerPivot installed to Excel and SharePoint 2010 you can now create a workbook in Excel that contains a pivot table and publish the workbook to a PowerPivot Gallery in a PowerPivot site on your farm.
For this example I created a simple pivot table from some data in the old Pubs database which you can still download from here, https://www.microsoft.com/download/en/details.aspx?displaylang=en&id=23654
There are three tables I am interested in for my pivot table: stores, sales, and titles. I want to show in my pivot table the count of books sold for each book type within each state that I have a store.
The PowerPivot add-in lets me easily build this Pivot Table by selecting…
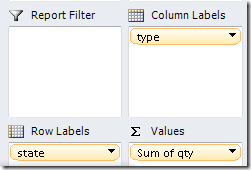
state from the Stores table – added as a Row label
type from the Titles table – added as a Column label
qty from the Sales table – added as a Value column
which results in the following pivot table
Formatting the Pivot Table
The next step is to make this pivot table available to Visio Services ( and everyone else ) by publishing it to the PowerPivot gallery but before I publish this I am going to make a few small changes.
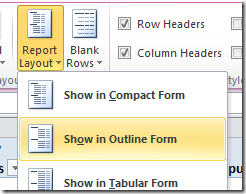
I like to change the view so that the first column displays a more meaningful column name. This will be helpful when I link this data to my Visio diagram. To do this I simply choose Show in Outline Form from the Report Layout button on the PivotTable Tools – Design tab in the ribbon.
Now you can see that my first column shows the name state instead of the default ‘Row Labels’
One last change I like to make helps to minimizes schema changes to the pivot table during data refresh. I typically turn on the display options that force the pivot table to display rows and columns that do not have any data.
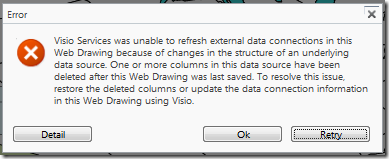
Why? If these rows or columns are not currently part of the pivot table then Visio Services will not expect them to be there in the future. If these rows or columns suddenly show up in our pivot table from a future data refresh then Visio Services will not know what to do with the new schema and will present the user with an error that the
Now I can publish this by saving or uploading the workbook to the PowerPivot gallery.
Setting the Data Refresh schedule
PowerPivot in SharePoint 2010 allows you to schedule data refresh so that the workbook that you publish is periodically updated with the latest data. This is critical for Visio Services because the data refresh for a Visio diagram will only pull data from the pivot table range in the Excel workbook and without this data refresh the Visio diagram would also reflect the data that was originally published to the PowerPivot gallery.
If you would like an overview on how to configure data refresh for your workbooks then take a look at this article, https://powerpivotgeek.com/misc/my-other-blog-articles/powerpivot-data-refresh/
For more detailed information on PowerPivot data refresh, review this article https://msdn.microsoft.com/en-us/library/ee210690.aspx
The one option I do want to point out is the Also refresh as soon as possible option
I like to check this option when testing or presenting demonstrations, but do be aware that this is not an immediate refresh because the refresh is actually managed by a timer job that will kick off as soon as it can after saving the changes to the data refresh schedule.
Data Linking wizard
Linking your diagram to the PowerPivot pivot table is as simple as choosing the Excel Workbook option in the data linking wizard, browsing to the workbook that you published to your PowerPivot gallery and then choosing the range in the workbook that contains the pivot table.
Selecting a range rather than linking to the entire sheet in the workbook is important in this case because the pivot table contains additional rows that can be mistaken by Visio as the header row. Selecting a range using the Select Custom range… button allows us to limit the range to include the proper header row.
Here I specifically leave out the first row of the pivot table
which imports to my Visio diagram with the proper header columns
Linking shapes to data and Data Graphics
Now it is up to you to create a diagram that visualizes this data using the Data Graphics capabilities of Visio 2010.
If you are not familiar with data linking you can review this article
https://visio.microsoft.com/en-us/Get_Started/How_To/Pages/Linking-Data-to-Shapes.aspxIf you are not familiar with Data Graphics you can review this article
https://blogs.msdn.com/b/visio/archive/2009/10/13/data-graphics-in-visio-2010.aspx
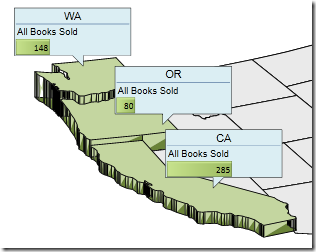
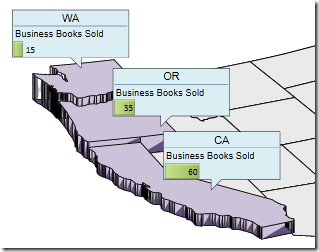
For my example I built a simple US Map ( shapes courtesy of www.visguy.com ), attached a callout to each of the state shapes and then linked each record from the data set to the appropriate callout shape. I then created a Data Graphic using the Text Label and the Data bar items to produce the following visualization
The data that I linked to the diagram has data for each book type sold. In order to provide additional views, one for each type of book sold, I simply created a page for each book type, copied the diagram from the first page to all the other pages, then updated the Data Bar items on each page to reference the specific book type summary column from the data set. For example, here is what my Business page looks like
Adding navigation
So now I have a diagram with multiple pages, each showing a different view of the data from the pivot table. When I publish this to SharePoint I want the user to be able to easily navigate between these pages. To do this I simply add additional shapes to the diagram, label them with the page names and add hyperlinks to the corresponding pages. When the diagram is published to SharePoint the user will hopefully discover and click on these shapes to navigate between the different pages.
Adding refresh information
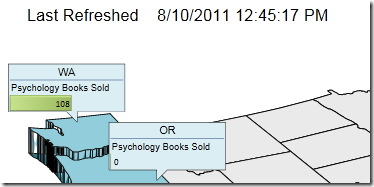
One last item I like to add to any data refreshed diagram is the date and time of which the data was last refreshed. This is important to consumers of your dashboard because this will tell them how old the data is.
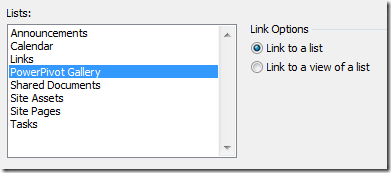
Where do I get the date and time for the last successful data refresh operation? Remember that the data refresh schedule for PowerPivot will update the workbook and the workbook is simply an item in the PowerPivot gallery which happens to be a SharePoint document library. One of the columns for any item in a document library is the Modified column. So, simply run the data linking wizard again and add an additional data source, in this case the actual PowerPivot Gallery.
Now we have a second data set attached to our diagram which has the Modified date and time.
The Data Graphic is very simple. All I did was draw a rectangle on the page using the rectangle tool, link the row in the PowerPivot Gallery data set to the rectangle, and then configure a Data Graphic with a single Text label item referencing the Modified property from the shape.
Publishing
Now we are finished and publishing to our SharePoint 2010 document library is the easy part. Just make sure you use the new Web Drawing file format so that Visio Services can render and refresh the diagram in the browser.
Attached to this article are the Excel workbook and the Visio diagram that I used for this demonstration.

