Connect to a SQL Database and Use the LINQ to SQL Designer
To begin working with LINQ to SQL in Visual Studio 2008 you will need a database that you can query and a copy of MS SQL Server or SQL Express. In this post, I'm going to focus on SQL Express since it is free and since it gets installed by default when you install all versions of Visual Studio except for some forms of Visual Studio Express. If for any reason you don't have SQL Express installed on your system, you can download it here.
Follow these steps to install and access the copy of the Northwind database that accompanies the samples that ship with Visual Studio 2008:
- Open the Help menu in Visual Studio, and choose Samples.
- Follow the directions there to install the Visual Studio 2008 C# Samples to a sub-folder of your Documents directory. Note that the latest copies of the samples are always available online at this address: https://go.microsoft.com/fwlink/?LinkID=85559.
- After installation, the Northwnd.mdf database file will be found in a directory called CSharpSamples\LinqSamples\Data, where CSharpSamples is a subdirectory created when you installed the samples.
NOTE: Additional Information on installing the Northwind database is available here .
Choose New Project from the File menu (Ctrl + Shift + N) and create a new console application:
- In Project Types, select Windows
- In Templates, select Console Application
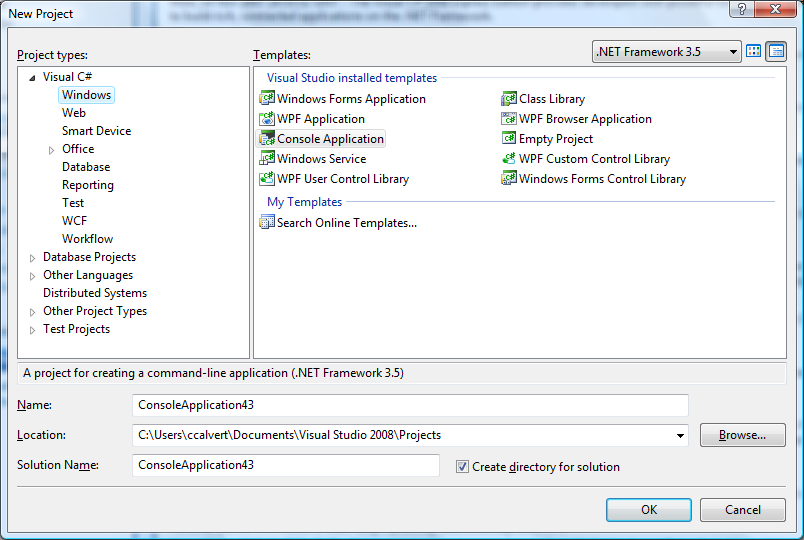
Figure 1: Creating a new console application.
Create a connection to the Northwind database:
- Choose the Server Explorer from the View menu (Ctrl + W, L). In Express editions of Visual Studio, this tool is called the Database Explorer.
- Right click on the Data Connections node shown in Figure 3 and choose Add Connection.
- In the Add Connection dialog select the Browse button and navigate to and select your copy of Northwnd.mdf.
- Select the OK button.
At this stage Northwnd.mdf should appear in your server or database explorer, as shown in Figure 3.
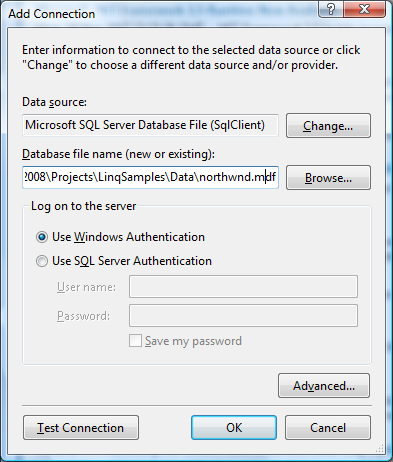
Figure 2: Select the Browse button in the Add Connection dialog and locate your copy of Northwnd.mdf
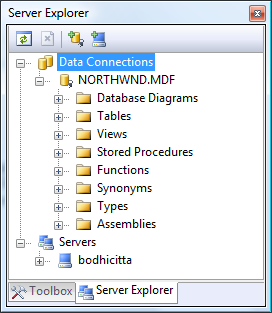
Figure 3: The Server Explorer provides a view of the Northwind database.
Using the SQL Designer
The LINQ to SQL Designer allows you to configure and view the metadata of the tables from the database that you want to query. There is a command line version of this tool called SqlMetal that is not covered in this document. By default, SqlMetal is part of the Visual Studio and .NET framework 3.5 install and is stored here: %ProgramFiles%\Microsoft SDKs\Windows\v6.0A\bin.
From the Project menu select Add New Item (Ctrl+Shift+A) . Select LINQ to SQL Classes from the list of Visual Studio Installed Templates, as shown in Figure 4.
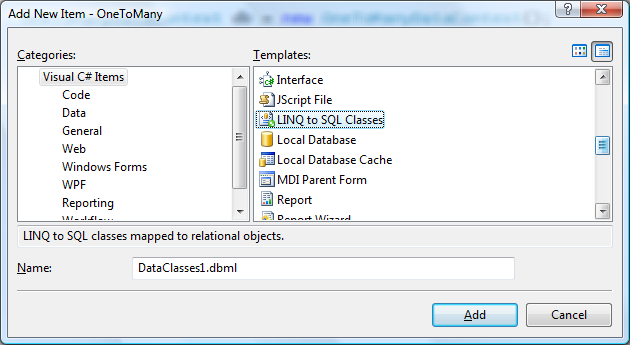
Figure 4: Choose the LINQ to SQL Designer from the list of available templates available in the Add New Item dialog.
Drag the Customer table from the Server Explorer onto the designer, as shown in Figure 5.
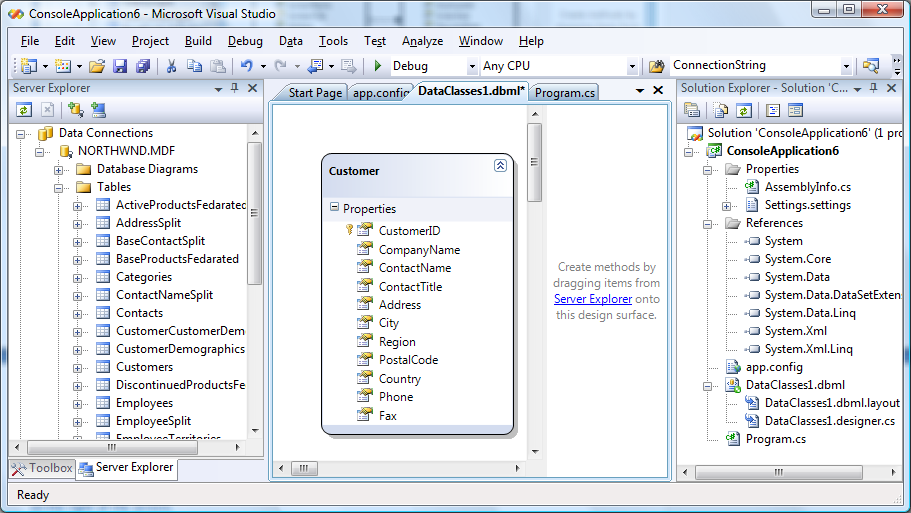
Figure 5: The LINQ to SQL designer with the Server Explorer on the left and the Solution Explorer on the right.
In Figure 5 the Customer table has been dragged from the Server Explorer onto the SQL Designer. Stored Procedures can be dragged onto the area where you see the text that begins “Create methods by dragging items…”
Several things happened as you completed the steps outlined above:
- When you added the SQL Designer to your project, a new node in the Solution Explorer called DataClasses1.dbml was added to your project. As shown in Figure 5, it contains two files, called DataClasses1.dbml.layout and DataClasses1.designer.cs.
- When you dragged the Customer table onto the designer an object relational mapping (ORM) was created between the Customer table in the database and a Customer class generated by the SQL Designer and placed in DataClasses1.designer.cs. This object is called an entity class and it allows you to access the data and fields of the Customer tables as if they were an object in your project.
- A second class, referred to as a DataContext, was also created in DataClasses1.designer.cs. As you will see in the next section, you can use this class to automatically connect to your database and to easily access the data and fields in the Customer table.
- A file called app.config was added to your project. It contains an automatically generated connection string for your database.
This is not the place to fully explore the SQL Designer and the code it generates. However, the steps shown above give you two key benefits:
- They ensure that you can automatically connect to the database.
- They let you access the Customers table in the database as if it were an object in your program. An example of how to do this is shown in the next section.
After you drag items from the Server Explorer onto the SQL Designer, you can modify the view that your program will have of the data. For instance, you can delete some of the fields from the Customers table, as shown in Figure 5. This operation modifies the classes generated, and not the actual table on the server.
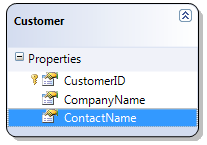
Figure6: A modified view of the Customer table with only three fields visible.
You can now test your work by opening up Program.cs in the Visual Studio editor and typing in the following code:
 using System;
using System.Linq;

namespace ConsoleApplication41
{
    class Program
    {
        static void Main(string[] args)
        {
            DataClasses1DataContext db = new DataClasses1DataContext();

            var query = from c in db.Customers
                        where c.City == "London"
                        select c.City;

            foreach (var q in query)
            {
                Console.WriteLine(q);
            }
        }
    }
}
Summary
In the post, you have seen how to:
- Download and install the Northwind database from the samples that ship with Visual Studio
- Access the database through the SQL Designer
You can learn more about LINQ by running the SampleQueries project that ships with Visual Studio samples referenced in this article.