Building a CRM 4.0 Report that will be accessed via an iFrame
CRM 4.0 has a large number of ways for you to build reports. The build in report wizard is quite empowering & Visual Studio allows you to quite easily build & deploy CRM reports to your server without much hassle at all…
HOWEVER, when it came to building a report that would not be accessed via the Report Server as a normal report within CRM – but embedded in an iFrame within CRM itself, the details were sketchy. Searching the internet for help didn't even provide much guidance.
As soon as we tried to link to the report in the iFrame we would receive the “An attempt was made to set a report parameter 'type' that is not defined in this report. (rsUnknownReportParameter)” error. After playing around with passing parameters via the iFrame we found that the account ID of the selected Account was no longer being passed to our report.
So after many hours of trying to get one of our existing reports to be accessible via an iFrame, I decided to start over & see if I could build one from scratch that worked.
Turns out I should have done this hours earlier!
I came across this great post that talks about the considerations for a Report that will be embeded in CRM in an iFrame (note this article is for CRM 3.0 so needed some modifications as per the additional Parameters listed below): https://blogs.msdn.com/crm/comments/5275605.aspx
The biggest mistake I made was trying to build the initial report in Report Wizard, and then customising it to add the complexity & drill through functionality we required. Don’t get me wrong the report wizard is great – but it does assume that your reports will be run c/o the Report Server report viewer within CRM. Adding an iFrame cancels out this helpfulness so we need to do a few things to help it work.
If you select Pass record object-type code and unique identifier as parameters option when you define your iFrame the following parameters are passed by default. Because our report will be loaded in an iFrame, we need to ensure that each of the parameters are set up within our report to match each of these: https://msdn.microsoft.com/en-us/library/cc150848.aspx
| Parameter | Name | Description |
| typename | Entity Name | The name of the entity. For custom entities this includes the customization prefix "new", as in "new_entityname". |
| type | Entity Type Code | An integer that uniquely identifies the entity. |
| id | Object GUID | The GUID that represents a record. |
| orgname | Organization Name | The unique name of the organization. |
| userlcid | User Language Code | The language code identifier in use by the current user. |
| orglcid | Organization Language Code | The language code identifier that represents the base language for the organization. |
In my example, I set placeholder parameters for all except the id parameter, but you can of course use these values to filter your report to make it language, organisation & user specific.
But why would you want to embed a report in an iFrame? iFrames load asynchronously – so even if you have a very complex report – it can be loading in the background while the user accesses/edits the other data in the form. It is also a nice was to get a quick visual representation of the data along side your form fields, which was the requirement in this instance.
So what was I trying to achieve:
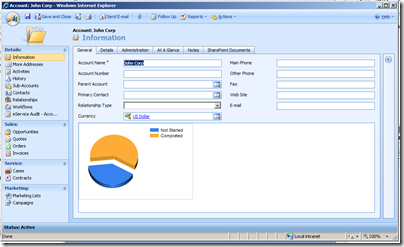
1. embed a graph/chart in an iFrame on the Account form that showed number of tasks for the selected account grouped by status (i.e. open, completed).
2. The second stage was to allow drill through to the underlying table summary data for each section of the report
This article will walk you through the steps to achieve part 1 – how to create a dynamic context aware report that can be embedded in an iFrame using the recently released demo VPC which has SQL 2008 & Visual Studio 2008 installed. The CRM organisation on this VPC is Contoso.
You have the option of creating the report using the Report Wizard, and then customising it to your needs. I think this adds unneeded complexity, however, it does add the required code for the Dynamics filters which is handy. There are also a few gotchas if you do it this way, so I have decided to walk you through that process as step 1, then we will import the report into Visual Studio & strip out what we don't need, make changes to the query, and add the required parameters.
Note: Personally, I would recommend building the report from within Visual Studio straight away as it is much cleaner & quicker.
Use the reporting Wizard to build the base report
1. Open Microsoft Dynamics CRM. Navigate to Workplace | My Work | Reports and click New.
2. In the “Report: New” window, click on the Report Wizard button.
3. On the first wizard page, leave “Start a new report” selected and click the Next button.
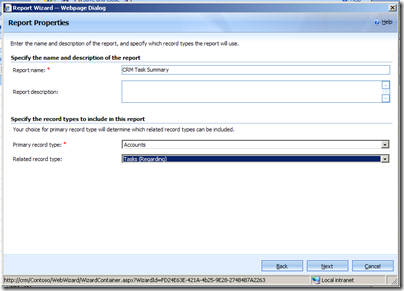
4. On the Report Properties page, enter CRM Task Summary for the Report Name. Select Accounts for the “Primary record type” and Tasks (Regarding) for the “Related record type”. Click Next.
5. You will not be adding any filtering at this time, so skip the Select Records to Include in the Report page by clicking Next.
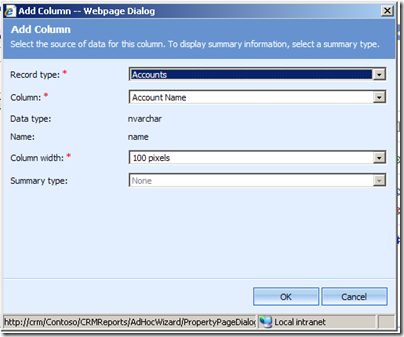
6. We will add some basic columns (remembering we will replace the query later). Click on the “Click here to add a column” box. In the Add Column Dialog box, leave Record type as Account. Leave column as Account Name and Column width as 100 pixels. Click OK.
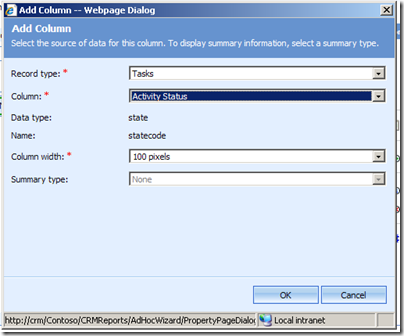
7. Repeat this time changing the Record Type to Task and then leave the column as Activity Status. Click OK
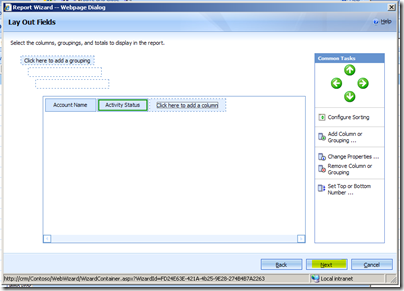
8. When finished, click Next on the Report Wizard Dialog.
9. Leave the default Table Only format selected and click Next on the Format Report page.
10. Review the Report Summary page and then click Next.
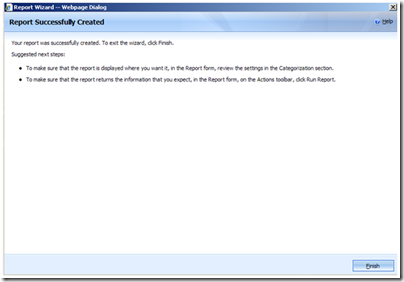
11. Click Finish.
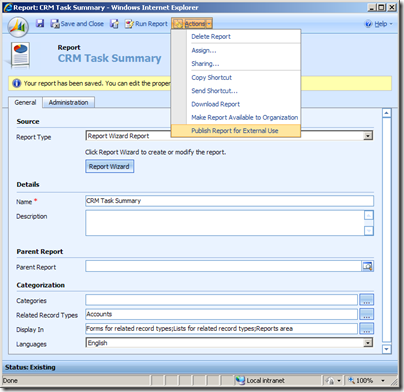
12. The report is now available to be run in CRM; run it now to verify. Also note that the Related record types & report name has been automatically populated based on your selections in the Wizard.
13. In the Report window, select Actions | Download Report and save the CRM Task Summary.rdl to C:\Documents and Settings\Administrator\My Documents.
14. Save and Close the Report window.
Note: For the export report to work in Visual Studio (our next exercise), we must verity that the database name saved to the CRM Report.rdl file is correct. The following steps will verify the database connection string is correct.
15. Open up Notepad by clicking on Start | All Programs | Accessories | Notepad.
16. In Notepad, select File | Open… and navigate to the location you saved the CRM Report.rdl file.
Note: Remember to set the Files of Type filter on the Open Dialog to All Files.
17. Once the file is opened in Notepad, select Edit | Find. Type in this text into the “Find what:” text box: “Adventure_Works_Cycle_MSCRM”. Then click on the Find Next button, then the Cancel button to close the Find dialog.
18. Replace the “Adventure_Works_Cycle_MSCRM” highlighted text with the following text: “ <insert your CRM instance name here>_MSCRM”.
19. Save and Close Notepad.
Open Visual Studio & create a new project
So the next part of the project is to import our Report Wizard report into Visual Studio, strip out some of the unneeded sections, change the format, and then add our required parameters.
Create the CRM Report Project
1. Open Microsoft Visual Studio 2005. Navigate to Start Menu | Microsoft Visual Studio 2005.
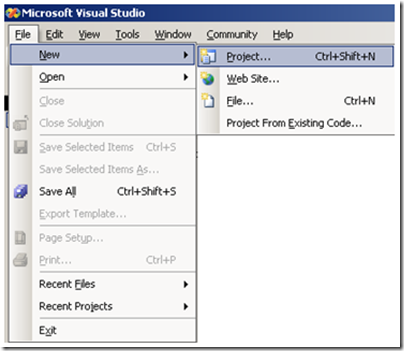
2. Create a new Project by clicking on File | New | Project.
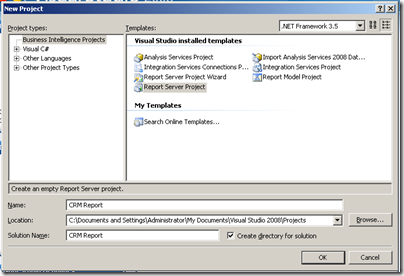
3. Select Business Intelligence Projects on the left and then select Report Server Project in Templates, enter CRM Report in the Name, leave the Location as your project folder and click on the OK button.
4. In the solution explorer window, right click on the Reports folder under the CRM Report project and select Add | Existing Item… .
5. Navigate to and select the CRM Task Summary.rdl file you saved in the previous exercise.
6. Double click on CRM Task Summary.rdl to open it up in Design View.
7. Delete all the items on the design surface until you are left with just a white box. To hide the Page footer, right click on it once all items have been removed, then select Remove Page Footer
8. We are going to modify the Query that the report wizard created. As our report needs to provide counts by Status, the report Wizard doesn’t provide that ability. It also doesn't handle the passing in of the specific Account ID that we will send it via URL when loading from the iFrame so we need to include a parameter for that, as well as the other parameters that need to be defined. What it does do well is include the Dynamics Filters & any required parameters for those so we will keep that section.
9. Right Click on Parameters in the Report Data Window, Select Add Parameter. Enter id into the Name and the Prompt fields, leave the data type as text as this will hold our account ID GUID, leave all other options as is & click OK
10. Right Click on Parameters in the Report Data Window, Select Add Parameter. Enter type into the Name and the Prompt fields, leave the data type as text, Click the check boxes for Allow Blank value & Allow Null value. Select the radio button next to Hidden in the select parameter visibility (as these are placeholders only & not used in this report) & click OK
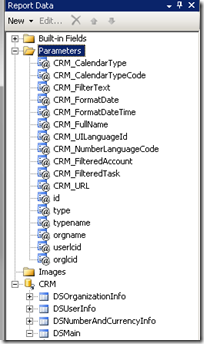
11. Repeat the above step & add parameters for typename, orgname, userlcid & orglcid . Double check your spelling as they have to be an exact match! If you kept all the parameters added by the Report Wizard, you will end up with a parameter list that looks like the following:
9. Right click on DSMain, Select Dataset Properties, replace the code in the Query box with the following code:
DECLARE @SQL nVarchar(3000)
DECLARE @SQL1 nVarchar(4000)
DECLARE @SQL2 nVarchar(4000)
SET @SQL = '
/* Creating Temp table to store all the data for final query */
CREATE TABLE #temp (
[activityid] [uniqueidentifier] PRIMARY KEY ,
[statuscode] [int] NULL,
[statuscodename] [nVarchar](100) NULL,
[regardingobjectid] [uniqueidentifier] NULL ,
[regardingobjectidname][nVarchar](100) NULL
)
'
SET @SQL1 = '
/* Inserting data into the Temp table for tasks related to selected Account */
insert #temp
SELECT ft.activityid , ft.statuscode, ft.statuscodename, ft.regardingobjectid, ft.regardingobjectidname
FROM (' + @CRM_FilteredTask + ') ft
inner join ( '
+ @CRM_FilteredAccount + ') fa on ft.regardingobjectid= fa.accountid
WHERE (fa.accountid = (''' + @accountid + '''))
'
SET @SQL2 = '
/* Select statement to retrieve data from Temp table */
select count(activityid) AS activitycount, statuscode, statuscodename, regardingobjectid from #temp
group by statuscode, statuscodename, regardingobjectid'
EXECUTE (@SQL+@SQL1+@SQL2)
This SQL code above builds a temp table, loads all of the required fields into it for the parameterised AccountID & then selects the grouped summary that allows us to extract the counts we need for this report.
10. Click on Parameters, click OK on the pop up window. Leave the top two parameters, for the @accountid row, select [@id] from the Parameter Value Drop down list
11. Click on Fields & ensure you have fields listed otherwise there is an error with your query.
12. Next we add the chart to the report. Right click on the design surface & select Insert | Chart, select the chart type you prefer, in this example I am selecting Shape | 3D Exploded Pie. Click OK
13. Drag ActivityCount from DSMain onto the chart surface. As you hover over it you will see sections for the report Data fields, series & category appear. Drop the ActivityCount field into the Drop Data fields here section.
14. Drag the statuscodename field form DSMain onto the Drop series Fields Here. In this example we are not adding any more complexity, but you could also add a category to this report by dropping another field into the Drop category fields here section .
15. Move the Chart to the top left hand corner & shrink the report sides by clicking & dragging the borders to frame the chart so that it will appear nicely in our iFrame. Double click the Chart Title & delete it.
16. Click Preview to test your report. Enter an AccountID into the id field at the top of the report & click View Report
17. Save the file then close Visual Studio.
Import the Report into CRM
1. Open Dynamics CRM. Navigate to Workspace | Reports. Click on CRM Task Summary in the Reports grid, then click Edit Report
2. Select Existing File from the Report Type Picklist.
3. Click on the Browse button and navigate to the ..\CRM Report\CRM Report folder within your reporting project folder and select CRM Task Summary.rdl then click Open.
4. Leave CRM Task Summary for the Name field and click the Save button.
5. On the Dialog that opens, click OK
6. Select Actions | Publish Report for External Use to ensure it is also uploaded to the Reporting services Server
7. test that you can open your report in the Report Server itself.In this example, my link would be: https://crm/ReportServer/Pages/ReportViewer.aspx?/contoso_MSCRM/CRM+Task+Summary&rs:Command=Render
8. For this to appear correctly within our iFrame, we will want to hide the toolbar & parameter list as the id will be passed, and the chart will be embedded so the toolbar is also not needed, so we can add &rc:Toolbar=false to the end of our report link when we add it to the iFrame.
9. Go to Settings | Customization | Customize Entities, double click the Account Entity, Select Forms and Views & Double click Form
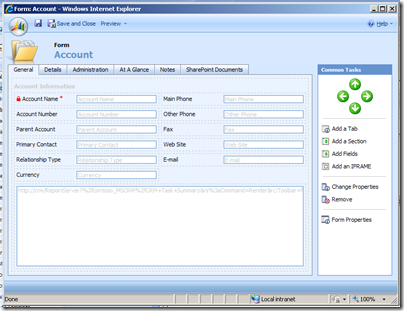
10. Click Add an Iframe, enter ReportFrame as the Name, https://crm/ReportServer?%2fcontoso_MSCRM%2fCRM+Task+Summary&rs%3aCommand=Render&rc:Toolbar=false as the URL, tick the checkbox for Pass Record object type code and unique identifier parameters, untick the check box next to restrict corss-frame scripting.
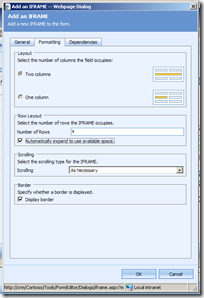
11. Click the Formatting Tab & tick the check box next to Automatically expand to use available space. Click OK
12. Click Save & Close
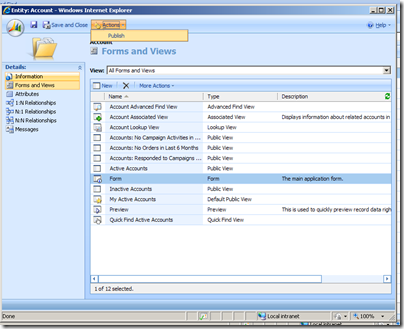
13. Click Actions | Publish
14. Navigate to an Account & check out your work! If you get any errors check the spelling of your parameter names.
Update: Good talk on how to build reports for CRM using Report Builder 2 & SQL 2008: https://blogs.msdn.com/crm/archive/2008/11/10/reports-for-crm-4-0-using-sql-server-2008-and-report-builder-2-0.aspx

