Developing applications using Windows CE SDK
Hello my Name is Nachiket Acharya and today I am going to talk about usefulness of an SDK and use it to create applications for the SDK.
Brent Bishop has posted an article on this site for Automating the Creation of an OS Design Project and Modifying an OS Design Programmatically. In this article – we will discuss what the importance of an SDK is and how to deploy, debug and run your applications on a Device Emulator.
Windows CE platform developers create platforms using Windows CE Platform Builder. The platform can be used by the application developers to write applications. An SDK provides a configurable way of providing the application developers with the platform OS Design and allow them to target applications for the platform.
Create OS Design Project with ARMv4I
1. Building from the article on Modifying an OS Design Programmatically – add SYSGEN_WCELOAD to support managed development
// Add WCELOAD to support managed development
osproject.AddCatalogItemToOSDesign("SYSGEN_WCELOAD");
2. We are going to target the Device Emulator – so, IMGNOKITL=1 build option needs to be turned off to allow Device Emulator to boot the Device Emulator Image.
osproject.ActiveConfiguration.BuildOptions.Add(“IMGNOKITL”, "1");
3. Now add an SDK to the existing OS Design Project. Expect a blog from someone on specifics on adding an SDK to the Existing OS Design Project shortly. After you build the OS Design, Image and the SDK – it is ready to be rolled out to your ISV customers.
4. One the SDK is installed; we can use more automation to create a Smart Device Project that targets C#. Refer back to Automating the Creation of an OS Design Project section Creating a new Visual Studio Add in. This step tells you how to create a new Smart Device Application. All this code would go in method public void Exec.
public void Exec(string commandName, vsCommandExecOption executeOption, ref object varIn, ref object varOut, ref bool handled)
{
handled = false;
if(executeOption == vsCommandExecOption.vsCommandExecOptionDoDefault)
{
if(commandName == "SmartDeviceApp.Connect.SmartDeviceApp")
{
//Create a solution
_applicationObject.Solution.Create(@"D:\Data\Work\Blog", "BlogApplication");
//Type Cast the Solution Object to Solution2
EnvDTE80.Solution2 soln = (Solution2)_applicationObject.Solution;
//Get Project Template String
String template = soln.GetProjectTemplate(@"Smart Device\Windows CE 5.0\Device Application", "CSharp");
//Add a Project From Template
_applicationObject.Solution.AddFromTemplate(template, @"D:\Data\Work\Blog\BlogApplication", "DeviceApp", false);
//Build Project
_applicationObject.Solution.SolutionBuild.Build(true);
handled = true;
return;
}
}
5. One can also use _applicationObject.Debugger.Breakpoints.Add to add breakpoints in the Application. For example, in order to set a break point at the first line of InitializeComponent in Form1.Designer.cs – you would need to make the following call:
_applicationObject.Debugger.Breakpoints.Add(
"InitializeComponent", //Function
"Form1.Designer.cs", //File
0, //Line
0, //Column
"", //Condition
dbgBreakpointConditionType.dbgBreakpointConditionTypeWhenTrue, //ConditionType
"CSharp", //Language
"", //Data
0, //Data Count
"", //Address
0, //Hit Count
dbgHitCountType.dbgHitCountTypeNone //Hit Count Type
);
6.

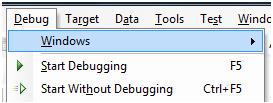
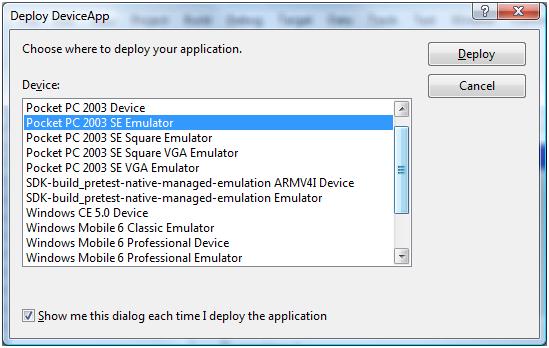
The Run With Debugging Command would throw a dialog like the following on the project. Select the appropriate SDK Emulator from the Dialog and Deploy to the application. It should show all the SDKs installed on your machine.

The deploy dialog unfortunately cannot be handled through DTE object due to its dynamic nature. So, this step has to be manual. For a more detailed discussion on DTE – click here. As you notice that the Installed SDK makes two entries in the Deploy Dialog with the SDK Name as the prefix (SDK-build_pretest-native-managed-emulation). Since, this SDK has emulation support – you can deploy the application to the emulator. For a detailed procedure on how to debug on a CE device without ActiveSync support – refer to the VSD Blog here. Once the application is deployed and running on the device/device emulator – you should notice break points being hit.