How to get your free student Windows 8 store account
The Windows 8 store is open for individuals to publish and students can get a Windows store account for free through the DreamSpark program, here’s how you do it.
Microsoft announced this week, that the Windows 8 Store is open to individuals and that they will be providing free accounts to students through the DreamSpark program, the same awesome deal we got for the Windows Phone marketplace. That means the only thing standing between you and an app in the store is some time at your keyboard geeking out!
How do you get your free marketplace account, go here and follow the instructions, the rest of this blog provides more detailed instructions on how to create your marketplace account.
You must
1. Verify you are a student
Already got a DreamSpark account?
Then jump to step 2 and Get your registration code!
Don’t have a DreamSpark account?
You need a DreamSpark account in order to get a registration code. It’s the registration code that allows you to create your store account for free. Only students or educators can create DreamSpark accounts. If you are a student or educator and do not have one yet, create a DreamSpark account.
2. Get your registration code
Go to DreamSpark and Sign in with your DreamSpark account, now from the top menu select Students | app development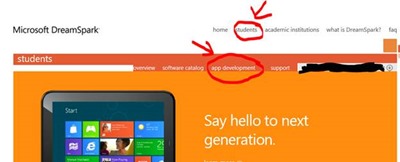
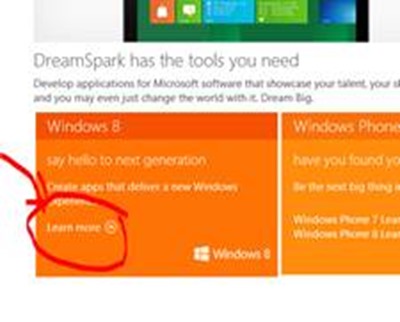
Select Windows 8 Learn more
Scroll to the bottom of the page and select Get Your Registration code
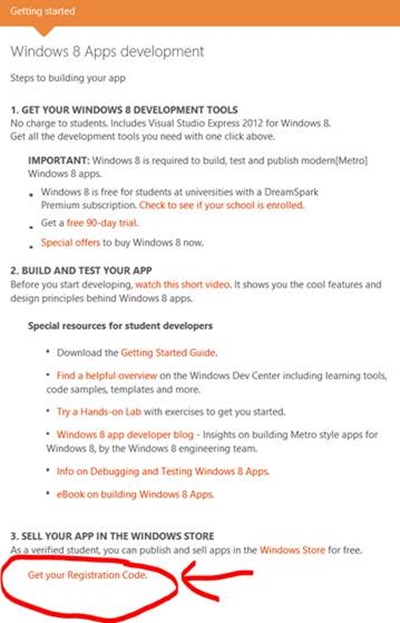
You will be brought back to the top of the screen. In the box with the title Get Registration Code. Select Get Code Now.

After you select Get Code now a code will be displayed in the box. Write that code down. That’s the code that will allow you to create your Windows Store account for free. Now you can creating your Windows Store account!
3. Register at the Windows Store
Go to the Windows Store
- If you already have a Windows Phone store account you can link the accounts and keep the same publisher display name for both accounts or you can start over and create a new Publisher account for your Windows 8 Store account.
- You will be asked to confirm or enter information about your store account including your Publisher display name. This is the name that will appear in the store as the publisher for all your apps.
- You will have to accept the application developer agreement.
- Enter your registration code in the registration code box so you don’t have to pay the $49 account fee.


You will now be asked to enter your credit card information.
Yes, even if you get a free Store account you are required to enter credit card information. Pre-paid credit cards won’t work. That’s because this is another way of confirming your identity. You enter credit card information and a small amount is charged to your credit card and then reversed. You will need to look at your credit card statement to find the transaction in order to be able to verify your Store account.
- After you enter your credit card information you will see a confirmation screen you can use to double check your information before you create your account by clicking the Purchase button. DONT FORGET TO READ THE SMALL PRINT THAT EXPLAINS THE FINAL VERIFICATION OF YOUR CREDIT CARD!

Now that your account is created, you need that credit card statement! It may take a day or two for your online bill to show the transaction. If you are in a hurry, you can try calling your credit card company to get the information sooner. If you do not have online billing, you will have to call the credit card company or wait until you get your credit card bill in the mail.
Once you have the credit card bill with the transaction information return to the Windows Dev Center , Sign In, select Dashboard from the menu, and select Verify your payment method.
At the bottom of the screen you are asked to enter the 3 digit code that appears in the transaction description OR the transaction amount that was charged (and will be refunded to the credit card!)

Once you have entered that information, Congratulations! You are ready to submit your first app to the Windows store! Whenever you are ready return to the dashboard and choose Submit an app to get started!
4. Get Coding!
Go reserve the name of your app (before someone else nabs it! Better to be Timer than Timer74) and get coding! Here’s a few resources to help
- Find out how students can download Windows 8 for free
- Keep an eye on our Windows 8 resources page to help you find different resources
- Find out how your you can enter your Windows 8 app in Imagine Cup