Yup time to do the Hello World App – Susan’s first phone app Part 2
If I can publish a phone app, anyone can, at least that’s my theory! So if you have ever thought about it, try it yourself as I blog. There are always roadbumps on the way. With the pressure of having you doing this with me I think I can do this. Last blog I managed to get the tools up and running. Today my goal is to get some code running.
As cliche as it is, I am going to build a Hello World app, if I am going to build a phone app, I need to make sure I know how to use the tools, that way when I start to get weird error messages on the screen, then I know it’s my code, and not because I don’t even know how to use the tool! By the way, this may look like a long blog, but that’s just because I have a lot of screenshots to help anyone who is new to Visual Studio.
If you don’t already have the tools installed you can check out Part 1 – Installing the Phone tools (the title doesn’t match but that’s what I did in the actual blog post)
Okay let’s go.
I have Visual Studio installed on my PC, you may have to launch Visual Studio Express for Phone, but once you are in the tool the steps should be nearly identical.
Step 1 – Launch Visual Studio 2010 (Start | All Programs | Visual Studio 2010 | Microsoft Visual Studio 2010)
Step 2 – Create a phone project (Okay I admit it, I like VB .NET better than C#, I can write C# but I have to think harder to do it, if I am going to embarrass myself by sharing my code with you, I might as well go all out and use VB.NET, all you C# aficionados can scoff if you wish, but I like it)
Choose File | New Project | Installed Templates (either pick Visual Basic or Visual C#) | Windows Phone Application
Sure there’s a bunch of other project types there, but I figure the first one will work for a Hello World application. I’ll have to figure out the difference between all those other ones later.
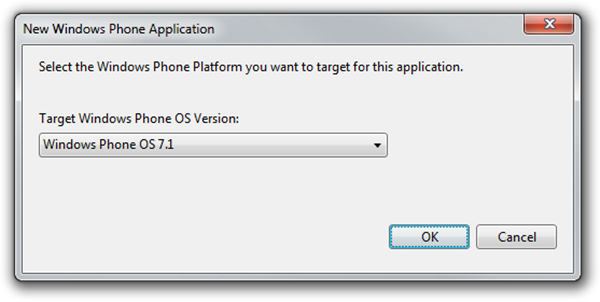
Now I get a window popping up asking which Windows Phone Platform I want to target for the application. I am going to choose 7.1, because 7.1 is the Mango release, I know there are some nice new features in that release and I want to be able to use them in my application. I also know that pretty much all Windows Phone users in Canada have the Mango update so I am not limiting who can use my application.
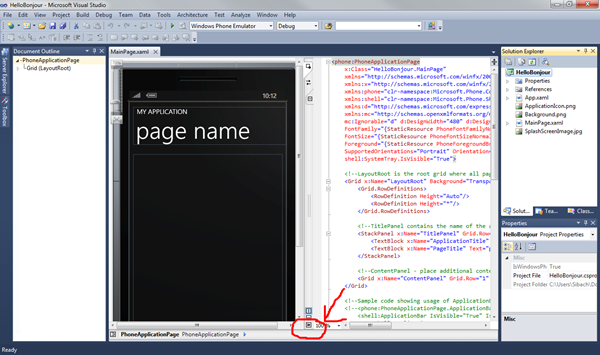
Okay now I see a screen with a whole bunch of scary looking XAML. I just want to create a hello world app, so let’s hide that XAML stuff for now. There is a tiny double arrow you can click on to hide the XAML pane.
Now I just have a page in front of me which says MY APPLICATION, and page name.
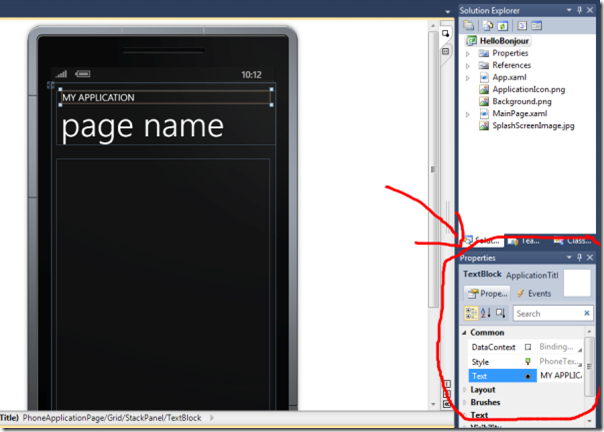
Let’s start by changing the text “MY APPLICATION” to “HELLO BONJOUR APPLICATION”. If you click on the text that says My application it will select the TextBlock control that displays the text. That TextBlock control has properties that affect how it is displayed. When you select the TextBlock you can see the property window displayed in the bottom right hand corner.
TIP: if you like you can click on that property window and drag it out and resize it so it is easier to see. If you close the property window, you can get it back by:
- selecting a control and hitting the <F4> key
- selecting View | Properties Window from the menu
- right clicking the control and selecting Properties from the pop-up menu.
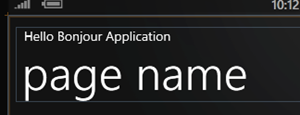
Go into the property window and change the Text Property to “Hello Bonjour Application”. The text on the screen should now show your new application title. I know from developing windows and web applications that you spend a lot of time editing properties, so good to get used to that right away.
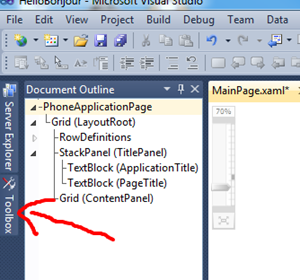
Now let’s add a Button, a TextBox, and a TextBlock to the screen. In order to add controls to the screen I need to display the toolbox window. On the far left of your Visual Studio window you will see a little tab called toolbox. You will need to click on that so that you can see the toolbox and add controls by dragging them to your screen. Lucky for me, although I have never built a phone app, I have used Visual Studio so I can actually help you out there if you haven’t.
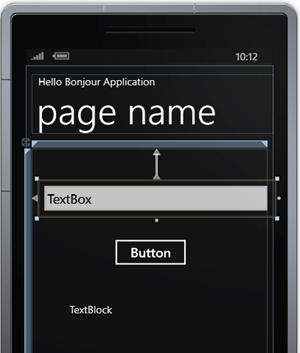
Once you can see the toolbox, drag a TextBox control, a Button Control and a TextBlock control to the screen and put them under the page name textblock. When you are done your screen should look something like this.
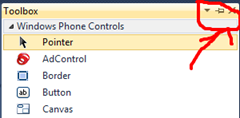
Tip: If you find it annoying the way you have to keep re-opening the toolbox, there is a little pushpin icon that allows you to pin it in place so it stays there all the time. The pushpin is a toggle, so if you want the toolbox to go away again you can just click on that pushpin icon again.
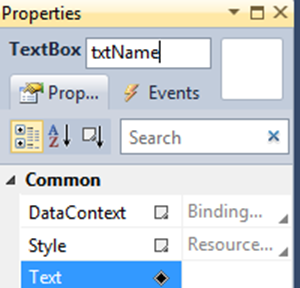
When you add controls, it is always a good idea to rename them, having controls called Button1 and textBox1, textBox2 is not very easy to keep track of later. I use a prefix to remember the type of control (e.g. txt, btn, blk) and then a meaningful name of some sort for each control. Let’s rename our controls. Button – btnDisplayMessage, TextBox – txtName, textBlock – blkMessage. You will find that makes life easier when you start adding code as well. To rename a control, bring up the properties and click on the control name, then you can type in a new name.
Let’s also change a couple of properties to change how they are displayed.
- BtnDisplayMessage set Content = Click Here
- TxtName set Text to blank
- BlkMessage set Text to blank
Now we need to add some code, what we’ll do is have the user type their name into the text box, then click on the button. When you click on the button we’ll display a message saying Hello <insert name here> on the screen.
Since we want our code to run when you click on the button, we can add an event handler to the button by double clicking on the button. That automatically creates a click event handler where you can write code that will execute when you click on the button. We are going to write code that says get the content of the Text property of the TxtName field (that will contain whatever the user types in) and put that value into the text property of our textblock concatenated to a string that says “Hello/Bonjour” so basically you need to add the following code to your event handler.
BlkMessage.Text = "Hello\Bonjour " & TxtName.Text
When you are done it should something like this (I reformatted a little bit to make it more readable)
     Private Sub BtnDisplayMessage_Click(sender As System.Object,
                                        e As System.Windows.RoutedEventArgs
                                        ) Handles BtnDisplayMessage.Click
        BlkMessage.Text = "Hello\Bonjour " & TxtName.Text

    End Sub
You now have two windows open, one is the designer window (MainPage.xaml) where you can add more controls and change properties. The other is the code window (MainPage.xaml.vb) where you can add and modify code. You can move back and forth freely between the windows by clicking on the tabs.
We’re done! Now we can test our application!
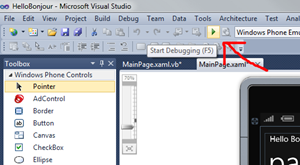
You can launch the application a couple of ways, you can click on the debug button in the toolbar. you can choose Debug | Start Debugging from the menu, or you can right click on the project name in the Solution Explorer window and choose Debug | Start new instance.
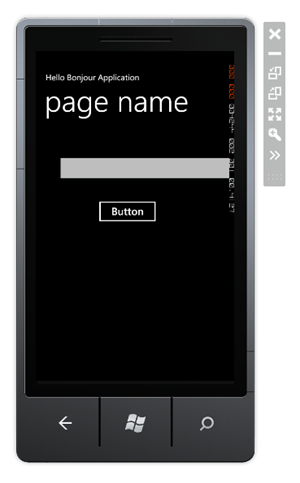
Now you wait a few little while for the emulator to load, dum de dum, (it takes a little time the first time you launch it) and then the application appears in the emulator.
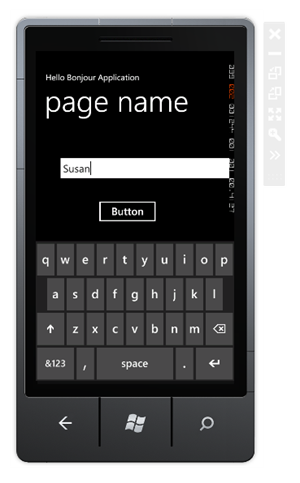
If you have a touch screen you can actually touch the textbox and the on screen keypad will appear in the emulator. If you don’t have a touchscreen, you can use your mouse to click inside the textbox and the onscreen keyboard will appear. This is where I go a little batty. You have to use the on screen keyboard by clicking the keys with your mouse, or tapping it with your fingers. You can’t use your desktop or laptop keyboard. Maybe they did that on purpose to remind us what it will be like for a phone user who doesn’t have a real keyboard ![]()
Now you can click on the button and ha! I just realized, when I screwed up my project and had to restart that I forgot to change the label on the button! So in the screen shots you will see that the button label is not set to “click here”! Man, I should really go fix that shouldn’t I…I am not going to go recreate all the screen shots though, forgive me! Hey i guess I get to show you how to go back to your code,
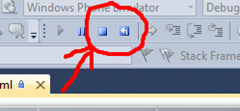
tip: DO NOT click on the ‘X’ beside the emulator. That works, but it unloads the emulator and then you have to wait for it to reload again. Instead go back to Visual Studio and choose Debug | Stop Debugging from the menu or click on the Stop debugging button in the toolbar. Then when you start debugging again it will be faster.
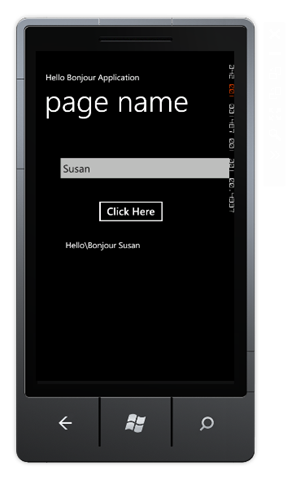
Okay go back, select the button, <F4> to bring up properties, Change Content to “Click Here”. Now run it again to test <Start Debugging> Ha! fixed it! Now Type “S u s a n” into the text box, click on the “Click Here” button and cool! the textblock now says Hello/Bonjour Susan. I love it!
So now that I have a very very simple application that I can run in the emulator I can play around a bit, start adding more controls to see what they look like, figure out how to line up the fields so they look nicer, play around with font sizes, explore the emulator buttons. That is why I like Hello World apps. They get me just far enough that I can start to explore. Next blog…I’m going to figure out how to put the application on my actual Windows Phone! But I got my Hello World finished, time to go celebrate with chocolate (I hope my kids have some Halloween candy left)
