Introducing XNA: A tri-platform game development framework – Part 3
Introducing XNA: A tri-platform game development framework – Part 3
In parts 1 and 2 of this series, we setup a multiplatform XNA solution that deploys to the PC, Xbox 360 and Windows Phone 7 devices seamlessly. In this 3rd and final part of the series, we’ll implement platform-specific behavior within the same codebase. And we’ll finally make our ship do something!
Conditional compilation symbols
When you created the three projects, Visual Studio set project-specific Conditional compilation symbols. These flags can be used with preprocessing directives to create conditions in the compilation process.
To view and edit these symbols, Right-click on a game project, select Properties, and go to the Build tab.

By default, Visual Studio added the WINDOWS symbol for the Windows project, XBOX and XBOX360 symbols for the Xbox project and WINDOWS_PHONE symbol the Windows Phone 7 project. In this article, we’ll use these to set certain platform-specific properties and capture hardware-specific input.
Settings up graphics properties
We’ll use the GraphicsDeviceManager to setup the screen properties for each platform. In the Initialize() method of the Game1 class, add the three #if preprocessor directives:
protected override void Initialize()
{
// TODO: Add your initialization logic here
#if WINDOWS
#endif
#if XBOX
#endif
#if WINDOWS_PHONE
#endif
base.Initialize();
}
For the purpose of this tutorial, we’ll run all three platform builds in full-screen. However, we’ll need to set an appropriate resolution for each one:
protected override void Initialize()
{
// TODO: Add your initialization logic here
#if WINDOWS
graphics.PreferredBackBufferWidth = GraphicsDevice.DisplayMode.Width;
graphics.PreferredBackBufferHeight = GraphicsDevice.DisplayMode.Height;
#endif
#if XBOX
graphics.PreferredBackBufferWidth = 1280;
graphics.PreferredBackBufferHeight = 720;
#endif
#if WINDOWS_PHONE
graphics.PreferredBackBufferWidth = 800;
graphics.PreferredBackBufferHeight = 480;
#endif
graphics.IsFullScreen = true;
graphics.ApplyChanges();
base.Initialize();
}
For the PC, we retrieve the desktop resolution and set our back-buffer (the viewport) to match it. For the Xbox, we use its native 720p high-definition output by setting the back-buffer bounds to 1280 by 720 pixels. For the phone, we simply set the resolution to the maximum resolution dictated by the Windows Phone 7 platform. Finally, we set the IsFullScreen property to true and call the ApplyChanges() method to commit the above changes. Note that these 2 lines of code are outside of any platform-specific preprocessor directives, since we want these two things to apply to all three of our builds.
When building the solution, depending on the target project, each flag in the processing directive will be checked. If it is set, the code inside the #if-#endif pair will be built. This means that you must be careful about fragmenting your code. For example, if you declare a field in a #if-#endif directive, but assign to it outside of the same condition, you will get an error for a specific platform (or a specific condition) about a missing declaration.
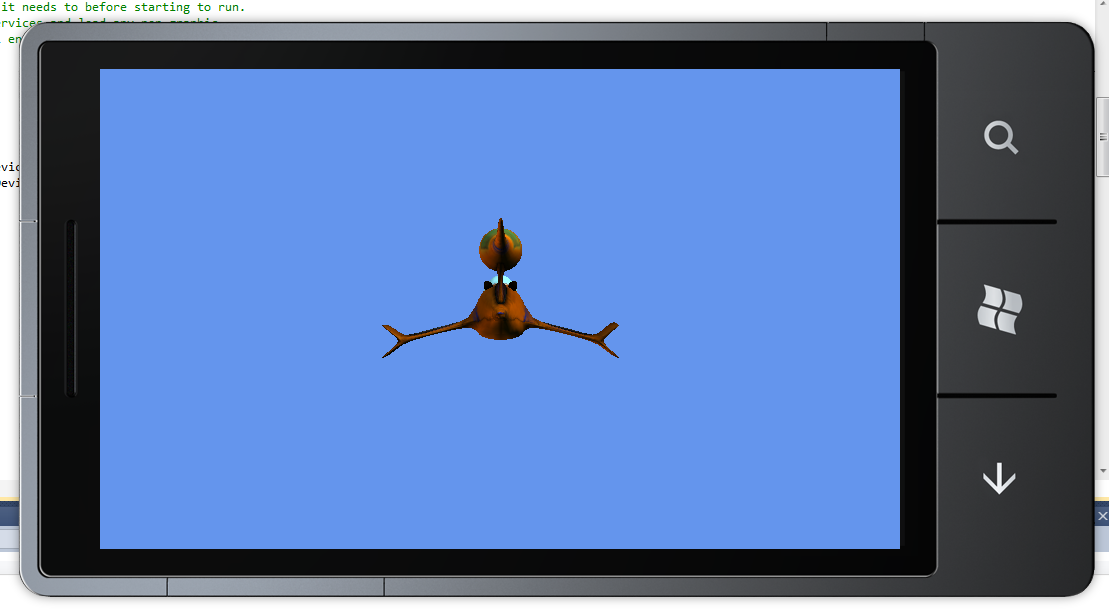
At this point, if you were to run the project on any platform, the resolution will be automatically adjusted and you should see the ship in platform’s native full-screen resolution, without any scaling or stretching!
Note: IsFullScreen is not strictly needed for the Xbox version, as all XNA games on the Xbox run in full-screen by default.
Capturing platform-specific input
Let’s make things a bit more interesting and challenging, by rotating the ship with a platform specific input device. On the PC, the input comes primarily from the mouse/keyboard combination; on the Xbox 360 from the Xbox controller; on the Windows Phone 7 from the touch panel. The Xbox controller can also be used as a gamepad in Windows. A keyboard can be used on the Xbox 360, but you should avoid this scenario, since most Xbox 360 owners don’t have a keyboard connected to their console. Windows Phone 7 devices also have additional buttons such as the “back” button, which can be read in XNA.
First, we’ll add platform independent code that will rotate the ship around the y-axis (also known as “Yaw”). Add a float to hold the yaw angle:
public class Game1 : Microsoft.Xna.Framework.Game
{
...
float yawAngle = 0.0f;
public Game1()
{
...
}
...
}
To rotate the ship, we’ll set the world matrix to the rotation about the y-axis matrix that is constructed with the yawAngle, which we set with an input device.
protected override void Update(GameTime gameTime)
{
...
world = Matrix.CreateRotationY(yawAngle);
base.Update(gameTime);
}
Next we will capture input from the keyboard to rotate the ship with the arrow keys. Remember that keyboard input should be captured on Windows only; we check if WINDOWS is set.
protected override void Update(GameTime gameTime)
{
...
#if WINDOWS
if (Keyboard.GetState().IsKeyDown(Keys.Left))
yawAngle += 0.05f;
if (Keyboard.GetState().IsKeyDown(Keys.Right))
yawAngle -= 0.05f;
#endif
...
}
We’ll use the Xbox controller’s left thumb-stick to rotate the ship left and right as well.
protected override void Update(GameTime gameTime)
{
...
#if XBOX
yawAngle += GamePad.GetState(PlayerIndex.One).ThumbSticks.Left.X;
#endif
...
}
If you were to test this code now, you’ll notice a little quirk. On Windows we’re incrementing/decrementing the angle by a constant of 0.05 radians every update. But on the Xbox the angle depends on the X position of the thumb-stick, which can result in a large value. The easiest solution is to simply dampen the value by a constant:
yawAngle += GamePad.GetState(PlayerIndex.One).ThumbSticks.Left.X * 0.05f;
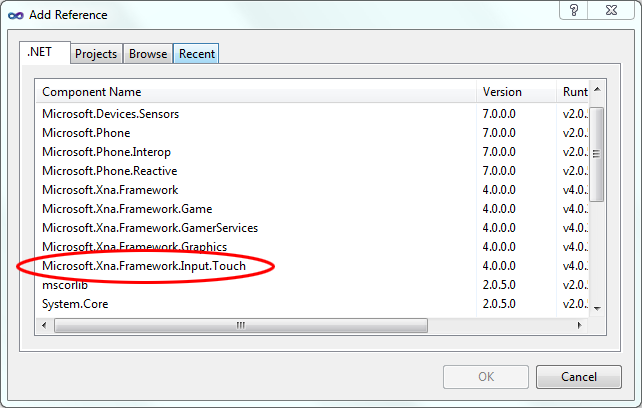
On Windows Phone 7, input is not as simple as keyboard strokes and thumb-stick positions. The phone captures input by recording touches. Touch points and displacement between them can be determined from raw touch data. Common higher level motions – known as gestures – are already provided by the XNA framework, so you don’t have to write your own. We’ll use the horizontal drag gesture to rotate the ship. Before we go any further, however, we need to include a reference to the Microsoft.Xna.Framework.Input.Touch assembly. It wasn’t included because our Windows Phone 7 project was created from the Windows project.
Expand the Windows Phone Copy of XNAIntro project, Right-click on References and select Add Reference. Under the .NET tab select Microsoft.Xna.Framework.Input.Touch.
We can now use the namespace in Game1. Since it is to be used for the phone only, be sure to place it in a proper compilation condition:
using Microsoft.Xna.Framework;
using Microsoft.Xna.Framework.Audio;
using Microsoft.Xna.Framework.Content;
using Microsoft.Xna.Framework.GamerServices;
using Microsoft.Xna.Framework.Graphics;
using Microsoft.Xna.Framework.Input;
using Microsoft.Xna.Framework.Media;
#if WINDOWS_PHONE
using Microsoft.Xna.Framework.Input.Touch;
#endif
namespace XNAIntro
{
/// <summary>
/// This is the main type for your game
/// </summary>
public class Game1 : Microsoft.Xna.Framework.Game
{
...
}
}
Before we can detect the horizontal drag gesture, we need to let the touch panel know that this gesture needs to be enabled.
protected override void Initialize()
{
...
#if WINDOWS_PHONE
...
TouchPanel.EnabledGestures = GestureType.HorizontalDrag;
#endif
...
}
Once the gesture is enabled, you can access the gesture with the TouchPanel.ReadGesture() method:
protected override void Update(GameTime gameTime)
{
...
#if WINDOWS_PHONE
while (TouchPanel.IsGestureAvailable)
{
GestureSample gesture = TouchPanel.ReadGesture();
yawAngle += gesture.Delta.X * 0.005f;
}
#endif
...
}
We first check whether or not a gesture is available with the TouchPanel.IsGestureAvailable property. Failure to check for this condition will result in an exception thrown by the first TouchPanel.ReadGesture() call. We then read the gesture from the touch panel, which will return the next available gesture. This means that when you have multiple gestures enabled you would need to check the gesture.GestureType property to determine which gesture this is. In this case, the check is not required because the horizontal drag gesture is the only one we enabled. Also note that since the input feedback is different between all devices, we use a different dampening value.
Ready, Steady, Go!
We’re done! Select any platform and run the little “game” to enjoy a truly breathtaking experience. Using a single codebase, you effectively created not one or two, but three game versions. All three are identical, and yet all three run on different hardware architectures and accept platform-specific input.
Although this is the conclusion of the series, you can find plenty of resources to get you going further on the App Hub at https://create.msdn.com. Enjoy!