Incorporating 2D assets in your Windows Phone 7 Games
What makes a game great aside from the interesting game
play, are the static data that makes the game dynamically fun. Pictures, fonts, sounds are all important
elements that can make or break a game.
These static data are called assets and are used by importers,
processors, content loaders.
- Importers – Applied at compile time, they convert assets
from their original formats to a small set of predefined formats. - Processors – Applied after importers and also at compile
time. Purpose is to convert the standardized
data supplied by the importers into managed objects. - Content Loaders – Applied at run time and finalizes the
object connection.
These steps will help with reducing the game’s loading time
as the content is serialized at compile time.
XNA Game studio supports 2D asset formats .bmp, .dds, .dib,
.hdr, .jpg, .pfm, .png, .ppm, and .tga.
PNG is the recommended format as many content generation
tools support this.
Example:
Game assets are stored in the Content project when a XNA
Game Studio 4.0 project is created.
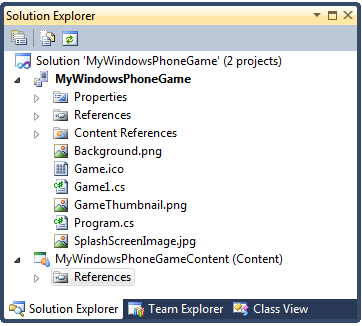
Adding
an asset is a simple process: right-click Content,
select Add, click Existing
Item, and then select an existing image file (for instance,
hills.png).
With the assets in place, now load the asset into the
game.
The asset needs to be stored in a variable there first we
define a field to store the asset in the game class. The asset is serialized as Texture2D object
and therefore the variable type should be Texture2D as well.
Texture2D hills;
The base class in the game project has a LoadContent virtual
method which provides a location to load the assets and initialize the
fields. By staging where you wish to
load the assets in a game, able to save on initialization times and create a
better experience.
loads the given asset, and stores the
corresponding managed object in the class field.
C#
protected override void LoadContent()
{
// Create a new SpriteBatch,
which can be used to draw textures.
spriteBatch = new
SpriteBatch(GraphicsDevice);
// TODO: use this.Content to
load your game content here
hills =
this.Content.Load<Texture2D>("hills");
}
Images need to be incorporated to their correct hardware
display resolution. In the XNA
framework, the back buffer allows the scaling to be done by the hardware of the
target device.
Configuring the back buffer for maximum resolution support
by Windows Phone 7
C#
if (this.Window.CurrentOrientation == DisplayOrientation.Portrait)
{
graphics.PreferredBackBufferWidth = 480;
graphics.PreferredBackBufferHeight = 800;
}
else
{
graphics.PreferredBackBufferWidth = 800;
graphics.PreferredBackBufferHeight
= 480;
}
The ability to support all types of device orientation is
set by this piece of code:
C#
graphics.SupportedOrientations = DisplayOrientation.LandscapeLeft |
DisplayOrientation.LandscapeRight | DisplayOrientation.Portrait;
Drawing the picture onto the device
C#
float scale = Math.Min(graphics.GraphicsDevice.Viewport.Width /
hills.Width, graphics.GraphicsDevice.Viewport.Height / hills.Height);
GraphicsDevice.Clear(Color.White);
this.spriteBatch.Begin();
this.spriteBatch.Draw(hills, // Texture to render
new
Vector2(0, 0), // Destination left top position
null,
Color.White, // Texture tint color
0, new
Vector2(0, 0), // Origin left top position
scale,
// Scale
SpriteEffects.None,
0);
this.spriteBatch.End();
Notice
how we calculate the "scale" value at the top of the code sample. We
want to scale the image as much as possible while keeping the entire image
within the display bounds.
Windows Phone 7 includes a hardware
image scaler. This allows XNA games to be written for any desired back buffer
resolution without considering the physical screen size. The scaler
automatically fits the drawing into the target display. It is worth mentioning
that the hardware image scaler's work does not consume CPU time.
As previously indicated, we intend to
show our image in full-screen mode with the best possible quality and without
distortion. The following code fragment shows how we can implicitly use the
hardware image scaler.
C#
if (this.Window.CurrentOrientation == DisplayOrientation.Portrait)
{
graphics.PreferredBackBufferWidth = 480 / 2;
graphics.PreferredBackBufferHeight = 800 / 2;
}
else
{
graphics.PreferredBackBufferWidth = 800 / 2;
graphics.PreferredBackBufferHeight = 480 / 2;
}
While
we have halved each of the back buffer’s dimensions, the size of the rendered
image is unaffected because the scaler resizes it to fit the device's display.