PICAXE: good way to get the first experience with microcontrollers
In the previous post I told that when buying an Arduino, Netduino, Nucleo or DragonBoard 410C board, you get the board that can help you achieve two goals:
- Getting a prototyping board for the selected microcontroller. If you have an idea and even don’t have much knowledge in electronics, you can use the prototyping board for smooth stating of your project. The board will allow you to concentrate your attention on the project itself, and you do not have to think about how to assemble your own board using the selected microcontroller;
- Getting a programmer. Almost all prototyping boards contain a programmer that allows you to upload your code directly to microcontroller using a USB cable. Usually the programmer is too complex and it’s better to buy a ready to use one rather than assembling your own programmer. Obviously, you will not include programmer’s component to the final solution, if you don’t allow people to reprogram your device.
So we can see the board as a tool rather than a component for your future device. Once you select a microcontroller which is the most suitable for your project, you can buy a prototyping board for this microcontroller with a programmer on the board (or you can buy external programmer) and you can start creating your prototype.
In the case if you want to start making experiments for fun or in order to find some ideas or just to get the basic knowledge in electronics, I would recommend to start with any board with a chip in the DIL package (DIP). This type of microcontrollers allows you to use the appropriate prototyping board to program the microcontroller itself. Once you upload and test your program, you can carefully detach the microcontroller from the board and use it to prototype the final solution. It will help to understand you the idea of microcontrollers as well as the list of all required components and the final cost of the solution.
If you like the Arduino family, you can select the Arduino Uno board with ATMega microcontroller in DIP. But if you have almost no knowledge in electronics or if you want to educate your children I would recommend to start with PICAXE microcontrollers.
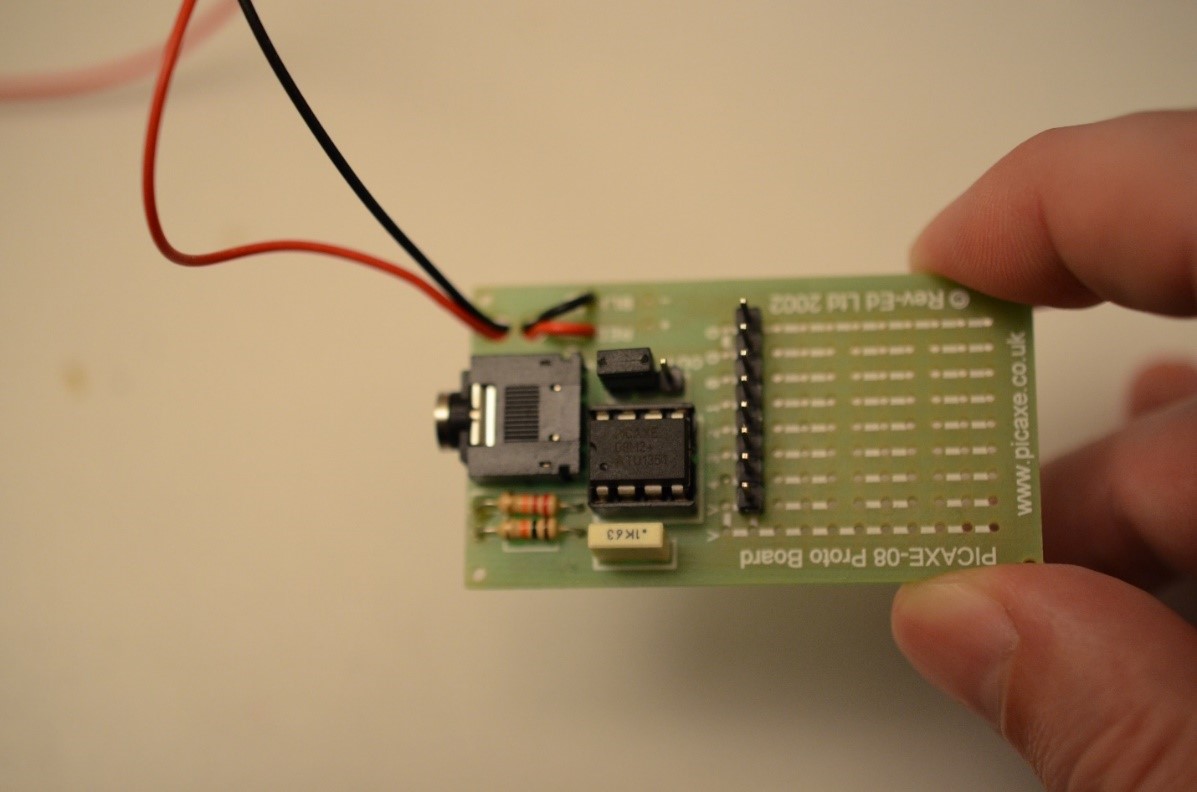
I found these microcontrollers accidentally, and you can find all information about them visiting https://picaxe.com website. Note that owners of the project don’t produce their own microcontrollers and all PICAXE microcontrollers are produced by Microchip (PIC12-19 family of 8-bits microcontrollers). But all PICAXE controllers have a modified bootloader that was designed for beginners and allows you to upload your program using a USB to stereo cable and a stereo jack socket. So, you do not have to buy or solder anything complex. In general, you can easily assemble your project on a breadboard or you can buy a kit that contains a socket and a small prototyping board for soldering.
In order to buy a kit and a microcontroller you can visit https://robotshop.ca and find all PIXAXE related components there. For example, I bought a kit for PICAXE-08M microcontroller for CAN 5,44 but you can buy the stereo jack socket only.
The USB to stereo cable is not so cheap, but you still solder your own.
Here are all components that I found in the kit:
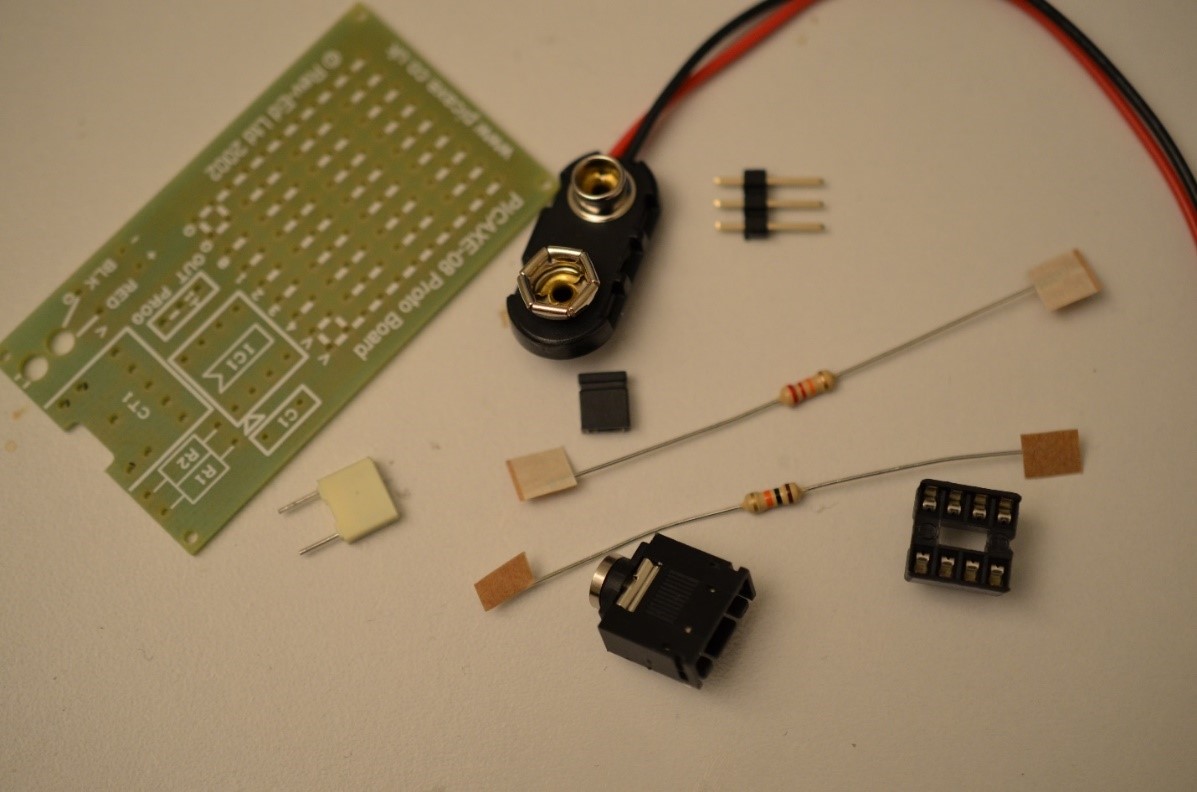
You can see that there is a couple of resistors, a capacitor and a socket itself. So even soldering the kit you can have some fun.
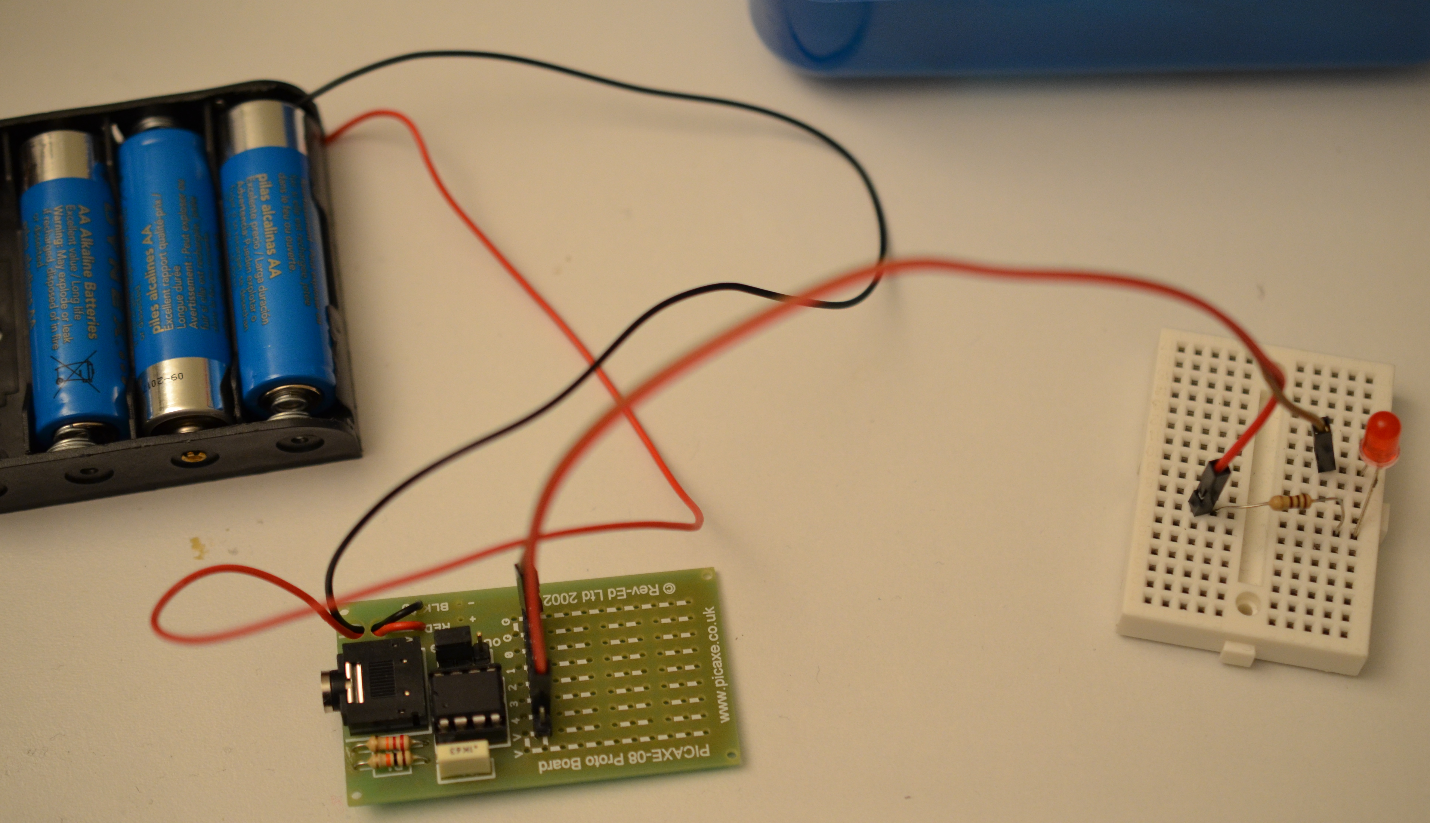
Note that the microcontroller requires 4.5-5V and you cannot use 9V battery despite the battery connector that is included to the kit. You have to use three AA or AAA batteries in order to solder your solution:
The second advantage of PICAXE is a number of different tools for creating software.
You can use at least three development environments:
- PICAXE Editor: the most popular editor for Windows that allows you to use BASIC to create your software;
- Blockly for PICAXE: visual software that works on Windows, Linux, Mac OS and even Chrome, iOS and Android. Thanks to this tool you can use lots of ready to use blocks to create your software even without coding;
- AXEPad: if you use Mac or Linux device, you can use this tool that allows you to use BASIC programming language for software development;
So all tools are adopted for beginners.
In my case I installed PICAXE Editor and all needed drivers and, finally, I created my first application in BASIC for PICAXE microcontroller.
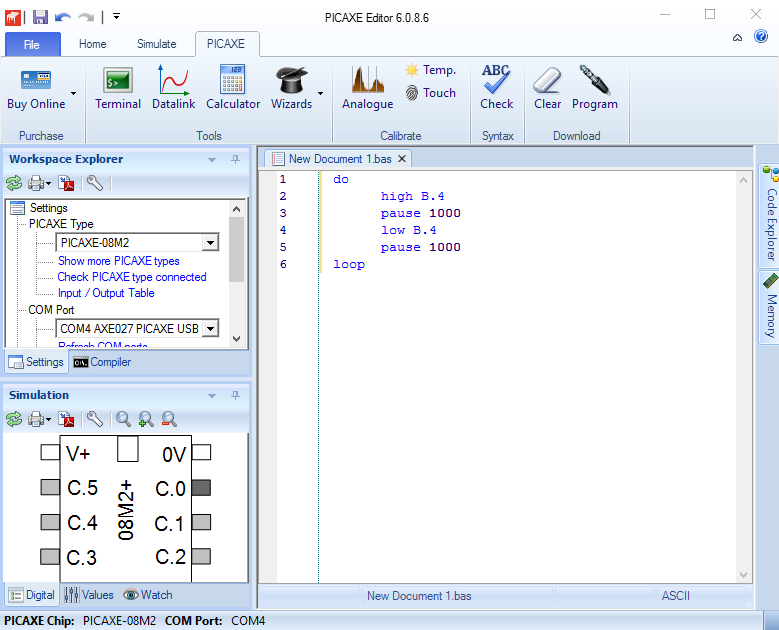
You can upload your application using the Program button. In case of any problems with a microcontroller type or a port, you can use Workspace explorer. Finally, the IDE has some advanced tools for checking memory, simulation, browsing variables and so on.
Once the application works fine, you can detach the microcontroller from the programmer and use it to create your prototype:
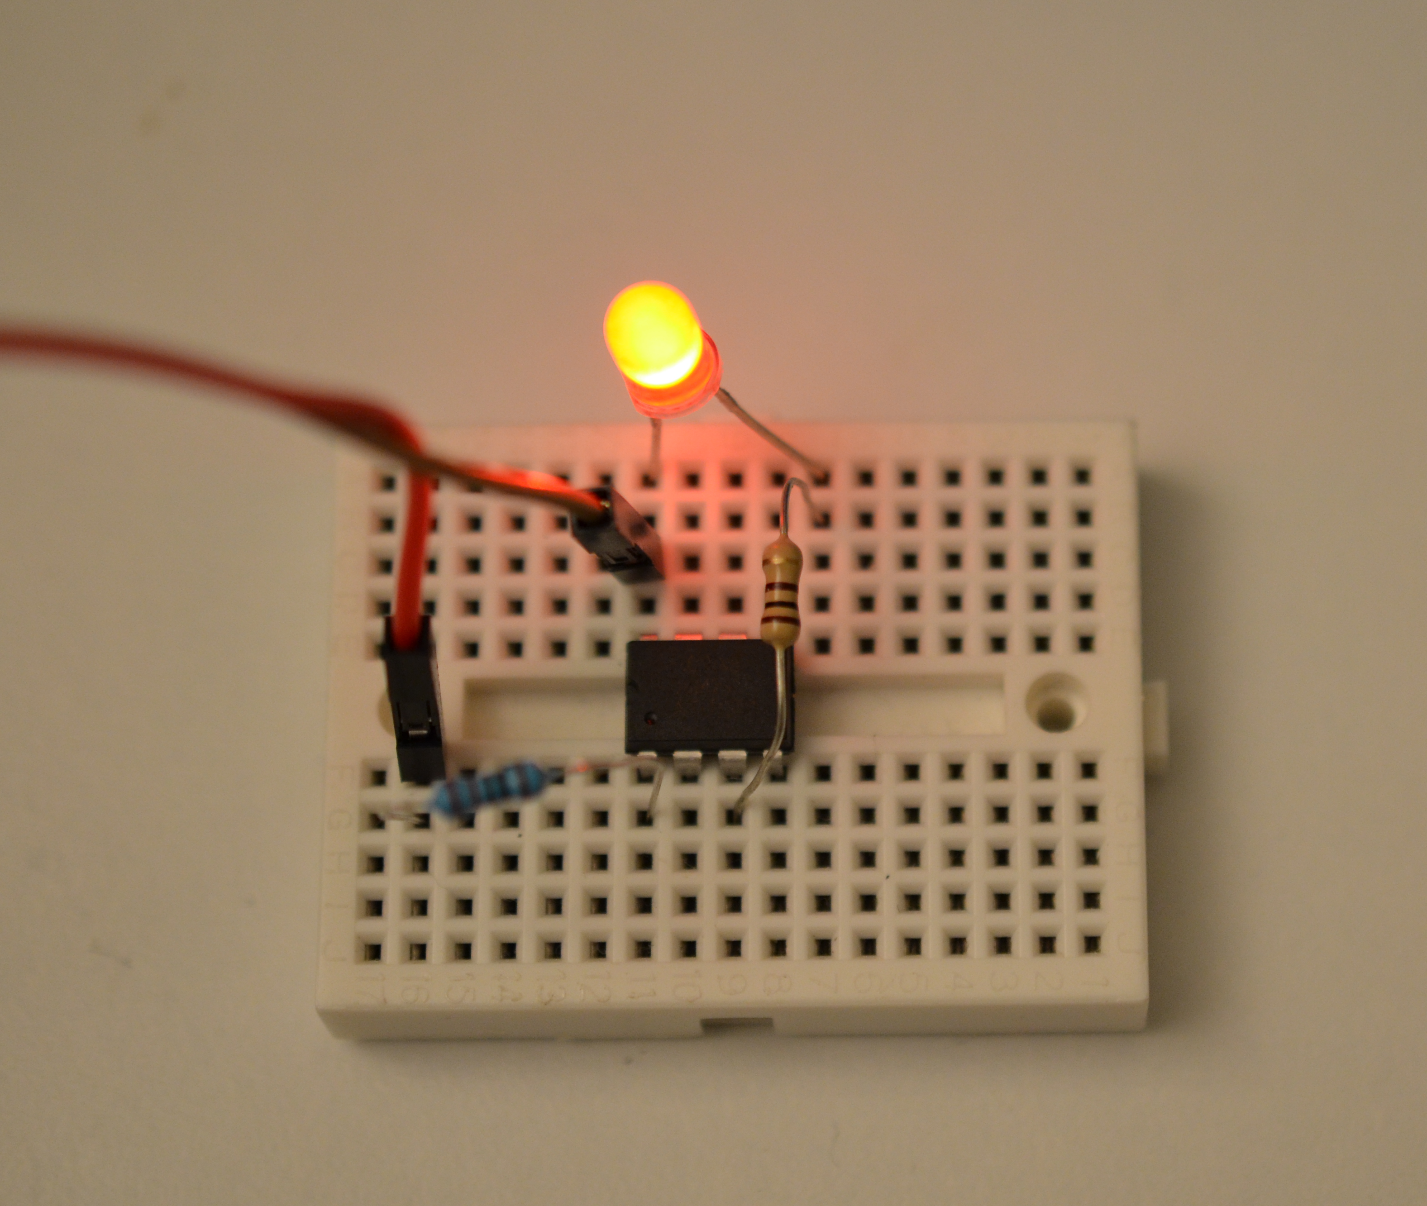
This is the most important step that helps you to understand the purpose of microcontrollers and programmers.
Right now, I can move it to a printed circuit board and send it to the production. Do you think I can become a millionaire selling this device?