Tutorial #5. How to back up your data
Thanks to Microsoft Azure your blog will be available all the time and in theory you should not lose any data but.. what if you accidentally delete one of your posts, or somebody hacks your password and deletes all the information in your blog. It’s a good idea to have a copy of your data so that if something happens you can restore everything back to the way it was quickly, especially if you have lots of valuable posts and many people who visit your site (or a school project due!)
There are two ways to back up your data: you can use BlogEngine or the Azure Management panel.
To use BlogEngine, go to the Administrator widget and select Settings
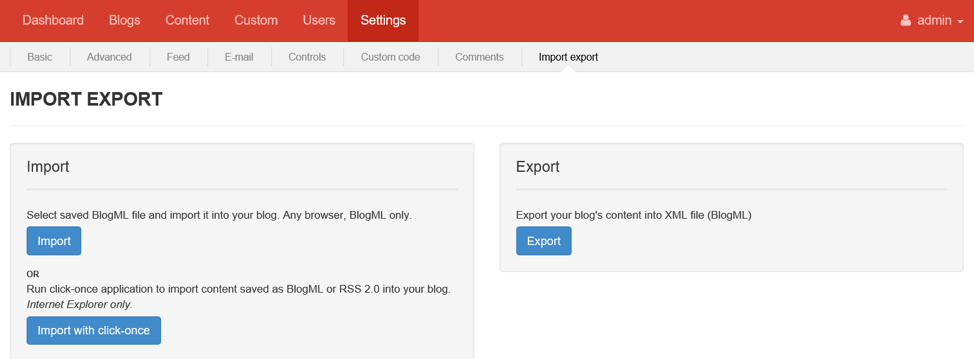
Select the Import export tab. If you click the Export button, you can export all data from your site in a single text file. If you lose everything and need to get it back, you can redeploy BlogEngine.NET , return to this tab, click the Import button and select the file where you had the backup. This works well, if you want to back up all the text on your site. But this won’t work for images. So, you may want to consider using the Azure Management panel to do your backup
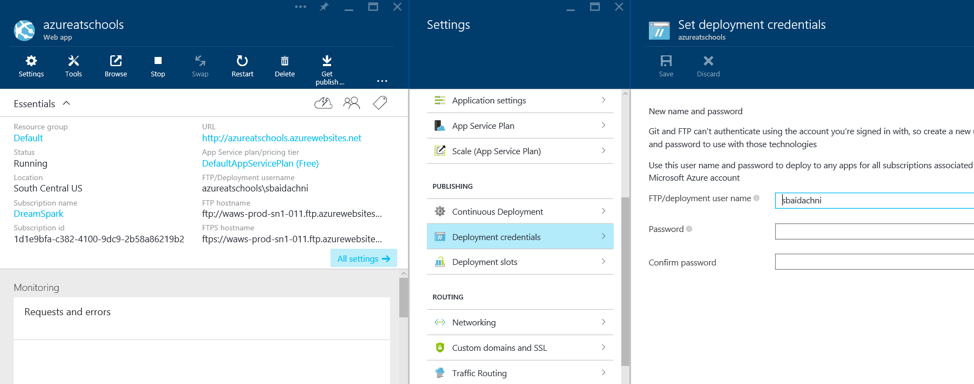
To use the Azure Management panel, Go to https://portal.azure.com and go to the dashboard of your web application. In order to login to the portal use the DreamSpark account login that you created in the first two tutorials. On the main page of the dashboard you will find the ftp username and ftp hostname. FTP is a special protocol/access method that allows to work with your site as a list of files and directories. Using FTP, you can open a folder on the server where you site is located and get access to the source code of your site, and since BlogEngine stores all the data in the same folder you can copy data from there and use that as a backup.
On your website, FTP username is not set. So, you need to click the All settings link on the page and open Deployment credentials to provide an ftp username and password:
Once you enter a name and the password you can copy ftp hostname and use it in Explorer to open the folder that contains the files for your website:
When you specify this folder as a location, explorer will ask for the login and password. Make sure you specify the full user name from the dashboard (you may want to copy and paste it from the dashboard)
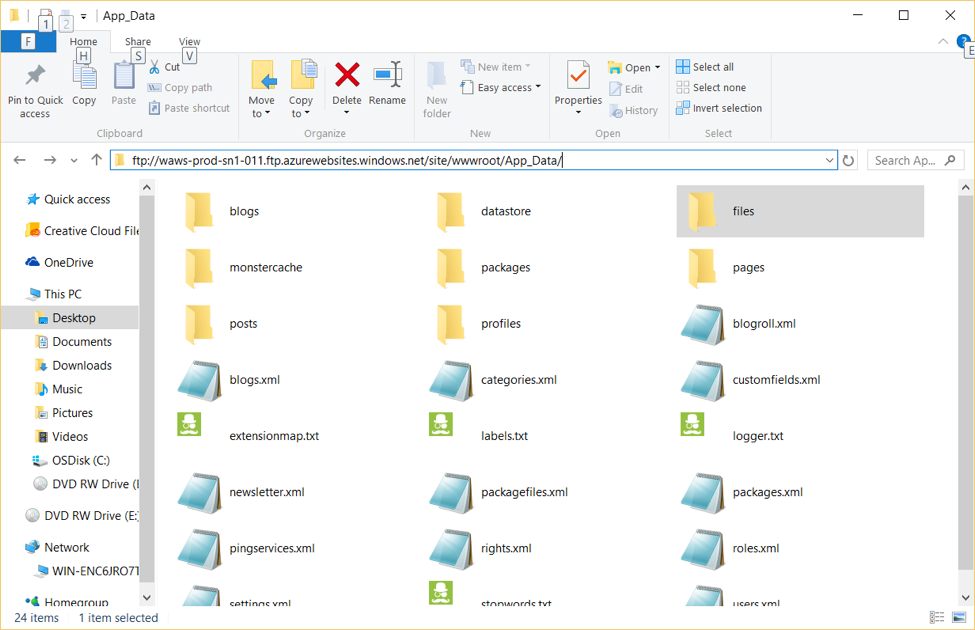
Once you have access to the folder, navigate to wwwroot, you will find some folders there. The BlogEngine.NET stores all it’s data in the App_Data folder. So, just copy the entire App_Data folder to your computer. If something happens with your site you can simply copy back the missing or corrupted files.
Congratulations! You can now backup your blog, so you can don’t lose all your hard work if something goes wrong.