Tutorial #3. How to configure the site and add some components from Web
In this tutorial you will learn how to setup your BlogEngine.NET blog
Go to the website you created in the previous tutorial. Log in using admin as a login and the password you set up in the previous tutorial.
Once you have logged into your site in administrative mode you can start editing lots of things there directly on the main page. Let’s have a look at the main components of the site and see how to change them.
The first component of your website is the header. The header includes the menu, the blog title, the blog description, the logo and links to social networks.
To start editing the header, select Settings from the administration menu. External users will not see this menu, this is a menu you can access because you logged in as the administrator.
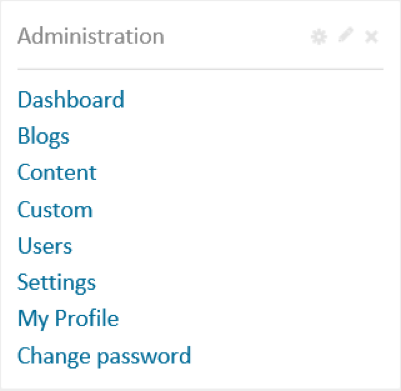
On the Settings window you can change your blog name, blog description, and other settings that control how your website displays content.
For now, just change the Name and description. If you want, you can change the theme. The theme controls the color scheme, fonts and general design of your blog. Let’s change the theme to Standard-28 and click Save before going to the main page of your blog.
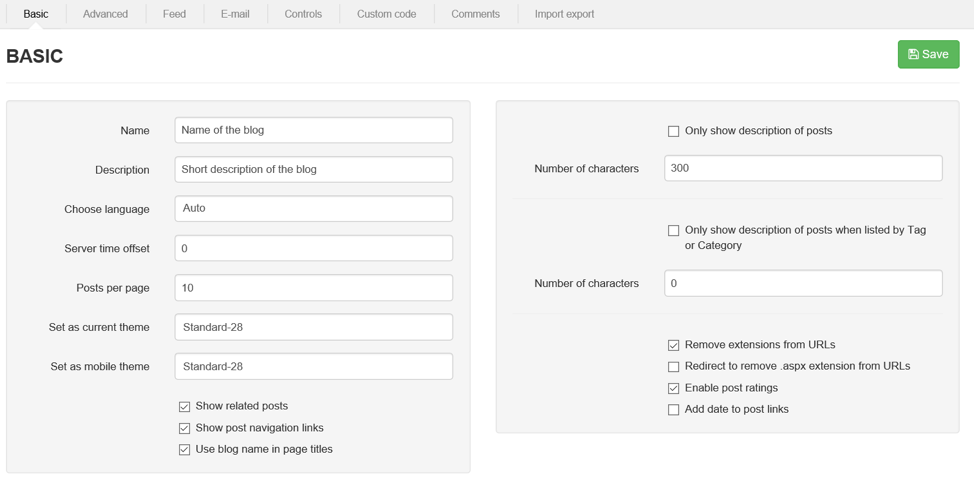
BlogEngine.NET allows to view your website from any type of device: Tablets, laptops or phones. That’s why you are allowed to select two different themes: one for standard devices and one for mobile devices.
Once you change the theme, name and description, the appearance of your blog will change.

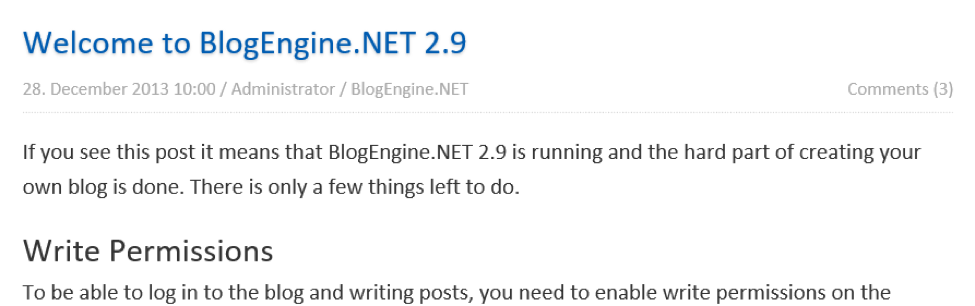
The next section of your blog’s main page are the actual blog posts. Typically, each post has a header, the date it was published, a link to provide comments on the post and most important the text of the blog post itself (the theme you selected in Settings can change exactly what information is displayed for each blog post)
If you go back to Settings, there are settings that affect how each blog post is displayed.
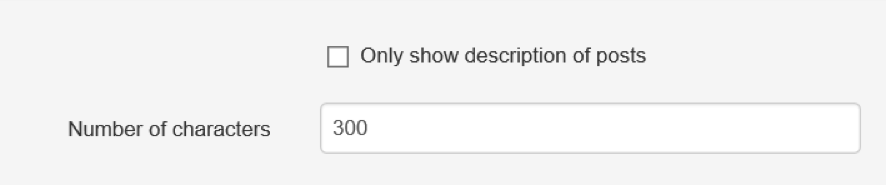
By default, the page will display the entire post but if you have a long post with a lot of information, you can limit it to display only the first few sentences. For now, I recommend to displaying the entire text.
If you are on the main page of your blog and click on a specific blog post title, you will be brought to a page for that specific post. Each post has its own page. This is great for sharing, because if you want to share a particular post you can just share the link to the specific post page instead of the link to the main page. That way your friends don’t have to search through all your posts to find the specific post you want them to read.
Because you are logged in as the administrator, you can see two command options: Delete and Edit. If you click the Delete link you will delete the post permanently. So, be very careful with this button. If you want to hide or edit an existing post, click Edit and the browser will take you to the page editor
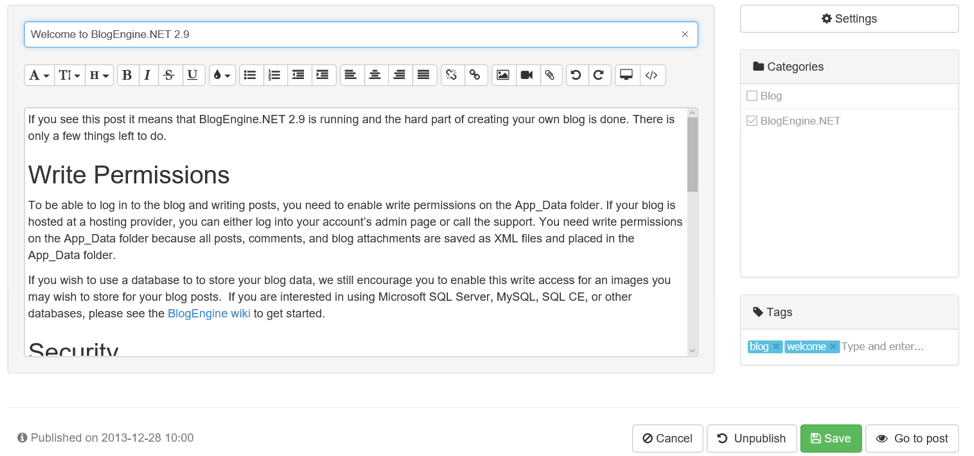
We don’t want our readers to see this default post. But instead of deleting it we are going to unpublish it. That way we can get the post back later if we need it. After you click unpublish you can go to the main page and find that the post is still there because you are the administrator. But your readers and visitors to your website will not see any posts that are unpublished. We will learn how to add new posts to our website in the next tutorial.
The next section of the page is the widget panel. Widgets are special independent controls. Each widget does something different: list the most popular posts, list the names of post authors, filter posts by tag or category, show a list of pages and so on. Depending on the theme you selected, your blog can have one or several widget panels. But all panels work the same way.
You can setup, move or delete a widget using the widget’s menu

The first button, that looks like a gear, allows you to move the widget from one panel to another, or to a different position inside a particular panel. Just click this button and you will see the list of possible locations. Try moving a widget around to get used to this functionality.
The second button, that looks like a pencil, allows you to edit the settings for each widget. Each widget has its own settings, so after clicking this button you can see the settings you can change for each different widget
The last button, that looks like an X, is the delete button you can use to remove the widget from the page.
If you want to add new widgets, use the Add button at the end of each panel

The AuthorList widget is displayed by default. It displays a list of all the authors who have written blog posts on your website. Since you are likely to be the only author, this isn’t going to be very helpful to your readers so let’s remove the AuthorList widget. We can also remove the Page list widget. Let’s add the RecentPosts widget so visitors to your website can easily find your most recent news.
By default your site supports four themes and a fixed set of widgets. You can get additional widgets and themes. Click Custom link in the Administrator widget.
You will see three categories: extensions, widgets and themes. Each category shows the elements that are already installed. If you select Gallery you can find and install additional elements.
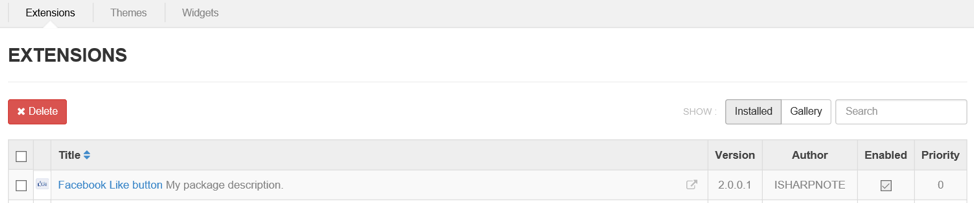
We’ve discussed widgets and themes, but what are extensions? Extensions allow you to extend the basic functionality of your site. For example, if you want to your readers to be able to Like your posts you can install the Facebook Like button extension. Select Extensions, if you don’t see the extension you want listed, select Gallery, search for the extension you want (for example: Facebook), select the Facebook Like button from the list and click install.

Congratulations, you’ve now started to set up the look and feel of your website, in the next tutorial we will learn how to start adding posts to our blog!