Visual Studio Code for Mac developers: Visual Studio Online and Git
Last time we discussed how to install Git and use it locally. Of course, Git is just a platform and it requires a provider, if you are not going to setup your own infrastructure. And if you are planning to create an open source project, which will be uploaded to a public repository, probably, you will use GitHub or Visual Studio Online as a provider. GitHub allows you to create an unlimited number of public repositories for free. But once you want to create a private repository, or want to have access to number of tools, which help you to support Software Development Life Cycle, it’s better to use Visual Studio Online.
Visual Studio Online allows you to have up to 5 developers per your account for free, and you can create any number of projects there and use some additional features like Sprint planning tools, Task and Kanban boards, virtual team room etc. And, of course, Visual Studio Online supports Git, and thanks to that you can use Visual Studio Code and Visual Studio Online together.
If you still don’t have an account for Visual Studio Online, it’s time to get one for free.
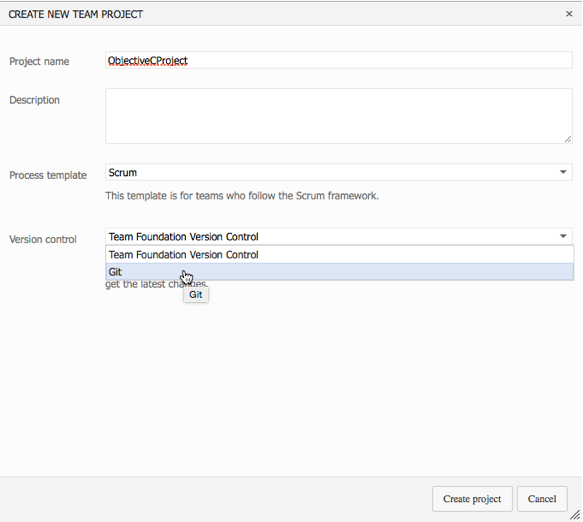
Once you get access to Visual Studio Online you can create a project. In this case project means everything that is related to the application lifecycle management: dashboards, repository, team room etc. Pay special attention that Visual Studio Online supports two types of version control including Git. Because we are going to use Visual Studio Code we need to select Git:
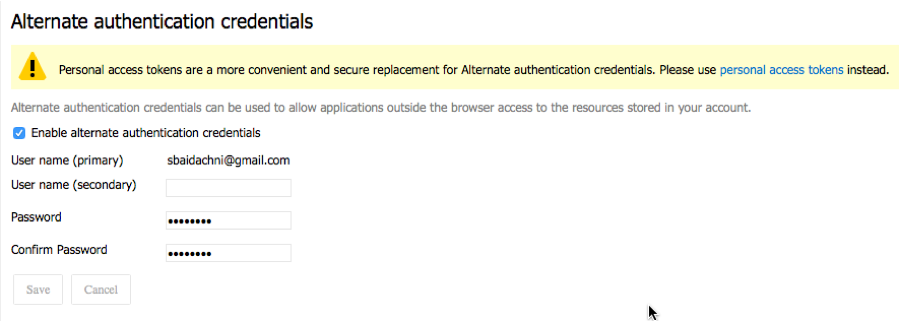
Once the project is created you need to do one more thing inside Visual Studio Online – open your profile and use Security tab to apply Alternate authentication credentials. By default Visual Studio Online uses LiveID to make authentication but Git tools don’t support LiveID. So, without this step you will not be able to setup Git on your PC.
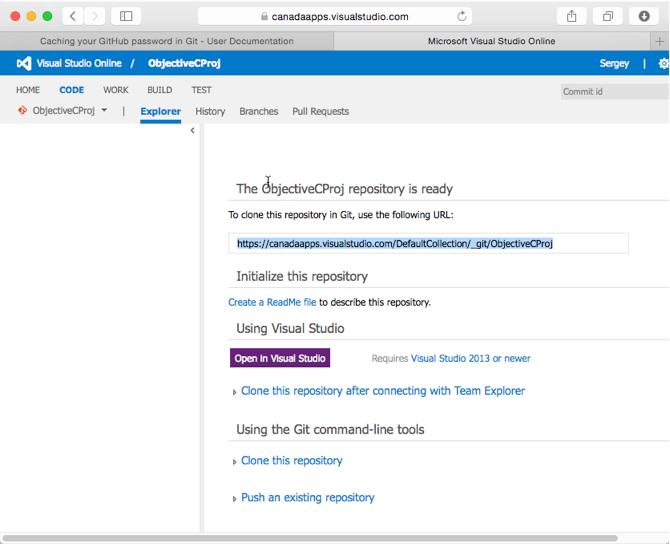
One more step on the server side is getting URL that you can use as a remote repository in Git. Just navigate to the project and open the CODE tab. You will see the URL – just copy it for next step.
That’s all done on server side, and it’s time to configure your Mac.
First of all you need to provide Git your user name, which you defined in Visual Studio Online as an alternate credential:
git config --global user.name sbaidachni@gmail.com
You can make it in Terminal window activating it from Visual Studio Code. It’s even better to do because you can run Terminal window from Code in context of workspace. But just make sure that you associated Git with the current workspace before to execute the next command.
Finally, you can add the reference to our remote repository:
git remote add origin https://canadaapps.visualstudio.com/DefaultCollection/\_git/ObjectiveCProj
And push existing local files to remote repository:
git push -u origin --all
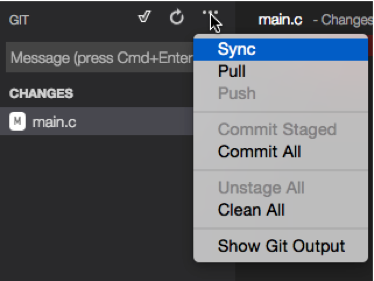
That’s all. Just reopen Visual Studio Code, and you should see that most of menu items of Git tab are already enabled for you:
You can start coding and commit all changes to Visual Studio Online.
Pay special attention that once you invoke the first push command in Terminal, you will be asked to enter user name and password. In order to preserve this information and avoid any problems with Code, you should execute the following helper:
git config --global credential.helper osxkeychain
If you install Git tool as part of XCode tools, this helper is already available.