Visual Studio Code for Mac developers: Editor features
As I mentioned in the previous post, Visual Studio Code is a folder-based editor. So, in order to open existing project you need to open the project’s folder. If you want to create a new project, you just need to create a folder and open it in Code.
Based on files’ extensions, Code uses syntax coloring for supported languages. You can find the list of supported languages using this link.
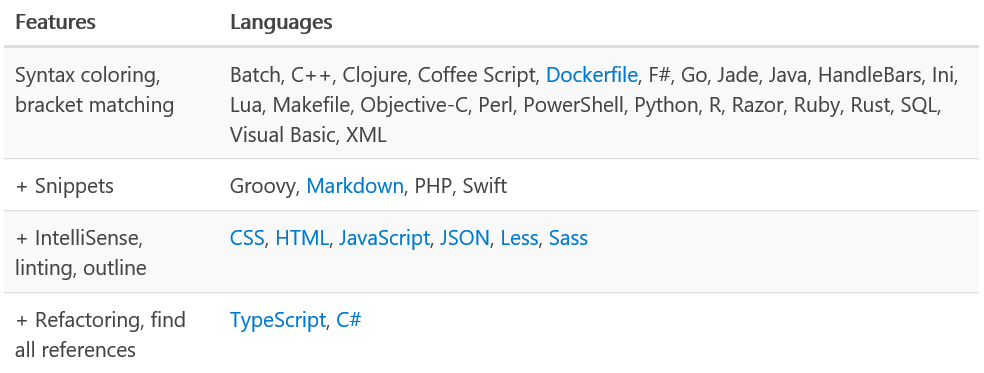
You can see that in the current version (0.8.0) Code supports more than 30 languages, and the greatest number of features supported is for TypeScript, CSS, HTML, JavaScript and JSON.
If you are running JavaScript or TypeScript code on Node.js, Visual Studio code support debugging there and additionally, Code includes experimental debugging support for Mono (ASP.NET 5.0). So, you can develop modern web applications even using the preview version, and you will have access to all needed features.
Using the status bar you can easily understand which language is selected for the active file:

And if Code didn’t recognize your file properly, for example, due to different extension, you can assign any other language using Select Language Mode popup window, just clicking current language in the status bar.
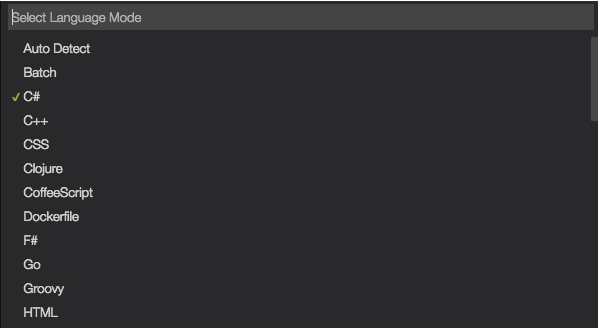
I like this window because it contains an up to date list of supported languages.
Of course, in order to have IntelliSense support for JavaScript or TypeScript, Code should have information about the projects in your folder. So Code will read information about your projects reading it from package.json for Node.js, project.json for ASP.NET configuration, jsconfig.json and tsconfig.json for JavaScript and TypeScript. In the next posts we will discuss this files in more details.
When working with files pay special attention that any changes are not auto saved. In order to activate the auto save feature, you need to open File menu and select Auto Save:

If Auto Save feature is turned off you can see number of unsaved files in explore window as well as on Viewbar

In general, when using Visual Studio Code you will work with the following common parts of interface: Viewbar, Sidebar, Statusbar and Editor window.
The Viewbar (an interface part near the left edge) allows to switch between different views and contains information about unsaved changes, commits etc.
The Sidebar allows displaying different views like Explore, Search, Git and Debug. The most common view is Explore which allows navigating between files in your folder, creating new files or deleting existing ones. The Search view allows to find a search term inside the folder’s files, the Git view provides some features related to Git and Debug view provides information about breakpoints, variable and so on during debugging session.
Finally, the Editor window allows editing files. You can open up to three Editor windows at the same time – just use the Sidebar to select any file and select Open to the Side context menu item to open the file in new Editor window.
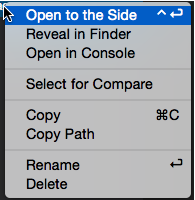
Using the context menu you can find two more useful commands: Reveal in Finder and Open in Console. The first one allows to open a folder where the selected file is located, and the second one allows to open the console in the context of the folder.
Visual Studio Code supports lots of different settings. To change existing settings you can use User Settings or Workspace Settings menu items:
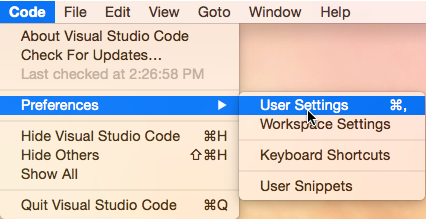
The first one allows to apply settings for all folders while the second allows to override settings for the current workspace.
Thanks to these menu items you can open existing settings by default and a new settings file which is used for storing override default settings.

It’s very comfortable because you can see all possible settings and decide what you want to change. The settings contain editor configuration, information about extensions that should be excluded from Explore and Search views, and IntelliSense settings for different languages.
Usually I like to use my mouse to invoke any command but if you prefer hot keys combinations, Visual Studio Code allows to do everything without using mouse at all – just click ⇧⌘P and in the shown pop up you can find and execute all possible commands:
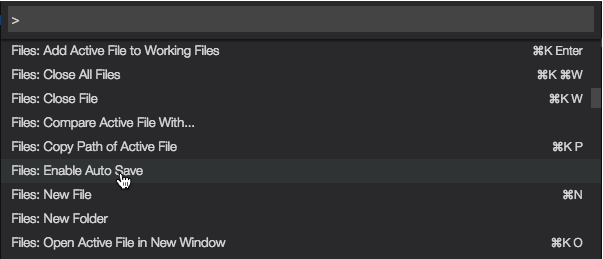
Using this window (Command Palette) you can see also hot keys combinations for future use. Of course, you can change any combination of keys by calling Preferences: Open Keyboard Shortcuts command using Command Palette.
So now you know all basic Code interface features. Later we will discuss additional features but if you want to check all of them right now it’s better to investigate Command Palette and all commands there.