State triggers and Blend
At last, Windows 10 is released and today developers have access to Visual Studio 2015 and Windows 10 SDK. I have already published some posts about Universal Windows Platform and Visual Studio 2015, and I promise lots of topics about it over next months; but today I want to drag your attention to Microsoft Blend 2015 tool which is included to Visual Studio installation.
Looks like Microsoft continues to invest in Blend and the latest release contains lots of new features. Today I want to talk about visual states editor new features.
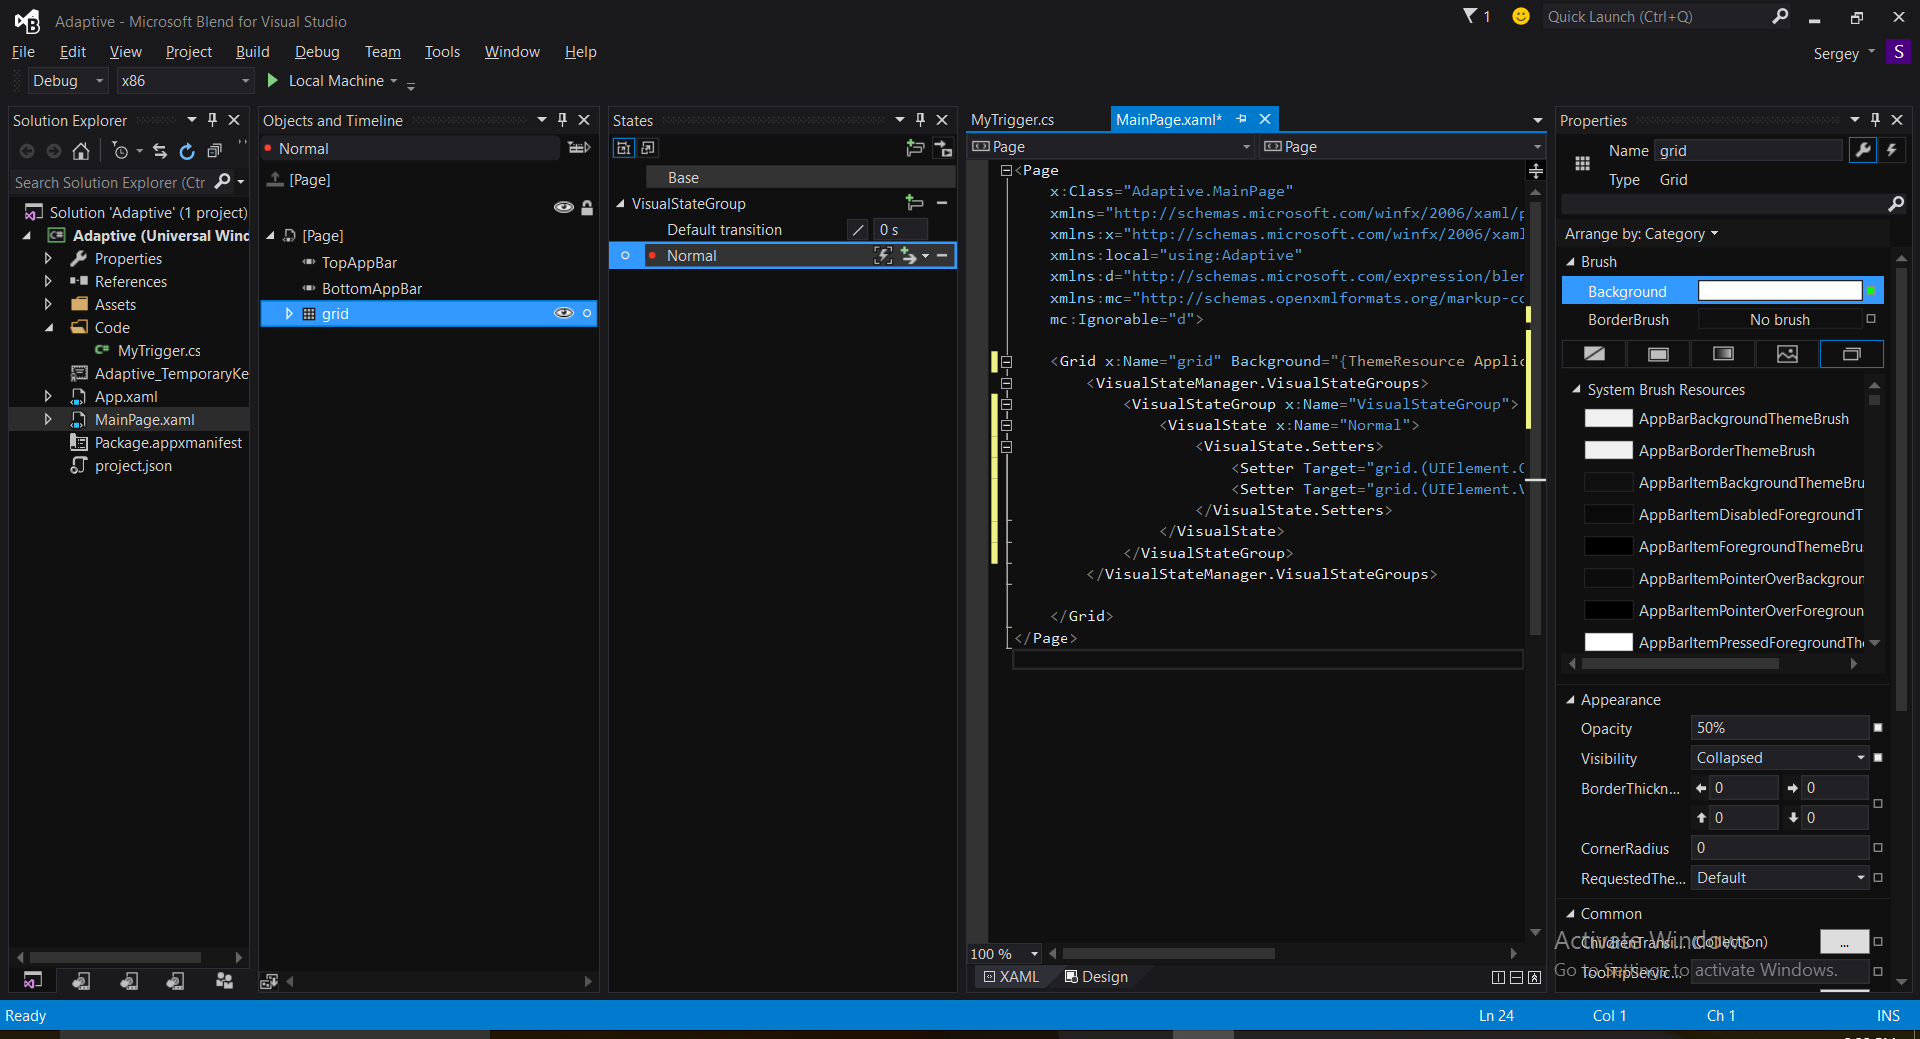
In order to see the new features just create a new project in Blend and select MainPage.xaml in Solution Explorer. Once you do this, Objects and Timeline window will show structure of the page. Usually, when we create visual states we work with main container such as Grid. So, in order to create several visual states it’s better to select the root Grid element in Object and Timeline and States windows to start editing visual states.
Blend allows you to edit visual states without coding at all. With the help of the States window you can create as many states as needed, and once you select a state, Blend switches editor to Record mode (Ctrl+R). In this mode you can change properties of any user controls and all these changes will be included to the selected state automatically. So, I propose to create just one state using Add State button in States window and select the main grid to change some properties. For example, you can change Opacity and Visibility using Properties window.
If you open XAML document you can find the following code there:
 <VisualState x:Name="Normal">
 <VisualState.Setters>
 <Setter Target="grid.(UIElement.Opacity)" Value="0.5"/>
 <Setter Target="grid.(UIElement.Visibility)" Value="Collapsed"/>
 </VisualState.Setters>
</VisualState>
So, you can see that Blend editor is fully integrated with the new approach that Universal Windows Platform implements thanks to Setter elements.
If you want to use the old approach or animate your properties from one state to another, you can continue to use the timeline and Blend will use animation instead of setters.
One more feature of Universal Windows Platform is state triggers, which allow you to move interface from one state to another without coding at all. UWP supports just AdaptiveTrigger but you can create your own triggers. Let’s see, how to use triggers in Blend.
I propose to add a class to the project which will have just one property but this class should be inherited from StateTriggerBase:
 class MyTrigger: StateTriggerBase
{
 public int State { get; set; }
}
Of course, this class doesn’t have any sense because it does not have any logic inside but it’s enough to show it in Blend. Just recompile the application because Blend will look at assemblies.
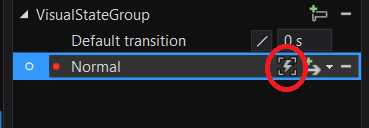
Let’s try to apply the created trigger to one of the states using the States window. Pay attention that this window contains new button called edit adaptive triggers:
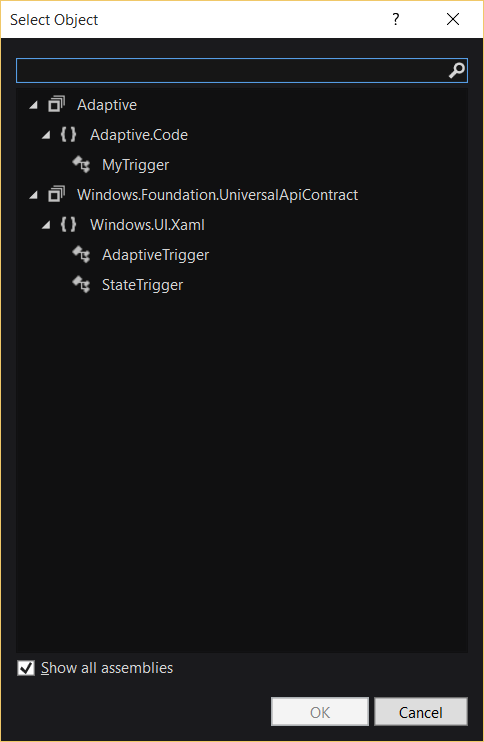
Just click the button for any state and Blend will show a dialog, which allows to select available triggers for the project:
Just select our trigger and Blend will allow you to initialize all public properties there (we have just one):
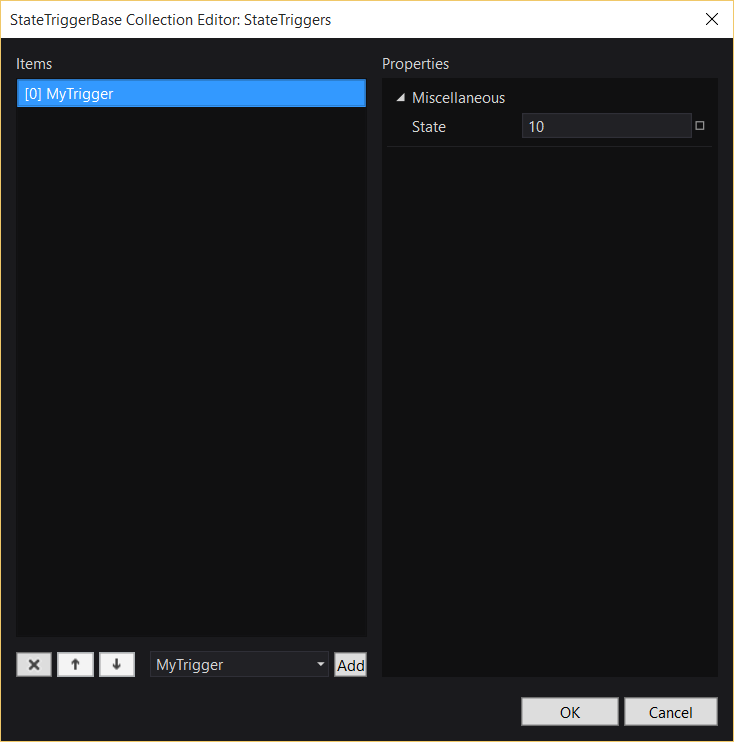
Enter any value there and click OK. Blend will generate the following code:
 <VisualState.StateTriggers>
 <Code:MyTrigger State="10"/>
</VisualState.StateTriggers>
Therefore, if you want to create a real adaptive interface and need to create lots of states and use many triggers, Microsoft Blend is the best tool for that.