Win2D: How to use graphics without knowledge in DirectX
Direct2D is a very good technology but using of it requires some knowledge in DirectX. Yes, DirectX is cool but lots of developers who build business applications have never used DirectX in their entire life. That’s why many of them ask about Direct2D features like about a separate Windows Runtime API, which is ready for non-game developers. Win2D is such an API.
Win2D is a Windows Runtime API which is available for C++ and C# developers and brings GPU optimized 2D graphic to Windows 8.x/Windows 10 XAML applications.
The best way to start working with Win2D is to visit Win2D Team Blog where you can find links to the documentation, sample code, source code (Win2D is an open source project) etc. But if you want to understand the full power of Win2D it is better to start develop something using this API. So, let’s look at some useful classes there and learn how to start developing with Win2D.
Since Win2D is an open source project and is not a part of Universal Windows Platform by default, you need to use NuGet package manager to add the latest version of Win2D libraries (use Win2D.uwp).
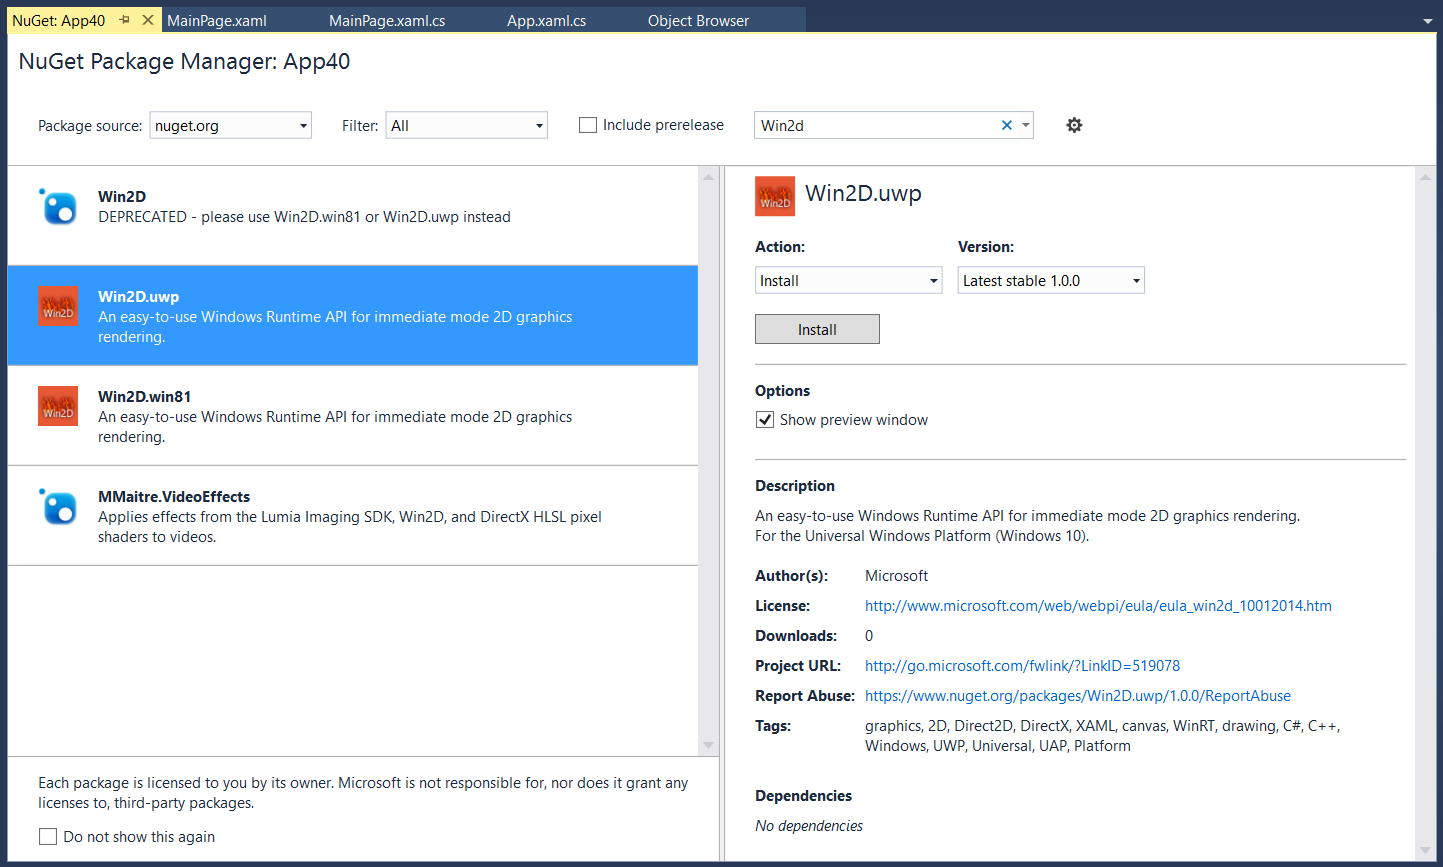
NuGet will add a reference to Microsoft.Graphics.Canvas assembly what contains all Win2D classes. So, it’s easy to open this assembly and find all namespaces and classes at the same place.
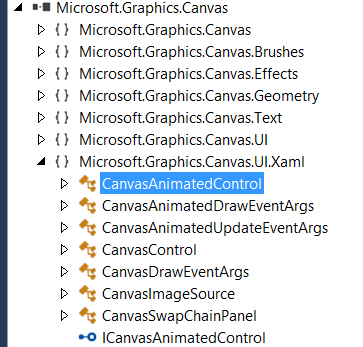
Just open Microsoft.Graphics.Canvas.UI.Xaml namespace and find all XAML controls there. You can see that there are two classes based on UserControl: CanvasAnimatedControl and CanvasControl. Additionally, there is CanvasSwapChainPanel class which is derived from Grid class. Let’s see these classes in more details.
First of all you need to add Microsoft.Graphics.Canvas.UI.Xaml namespace to your XAML file:
xmlns:canvas="using:Microsoft.Graphics.Canvas.UI.Xaml"
Right after that you can use the controls there and we will start with the simplest one, CanvasControl.
<canvas:CanvasControl Draw="CanvasControl_Draw"></canvas:CanvasControl>
CanvasControl is a place for drawing but we need some places to implement drawing algorithms. That’s why CanvasControl has two important events: Draw and CreateResources. Let’s start with Draw event and look at the code below:
 int i = 0;
private void CanvasControl_Draw(Microsoft.Graphics.Canvas.UI.Xaml.CanvasControl sender, Microsoft.Graphics.Canvas.UI.Xaml.CanvasDrawEventArgs args)
{
 i++;
 CanvasTextFormat format = new CanvasTextFormat() { FontSize = 96, FontWeight = FontWeights.Bold };
 args.DrawingSession.DrawText($"Hello {i}", 200, 100, Colors.Green, format);
}
In this event handler we used DrawText method to print text. You can find lots of different methods inside CanvasDrawingSession class and it’s easy to use. Pay special attention that I injected integer variable to the output string. Thanks to this variable we can see when our event handler works. Just run the application and try to work with the window for some time. You will see that Draw event fires when it’s needed for Windows to redraw the window. So, if you change window size your counter will increase but if you don’t touch widow at all the counter will remain the same.
That’s why CanvasControl works fine for “static” content.
The second important event for CanvasControl is CreateResources event. Let’s look at our code again and you can see that the application creates CanvasTextFormat object each time when Draw event handler is invoked. Of course, this object is not very complex but in case of real scenarios developers need to make lots of objects first before they can start drawing and additionally developers should guarantee that all objects will be created before event handler is invoked. There are two ways to initialize all needed objects: assign Draw event handler dynamically (right after initialization methods) or use CreateResources event handler. The second method is more straightforward and implements some stuff for asynchronous programming.
Let’s modify our XAML page:
<canvas:CanvasControl Draw="CanvasControl_Draw" CreateResources="CanvasControl_CreateResources"></canvas:CanvasControl>
And here is code:
 CanvasLinearGradientBrush brush;
CanvasTextFormat format;
private void CanvasControl_CreateResources(Microsoft.Graphics.Canvas.UI.Xaml.CanvasControl sender, Microsoft.Graphics.Canvas.UI.CanvasCreateResourcesEventArgs args)
{
 brush = new CanvasLinearGradientBrush(sender, Colors.Red, Colors.Green);
 brush.StartPoint = new Vector2(50, 50);
 brush.EndPoint = new Vector2(300, 300);
 format = new CanvasTextFormat() { FontSize = 96, FontWeight = FontWeights.Bold };
}

int i = 0;
private void CanvasControl_Draw(Microsoft.Graphics.Canvas.UI.Xaml.CanvasControl sender, Microsoft.Graphics.Canvas.UI.Xaml.CanvasDrawEventArgs args)
{
 i++;
 args.DrawingSession.DrawText($"Hello {i}", 50, 50, brush, format);
}
You can see that I used CanvasControl_CreateResources method to make a brush for my text.
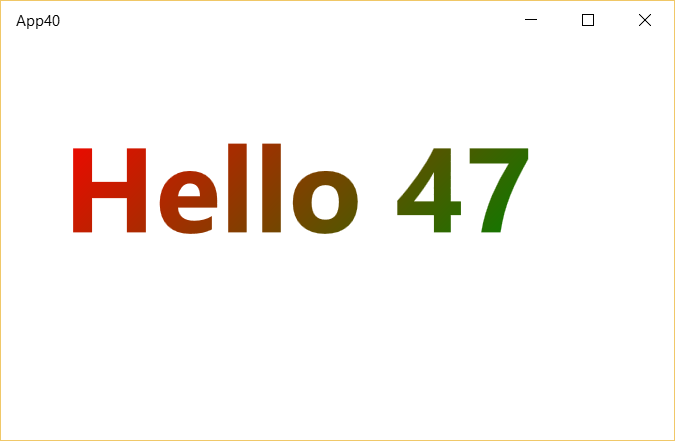
Using CreateResource event handler you can guarantee that Draw event will not be fired up to the event handler is completed.
In the previous example we used synchronous event handler for CreateResource method but even for simple image loading action you need to call asynchronous APIs. Of course advanced C# developers will add async keyword before the event handler signature but this approach doesn’t work for CreateResources event handler. Instead of async keyword you should use the following approach:
 CanvasImageBrush brush;
CanvasTextFormat format;
private void CanvasControl_CreateResources(Microsoft.Graphics.Canvas.UI.Xaml.CanvasControl sender, Microsoft.Graphics.Canvas.UI.CanvasCreateResourcesEventArgs args)
{
 args.TrackAsyncAction(CreateResources(sender).AsAsyncAction());
}

async Task CreateResources(Microsoft.Graphics.Canvas.UI.Xaml.CanvasControl sender)
{
 brush = new CanvasImageBrush(sender);
 brush.Image= await CanvasBitmap.LoadAsync(sender, "Assets/drone.jpg");

 format = new CanvasTextFormat() { FontSize = 96, FontWeight = FontWeights.Bold };
}

int i = 0;
private void CanvasControl_Draw(Microsoft.Graphics.Canvas.UI.Xaml.CanvasControl sender, Microsoft.Graphics.Canvas.UI.Xaml.CanvasDrawEventArgs args)
{
 i++;
 args.DrawingSession.DrawText($"Hello {i}", 50, 50, brush, format);
}
You can see that we used parameter of event handler to call TrackAsyncAction method and this method can get async method as a parameter.
Ok. Thanks to CanvasControl we can draw “static” content and it’s fine for many scenarios. For example, you can use this control to apply effects to images, you can create graphs or high performance text rendering application. But you cannot use CanvasControl for developing simple 2D games or similar applications which should present “dynamic” content. In order to make it, Win2D provides another control: CanvasAnimatedControl.
We can use almost the same code, slightly modifying it:
<canvas:CanvasAnimatedControl Draw="CanvasAnimatedControl_Draw" CreateResources="CanvasAnimatedControl_CreateResources"></canvas:CanvasAnimatedControl>
 CanvasImageBrush brush;
CanvasTextFormat format;
async Task CreateResources(Microsoft.Graphics.Canvas.UI.Xaml.CanvasAnimatedControl sender)
{
 brush = new CanvasImageBrush(sender);
 brush.Image= await CanvasBitmap.LoadAsync(sender, "Assets/drone.jpg");

 format = new CanvasTextFormat() { FontSize = 96, FontWeight = FontWeights.Bold };
}

int i = 0;
private void CanvasAnimatedControl_Draw(Microsoft.Graphics.Canvas.UI.Xaml.ICanvasAnimatedControl sender, Microsoft.Graphics.Canvas.UI.Xaml.CanvasAnimatedDrawEventArgs args)
{
 i++;
 args.DrawingSession.DrawText($"Hello {i}", 50, 50, brush, format);
}

private void CanvasAnimatedControl_CreateResources(Microsoft.Graphics.Canvas.UI.Xaml.CanvasAnimatedControl sender, Microsoft.Graphics.Canvas.UI.CanvasCreateResourcesEventArgs args)
{
 args.TrackAsyncAction(CreateResources(sender).AsAsyncAction());
}
You can see the same text but counter will increase very fast (every 16.6 ms or 60 steps per second). So, CanvasAnimatedControl is better to create a large number of dynamic objects that are flying, firing, jumping etc. Of course, it’s not enough to have just Draw method because in real games you need to guarantee timing and have the same speed on all devices. So, a game loop is more complex than a simple Draw method. But developers of Win2D know about it and you can find some more events and useful properties in CanvasAnimatedControl class.
Let’s review those properties and events slightly modifying the previous Draw even handler:
 private void CanvasAnimatedControl_Draw(Microsoft.Graphics.Canvas.UI.Xaml.ICanvasAnimatedControl sender, Microsoft.Graphics.Canvas.UI.Xaml.CanvasAnimatedDrawEventArgs args)
{
 i++;
 args.DrawingSession.DrawText($"Hello {i}", 50, 50, brush, format);
 sender.Paused = true;
}
You can see that we used Paused property to make pause in our game loop. And if you don’t touch the application you can see that the counter is frozen but once you resize the window the counter will grow fast. It happens because in the pause mode draw method is called once Windows needs to redraw the window. So, it’s better to use Draw event handler only for drawing. If you need to change any data in the game loop then it is better to use Update event. Update event handler will be called before Draw method and in case of pause Update event handler will be frozen.
 private void CanvasAnimatedControl_Update(Microsoft.Graphics.Canvas.UI.Xaml.ICanvasAnimatedControl sender, Microsoft.Graphics.Canvas.UI.Xaml.CanvasAnimatedUpdateEventArgs args)
{
 i++;
}
In general, Draw+Update event handlers should be called every 16.6 ms but if you have a slow device and running timeframe is greater, Update call may be passed. So, you can see several Draw calls before Update call. It allows saving same speed of the game but you can see some drawing problems. If it happens not very often it’s not very critical but in some cases you can decrease the elapsed time for each step (for example, 30 frames per second). You can easily do it using TargetElapsedTime property.
Additionally, you can use events like GameLoopStarting and GameLoopStopped. These events fire before and after the game loop and can be used for scene initialization and for destroying all objects from memory respectively.
Pay special attention that all event handlers fire in separate gaming loop. So, any actions there will not block interface thread. But developers should think how to pass the data to the gaming thread from the interface one. The best way is calling RunOnGameLoopThreadAsync method from the interface thread:
await myCanvas.RunOnGameLoopThreadAsync(()=> {/*call something here*/});
The last control in Microsoft.Graphics.Canvas.UI.Xaml namespace is CanvasSwapChainPanel. If you know something about game development you should have heard about the swap chains. The main idea is have two or more buffers (pages) for your game. The first page you use for presenting an updated scene on the screen while updating the second one behind the scene. You should not use CanvasSwapChainPanel class or CanvasSwapChain with CanvasAnimatedControl because the last one uses swap chains internally. But if you want to implement your own CanvasAnimatedControl or a similar control you can use both classes.
 var swapChain = new CanvasSwapChain(device, width, height, dpi);
swapChainPanel.SwapChain = swapChain;
//draw
swapChain.Present();
Ok, right now we have some knowledge how to draw something and what are the differences between controls there. So, it’s time to talk about other useful classes and I am going to start with image
effects.
Image effect is the most growing category in Win2D and just several days ago they added 10 more effects but we are still waiting for some classes, which help to create our own custom effects. In any case Win2D API already contains more than 50 effects, so, you definitely can find some useful filters there. Here is an example how to apply two effects to the same image:
 GrayscaleEffect effect;
GaussianBlurEffect blurEffect;
async Task CreateResources(Microsoft.Graphics.Canvas.UI.Xaml.CanvasControl sender)
{
 effect = new GrayscaleEffect();
 var bitmap=await CanvasBitmap.LoadAsync(sender, "Assets/drone.jpg");
 effect.Source = bitmap;

 blurEffect = new GaussianBlurEffect();
 blurEffect.BlurAmount = 5;
 blurEffect.Source = effect;
}

private void myCanvas_Draw(Microsoft.Graphics.Canvas.UI.Xaml.CanvasControl sender, Microsoft.Graphics.Canvas.UI.Xaml.CanvasDrawEventArgs args)
{
 args.DrawingSession.DrawImage(blurEffect);
}

private void myCanvas_CreateResources(Microsoft.Graphics.Canvas.UI.Xaml.CanvasControl sender, Microsoft.Graphics.Canvas.UI.CanvasCreateResourcesEventArgs args)
{
 args.TrackAsyncAction(CreateResources(sender).AsAsyncAction());
}
In this example I used blur and grayscale filters. Since I don’t have any other logic I used CreateResources event handler.
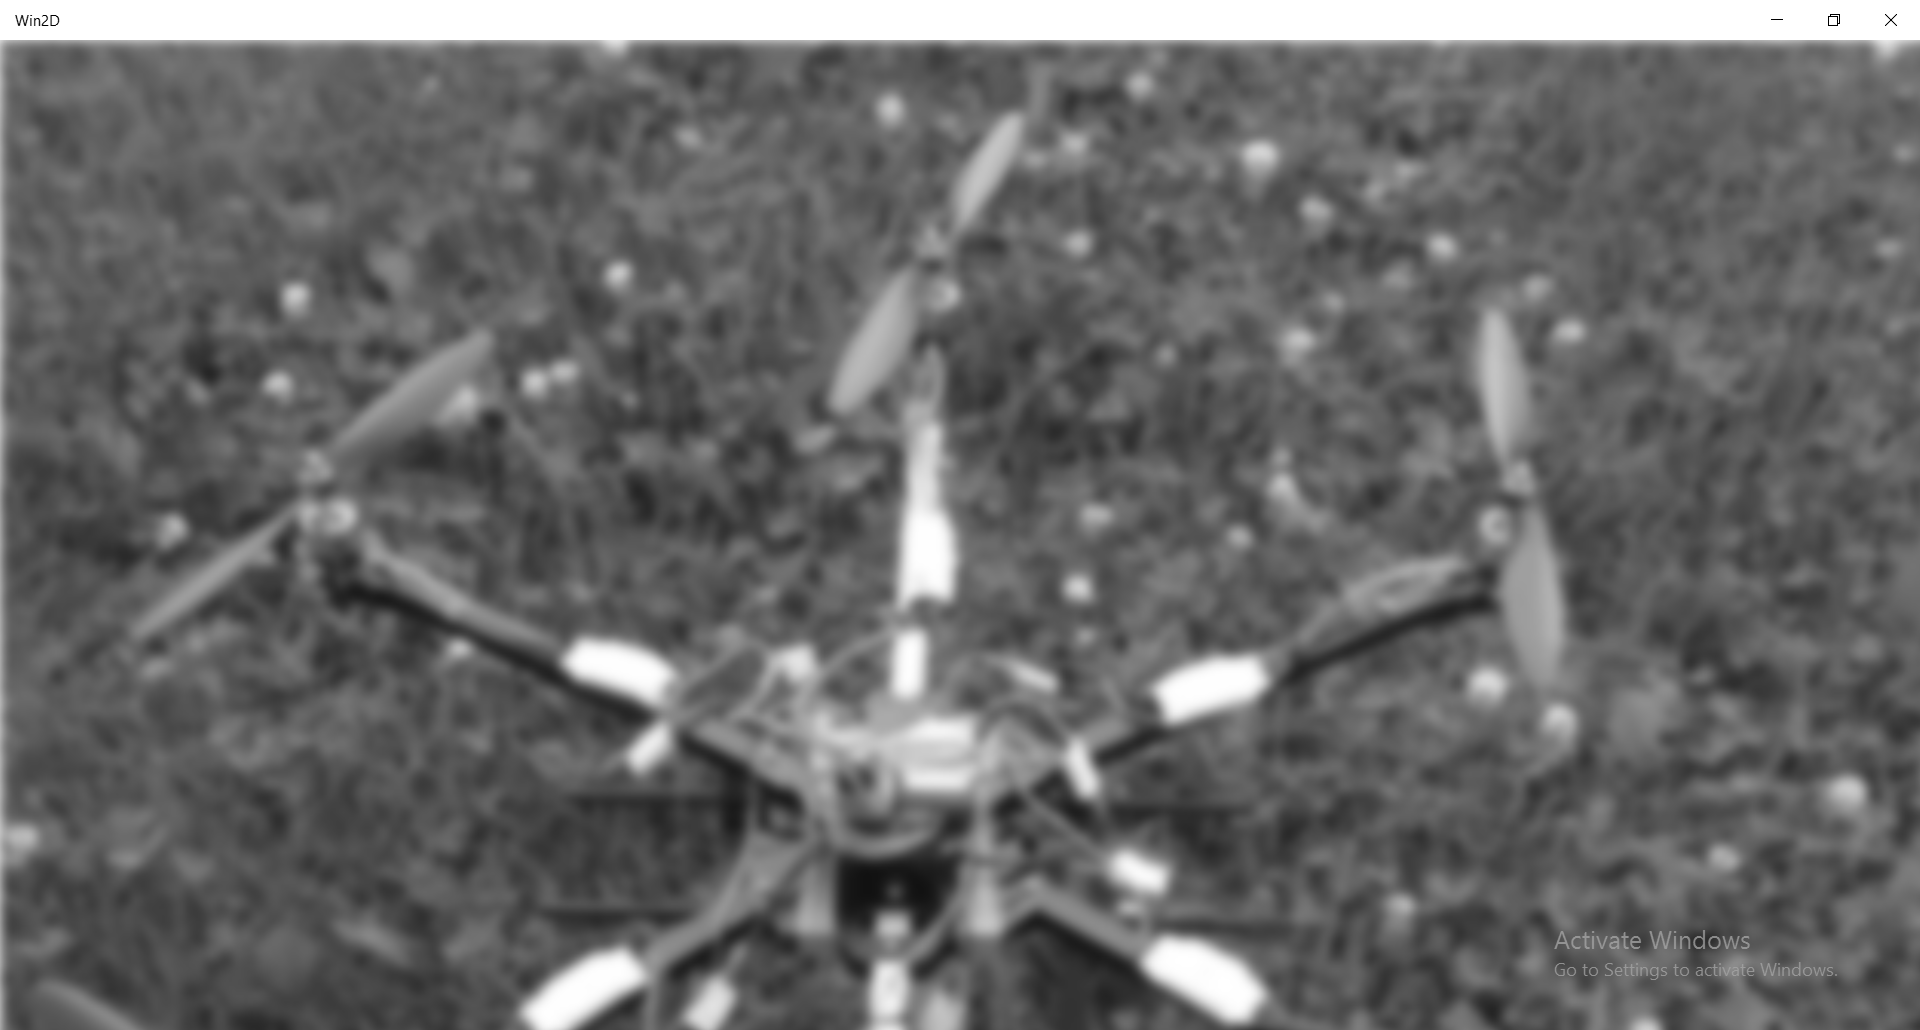
If you use the same effect for the same image you can simply apply this effect in advance and reuse it later. But in many cases you need to build more complex objects which should contain not just effect but some drawing etc. In this case you can use CanvasCommandList class in order to prepare and preserve your object for future use. I just slightly modified the previous example:
 GrayscaleEffect effect;
GaussianBlurEffect blurEffect;
CanvasCommandList cl;
async Task CreateResources(Microsoft.Graphics.Canvas.UI.Xaml.CanvasControl sender)
{
 cl = new CanvasCommandList(sender);
 using (CanvasDrawingSession clds = cl.CreateDrawingSession())
 {
 effect = new GrayscaleEffect();
 var bitmap = await CanvasBitmap.LoadAsync(sender, "Assets/drone.jpg");
 effect.Source = bitmap;

 blurEffect = new GaussianBlurEffect();
 blurEffect.BlurAmount = 5;
 blurEffect.Source = effect;

 clds.DrawImage(blurEffect);
 }
}

private void myCanvas_Draw(Microsoft.Graphics.Canvas.UI.Xaml.CanvasControl sender, Microsoft.Graphics.Canvas.UI.Xaml.CanvasDrawEventArgs args)
{
 args.DrawingSession.DrawImage(cl);
}

private void myCanvas_CreateResources(Microsoft.Graphics.Canvas.UI.Xaml.CanvasControl sender, Microsoft.Graphics.Canvas.UI.CanvasCreateResourcesEventArgs args)
{
 args.TrackAsyncAction(CreateResources(sender).AsAsyncAction());
}
In this example we created our own CanvasDrawingSession and used it to draw all needed objects and to apply filters there. Right after that we destroyed CanvasDrawingSession and preserved CanvasCommandList for future use (making global reference on it). Thanks to this approach you can create all complex objects in advance and later draw them as images.
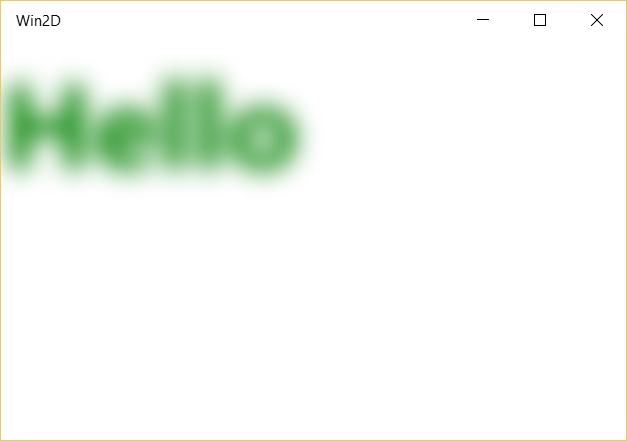
When I told about image effects I didn’t mention geometry and text but you can apply effects to these entities as well. In order to do in you need to use CanvasRenderTarget class for converting vector data to pixels:
 private void myCanvas_Draw(Microsoft.Graphics.Canvas.UI.Xaml.CanvasControl sender, Microsoft.Graphics.Canvas.UI.Xaml.CanvasDrawEventArgs args)
{
 var myBitmap = new CanvasRenderTarget(sender, 300, 300);
 using (var ds = myBitmap.CreateDrawingSession())
 {
 ds.DrawText("Hello", 0, 0, Colors.Green,
 new CanvasTextFormat() {FontSize=96, FontWeight=FontWeights.Bold });
 }

 var blur = new GaussianBlurEffect
 {
 BlurAmount = 10,
 Source = myBitmap
 };
 args.DrawingSession.DrawImage(blur);
}
Running this code you will see the following window:
I think this is enough for the first look at Win2D. I missed lots of classes that help to work outside XAML or allow working with images pixel by pixel but I hope that it’s easy to understand using documentation because Win2D is easy.