UWP: New Controls (part 5 – Media)
Of course, the existing Media controls are not new but I cannot overlook them due to number of new features there. I have developed lots of applications which work with video and I know about disadvantages of Media controls in Windows 8.x like:
- Problem with adaptive streaming – in order to start working with adaptive streaming you needed to use external libraries like Player Framework and Smooth Streaming SDK because Windows 8.x SDK doesn’t support embedded features for adaptive streaming. Even if you use these libraries you will get support for Smooth Streaming only;
- No support of existing formats for closed captions – Windows 8.x SDK doesn’t support closed captions at all. SMPTE-TT and TTML were introduced in Player Framework SDK only;
- No way to change template for existing media player control – Windows 8.x supports SystemMediaTransportControls but there were not many ways to change something. So, you had to design your own player from scratch or use existing player from Player Framework with less ability to change anything there;
Let’s see how Microsoft fixed all these disadvantages in Universal Windows Platform.
Adaptive Streaming
HTTP Live Streaming (HLS), Dynamic Adaptive Streaming over HTTP (DASH) and Microsoft Smooth Streaming are the most popular technologies for adaptive streaming. New MediaElement control supports all of them.
If you want to test how it works it’s better to use Azure account (you can use trial) and create Media Service instance there. Media Service supports dynamic packaging, so you can upload your video there and encode it using one of profiles which are ready for adaptive streaming.
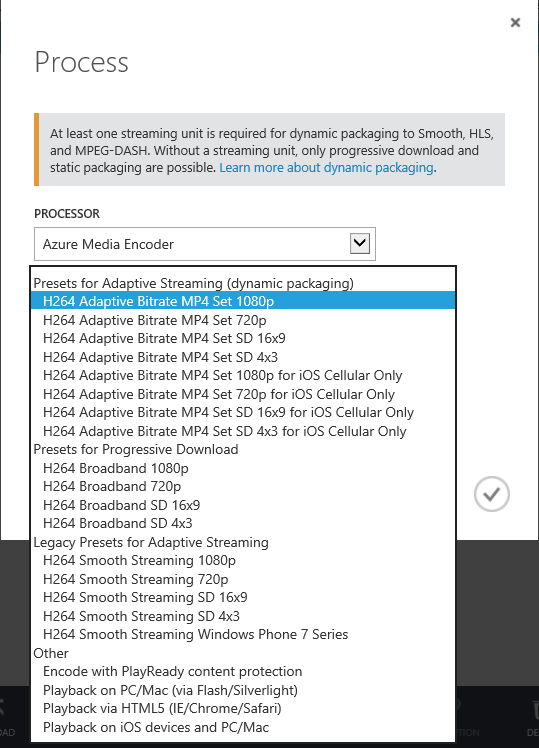
Pay special attention that you need to create at least one streaming unit. Once video is encoded, thanks to dynamic packaging, you can stream it using any format that I mentioned previously (HLS, Dash, Smooth).
Let’s test, how to work DASH. In order to do it you need just add MediaElement to XAML page:
<MediaElement Name="media" AreTransportControlsEnabled="True" />
In order to create adaptive media source you can use AdaptiveMediaSource class like this:
 AdaptiveMediaSourceCreationResult result = await AdaptiveMediaSource.CreateFromUriAsync(new Uri("https://testadaptive.streaming.mediaservices.windows.net/e1f03724-c228-4f86-9570-7321f1767fc5/Module%202.1_H264_4500kbps_AAC_und_ch2_128kbps.ism/Manifest(format=mpd-time-csf)", UriKind.Absolute));
if (result.Status == AdaptiveMediaSourceCreationStatus.Success)
{
 var astream = result.MediaSource;
 media.SetMediaStreamSource(astream);
}
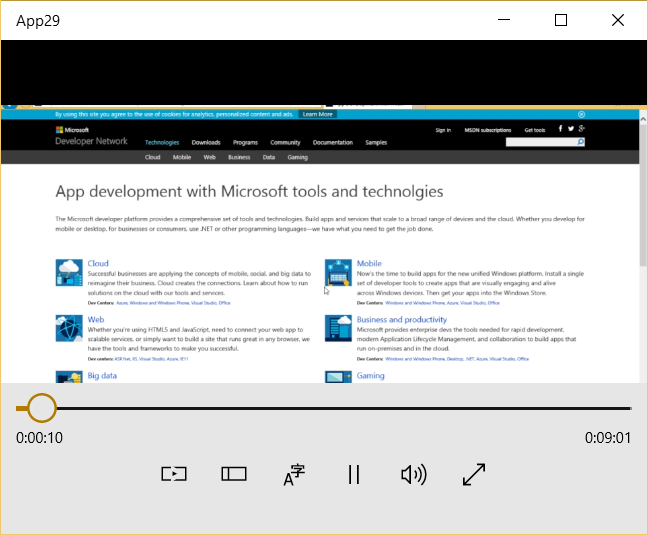
My video works fine and thanks to MediaTransportControls I have great interface for my media player:
Captions
If you want to add closed captions it’s easy to do with new controls as well. Just use the following code to associate TTM file with existing adaptive stream:
 AdaptiveMediaSourceCreationResult result = await AdaptiveMediaSource.CreateFromUriAsync(new Uri("https://testadaptive.streaming.mediaservices.windows.net/e1f03724-c228-4f86-9570-7321f1767fc5/Module%202.1_H264_4500kbps_AAC_und_ch2_128kbps.ism/Manifest(format=mpd-time-csf)", UriKind.Absolute));
if (result.Status == AdaptiveMediaSourceCreationStatus.Success)
{
 var astream = result.MediaSource;
 var ttmSource = TimedTextSource.CreateFromUri(new Uri("ms-appx:///assets/captions.ttm"));
 var mediaSource=MediaSource.CreateFromAdaptiveMediaSource(astream);
 mediaSource.ExternalTimedTextSources.Add(ttmSource);

 var mediaElement = new MediaPlaybackItem(mediaSource);

 media.SetPlaybackSource(mediaElement);
}
You can see that we use TimedTextSource class to create source based on file with captions. In order to associate the captions with media source we used MediaSource class and MediaPlaybackItem class to prepare source for MediaElement.
Template for Media
Starting with Windows 10 the MediaTransportControls class has its own states and a template according to modern design. It allows to change anything there by modifying the existing XAML template. So you should not create buttons from scratch, implement logic etc. There are three ways to get existing template for MediaTransportControl: visit MSDN, find generic.xaml file on your computer or use Blend.
Because I have written this post before release of Windows 10 SDK there was no information on MSDN but I hope that you can find it right after release.
Generic.xaml file you can find using the following path C:\Program Files (x86)\Windows Kits\10\DesignTime\CommonConfiguration\Neutral\UAP\10.0.10069.0\Generic. Just open generic.xaml and find template for MediaTransportControls there (don't edit generic.xaml - just copy the template).
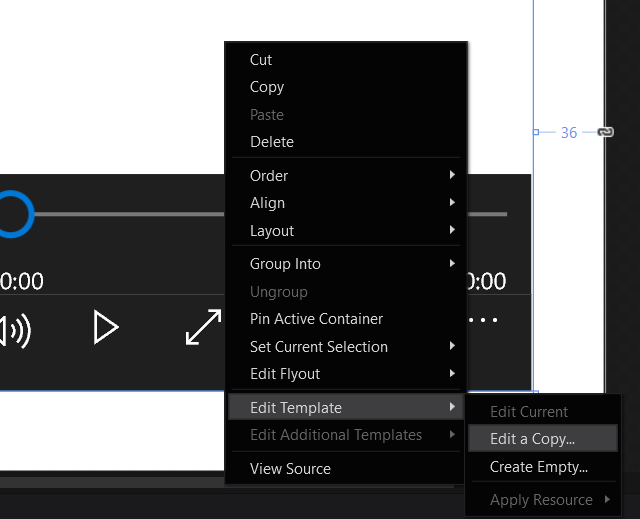
Finally, you can extract template using Blend tool. I would like recommend this way because it’s easy not just to create copy of template but to modify it as well. In order to extract template for MediaTransportControls you need to create a new project (or open existing) in Blend and add MediaTransportControls to a page. Using context menu select Edit Template -> Edit a Copy menu item.
Blend will propose to select location and name for new style. So, select it and click OK.
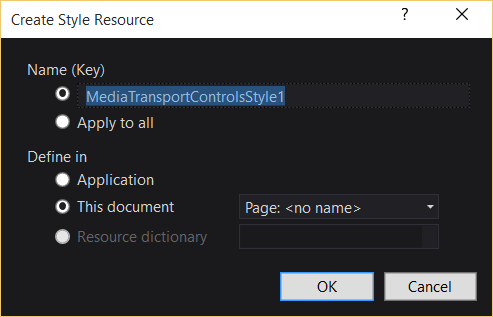
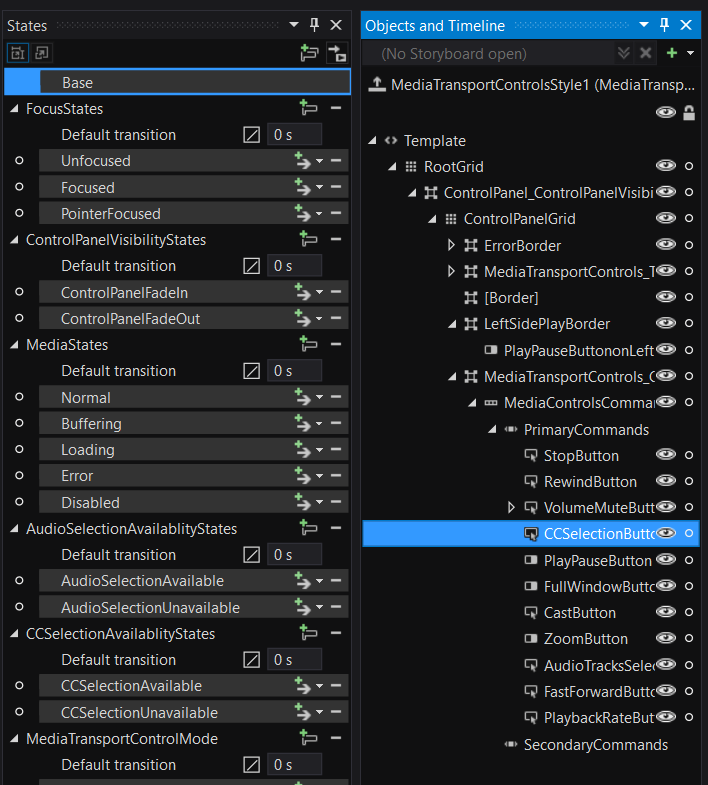
Right after it you can open XAML and modify new template there or use powerful editor in Blend to see and modify everything there: