EZ-Robot controller and Universal Windows Platform
If you already have EZ-B micro controller from EZ-Robot, there is good news for you: Universal Windows Platform SDK already available to download. I have already tested it and it’s really easy to use the SDK for developing own applications for Windows Phone, Windows 10 and even for Raspberry Pi 2. Thanks to Universal Windows Platform you can create just one application for controlling your robots using all Microsoft devices.
If you still don’t have EZ-B, I think that my post below should be interesting for you.
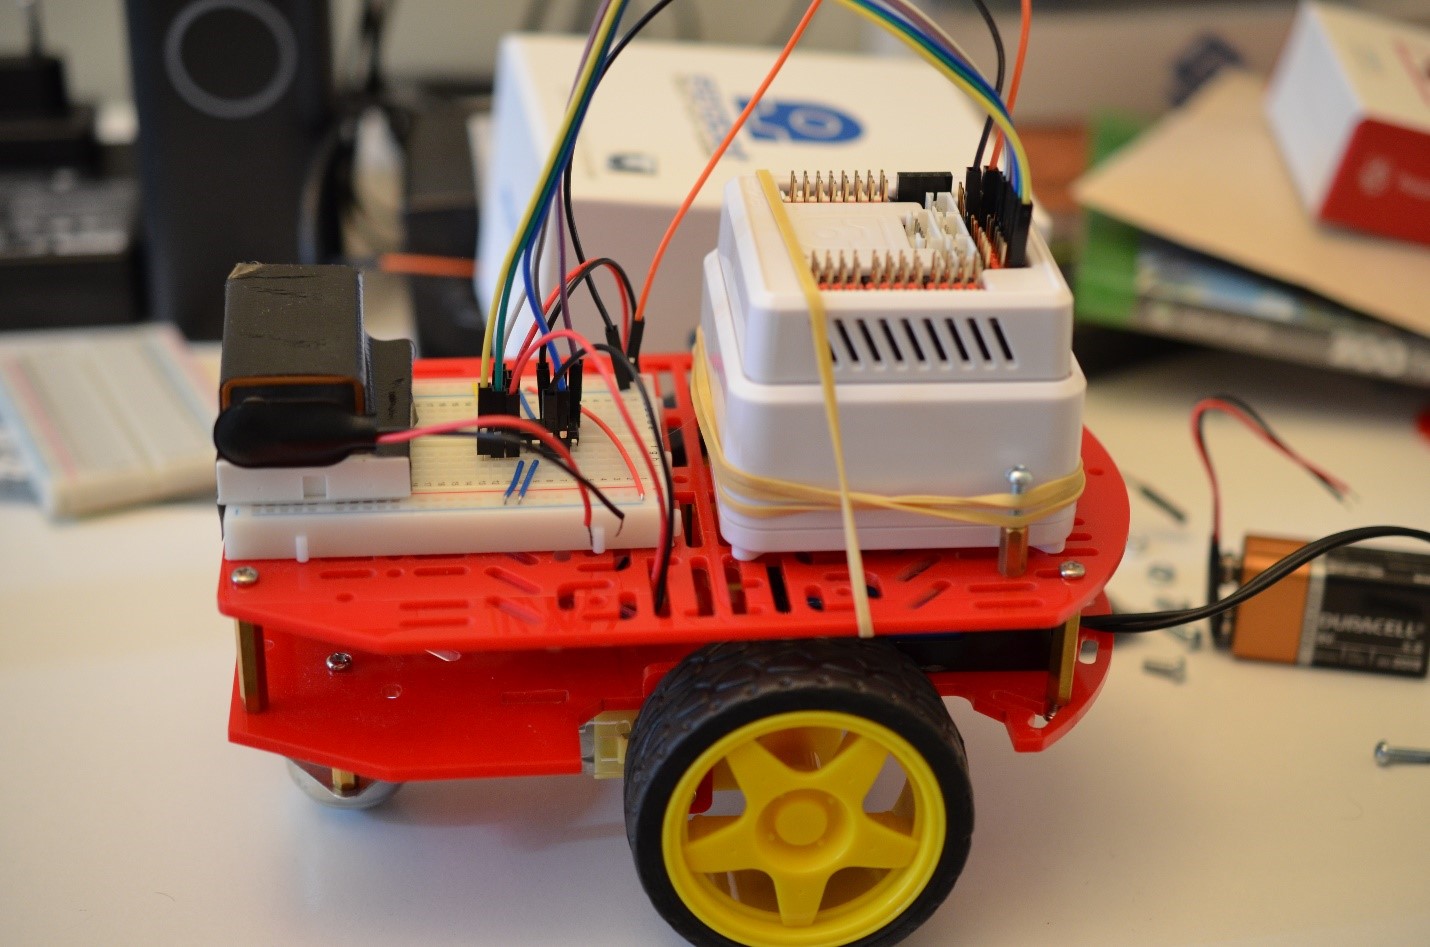
Last week I got a chance to test EZ-B controller. This controller was invented by EZ-Robot company located in Calgary and you can visit EZ-Robot site to find many different robots and components there. Besides that you can buy and use EZ-B controller separately and use it like heart and mind for your own robots including rovers, drones etc.
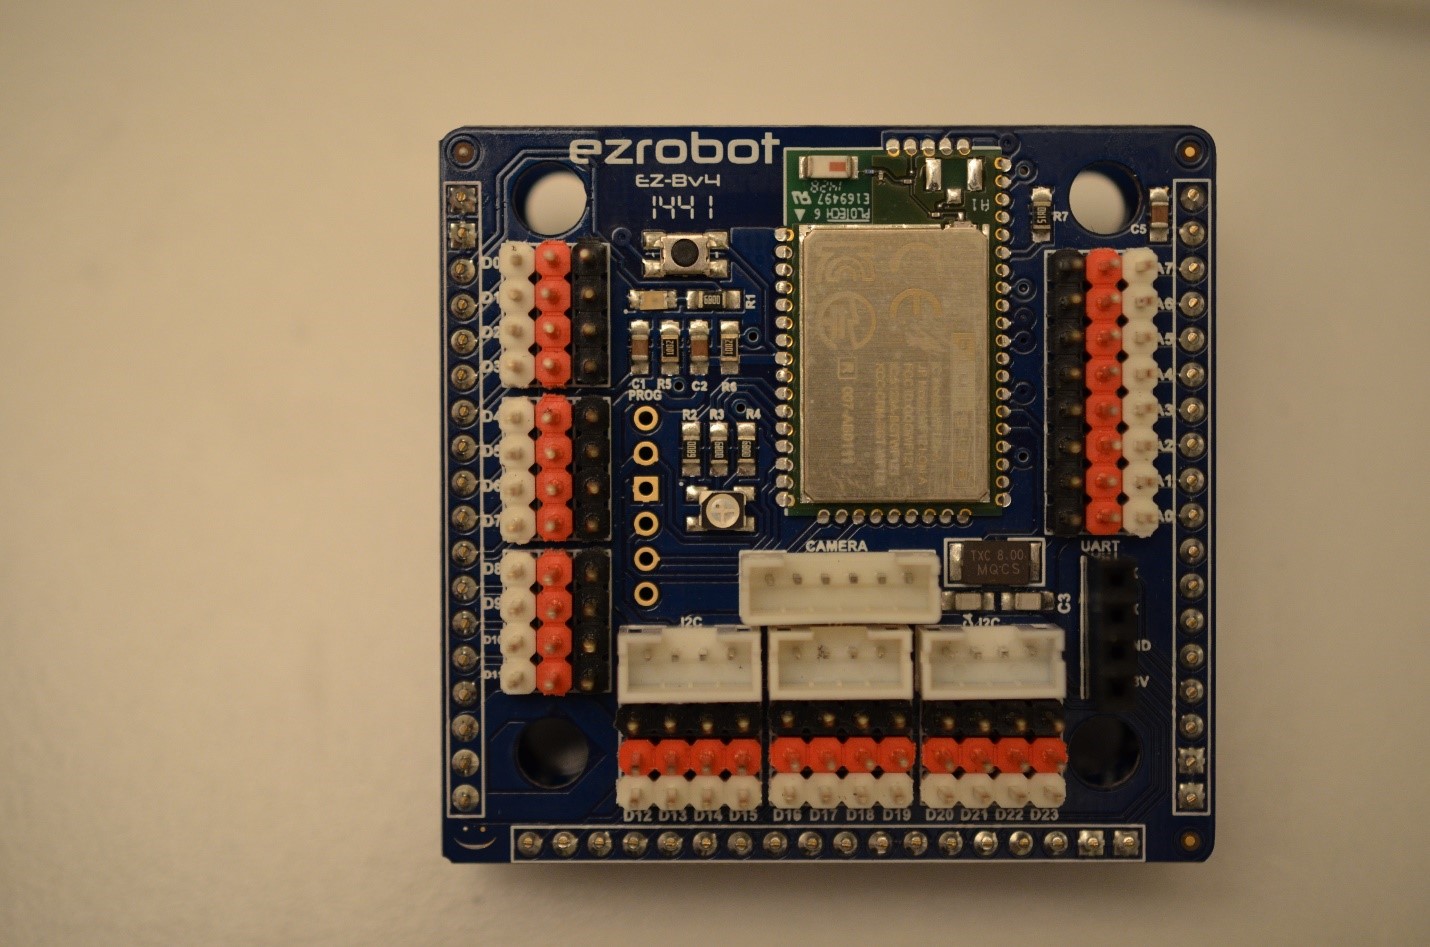
What is EZ-B? It’s a very powerful controller based on 120 MHz 32-bit ARM Cortex-M3 processor and it contains 8 analog pins, 24 digital pins, amplified speaker, camera port, I2C and UART ports and WiFi module. Therefore, from the price perspective, EZ-B is better than Arduino, Netduino and some other existing micro controllers. But what is more important, EZ-B contains Web server and all needed software to control all hardware stuff using external devices like phones, tablets, desktops etc. So, EZ-B is the best choice if you are going to control your robot directly and make all related calculations using your own device.
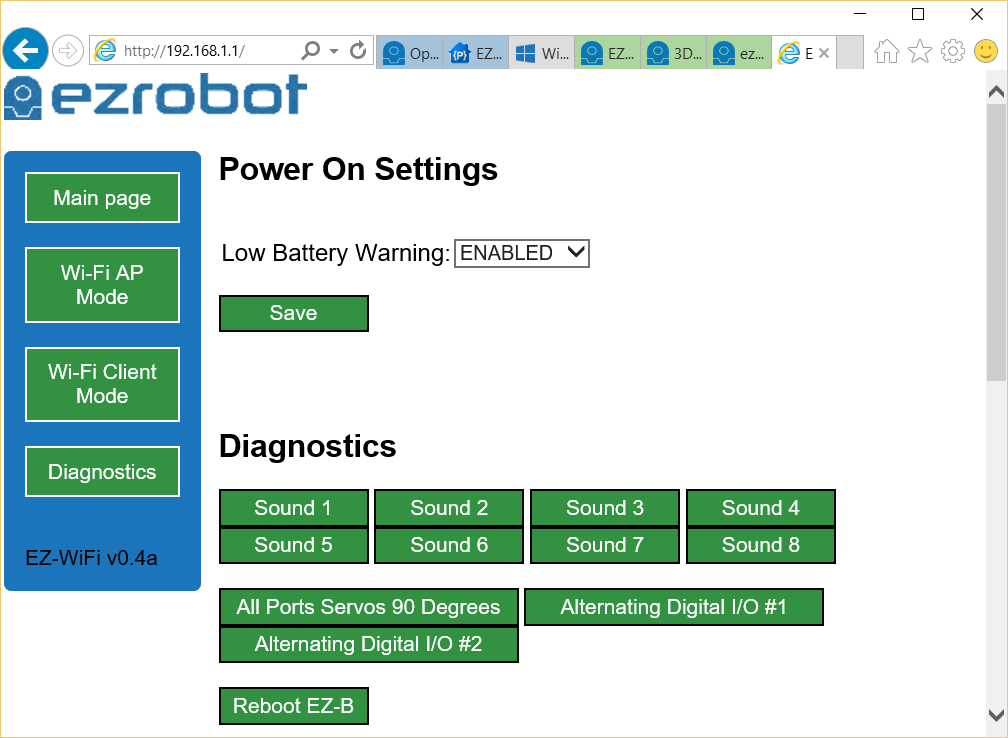
How to start developing for EZ-B? First of all you need to setup the controller. The box contains the controller itself and docking station for it which allows to use external power supply. Because EZ-B allows power from 4.5V to 16V, you can use it with power supply from Galileo or something like it or you can use battery pack. Once it’s online you can connect your PC to EZ-B WiFi network and start to setup the controller. You need to select WiFi mode. If you are in the place with local WiFi network you can switch your controller to Client Mode but if WiFi is not available, you can continue use EZ-B like access point.
Use diagnostic page to disable (or enable) Low battery warning. It can be very useful. For example I powered my EZ-B from ESC on my drone and it generates just 5V but I have my own warning system, so I just disabled EZ-B warnings.
Once EZ-B is connected to WiFi, it’s time to start developing something. In order to develop your first UWP application for EZ-B you need to download SDK for EZ-B and include it to your UWP solution. Inside EZ-B project you can find lots of classes for different sensors, servos etc. but if you have something own you can use Digital and Analog pins directly. Because EZ-Robot provides full access to source code, you can check existing classes to understand how to create new one.
In any case, the first thing that you need to do is to connect your application to EZ-B. It’s easy to do using the following code:
 EZB ezb = new EZB();
await ezb.Connect("192.168.1.1");
In this case I used EZ-B in Access Point mode, so you can use 192.168.1.1 by default. If your application is successfully connected to EZ-B, you can start working with your sensors and devices.
For example, to connect my MPU6050 I use the following code:
 sensor = new MPU6050(ezb);
sensor.Init();
var res=await sensor.GetData();
In order to work with digital pins you can use the following code:
ezb.Digital.SetDigitalPort(Digital.DigitalPortEnum.D12, true);
So, it’s really easy to start development for EZ-B.