Raspberry Pi 2 and Windows 10: My first experience
Finally, Microsoft published Windows 10 preview build for Raspberry Pi 2 (and not just for Raspberry). So, if you have Raspberry, you can visit https://dev.windows.com/en-US/iot and download the build and setup instructions.
Of course, it’s easy to prepare an SD card and put it to Raspberry but pay special attention that:
- You need to use microSD card class 10. I missed this requirement and was very upset when found that my Raspberry is not even trying to start. When I checked manual once again I checked my SD and found
that it has class 4! So, I changed it and everything started working fine; - First start requires much time to finish all things. So, you need to be patient;
- You need to connect your board to network using network cable. It’s a preview and many famous WiFi adapters don’t work on Raspberry right now. So, if your application connects to Internet you will need to use network cable all the time but if you want to create a simple LED project you need access to network at least for deploying your project;
If everything is ok you will see Raspberry image and important information like device name and IP address on the screen. So, your device is ready and it’s time to establish connection between your PC and Raspberry. In order to do it you can visit the following page to setup connection using PowerShell. I tried to make it several times and discovered some issues on my PC. Because I am not admin it was very hard to understand what happened there, so I want to share all stoppers I had:
- Set-Item issue – when I ran this command I got an exception with complicated message about private and public networks and some advice to change network from Public to Private. When I checked my network settings (Network and Sharing Center) I found that my network is Private but I have Virtual Ethernet Adapter which was created by Visual Studio installation. I simply disabled it and the exception was gone;
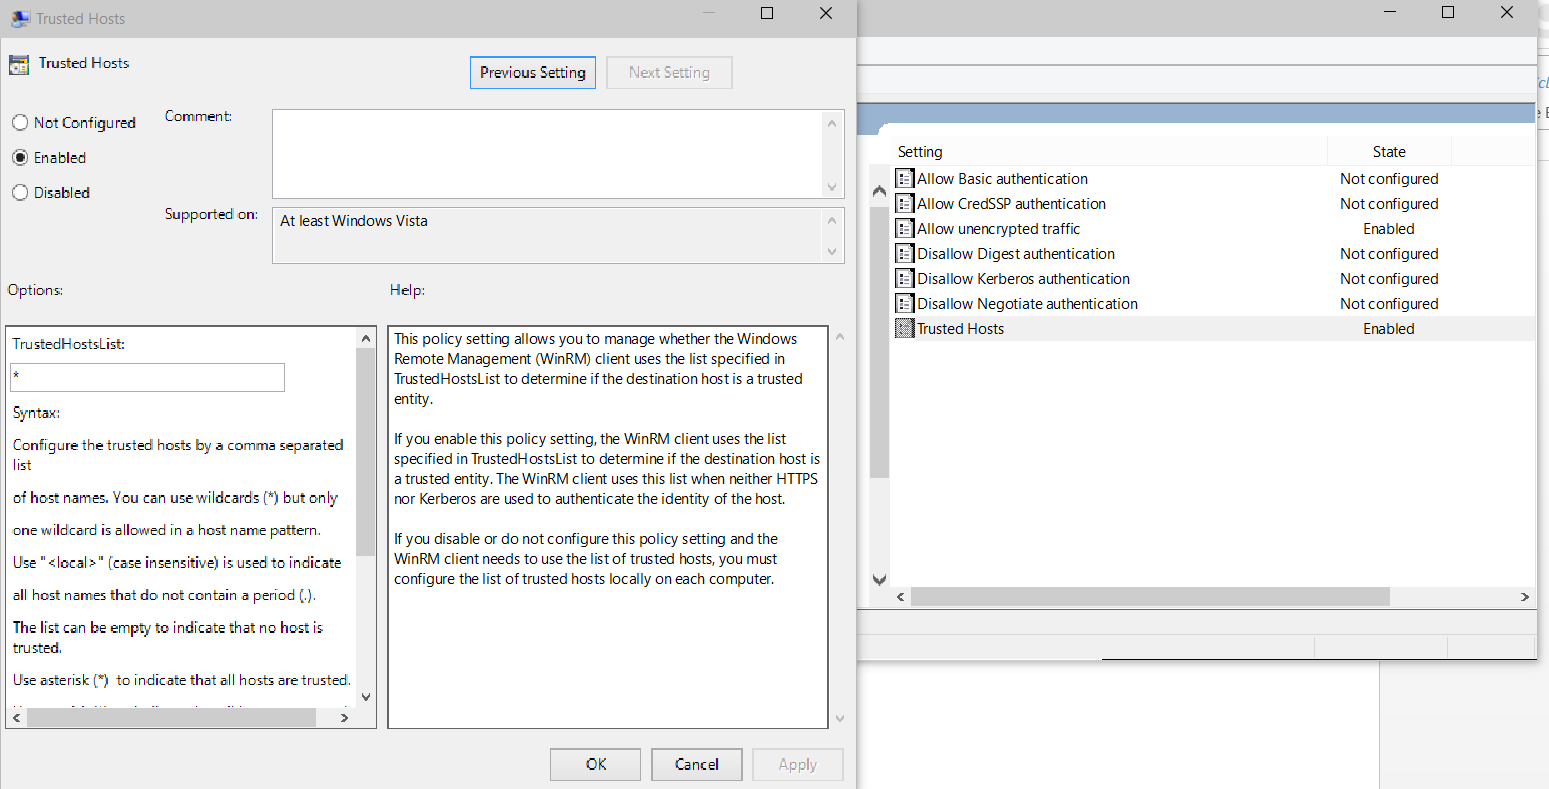
- Enter-PsSession – when I ran this command I got one more exception “The WinRM client cannot process the request. If the authentication scheme is different from Kerberos…” Once I got it I spent much time to understand how to setup WinRM but my knowledge in this area is not enough, so I selected the simplest way: I ran Gpedit.msc and navigated to Local Computer Policy->Computer Configuration->Administrative Templates->Windows Components->Windows Remote Management->WinRM Client. There I enabled Allow unencrypted traffic and Trusted Hosts and, additionally, I enabled all hosts there. And the problem was gone. I hope that you can find a way to configure it in a better way but I simply didn’t have much time to check all combinations because I wanted to start development!;
Once you connect to your Raspberry you can change password, device name, run some configuration cmdlets etc. Pay special attention that Raspberry supports two modes: headed and headless (with GUI and without GUI). You can read more about the modes here.
Right after you establish connection between your PC and Raspberry you can try to develop something. Thanks to Visual Studio it’s very easy to develop, deploy and debug solutions on Raspberry. Raspberry runs Remote Debuger by default so you should not make any additional configuration.
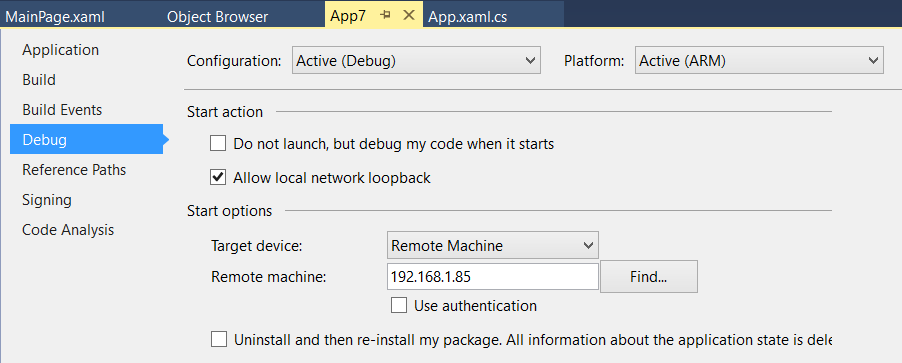
In order to start you need to select the language. You can select between Node.js, Python and standard languages for Universal applications like C#. Of course, I decided to use C# but you can easily install Python or Node.js tools from Connect site. So, in order to start you need to create a simple Universal application, change platform to ARM and select Remote Machine for deploying and debugging.
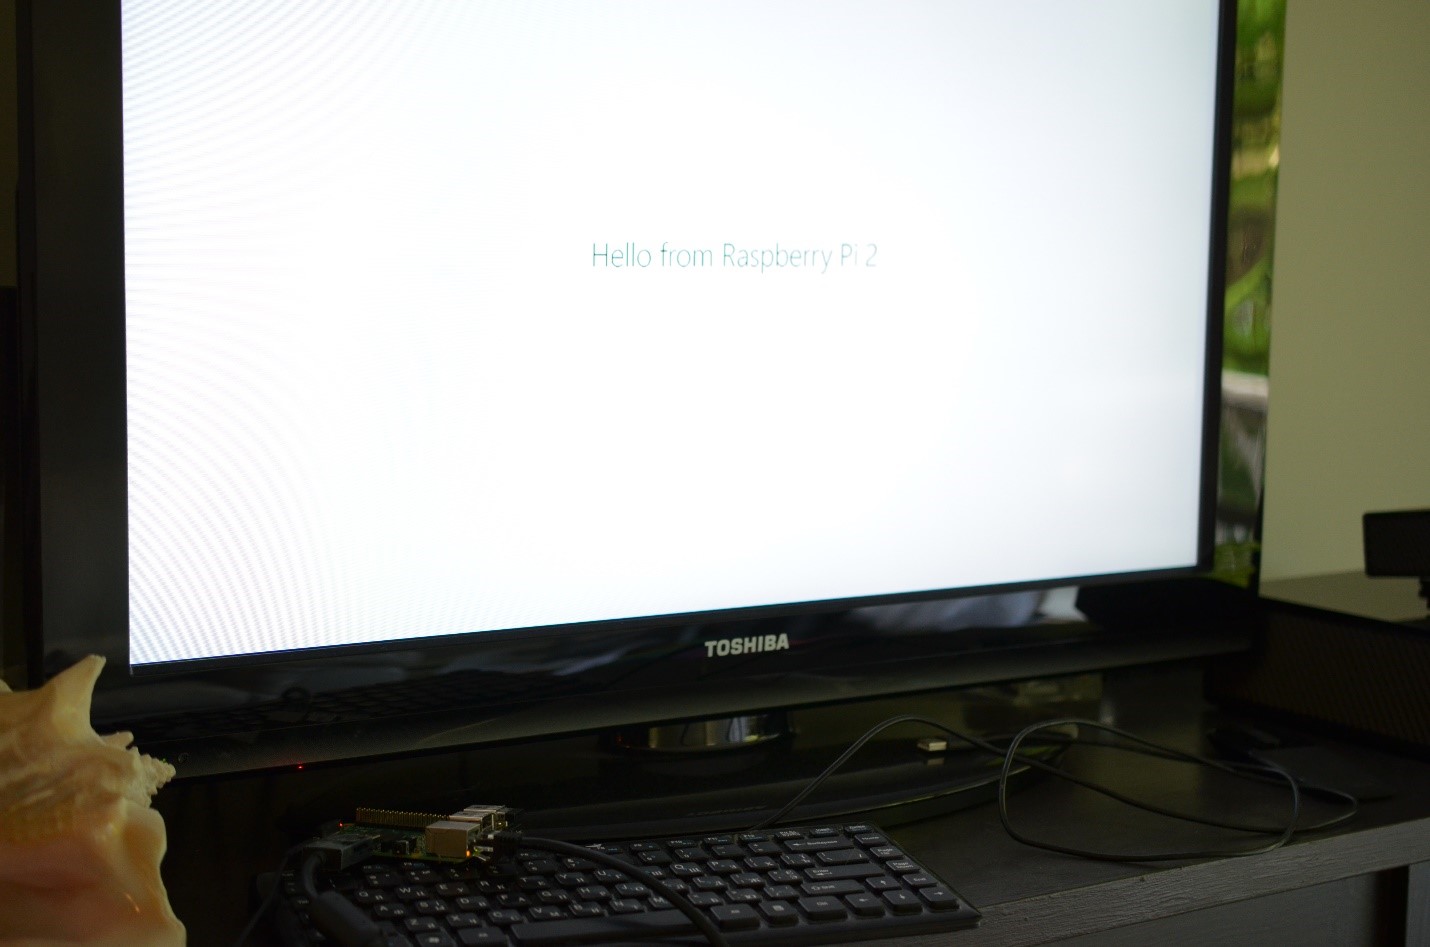
Finally I develop and deploy my first application for Raspberry:


