IoT: How to run a brushless motor using Netduino
In one of my articles about Galileo I showed how to run a simple DC motor using L293D chip. But it’s not very interesting because if you are going to build your own robot or drone, you need to use more powerful motors. For example, I have a dream: I want to build my own drone using boards like Galileo or Netduino. So, I decided to start my research with the most expensive part of drones – motor system. I already printed several propellers using my 3D printer, so I wanted to reach two goals: test the printed propellers to understand, if I can use them; understand, how to use Netduino or Galileo boards to operate more powerful motor.
If you are going to build your own drone you need several multirotor brushless motors. It’s very important because motor should work in both directions to guarantee stability of the drone and you should have a way to regulate speed to move drone in 3D space. Additionally you need to buy ESC (electronic speed controller), which will help to operate the motor. It’s kind of like more advanced version of L293D chip. Finally you need a battery. Because your motor should be powerful and you need 4-6 motors there (I decided to use 6), you cannot use a simple 9V battery – you should use lithium polymer and a charger for your LiPo battery as well. All these things are not very cheap and you need to spend more than 150 dollars in order to buy everything but don’t worry, because it’s the most expensive part of the drone.
Finally I bought the following things:
1000 Kv brushless motor + 30A ESC – I bought 6 motors and 6 ESC;
5100 mAh IRIS+ battery – It’s a very powerful battery, which is used by IRIS drone;
A charger – there many different charges in the market, so you can select the cheapest one;
Once I got my package I spent much time to run the motor. It was not easy because you should understand which signals to send ESC to start moving. In my case I got ESC without any instructions, model number etc. So, I tried to use the standard procedure to initialize it:
Attention: ESC has three wires, which you connect to your board (ground, signal and power). Don’t connect red wire (power) to your board. ESC doesn’t require additional power because it’s enough power from LiPo battery. Officially you can use it in order to send some power to your board (or fly controller) but I still didn’t test it.
First of all, you should setup your ESC. In order to do it you need to send the highest power signal from ESC range and plugin you ESC to power (LiPo). Your ESC should initialize the highest number and finish it with one beep;
Once you have heard ESC beep you should send the lowest signal. If you are using your ESC for the second time you need to send the lowest signal before you connect ESC to LiPo. If everything is OK, your ESC will send several beeps, which are signals about number of cells in your battery;
If everything is OK, you can start to send different signals inside your range in order to operate your motor;
Attention. ESC has three wires which you should connect to the motor wires. You can use any sequence. Depends on sequence, the motor will operate in different directions.
The procedure looks very simple but there are still several questions. For example, it is not clear, which signal I should send to ESC and how to setup your PWM pin in order to send the right signals.
Attention. In order to send signals to ESC you should use PMW signals. In case of Galileo, all PMW are marked by “~”. In case of Netduino 2 Plus you can use pins 3,5,6,9,10,11.
Officially you can use Servo library for Galileo and find the similar library for Netduino. I tried to use this approach but my ESC just sent beep-beep-beep… signals without any results (these beeps say that signals from the board are not in the range). So, I decided to forget about standard libraries and use PMW directly. Finally I found the following parameters for PMW constructor in .NET Micro Framework:
High signal – PWM(PWMChannels.PWM_PIN_D5, 20000, 1750, PWM.ScaleFactor.Microseconds, false);
Low signal – PWM(PWMChannels.PWM_PIN_D5, 20000, 1250, PWM.ScaleFactor.Microseconds, false);
So, in order to initialize my PMW I just use these lines of code in debug mode. I send high signal, stop execution (using breakpoint) there and attach my LiPo battery. Once the motor sent the right signal I executed the second command.
In order to test my motor I connected a joystick to my board and implemented the following code:
 public static void Main()
{
 AnalogInput an1 = new AnalogInput(AnalogChannels.ANALOG_PIN_A0,1000,0,-1);
 AnalogInput an2 = new AnalogInput(AnalogChannels.ANALOG_PIN_A1, 1000, 0, -1);
 InputPort p = new InputPort(Pins.GPIO_PIN_D8,
 true, Port.ResistorMode.PullUp);

 PWM pwm = new PWM(Cpu.PWMChannel.PWM_0, 20000,
 1750, PWM.ScaleFactor.Microseconds, false);

 bool flag = false;
 bool isStarted = false;

 while(true)
 {
 if (flag)
 {
 if (isStarted==false)
 {
 pwm.Duration = 1250;
 pwm.Period = 20000;

 pwm.Start();
 isStarted = true;
 Thread.Sleep(5000);
 }
 double posx=an1.Read();
 double posy=an2.Read();
 if ((posx<500)||(posy<500))
 {
 uint duration = pwm.Duration;
 if (posx<500)
 {
 duration-=10;
 }
 if (posy<500)
 {
 duration+=10;
 }
 if (duration > 1750) duration = 1750;
 if (duration < 1250) duration = 1250;
 pwm.Duration = duration;
 pwm.Period = 20000;
 pwm.Start();
 Thread.Sleep(500);

 }
 if (p.Read() == false)
 {
 pwm.Stop();
 isStarted = false;
 flag = false;
 Thread.Sleep(1000);
 }
 }
 else
 {
 if (p.Read()==false)
 {
 flag = true;
 Thread.Sleep(1000);
 }
 }
 }
}
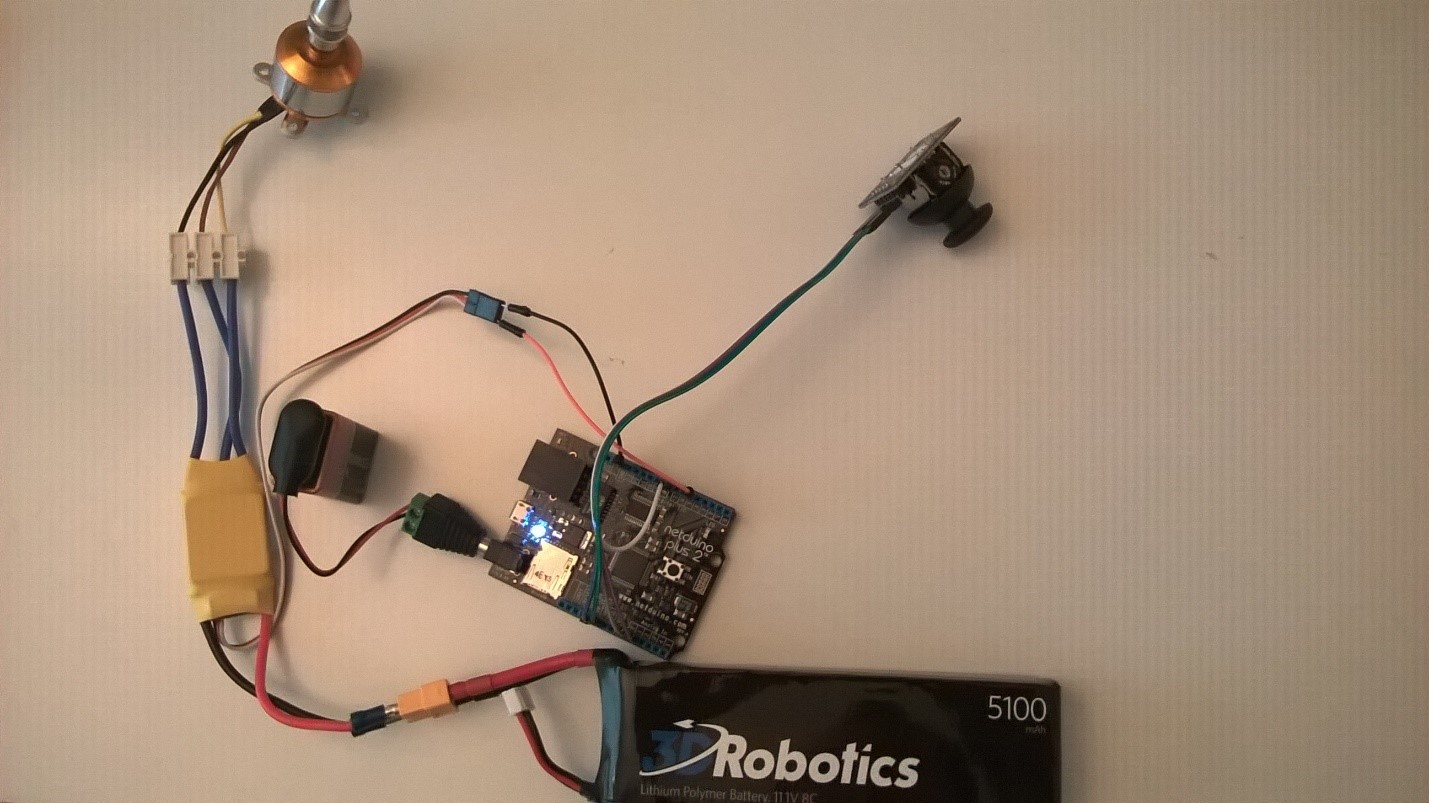
Thanks to that code I got a chance to turn on and turn off my motor using click, and speed up and down my motor using up and left directions of joystick (my joystick has been broken, so I could not use up and down).
Of course, in order to test the motor with a propeller, you should think about the right environment. First of all you should fix your motor. I made a mistake there, I used several bolts in order to fix my motor on top of the cardboard box. It didn’t stop my motor and it was trying to fly with a piece of the box. Thanks to Galaxy I am still alive but right now I am printing a new propeller. I still don’t understand why I decided that a cardboard box would stop the motor which should be able to get the drone up to the sky.