Kinect With Me Part 2 - Tracking Bodies and Overlaying Shapes on Infrared Data
This Kinect for Windows v2 tutorial series will help you build an interactive Kinect app using Visual Studio and C#. You are expected to have basic experience with C# and know your way around Visual Studio. Throughout the series, you will learn how to set up your Kinect for Windows v2 sensor and dev environment, how to track skeletons and hand positions, how to manipulate the data from the colour and infrared sensors and the microphone array, how to recognize hand gestures, and how to put it all together in a deployable Windows app.
Level: Beginner to Intermediate
If you have not yet done so, I recommend you begin with Part 1: Setting Up Your Machine. Another great resource is Getting Rolling with Kinect for Windows v2 SDK, a post by Microsoft Student Partner Louis St-Amour.
Welcome to part 2 of the Kinect With Me Kinect for Windows development series! Last time we set up our dev environments for Kinect for Windows development. Today we'll start getting into the code with an intro to body tracking and overlaying shapes on the body in real time. By the end of this tutorial, you will know how to recognize bodies and overlay images that move with the skeleton.
To start, we'll keep it easy and use the infrared sensor so we don't need to deal with colour. By the end of this tutorial we will have an app that displays the sensor's IR feed with a red circle on the head of the bodies in view.
1) Add a Canvas for the Infrared Feed
Within the main Grid on MainPage.xaml, add an Image and a Canvas. For now we'll use 512x424 dimensions because that is the resolution of the IR sensor.
<Grid Background="{ThemeResource ApplicationPageBackgroundThemeBrush}">
<Image Name="image" Width="512" Height="424"/>
<Canvas Name="bodyCanvas" Width="512" Height="424"/>
</Grid>
2) Initialize the Sensor and Related Body Data Structures
Click on over to the MainPage.xaml.cs file, where we'll give our app some eyes. The very first thing you want to do is add WindowsPreview.Kinect:
using WindowsPreview.Kinect;
Then we'll set up the objects we need:
KinectSensor sensor;
InfraredFrameReader irReader;
ushort[] irData;
byte[] irDataConverted;
WriteableBitmap irBitmap;
Body[] bodies;
MultiSourceFrameReader msfr;
And initialize them on MainPage_Loaded:
void MainPage_Loaded(object sender, RoutedEventArgs e)
{
sensor = KinectSensor.GetDefault();
irReader = sensor.InfraredFrameSource.OpenReader();
FrameDescription fd = sensor.InfraredFrameSource.FrameDescription;
irData = new ushort[fd.LengthInPixels];
irDataConverted = new byte[fd.LengthInPixels * 4];
irBitmap = new WriteableBitmap(fd.Width, fd.Height);
image.Source = irBitmap;
bodies = new Body[6];
msfr = sensor.OpenMultiSourceFrameReader(FrameSourceTypes.Body | FrameSourceTypes.Infrared);
msfr.MultiSourceFrameArrived += msfr_MultiSourceFrameArrived;
sensor.Open();
}
Essentially what we're doing here is setting up the infrared reader and setting the image (that we made in our xaml file) to the infrared data. We set it up in a WriteableBitmap so it is properly formatted, and set image.Source equal to that WriteableBitmap. Then we initialize the bodies array, which will store the Body objects identified by the sensor. You'll notice that we give the Body array a size of 6 because the Kinect v2 can track up to six bodies simultaneously. Keep in mind that, while six bodies can be tracked, only two of those bodies can have recognized hand states at any given time (but we'll deal more with that later). Finally, we open a MultiSourceFrameReader on the sensor and create a method, msfr_MultiSourceFrameArrived, to handle each frame that arrives in the reader.
3) Handle Frames and Display Them in the App
Now, let's write the FrameArrived method for the MultiSourceFrameReader msfr. This will take the frames acquired by the reader and, for each frame called irFrame, convert it into a usable shade and copy it into irBitmap to be displayed in the image frame. The infrared sensor represents the presence of bodies by integers of 1-5 representing the distance between the sensor and the part of the body at that pixel. In the following code we set up our frames and display the Kinect's infrared view in the image part of our app.
void msfr_MultiSourceFrameArrived(MultiSourceFrameReader sender, MultiSourceFrameArrivedEventArgs args)
{
using (MultiSourceFrame msf = args.FrameReference.AcquireFrame())
{
if (msf != null)
{
using (BodyFrame bodyFrame = msf.BodyFrameReference.AcquireFrame())
{
using (InfraredFrame irFrame = msf.InfraredFrameReference.AcquireFrame())
{
if (bodyFrame != null && irFrame != null)
{
irFrame.CopyFrameDataToArray(irData);
for (int i = 0; i < irData.Length; i++)
{
byte intensity = (byte)(irData[i] >> 8);
irDataConverted[i * 4] = intensity;
irDataConverted[i * 4 + 1] = intensity;
irDataConverted[i * 4 + 2] = intensity;
irDataConverted[i * 4 + 3] = 255;
}
irDataConverted.CopyTo(irBitmap.PixelBuffer);
irBitmap.Invalidate();
}
}
}
}
}
}
Now when you run your app you should see something like this (but with you in the frame instead of me!):
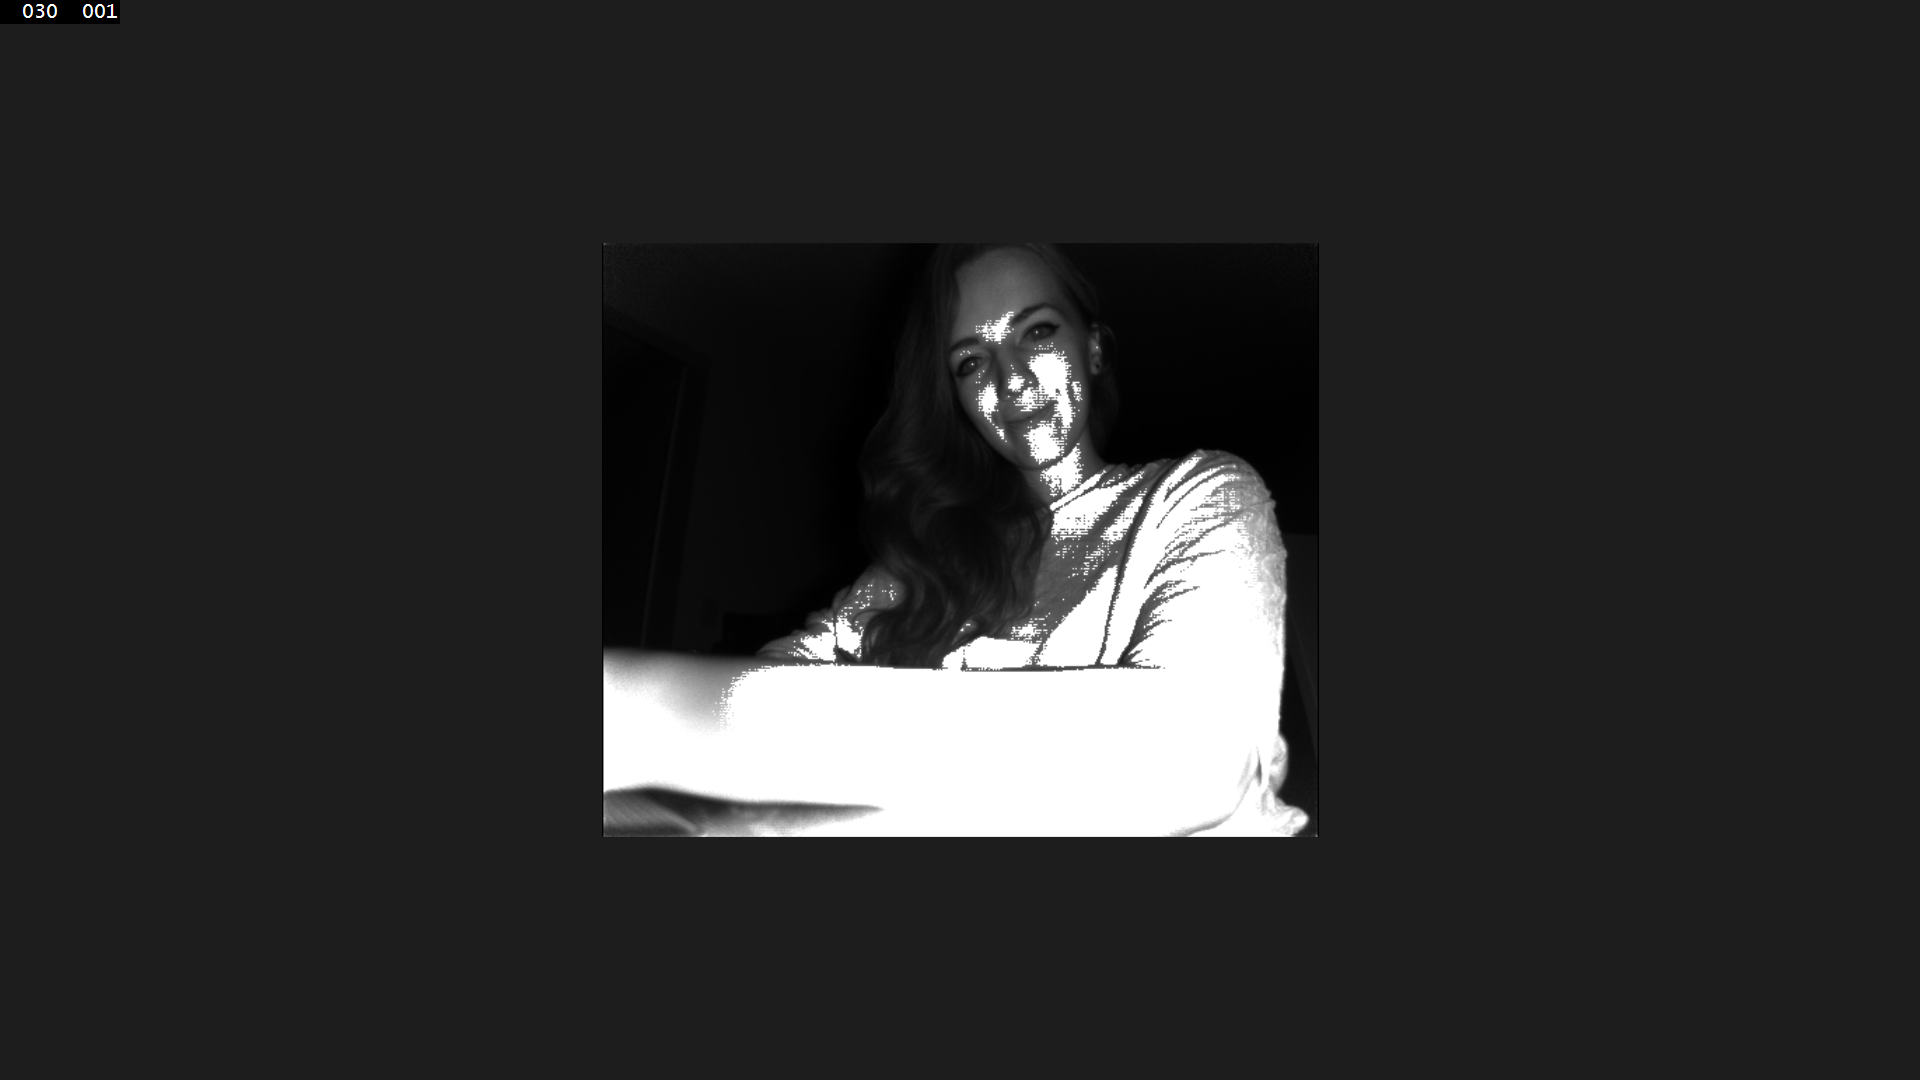
Great! Now the Kinect sees you…but does it recognize you as a body? Let's find out!
4) Overlay Shapes On Tracked Bodies
In the deepest if statement, after the line irBitmap.Invalidate();, we'll add code to display a red circle over the heads of the bodies in view. Pay close attention to how we position the circle, 25px in from the left and top of the head, so it is centered on the head. If you want, play around with this step a bit and share your screenshots on Twitter with the hashtag #kinectwithme (tweet it at @theTrendyTechie and @cdndevs)! The most creative one gets a shoutout in Kinect With Me Part 3.
First we add:
using Windows.UI.Xaml.Shapes;
using Windows.UI;
Then we can write the fun stuff:
bodyFrame.GetAndRefreshBodyData(bodies);
bodyCanvas.Children.Clear();
foreach (Body body in bodies)
{
if (body.IsTracked)
{
Joint headJoint = body.Joints[JointType.Head];
if (headJoint.TrackingState == TrackingState.Tracked)
{
DepthSpacePoint dsp = sensor.CoordinateMapper.MapCameraPointToDepthSpace(headJoint.Position);
Ellipse headCircle = newEllipse(){Width = 50, Height = 50, Fill = newSolidColorBrush(Color.FromArgb(255,255,0,0))};
bodyCanvas.Children.Add(headCircle);
Canvas.SetLeft(headCircle, dsp.X - 25);
Canvas.SetTop(headCircle, dsp.Y - 25);
}
}
}
Now when you launch your app, you should see that your face is now covered by a red circle (move back if you don't see it at first, you may be too close to the sensor). If it is, congratulations! You've successfully learned how to track bodies using Kinect, and overlay shapes to convey this to the user. Conveying a successful connection is very important for the user experience of Kinect apps. It is not just enough for the app to work; the user must know that it works. Before we added the circle we had no idea whether our bodies were being tracked or recognized at all. Adding the circle conveyed to us when things were working as expected.
.png)
Summary: Today we learned how to start tracking bodies using the infrared sensor in our app, and how to overlay shapes (or images, or text, for that matter!) on a specific part of the body, that will move with the body as it is tracked.
This tutorial was partially inspired by the MVA course by Ben Lower and Rob Relyea, Programming Kinect for Windows v2 Jump Start. They provide a great introduction, and much of the code you see here is very similar to the code in Part 2 of their course. Starting with next week's tutorial we will deviate from their course and start introducing more concepts.
Thanks for Kinecting with me! See you next Thursday for Part 3 of this tutorial series. Don't forget to tweet at @theTrendyTechie and @cdndevs with the hashtag #kinectwithme to share your screenshots and questions!
***************
Sage Franch is a Technical Evangelist at Microsoft and blogger at Trendy Techie.