Improve your JavaScript with Web Essentials and JSHint
Visual Studio has some great features to help you write better JavaScript. JavaScript is a first class citizen in Visual Studio 2013 now with features like IntelliSense and Code Snippets.
With the Web Essentials extension, you get even more great features to help improve your JavaScript. Web Essentials is a Visual Studio plugin that every web developer should have installed. The list of productivity features is huge.
One feature that I have been using a lot lately is the integration with JSHint.
What is JSHint?
JSHint is a source code analysis tool for JavaScript. It can analyze your JavaScript code and flag common misuses or suspicious code. Think of it as FxCop for JavaScript.
How does it work?
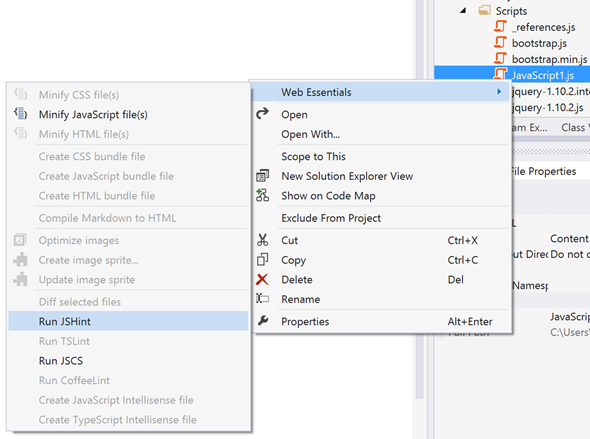
Once Web Essentials is installed, simply right click on either a JavaScript file or a folder containing JavaScript files and select Web Essentials –> Run JSHint from the menu.
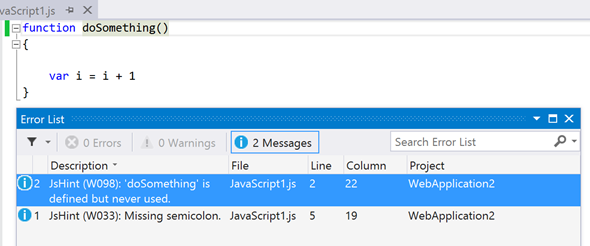
The output from JSHint will be listed as Messages in the Error List (If the Error List is not visible, you can show it by selecting View –> Error List from the main menu).
In this example, we can see that I have a method that is never used and a missing semi-colon on line 5.
JSHint has a long list of rules that it checks against. Try not to take it personally if your Error List contains a large number of JSHint. After all, JSHint is just trying to help.
From a productivity perspective, I love that Web Essentials automatically runs JSHint against any JavaScript files that are open. Every time you save a JavaScript file, JSHint is re-run and the Error List is updated. I have started to keep a close eye on the Error List when making changes to JavaScript files.
JSHint Options
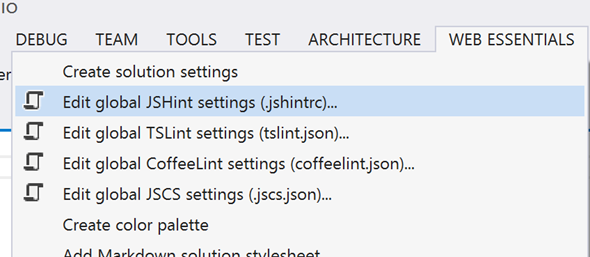
You might not agree with some of the things that JSHint points out in your code, and that’s okay. Your style is your style. You have the option to change JSHint options globally (for all Visual Studio solutions and projects) by selecting Web Essentials –> Edit global JSHint settings (.jshintrc) from the main Visual Studio menu.
The JSHint settings is simply a text file containing a JSON object that will be passed on to JSHint when it runs. The configuration options are all very well documented on the JSHint website, with a complete list of options here.
JSHint Options – Solution Level
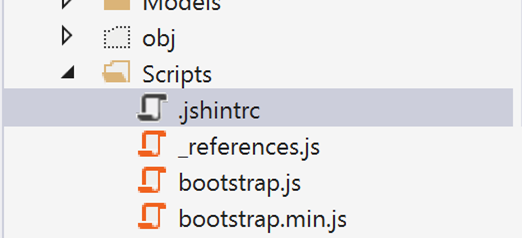
You might prefer to configure JSHint options for a particular project and share those settings with the rest of your team. To do this, simply create a file named .jshintrc in the root folder containing your JavaScript files.
Note: Creating a file that starts with a . can be difficult from Windows Explorer or from Visual Studio. The easiest way to create this file is to open a command prompt and enter echo.>.jshintrc. Once the file is created, include it in your Visual Studio project.
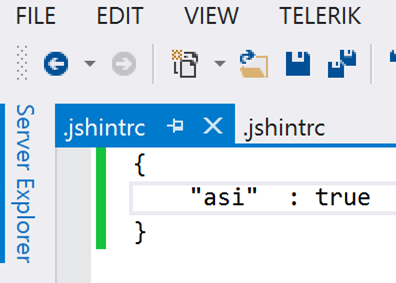
In this file, set whatever JSHint options you want. For example, if for some reason you wanted to allow missing semi-colons you could set the asi option to true.
Now all you need to do is add the file to source control and your settings are shared across your development team.
JSHint Options – File Level
You also have the option to override JSHint options at the file level using special comments.
For example, you could allow missing semi-colons for a specific file by adding /* jshint asi:true */ to the top of the file.
Bottom Line
Visual Studio Web Essentials’ JSHint integration is a great tool out to help you improve the JavaScript code in your web project. Give it a try and see how much it helps you and your team.
