Create a Dev & Test Environment in Minutes!
 How many times do we have to scramble to assemble a decent Dev & Test environment?
When I think back to my past lives, I can attest that it’s been a challenging mess. I used to run around to various departments in order to find available machines, software installation disks, licenses and IT resources to help me put everything together.
Taking shortcuts usually meant cutting back on the Dev & Test infrastructure. Consequently, I rarely had environments that mirrored the actual production environment. Products would make their way through development and quality assurance, but I rarely had a clear picture of how it would react to the production environment. Deploying to production usually resulted in being asked to come in on weekends because the outcome was completely unpredictable and that time needed to be scheduled in order to rollback.
Just thinking about all this sends chills down my spine!
Since then things have change quite a bit. I found shortcuts allowing me to build cost effective environments without having to run around begging for resources. Microsoft has recently introduced Dev & Test that allows me to setup my environments in a matter of minutes!
If you’re already an MSDN subscriber then you’re all set! Visual Studio Professional, Premium or Ultimate MSDN subscriptions will permit you to activate Dev & Test by creating a Windows Azure subscription from your MSDN subscription benefits page.
Using the MSDN Windows Azure subscription, I can spin up virtual machines that allow me to test various scenarios. For example, I can choose from a variety of pre-configured Virtual Machines like Windows Server, SQL Server, SharePoint and BizTalk. With discounts ranging from 25% on Cloud Services to upwards of 33% on BizTalk Enterprise Virtual Machines.
More Details
- See details for Windows Azure Benefits for MSDN Subscribers
- See offer details for Visual Studio Professional, Premium or Ultimate (with MSDN) for the hourly rates
- Develop and test applications faster
There are a couple of interesting benefits to building my Dev & Test environments on Windows Azure. First of all, it’s great for short lived projects. I can create environments without major capital investments and I can rapidly decommission Virtual Machines, services and reserved resources when the project comes to an end. Best of all I don’t get stuck with the extra hardware and software licenses.
Waiting after IT departments is a thing of the past, I can get up and running quickly!
Using Windows Azure Dev & Test, I can cycle through proof of concepts using various Virtual Machine configurations. Easily playing around with OS versions, the # GBs of RAM, the # of CPU cores and the amount of available bandwidth allows me spot potential pain points before going to production. Doing the same kind of tests on-premise can be quite complex due to the sheer amount time required to deal with all the hardware and software involved.
On Windows Azure, creating a new Virtual Machine is a breeze!
Login to the Windows Azure Management Portal and click on the NEW + menu found at the bottom left of the screen.
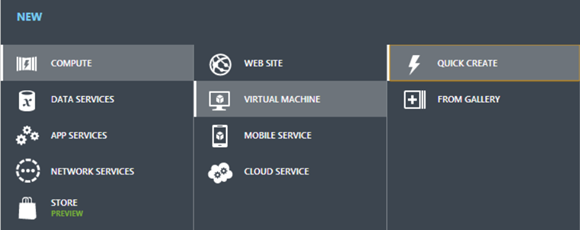
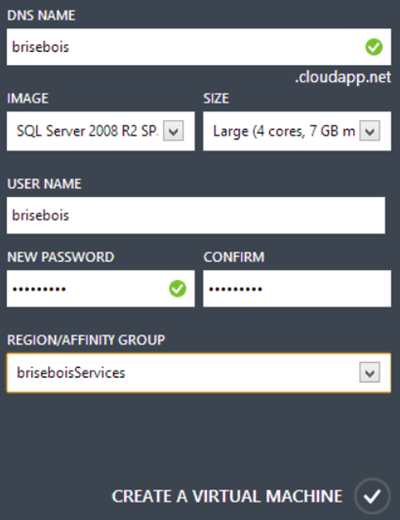
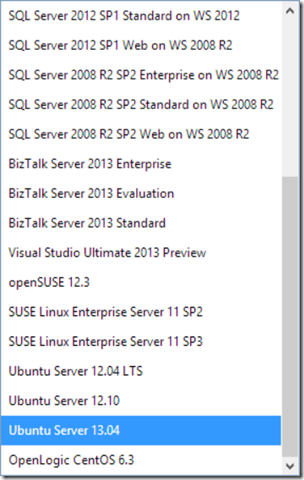
Select QUICK CREATE from the VIRTUAL MACHINE option found under COMPUTER. Then complete the form by providing your new Virtual Machine with a name, a size and by selecting the base image from the dropdown list. Provide Windows Azure with a user name and password that you will use to login. Finally select the region where you want to create your Virtual Machines.
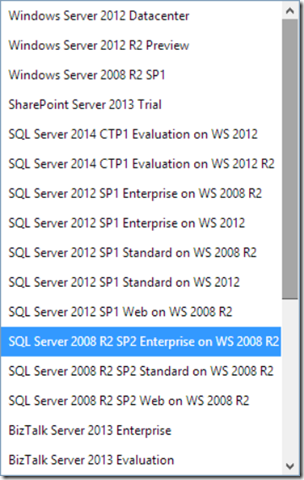
There are quite a few pre-configured Virtual Machine Images available. If you don’t find what you are looking for, you can create your own by creating a Virtual Machine Image on-premise and by uploading it to Windows Azure. You will then be able to provision Virtual Machines base on your custom Image. See the full list of Microsoft server software supported on Windows Azure Virtual Machines.
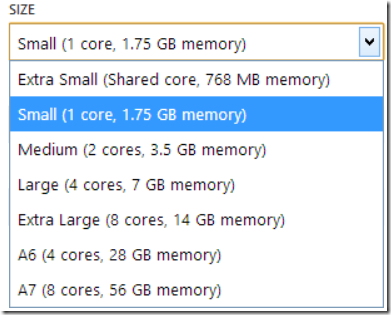
Virtual Machine and Cloud Service Sizes for Windows Azure are listed below. I usually work with Medium sized Virtual Machines because my software requires quite a bit of RAM.
Choosing the right Virtual Machine size can be challenging and being able to try them out is a huge advantage. At this point it’s also important to note that along with CPU, RAM and Disk Size each configuration comes with a specific amount of Bandwidth. Be sure that your application does not suffer because it lacks Bandwidth.
Clicking on CREATE A VIRTUAL MACHINE will start provisioning a Virtual Machine based on your specifications. This is the perfect time to get yourself a cup of coffee, by the time you get back you will be presented with your brand new Virtual Machine.
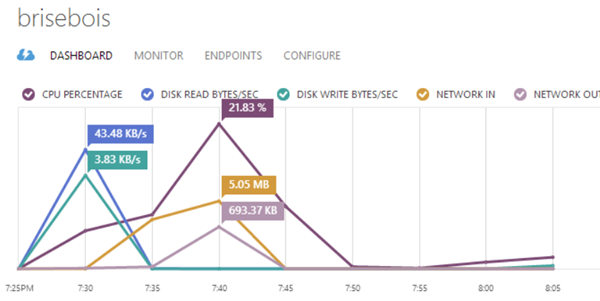
Clicking on the Virtual Machine will bring you to it’s dashboard.
This is where you are presented with diagnostics, configurations and general information about the Virtual Machine. Use this information to monitor and diagnose performance problems without using Remote Desktop.
The Windows Azure Management Portal will also provide you with the following commands.

Use CONNECT to safely Remote Desktop into your newly created Virtual Machine. RESTART or SHUTDOWN the Virtual Machine directly from the Windows Azure Management Portal. Deleting the Virtual Machine will release its resources back to Windows Azure.
Take Away
Working with Windows Azure over the last year, I have to say that much of the pain associated with creating and managing Dev & Test environments has gone away. I can finally concentrate on finding the right solution for my client’s needs without having to deal with too much politics and the red tape that comes with it.
Being able to spin up machines at a moments notice has allowed to me rapidly confirm and validate possible architectures. Above all else, it’s allowed me to do so at a very low cost since I don’t really need to have my Virtual Machines running 24/7.
Keep in mind that prices used in this post have been taken from August 2013 and may have changed over time. Please refer to the official pricing on windowsazure.com.
Shutting down Virtual Machines when I don’t need them ends up saving me quite a bit of money! I currently start the Virtual Machine when I start working in the morning and I shut it down when I go home at night. I’m currently paying for about 8 hours worth of compute time per day. Since its only running for 8 hours per day I’m currently paying $0.96/day instead of $2.88/day, which corresponds to a full day’s worth of compute.
Lets put this back into perspective, because daily pricing doesn’t really give a good idea of the actual cost for my Dev & Test environment. So lets look at this on a long term basis. My projects usually go for 3 months, working on average 20 days per month. That means that my Dev & Test environment is costing me a total of $57.60 for the duration of whole project. Keep in mind that if my Virtual Machine had been running 24/7 it would have cost me $144.
Nevertheless, savings generated by the discounted pricing of the Windows Azure Dev & Test offering are quite significant and do make a world of difference in the long run.
I use Windows Azure Dev & Test environments because:
- You can connect securely from anywhere (working from home)
- You can test load and scalability scenarios
- You can use PowerShell to automate their creation
- You can develop Windows & Linux based solutions
- You can test newly release software (SQL Server, BizTalk, SharePoint…)
- You don't have to wait for hardware, procurement or internal processes
- You pay for what you use (by the minute billing)
- You benefit from discounted hourly rates
- You get monthly Windows Azure Credits
- You can Dev & Test in the cloud and deploy on-premise
- You can use MSDN Software on Windows Azure

