Internet Explorer 9 Developer Tools Deep Dive – Part 2: HTML & CSS
This continues a series of posts on the F12 Developer Tools included with Internet Explorer (since version 8) to help you improve your websites with tools to review content, diagnose issues, improve performance, and more:
- Part 1 – Introduction
- Part 2 – Working with HTML and CSS
- Part 3 – Debugging JavaScript
- Part 4 – Profiling JavaScript
- Part 5 – Network Performance and Debugging
If this is your first look at the F12 Tools, I recommend you skim through the introductory post first.
Working with HTML and CSS
One of the best uses of the F12 Tools (press F12 or choose Tools –> F12 Developer Tools) is to work through issues with page structure and design. Usually you’ll start by selecting a particular element. You can browse the HTML tab to find content manually, but here are three shortcuts:
Find Element by Click
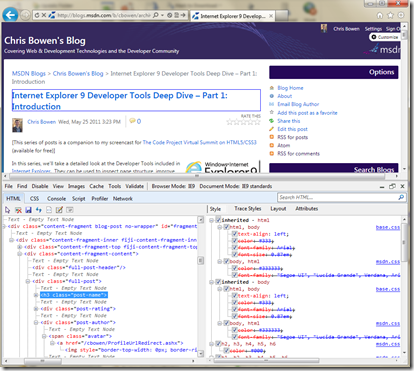
Easy enough. Just click the arrow button  (or CTRL+B) and click on the element you’d like. The element will be outlined in the page and selected in the HTML display.
Search Box
Next is the Search box, available on all tabs except Console. Enter text to find and, if matches are found, they will be highlighted in the main and HTML/CSS windows, and the forward/back buttons  will be enabled.
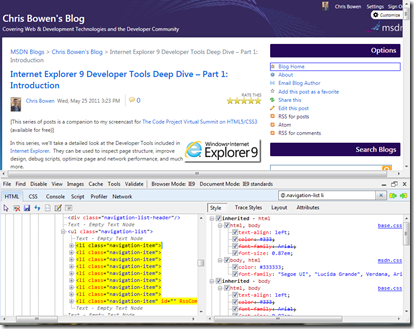
On the HTML tab, Search supports selectors as used by CSS (and the basis of jQuery selectors) but you need to type an “@” symbol before your expression, otherwise it’s treated as a literal text search.
For example, a search for “@.navigation-list li” on my blog finds the li items in elements assigned the “navigation-list” class:
The matching items are highlighted in the HTML (or CSS) tab and the first match outlined in the browser window.
Outline Elements
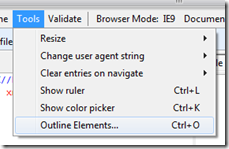
If you want to quickly survey a page to find a category of element, use Tools –> Outline Elements (CTRL+O):
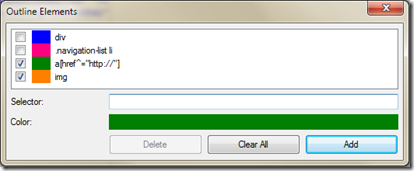
Add elements and/or selectors (and colors) and they’ll be outlined in the browser window:
For example, the two selectors enabled above outline all images and non-local links:
Unlike search, Outline Elements affects only the main browser window, and does not highlight matches in the HTML tab. However, your choices will be highlighted on all pages you visit while the F12 Tools are open.
Working with HTML
Now that you’ve found the content, the HTML tab will let you review, change, and save changes to your page.
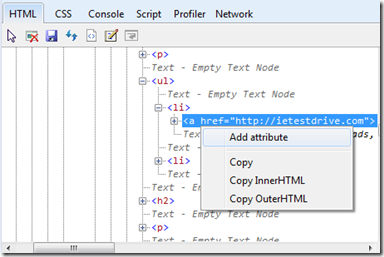
Any existing attribute can be edited, and new ones added by right-clicking the element and choosing “Add Attribute”. You can also edit the HTML directly by clicking Edit  (CTRL+E).
Content changes modify only your local view, so you’ll need to update your site manually. You can click Save  to save HTML or CSS files, but a handy way to isolate a change is the Element Source with Style button
  (CTRL+T). It shows the markup focusing on that element, plus any applied CSS styles.
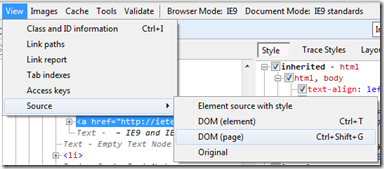
You can also view just the DOM either for the page or just an element via the View –> Source options:
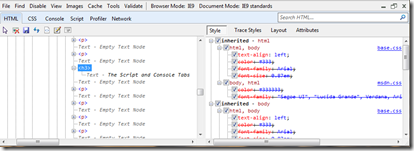
In the CSS section next, we’ll cover the details shown in the panes on the right-hand side of the HTML tab, but note that while most nodes deal with CSS, the Attributes node applies to both CSS and HTML attributes.
Note: The HTML display reflects changed attributes and edited HTML, but if script changes the page structure, refresh the HTML tab by clicking Refresh  or pressing F5 (make sure the HTML tab has focus, or the main page will refresh, losing any changes you’ve made.)
Working with CSS
Now that you know how to work with HTML, let’s focus on styling with CSS. You’ll find the F12 Tools are great for diagnosing style issues (e.g. “Now why is that text red?!”).
When elements are selected in the HTML tab, the right-hand pane displays the Style view by default:
This view shows all styles that apply to the current element, organized by style. You can see which attributes have an effect and which aren’t used (indicated by strikethrough font) because they are overridden by another style. Click the checkboxes next to each to see the result of enabling/disabling the style or attribute.
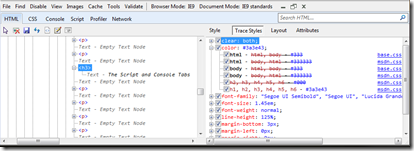
Trace Styles takes a different approach, displaying by attribute rather than style. I find it the fastest way to discover why a particular effect/setting is being used. For example, to find why text is a certain color, expand the color attribute and you’ll see the various styles that set the color, and which has “won”:
As with Style, you can check/uncheck settings to determine their effects.
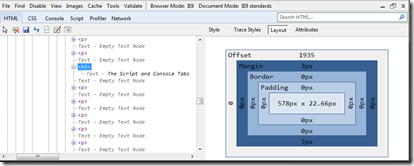
Layout is a graphical representation of the size, offset, margin, border, and padding for a given element. It is editable, so you can modify layout directly here.
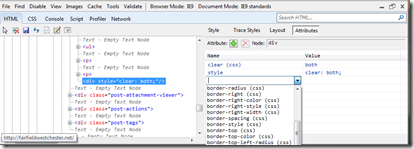
Attributes shows all attributes for the selected element, including HTML and CSS. You can edit and add attributes as you wish, with a full drop-down list of attributes as guidance:
You can also click “Show Read-Only Properties” to see all attributes for that element. Read-only attributes will be listed in gray.
CSS Tab
The CSS tab displays current CSS classes and styles, allowing you to view specific CSS files in use by the page, make changes, and search.
Select from the available stylesheets for the page, and you’ll see the styles driven by that document.
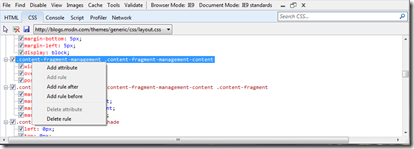
You can modify styles directly in the tab, and right-click to create or delete rules and attributes:
And as described earlier, you can also use the Search box to find content in the selected stylesheet.
Browser Testing
Top of mind for many, especially when using HTML5 and CSS3, is making sure a site works and looks good in other browsers that might be used to access your site.
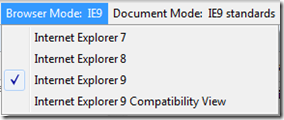
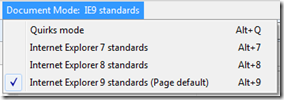
A good way to do this is to have the F12 Tools simulate being another browser and/or version. On the right side of the menu, you’ll see options to change the Browser Mode and Document Mode:
It’s important to know the difference between these, so here we go...
Browser Mode
While Browser Mode sets default Document Mode (we’ll get to that next), it more importantly also changes the UA (user-agent) string sent by IE to the web server.
For example, you could tell the website that you are running Internet Explorer 7. If the server cares about this (via conditional logic or controls), it might send you different content tuned for IE7. Of course, for static content, this setting will have no effect on what is sent by the website.
Keep in mind that the content itself might have logic that depends on the UA string, such as reacting to certain browsers/versions (e.g. “If Internet Explorer < 8, do this, else…”)
As mentioned, Browser Mode also sets Document Mode to the default choice for that browser (e.g. IE7 standards mode for IE7), but you could set these independently (e.g. IE9 Browser Mode w/ IE8 Standards Document Mode).
Document Mode
Unlike Browser Mode, Document Mode changes the way content is processed locally by Internet Explorer itself.
In other words, regardless of what you tell the server via Browser Mode, this sets how IE will process and display the received content. For example, if you are working in IE9 on a page using HTML5 features, you can switch to IE7 or IE8 mode to see how that same content would be rendered for users of those versions.
The best way to learn these is to try them, especially on a page that offers features not supported in an earlier version of Internet Explorer or has logic that depends on the UA string.
For more details on all of this, see Testing Browser and Document Compatibility Modes with the Developer Tools and Defining Document Compatibility on MSDN.
Change User Agent String
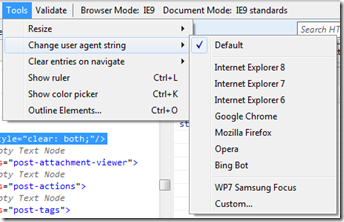
If you want to change the UA string beyond the default entries in Browser Mode, use Tools –> “Change user-agent string”:
You can choose one of the built-in UA strings, or define your own by clicking “Custom…”. In the image above, I have a custom UA string for a mobile device.
Remember that this has no effect on the Document Mode used to process the content, and is only a signal to the website/page that you have a particular browser/version.
Expression Web SuperPreview
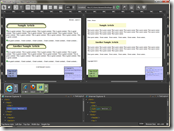 While you can change the UA string as you wish, it can be important to see and compare how a page actually renders in different browsers beyond. Short of having all of those browsers (and OS versions) at your disposal, Expression Web SuperPreview can help.
There is a trial version and a full version that offers Remote Browsers, enabling rendering of pages on browsers you may not have (e.g. Safari 5 on a Mac).
See the end of my article “HTML5, CSS3, and More with Expression Web 4 SP1” for details on SuperPreview.
Next: Part 3
In the next article, we’ll begin diving into JavaScript, using the F12 Tools Console and Script tabs to debug your scripts.
-Chris
