Tips from My Technical Presentations
My role involves spending a good deal of time with technical audiences. Recently, I've been getting reactions like this - "I enjoyed your presentation! I have an odd question - how did you zoom in like that?" or "How did you set those colors in Visual Studio?"
So, I'm posting some tips so I can direct people here for more information.
1) Use ZoomIt for Screen Zooming
 It's never a good thing to feature content on your screen that the audience can't see. It's frustrating for them, and hinders conveying the very message you're trying to present.
Fortunately, there's a very easy answer. For areas where you can't already have proper font sizes and colors (see below), use ZoomIt, a free tool from TechNet!
Read my post on ZoomIt for details.
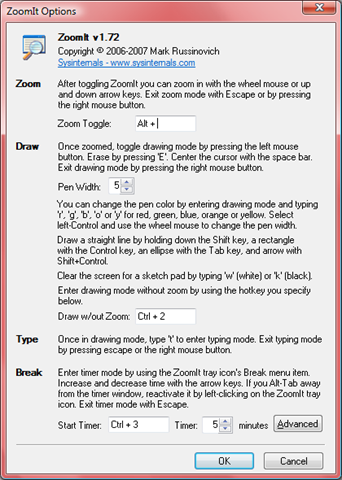
ZoomIt is just great. Obviously, you can zoom, but you can also draw lines, boxes, ellipses and text anywhere on the screen. It also has a break timer you can use to quickly count down that break between your sessions.
2) Change the Default "Highlight" Color in Visual Studio
 The default blue highlight for selected text in Visual Studio looks fine on a computer, but when projecting, selecting text can actually make it harder to read - it's likely that nobody past the first few rows can read what you've just selected.
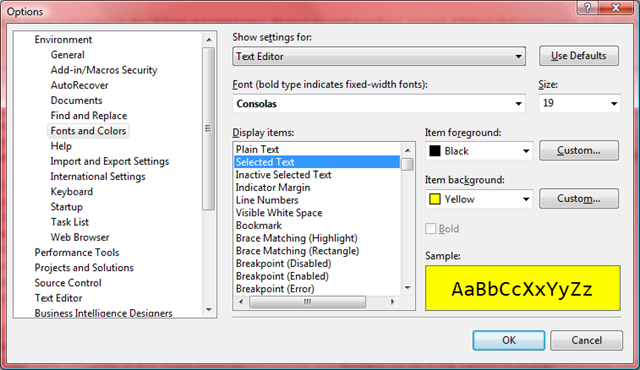
To fix this, go to Tools->Options->Environment->Fonts And Colors, then in the "display items" list, 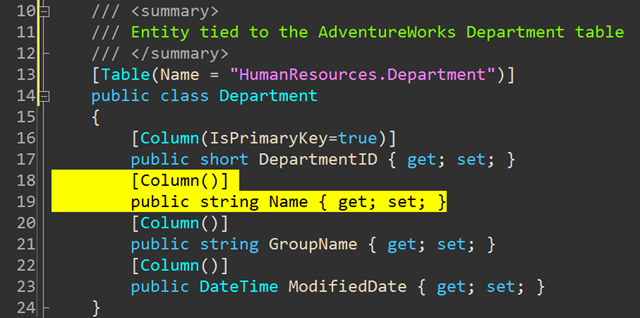 choose "Selected Text" and change the background color to bright yellow or green (think highlighter) and the text to black.
3) Use a Code Color/Font Scheme That's Easy to View
This is clearly subjective, but I've found that changing the fonts and colors from the default results in code that's easier on the eyes. Many people have told me they prefer this, nobody has said they had trouble with it.
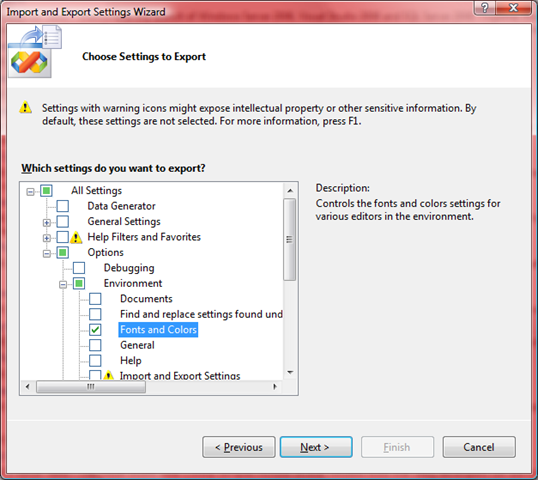 I've uploaded the settings file for my colors and fonts to SkyDrive (see the above code picture for a preview.) You can easily apply them to your own Visual Studio settings using "Tools->Import and Export Settings". I'd recommend you back up your current settings using the Export option before trying this out.
I use the Consolas font in Visual Studio, which you can download here.
Also, check out Scott Hanselman's great post on alternate Visual Studio themes.
4) Create Quick-Change Font Size Macros
In Visual Studio, it's easy to create your own keybindings to IDE features. 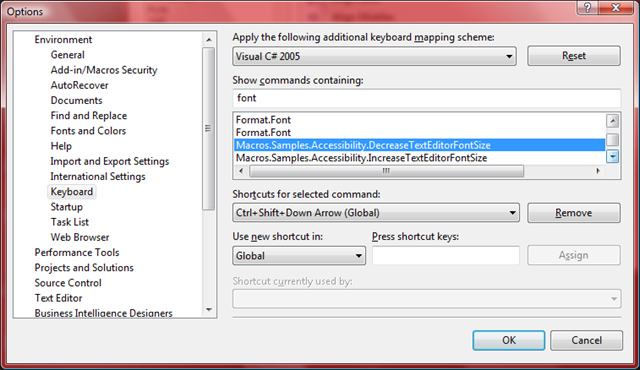 I've added CTRL-SHIFT-[+/-] to mine which quickly increments or decrements the editor font size.
The screenshot at right shows the decrease font macro I've wired up. Go to Tools->Options->Environment->Keyboard, then type "Font" into the Show Commands Containing textbox to find the font-related commands.
Then you can just ask the audience if they can see, quickly bump the font a bit and you're good to go.
5) Have Emergency Backup Plans... and Pictures... and Video
![MPj04005760000[1]](https://msdntnarchive.blob.core.windows.net/media/TNBlogsFS/BlogFileStorage/blogs_msdn/cbowen/WindowsLiveWriter/TipsforTechnicalPresenters_8FE8/MPj04005760000%5B1%5D_2.jpg) Let's face it, sometimes demos don't work as planned. Pilot error, beta software, phases of the moon - you need a contingency plan. I'll typically run through my demos and take screenshots of the key points, adding them to the end of my presentation deck.
Let's face it, sometimes demos don't work as planned. Pilot error, beta software, phases of the moon - you need a contingency plan. I'll typically run through my demos and take screenshots of the key points, adding them to the end of my presentation deck.
In some cases, you might even consider recording the whole demo, using a tool like Camtasia. Play the video (without sound) and narrate what's happening for the audience. Your audience will appreciate having content rather than watching you flail about, trying to diagnose a problem.
This also applies to websites that you may want to show, should you find yourself without web connectivity. Either save a local copy of the page (in IE, File->Save As->Web Archive, single file (*.mht)) or just take a screenshot.
Hope you find these tips useful. Do you have others?
-Chris