Microsofties in Residence Silverlight Training - Day 3
John and I started parallel working in Day 3 and chatted back and forth on each other's progress using Office Communicator.
On the Design side, I first focused on creating graphical elements in Expression Design. For each of our application scenario: sending gift, touching hands, and playing games, I created graphics for three different states: the normal states, the mouseover state when a user enters the tool/object, and a disable state when a user starts to drag the object onto the surface table.
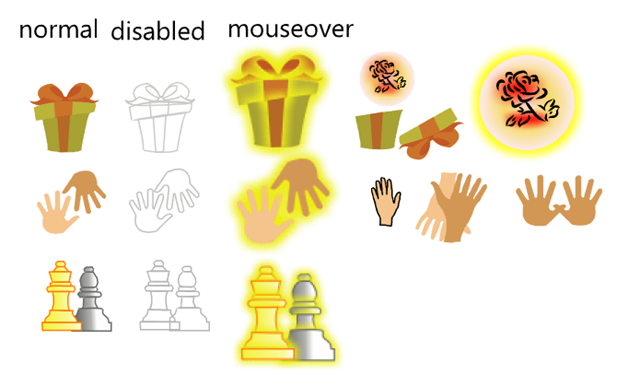
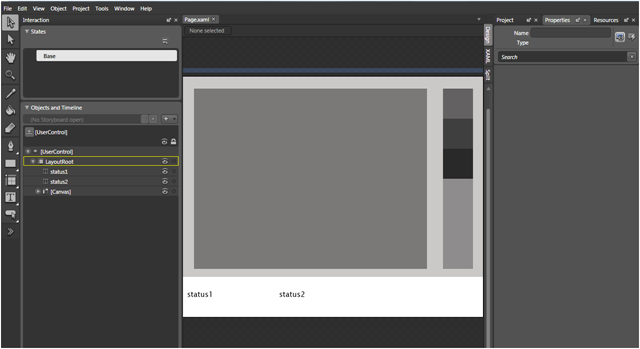
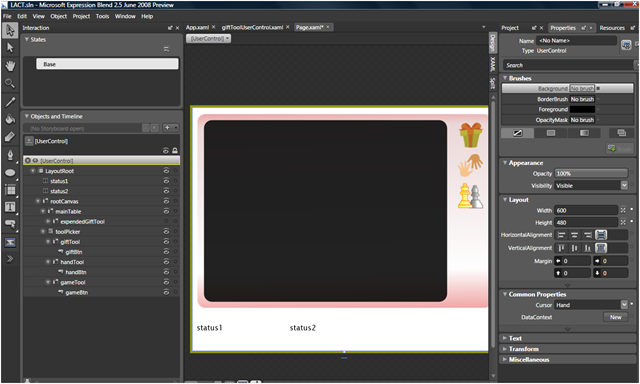
The second part of my work is to create controls and animation using these graphics in Blend. The left image below is the initial wireframe, and the image on the right is after editing XAML and important XAML from Design. Creating a button with different interaction states is quite easy in Blend using visual state manager. Basically, I created a button template with three graphics as its content and then depending on the state to set the proper graphics to fade in and the current graphics to fade out.
On the development side, here's from John's own words.
Today, I focused two aspects of the LACT(Live Apart but Connect Together) application. First, I wrote a quick implementation of drag & drop functionality that our users will experience as they interact with the application. It was important for me to implement this feature early on in the development lifecycle since a visual element like this is critically important to a positive user experience. Second, I began working on the underlying implementation of the messaging framework that will be used for the LACT application. In retrospect, I should have probably thought a little more about its possible implementation. As I walked through the design of the architecture, I began to realize just how complex it was! For the LACT application, we’ll be looking at using some of the new HTTP duplex mechanisms now supported in Silverlight 2 Beta 2. I’m glad that this feature was added recently. Otherwise, I’d be stuck coding sockets. Yuck.
Here’s a screenshot (below left) of the drag & drop implementation I built earlier today:
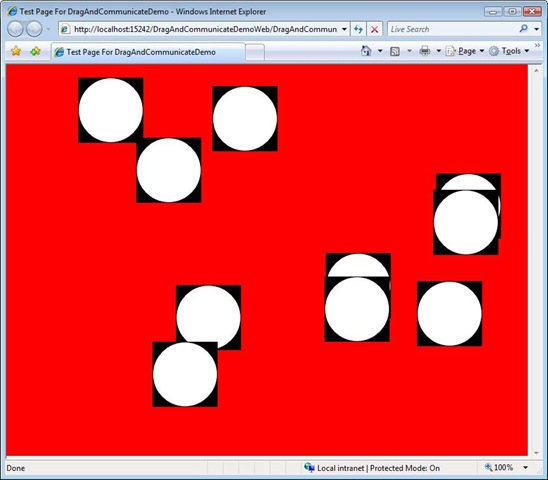
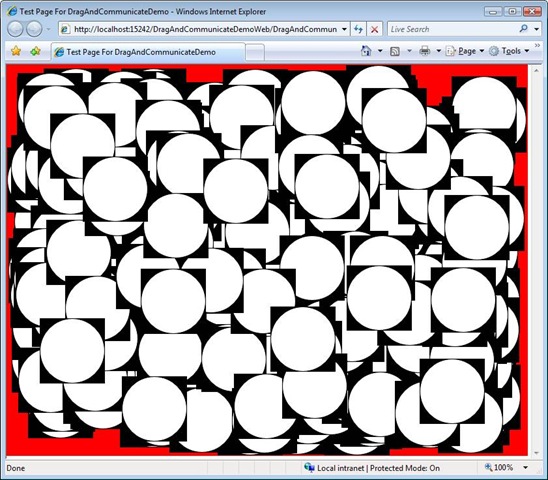
The black background for each element has been designated our non-hittable area. This space is reserved for navigation items (i.e. close icon) and allows us to support non-rectangular objects in a 2-D space. Note: The black will be made fully-translucent once we get closer to our “RTM”. This white ellipse represents our objects. These could be anything, really. They support a drag & drop functionality that will elevate them to the top of the z-index when they are selected. This is a common implementation for more 2-D surfaces you see in the industry today.
I also made sure that the implementation can scale. Here’s a screenshot with 500 objects. (see above right) I wasn’t able to see any flickering with this many objects on the surface. Hooray!
Day 4, we'll start integrating XAML with code so that instead of dragging dummy objects above, users will be able to drag objects I created above to the table and see animation occur. Let's wish the best luck for John to make breakthrough in implementing the underlying messaging framework so that two instances of the application can communicate with each other.
Technorati Tags: training,Microsoft,Silverlight 2