Server Performance Advisor 3: First Look
The latest version of the server performance advisor has been released. Version 3 ALPHA can be downloaded from here: https://msdn.microsoft.com/en-us/windows/hardware/hh367834.aspx
The new version includes support for Windows 2008 & 2008R2, it can do remote analysis, and trend comparison has been included in the box.
The install files, manual and deployment guide are all here: https://msdn.microsoft.com/en-us/windows/hardware/hh367834.aspx
For my lab i used Windows Server 2008 R2. The steps i followed are:
1. I needed to install .net 4 (https://www.microsoft.com/download/en/details.aspx?id=17718 )
2. Downlaod and install SQL Express (https://www.microsoft.com/download/en/details.aspx?displayLang=en&id=23650).
3. There isnt a traditional installer for SPA, its a cab file that you copy to the server and just extract to a directory that suits. I created a directory called c:\spa and extracted the spa cab into that.
* Important note. If you just use Windows it might create a flat structure when extracting the cab file. If you dont see an "APs" folder in your destination directory, chances are it hasnt worked. Use the extract utility instead. Eg: extrac32.exe /e /a /l c:\SPA3 c:\temp\SPAPlus_amd64.cab
4. I also created a directory for servers to put SPA data called c:\spa_data
5. Launch SPAConsole.exe to arrive at the main SPA screen
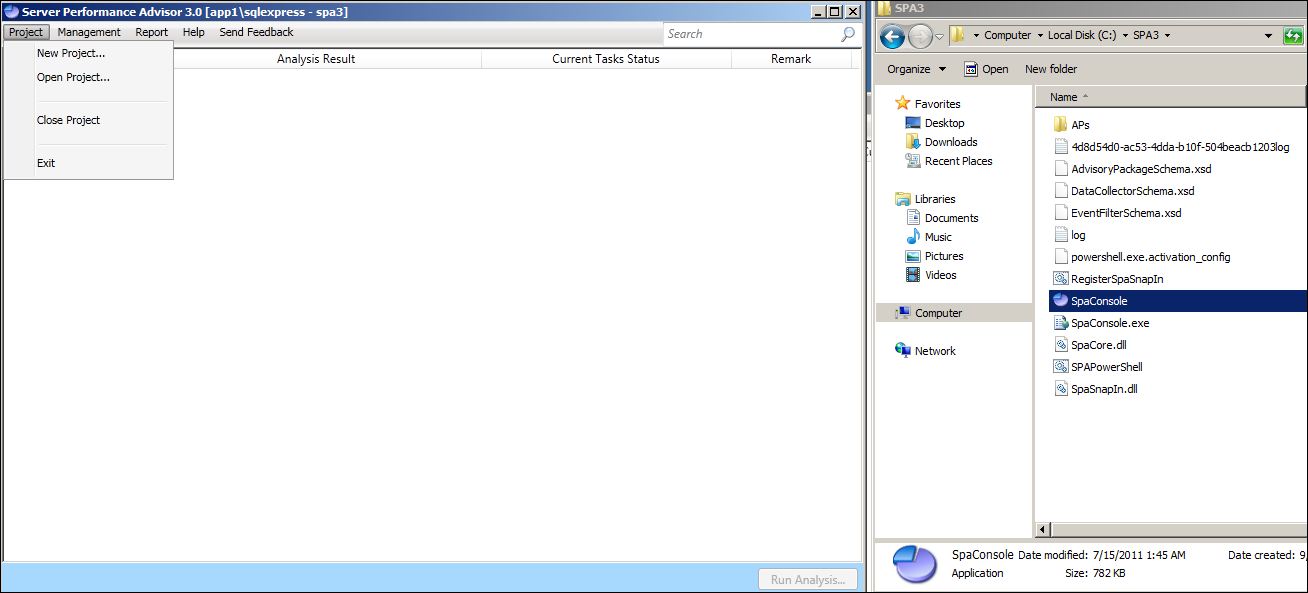
6. Click New Project
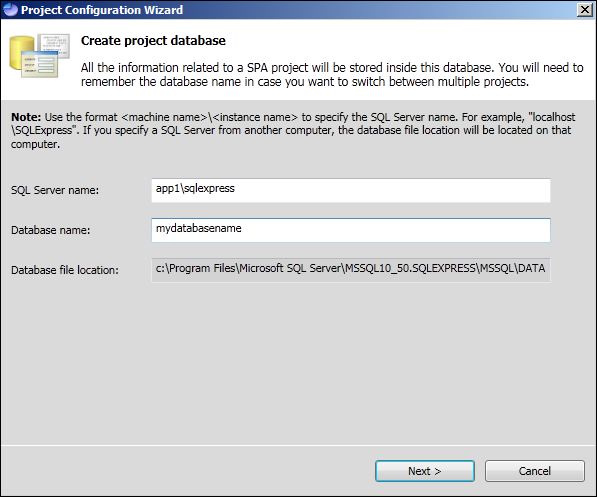
7. You will be prompted for SQL server details. If you accepted the defaults when installing SQL express your details will be similar to below, where app1 is my server name and sqlexpress is the default instance on a SQL express install. The console will fill out the SQL location details automatically, if it does not, there is a problem with your instance name. Database name can be any valid sql database name, but it is important to remember what it was called.
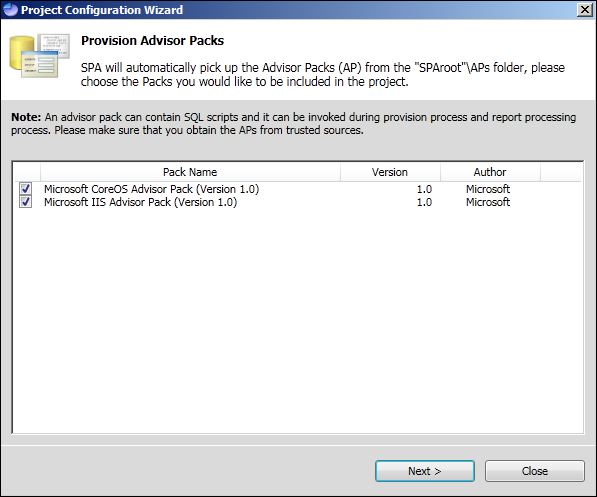
8. If everything is working you should see the two default content packs on the next screen.
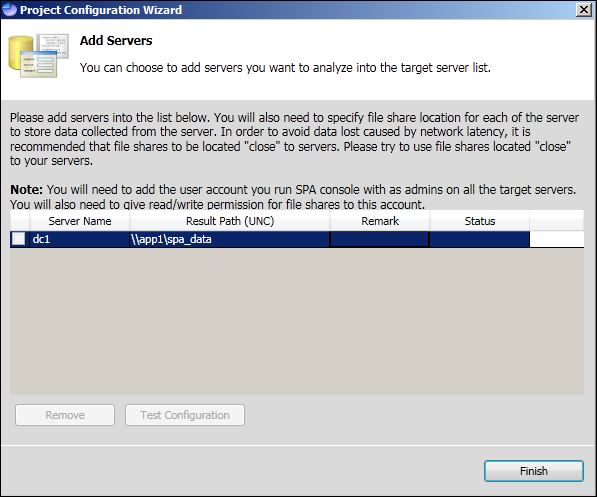
9. The next screen allows you to choose targets for analysis. In my case the server is DC1, the share is where i will save the data (share created earlier), in my case \\app1\spa_data
10. Once you return to the main screen you are ready to collect some data against the targets you defined.
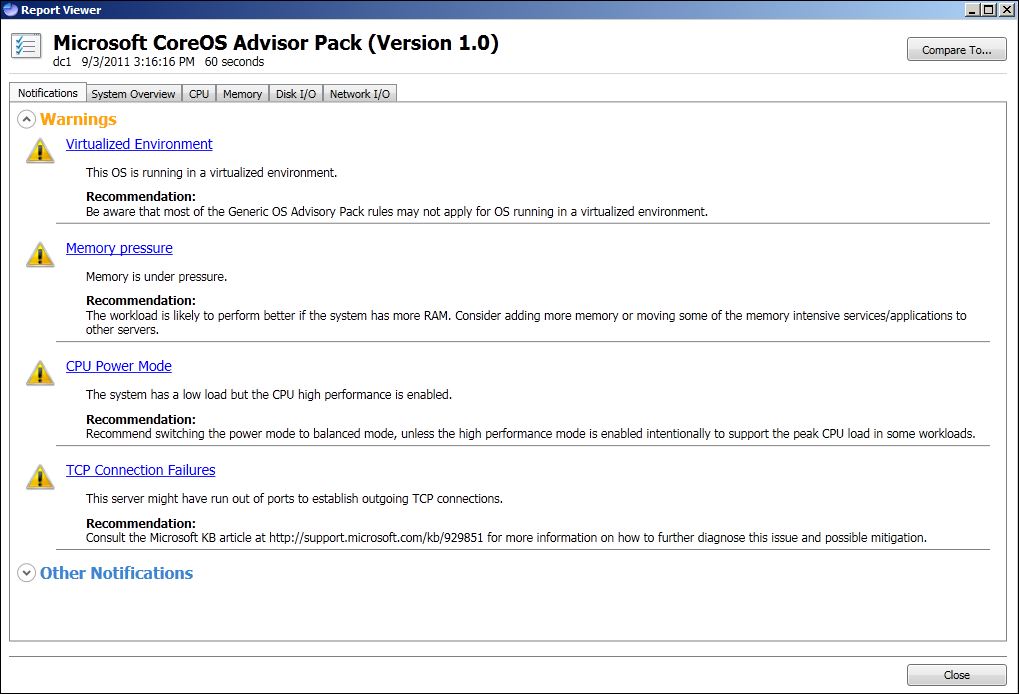
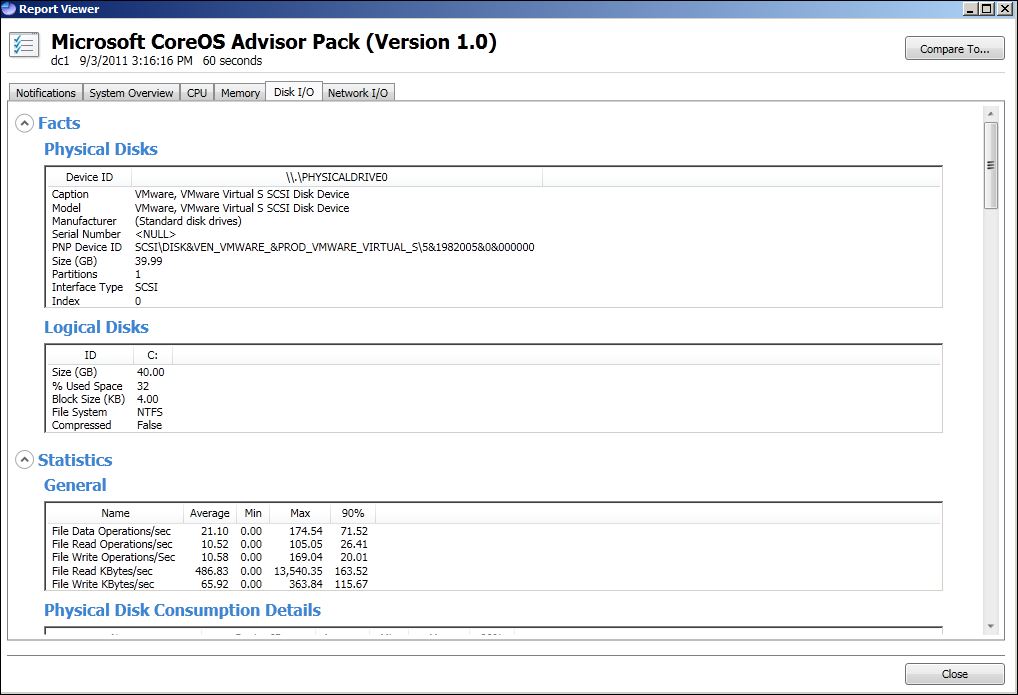
I did a bit of messing around with the built in core pack, some screenshots are shown below to give you an idea of the power of this tool. Once i get a chance i will include some details and any gotcha's i find for the advanced features such as trend analysis and comparisons as well.
Overview:
Memory:

Disk:
Network:

If you have any feedback on the tool be sure to use the help option in the console and send your information to the team developing this toolset.