WPF: Using the InkCanvas Control
I have been doing a demo of InkCanvas recently to demonstrate the power of WPF and a lot of people have requested that I put the code on the blog, so here it is.
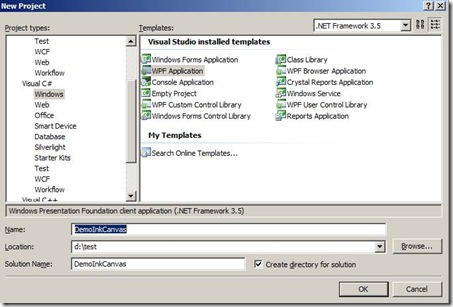
1) Open Visual Studio 2008 create a new WPF project in .NET 3.5. Let call it DemoInkCanvas. I chose C#, you can do the same in VB.NET
2) You will get something like the following:
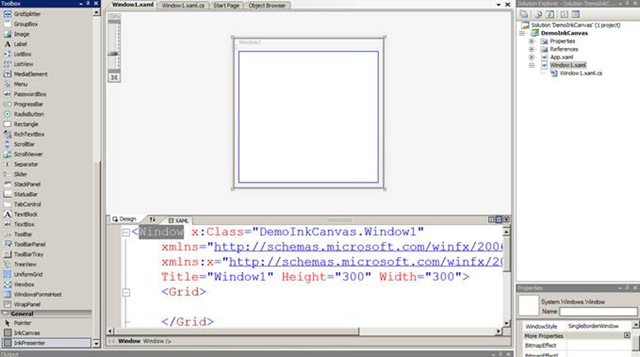
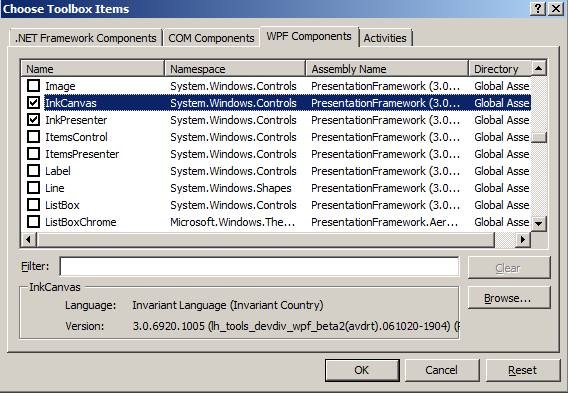
The inkCanvas control is not available on the toolbox by default, lets now add it – right click on the circled area and select “Choose Items…”. Select the “WPF Components” tab and choose “InkCanvas”
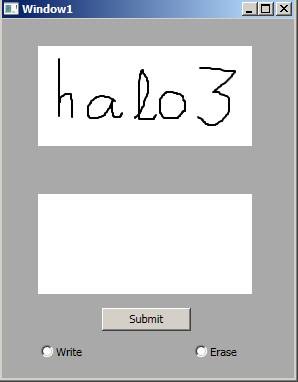
3) We are going to create a form filling application, where the fields can take handwriting and convert it to text automatically
4) Lets change the background color of the Grid to something darker

5) Lets Drag and drop two InkCanvas controls, two radio buttons (for choosing writing or erasing pen) and a button control (for submit) on the WPF form. Watch the XAML text getting added to the XAML view automatically.

6) Change the “Content” property of the Button to “Submit” and the Radio Buttons to “Erase” and “Write”
7) Lets run the application so far by pressing Ctrl+F5 and test the handwriting part by writing something with the mouse on the InkCanvas control
8) Simple so far…Now lets add some handwriting recognition code to the application so that whatever we type gets converted to text for further processing. We will create and place a hidden text box behind each of the InkCanvas control such that when the focus from the InkCanvas control is lost, the text recognition takes place and is shown in the TextBox instead. We will also write the code to store the Canvas control in an in-memory Dictionary object, so that we can replace it back when the mouse is over the text box, in case if you want to make changes
9) Lets add the MouseLeave event handler to the InkCanvas control in the XAML view. Watch the intellisense.
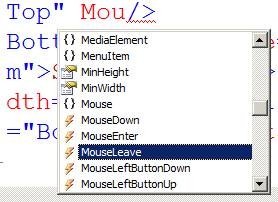
10) Since there is no existing event handler the IDE shows “New Event Handler”. Double click on it and the IDE automatically puts a new handler with a proper name

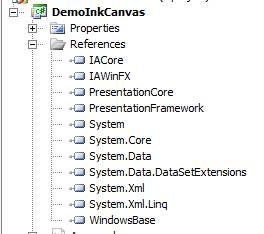
11) Lets do some coding NOW! Before that add the following reference assemblies that will allow you to add the handwriting recognition feature: IACore.dll and IAWinFX.dll
12) Add the using namespace statements for System.Windows.Ink and System.IO
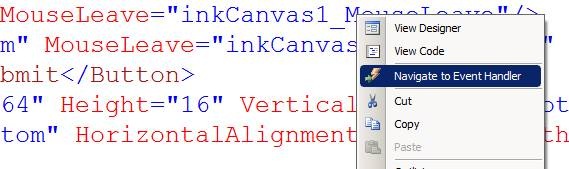
13) Right click on the name of the event handler and choose “Navigate to Event Handler”. This will take you into the code behind file – Window1.Xaml.cs
14) Add a TextBox and a Dictionary object to the class:
TextBox overLayedTxtBox;
Dictionary<String, InkCanvas> storeCanvasContent = new Dictionary<string, InkCanvas>();
15) Add the following code snippet to the MouseLeave event handler:
private void inkCanvas1_MouseLeave(object sender, RoutedEventArgs e)
{
InkCanvas editBoxCanvas = (InkCanvas)sender;
//store the canvas control in a dictionary
//so that you can hide it once you have
//finished recognizing the text and place
//a text box instead
storeCanvasContent[editBoxCanvas.Name] = editBoxCanvas;
//instantiate the InkAnalyzer to do recognition
InkAnalyzer theInkAnalyzer = new InkAnalyzer();
if (editBoxCanvas.Strokes.Count > 0)
{
theInkAnalyzer.AddStrokes(editBoxCanvas.Strokes);
}
AnalysisStatus status = theInkAnalyzer.Analyze();
if (status.Successful)
{
overLayedTxtBox = new TextBox();
grid1.Children.Add(overLayedTxtBox);
overLayedTxtBox.FontSize = 20;
overLayedTxtBox.Name = editBoxCanvas.Name;
overLayedTxtBox.Height = editBoxCanvas.Height;
overLayedTxtBox.Width = editBoxCanvas.Width;
overLayedTxtBox.Margin = editBoxCanvas.Margin;
overLayedTxtBox.VerticalAlignment = editBoxCanvas.VerticalAlignment;
overLayedTxtBox.Text = theInkAnalyzer.GetRecognizedString();
overLayedTxtBox.MouseEnter += new MouseEventHandler(overLayedTxtBox_MouseEnter);
overLayedTxtBox.Background = Brushes.PaleGoldenrod;
overLayedTxtBox.Visibility = Visibility.Visible;
editBoxCanvas.Visibility = Visibility.Hidden;
}
else
{
MessageBox.Show("Recognition Failed");
}
}
16) I have used the Analyze() Method of the InkAnalyzer, you may want to use the backgroundAnalyze() method and handle the events for more intensive asynchronous recognition. The GetRecognizedString method is the one that will retrieve the recognized text for you.
17) Notice the overLayedTxtBox_MouseEnter event handler – this is used to place the InkCanvas from the Dictionary object (storeCanvasContent) back inplace of the TextBox. Add the following code to the MouseEnter event handler:
void overLayedTxtBox_MouseEnter(object sender, RoutedEventArgs e)
{
//retrive the ink control back from the
//dictionary and show
//it again inplace of the text box
TextBox editBox = (TextBox)sender;
InkCanvas overLayCanvas = storeCanvasContent[editBox.Name];
editBox.Name = overLayCanvas.Name;
overLayCanvas.MouseLeave += new MouseEventHandler(inkCanvas1_MouseLeave);
if ((bool)radioButton2.IsChecked)
overLayCanvas.EditingMode = InkCanvasEditingMode.EraseByStroke;
else
overLayCanvas.EditingMode = InkCanvasEditingMode.Ink;
editBox.Visibility = Visibility.Hidden;
overLayCanvas.Visibility = Visibility.Visible;
}
18) The InkCanvasEditingMode properties – EraseByStroke and Ink let you choose whether you want to use the writing pen or the erasing pen
19) Build and Run the Demo – Enjoy….
PS: in case if someone wants the complete code sample, please mail me through the blog. I will send it across.
[edit: Aug 21, 2008]
Adding the demo in a zip right here - earlier when i wrote the post i did not know how to use Skydrive and then for a long time i seemed to have misplaced the code - finally here it is: