Hyper-V on Windows 8
Virtualization was for a long time considered a technology closely associated with enterprises that needed to maximize their hardware investment. Those benefits that come with virtualizing an operating system (OS)/applications weren’t exclusive to big businesses and as such the technology trickled down to consumers who also had a need to use it.
I was an avid user of Microsoft Virtual PC (VPC) as it really gave me the ability to complete certain tasks (albeit with a few restrictions) that I generally couldn’t if I wasn't running a specific OS. For instance, test an installation package on a clean OS for the then hot client/server desktop application that I was developing or install Beta bits to see the latest and greatest software that was coming to fruition. Of course there were more benefits but the one that was unobtainable was running 64-bit guest images. Enter Hyper-V on Windows 8.
Hyper-V picks up the baton where VPC left off and runs full steam ahead with it. The problem however was that you needed Windows Server to actually use it. That is until now. With Windows 8, you can easily add this functionality and reap some of the benefits that are generally found in Windows Server 2008 R2/2012.
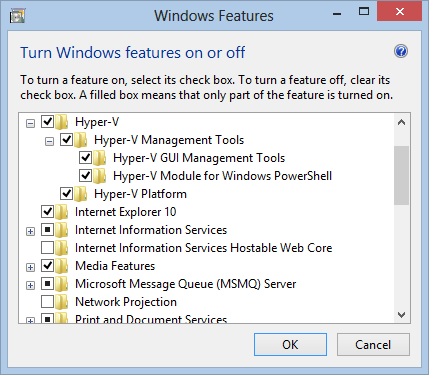
Having said that, just how can you enable Hyper-V and what exactly can you do with it? The first part couldn’t be easier as you just have to check the Hyper-V checkbox after selecting “Turn Windows features on or off” from the Control Panel. After a restart you’re good to go.
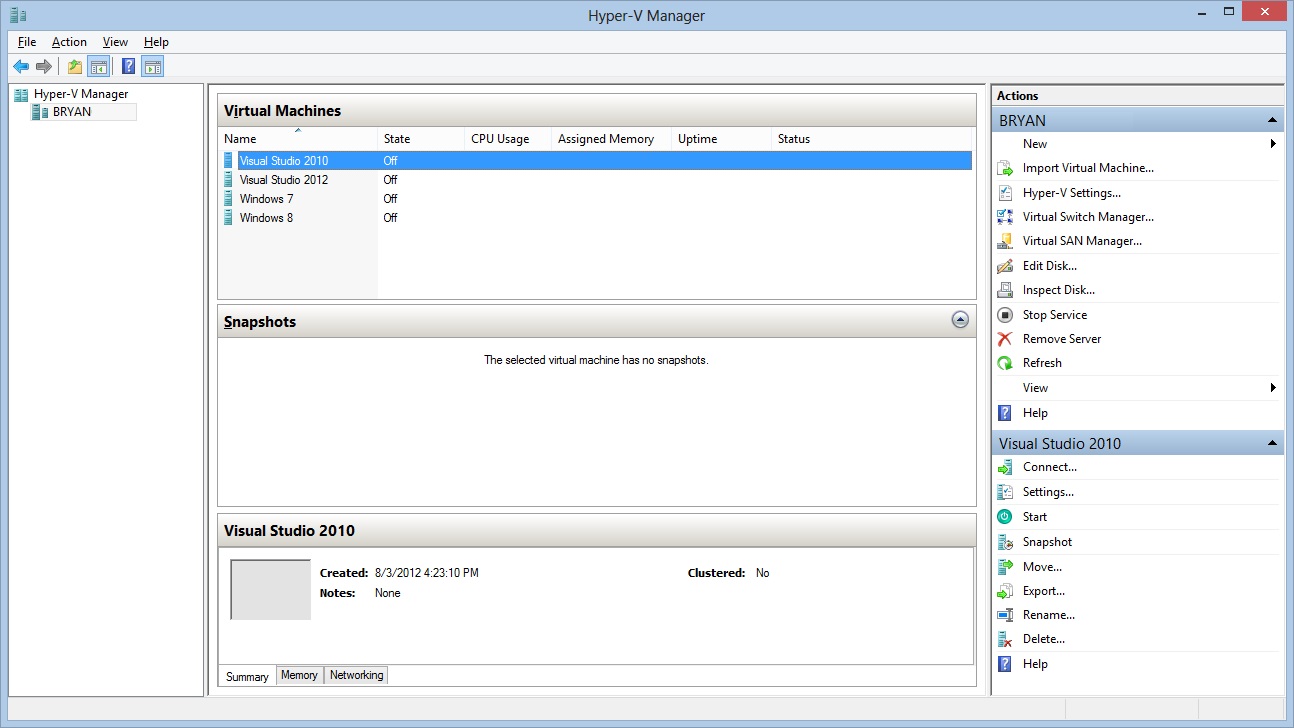
You now should now have two applications: Hyper-V Manager and Hyper-V Virtual Machine Connection. Using the Manager is where you’ll spend most of your time configuring the virtual machines (VM) as well as Hyper-V’s settings. If you’re familiar with the server version of Hyper-V then you should feel right at home but if not the Manager makes it easy to configure an existing VM or create a new one.
I usually virtualize my development environment especially when I’m running non-RTM software or when I need to mirror an environment. For example, the above VM is aptly named Visual Studio 2010 (VS) since it contains VS/TFS on Windows Server 2008 with Office 2010, SharePoint and SQL Server 2008. This provides a fertile playground and if something does get Fubar I can use a snapshot to revert the VM to a previous state. Be forewarned, creating snapshots and multiple VM’s will require large amounts of disk space so a few hundred gigabytes can be gone in an instant.
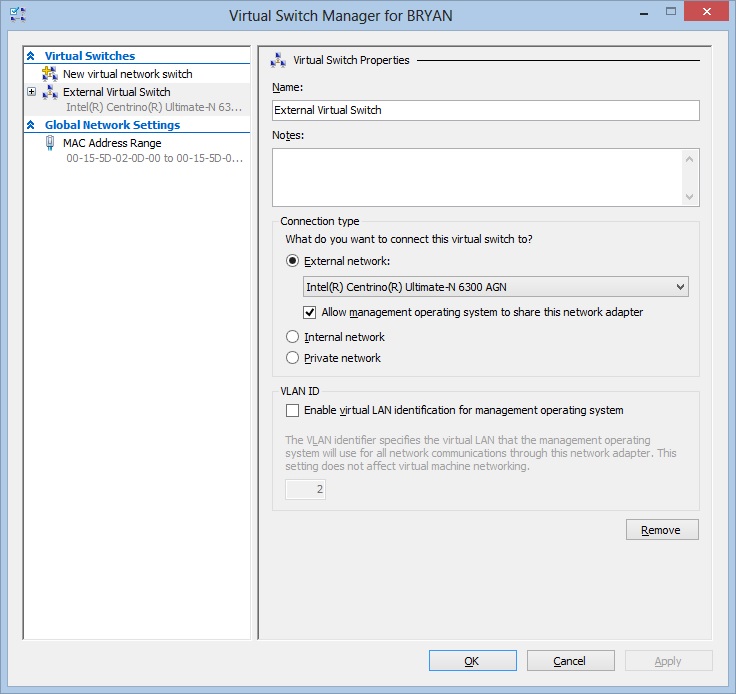
One item that you’ll most likely want right off the bat is Internet connectivity for your VM’s. The Manager makes this a trivial affair as you don’t have to get bogged down in creating bridged networks and configuring adapter settings. Simply select “Virtual Switch Manager” from the Manager and create a “New virtual network switch.” You can see I created one that is attached to my wireless adapter but I could’ve easily created it for my local area network (LAN) adapter. Mathew John, Senior Program Manager here at Microsoft has a nice video which outlines these steps so it’s definitely worth watching.
I will mention that those looking for cut-copy-paste functionality for files might be disappointed to not have that within the Virtual Machine Connection Manager. Not to worry though as a quick RDP session into that VM will provide this. If for some reason you can’t remote into the VM you could always setup a file share and transfer files to and from the host and guest OSes. Not ideal but it works.
While there are numerous third party virtualization solutions available having this ability out of the box with Windows 8 is certainly beneficial. Obviously cost savings is one of them (although some utilities are free) but more importantly; the knowledge gained here can be transferred when working with the server version.
So set aside some time, create a few VM’s and see how virtualization can help you be more productive.