Installing And Configuring PowerShell To Build Out a Linux-based High Performance Storage Infrastructure In The Cloud
This post is about provisioning a Linux VM (Ubuntu) with Premium storage. Most posts focus on Windows but the customers I work with our 100% Linux based. As of this post, the only definitive and testing scripting approach is with Windows-based PowerShell. I apologize for this and hope we get a more JavaScript version soon with Azure xPlat CLI. You can read about Linux-based tooling here: The Azure Cross-Platform Command-Line Interface. It is only a matter of time before PowerShell and the Cross-Plat tools are in parity.
Two other good reads are:
- Introducing Premium Storage: High-Performance Storage for Azure Virtual Machine Workloads
- Premium Storage: High-Performance Storage for Azure Virtual Machine Workloads
I have focused on providing guidance around Linux specifically.
Microsoft has recently gone into preview with an amazingly fast storage infrastructure. I am very excited about this because I am working with a lot of companies who want the fastest possible disc-based performance. MS’s new offering is called Azure premium storage.
I don't know if you've been paying attention, but MS is now offering unprecedented hardware.
Our G5 hardware includes the following:
| Cores | 32 |
| RAM | 448 GB |
| Local SSD disk | 6,144 GB |
| Number of Attached drives available | 64 1 TB drives |
| Potential IOPS | 64 x 500 IOPS or 32,000 IOPS |
No other leading public cloud vendor today is offering a machine of this caliber in the public cloud. The huge, local SSDs and the latest Intel® Xeon® processor E5 processor is state-of-the-art.
The DS-Series supports Premium Storage
Premium Storage stores data on the latest technology Solid State Drives (SSDs) whereas Standard Storage stores data on Hard Disk Drives (HDDs).
You can read about all the available hardware here: https://msdn.microsoft.com/en-us/library/azure/dn197896.aspx
Premium Storage is specifically designed for Azure Virtual Machine workloads requiring consistent high performance and low latency. This makes them highly suitable for I/O-sensitive SQL Server workloads. Premium Storage is currently available only for storing data on disks used by Azure Virtual Machines.
Many ways to provision VMs and Storage
There are numerous ways to provision resources in Azure. The future really belongs to the Azure resource manager (ARM), which represents a declarative way to build your infrastructure, as opposed to the traditional way of imperatively building out your infrastructure, step-by-step.
The ARM will enable you to build out a JSON-based text file that defines such things as networking, virtual machines, storage, services, and anything that you can do today manually through the portal or through scripting.
It is in preview today so we will postpone a discussion of the ARM.
Two Scripting Environments
You can read more about it here: Using Windows PowerShell with Resource Manager
There are two scripting environments that support the automation for provisioning Azure infrastructure:
Windows PowerShell
Cross-Platform CLI (xPlat CLI)
PowerShell is the most up-to-date
PowerShell is the most complete and thorough way to provision resources. Microsoft works hard instead keeping this scripting language the most up to date. Unfortunately, the Xplat CLI lags behind the supported feature set. So this post will focus on PowerShell because it's the most complete.
Installing PowerShell
Linux users won't be very thrilled to know that PowerShell is only supported on a Windows platform. I must confess that although I like all scripting languages, PowerShell is beautiful and elegant. It's very compact and easy to write. My view is to use the best tool for the job, and if it means learning something new, so be it.
But you aren’t done – Still need Azure PowerShell
The section below will have you install Azure PowerShell, which adds to the generic version of PowerShell.
This guidance here probably provides the easiest way to get PowerShell onto your Windows environment:
Many versions of Windows are supported I will be using Windows 8.1 for this post.
| How to install PowerShell | https://technet.microsoft.com/en-us/library/hh847837.aspx#BKMK_InstallingOnWindows8andWindowsServer2012 |
| Windows 8 | It is preinstalled, so "forget about it." You are done. |
| Other versions of Windows | See link above |
Installing the PowerShell Azure CmdLets
Once the scripting environment of PowerShell is installed, your next step is to install the Azure CmdLets. This is basically the same as Azure PowerShell.
How to install and configure Azure PowerShell
https://go.microsoft.com/fwlink/p/?LinkID=320552#
Once you have figured the Azure CmdLets, we are ready to start provisioning resources. For the moment, we will disregard the Azure resource manager, which hasn't been officially released at this time. I will circle back to the ARM in a future post.
Running PowerShell
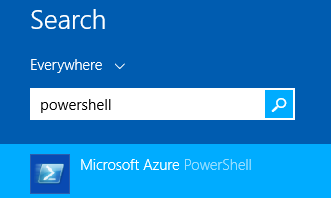
Once you have it installed, it's fairly simple to get the environment up and running. Let's begin by hitting the Windows key. You can also right mouse click on the Windows taskbar icon and select search . Type in PowerShell .
Figure 1: Starting PowerShell
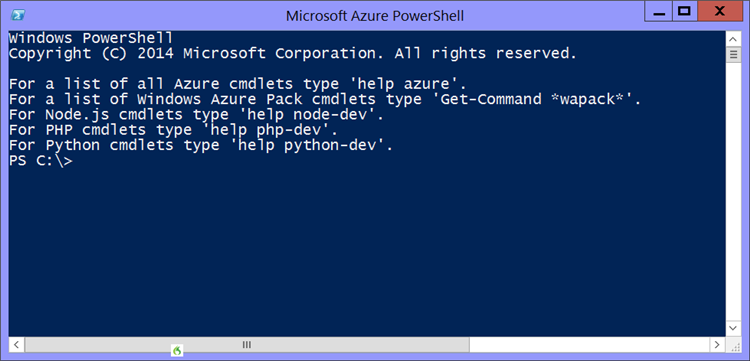
Select Microsoft Azure PowerShell . You will see Figure 2, which is the Azure PowerShell command line.
Figure 2: PowerShell Command Line
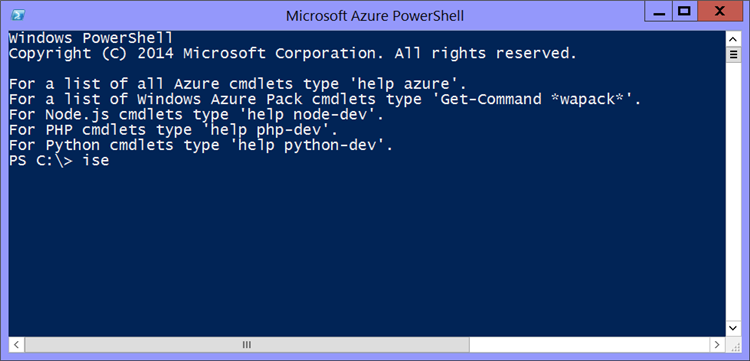
At the command prompt type in ISE .
Figure 3: Starting the PowerShell IDE
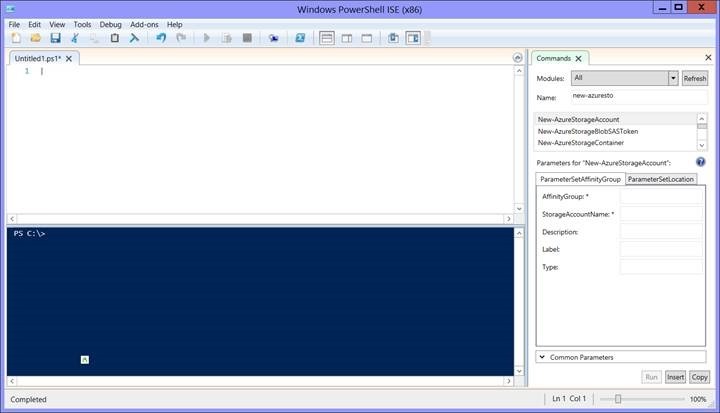
At this point the IDE will show up. This is a wonderful scripting environment that has a powerful help system built-in as well as integrated debugging.
Figure 4: The PowerShell IDE
Notice the various panes and a full debugging experience. The debugger is so useful so take a look here.
| How to debug Azure PowerShell Script | https://technet.microsoft.com/en-us/library/dd819480.aspx |
Background - Premium Resources
MS has built specialized machines with built in caching technology, optimized to provide low read latency. As you know, there are four categories of VMs:
(1) A Series
(2) D Series
(3) DS Series
(4) G Series
The DS Series are currently (as of 1/23/2015) the VMs that support Premium Storage. Note that they can also leverage standard storage, just like the other 3 types of VMs. The point is that you must provision the DS series for Azure Premium Storage.
Sign Up through your subscription
It goes without saying that you will need an Azure subscription to get started. To sign up for Premium Storage, you will need to go to the Azure Preview page, and sign up for the Microsoft Azure Premium Storage service using one or more of your subscriptions. As subscriptions are approved for the Premium Storage preview, you will get an email notifying you of the approval.
Once you get approved, you can then go to the Microsoft Azure Preview Portal and create a new Premium Storage account using the approved subscription.
Not all regions are created equal
You need to pay special attention to providing the right information when provisioning Premium Storage. For example, Premium Storage is not available in all regions. You will notice this in my PowerShell code later in this post. Currently, Premium Storage is available for preview in the following regions:
West US
East US 2
West Europe
Provisioning Resources
We have completed the following:
Installed PowerShell
Azure Cmdlets
Started PowerShell and brought up the IDE
It is now time to use PowerShell to provision the appropriate VM and premium storage.
Making your Azure account and its subscriptions available in Windows PowerShell
You need to tell Azure PowerShell about your subscription. The steps are below. You can learn more here:
I am using the Azure AD Method. You can learn more here:
https://azure.microsoft.com/en-us/documentation/articles/install-configure-powershell/#Connect
PowerShell
 Add-AzureAccount

$cred = Get-Credential

Add-AzureAccount -Credential $cred
The steps above authenticates through Windows Azure Active Directory and downloads associated subscriptions.
Creating a storage account
The following command creates a storage account . The storage account name is terkalystorage .
 New-AzureStorageAccount –StorageAccountName "terkalystorage" `
      -Location "East US 2" -Type "Premium_LRS"
Creating a DS series VM with a storage account
We will now create a virtual machine to which we will attach our storage account. When you provision your virtual machine you specify the type of operating system you would like. To get a list of available operating systems, you will need to follow directions below.
Getting a list of available operating systems (virtual machine types)
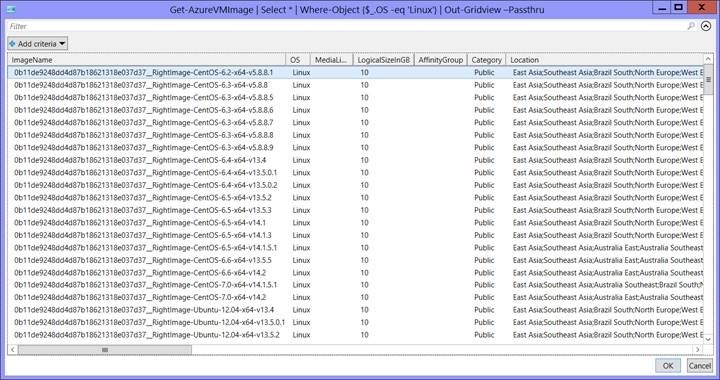
This is an awesome command that will list out list the available virtual machines from which you can choose. Notice that it outputs in grid format. See figure 5.
PowerShell
Get-AzureVMImage | Select * | Out-Gridview -Passthru
If you like to filter out only the Linux images:
PowerShell
 Get-AzureVMImage | Select * | Where-Object {$_.OS -eq 'Linux'} `
    | Out-Gridview -Passthru
Associated the current storage account
I found this to be a little confusing and I'm not sure I still really fully understand it. This was a nasty challenge. You can read more here:
https://azure.microsoft.com/en-us/documentation/articles/storage-create-storage-account/
Set-AzureSubscription -SubscriptionName "Windows Azure Internal Consumption" ` -CurrentStorageAccount terkalystorage
Notice that the subscription name is easily obtained at the portal. Or you can use this command, which outputs the information to a text file. You can find the SubscriptionName there.
Get-AzureSubscription | out-file c:\temp\sub.txt
The terkalystorage part is based on the name you provided for your storage account in a previous step.
Let's get a list of available Linux VMs
In order to build a Linux (or Windows for that matter) vm, you will need the imagename . PowerShell can give you those image names pretty easily, even in a grid format, as discussed earlier.
Figure 5: PowerShell Output Grid
Notice in the code below we found the image name of 0b11de9248dd4d87b18621318e037d37__RightImage-Ubuntu-14.04-x64-v14.2. This is an Ubuntu image, x64, version 14.2.
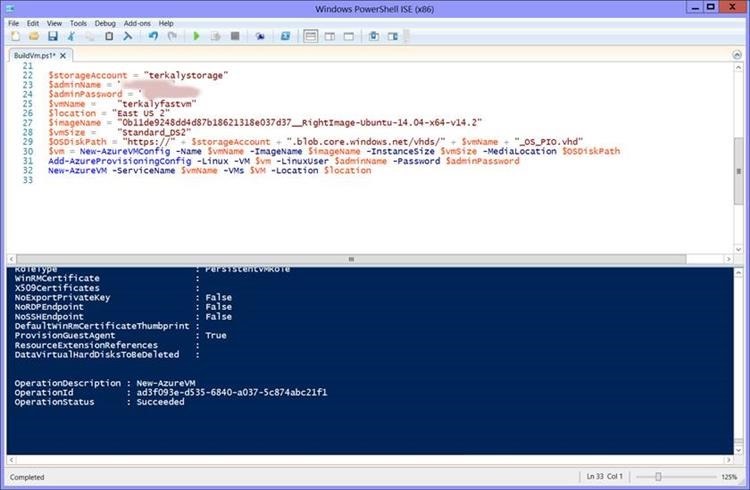
The following commands creates a VM and associates the previously created storage account.
PowerShell
 $storageAccount = "terkalystorage"
$adminName = "YOUMAKETHISUP"
$adminPassword = "THISISYOURSECRET"
$vmName =    "terkalyfastvm"
$location = "East US 2"
$imageName = "0b11de9248dd4d87b18621318e037d37__RightImage-Ubuntu-14.04-x64-v14.2"
$vmSize =    "Standard_DS2"
$OSDiskPath = "https://" + $storageAccount + ".blob.core.windows.net/vhds/" + `
              $vmName + "_OS_PIO.vhd"
$vm = New-AzureVMConfig -Name $vmName -ImageName $imageName `
              -InstanceSize $vmSize -MediaLocation $OSDiskPath
Add-AzureProvisioningConfig -Linux -VM $vm -LinuxUser `
              $adminName -Password $adminPassword
New-AzureVM -ServiceName $vmName -VMs $VM -Location $location
Figure 6: Provisioning the VM and linking Premium Storage
Summary
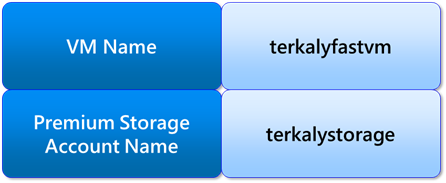
We are done. Here is what we've created.
Figure 7: What we built
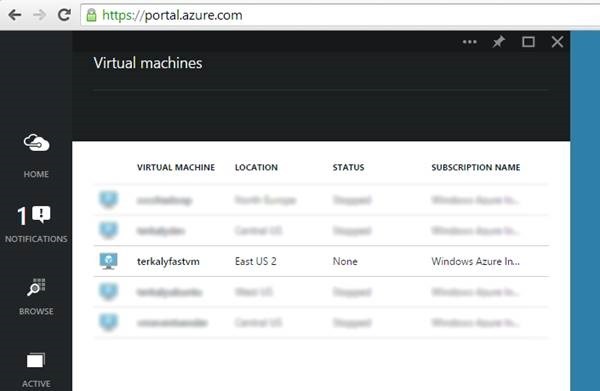
Here is what it looks like in the portal.
Figure 8: Verifying the VM at the Portal
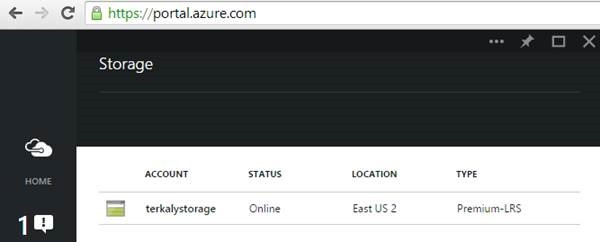
And here is the storage account.
Figure 9: Verifying Storage at the portal
