Developing ASP.NET Apps with Windows Azure Active Directory
Overview
The goal of this post is to illustrate authentication for applications posted in Windows Azure websites. This particular post will focus on ASP.NET, not node.js or other open-source platforms, including PHP.
You will learn the basic skills of identity management in the cloud. applications can be as powerful as allowing web-based applications that manage a company's active directory. on a more fundamental level active directory can be used to validate users to allow access to secure information.
Prerequisites
Visual Studio 2013
An account on Windows Azure. You can get a free account here https://manage.windowsazure.com/.
Exercise 1
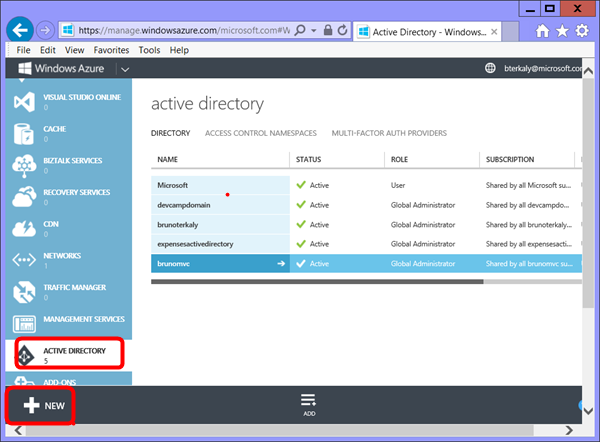
In this section you will log into the portal and choose to create a new active directory service. In the left menu pane choose Active Directory.
Task 1: Entering basic directory information
In the next few screens you'll enter information about the newly created directory. You will need to provide a login name and domain name to be used.
You will add a new active directory. Select active directory from the left menu and click new.
Creating a new active directory
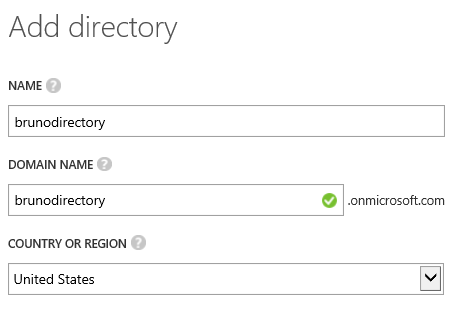
Enter in the name, the domain name, and choose the country or region.
Adding a new directory
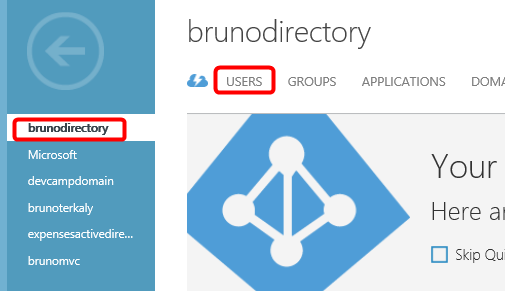
Changing details about the directory (brunodirectory). Click the arrow to drill into a specific directory.
Changing directory details
You will add users. Click the user menu.
Adding users
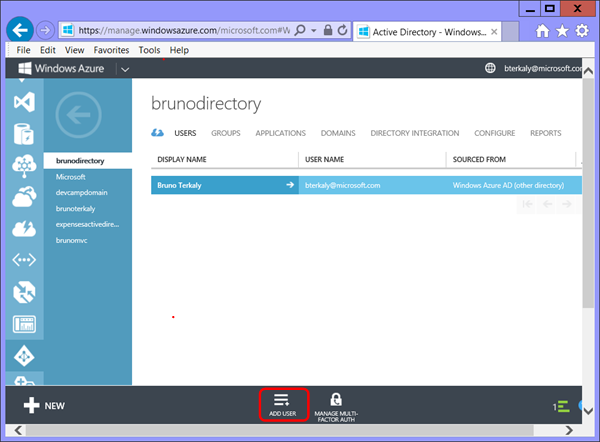
From the left menu bar choose add user.
Adding a user
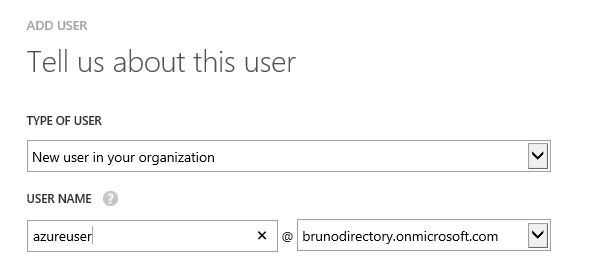
You will enter a username for the provider directory.
Adding a user
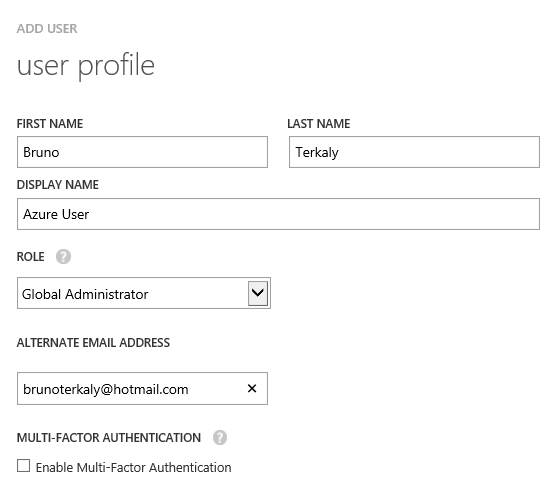
You will enter user profile details. Enter first, last, display name. Also select the role for the user. Choose global administrator. Also indicate an email address.
Entering user profile details
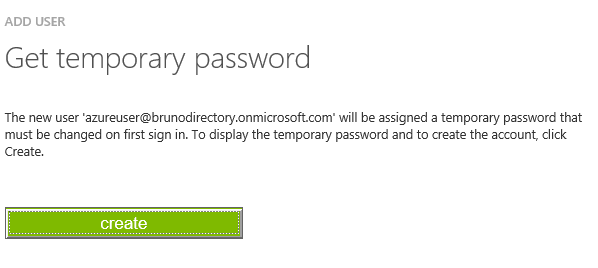
Creating a temporary password. Click the create button
Creating a temporary password
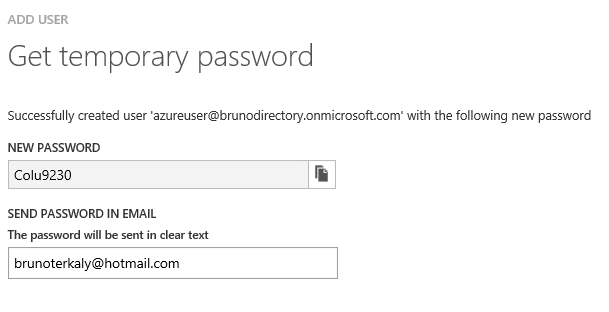
You will be given a new password. You will need to select an email address to send a confirming email to.
Confirming your temporary password
Validating that the user was added. For the details section of your directory, notice the display name should match the one entered, in addition to the user name and domain.
Validating user profile details
Exercise 2
Exercise two is about creating an MVC application that can leverage Azure active directory, or directory services. you will learn the built-in tooling inside of Visual Studio is that makes this possible.
Task 1: Creating the web application
In this task you will create the ASP.net web application.
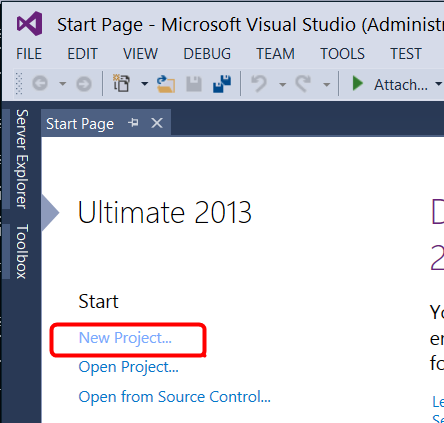
Start Visual Studio 2013 as administrator. From the start page click new project.
creating a new MVC project
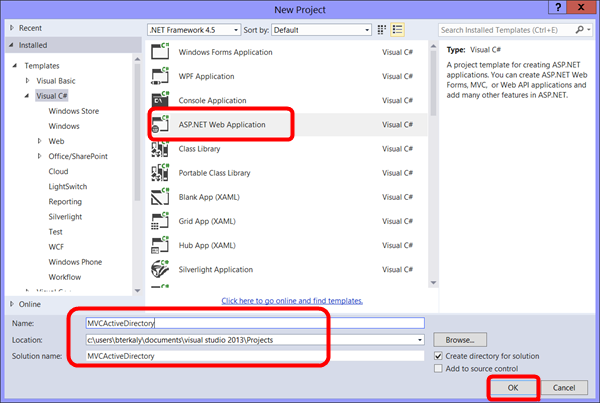
From the templates choose Visual C# . from the middle pane select ASP.NET Web Application. Then provide a name, location and click ok.
Creating a new ASP.net web application
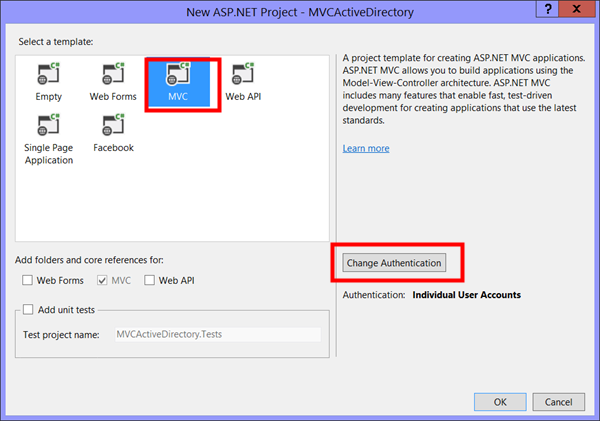
From the template pane select MVC. Then click change authentication.
Specifying an MVC project with authentication
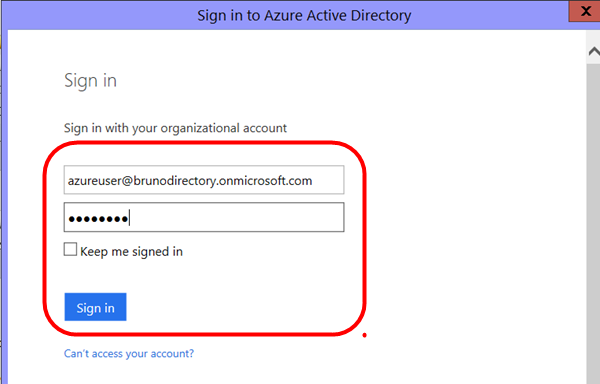
Login with the credentials from the previous exercise. These are the credentials that you specified at the Azure portal.
Logging in to your domain
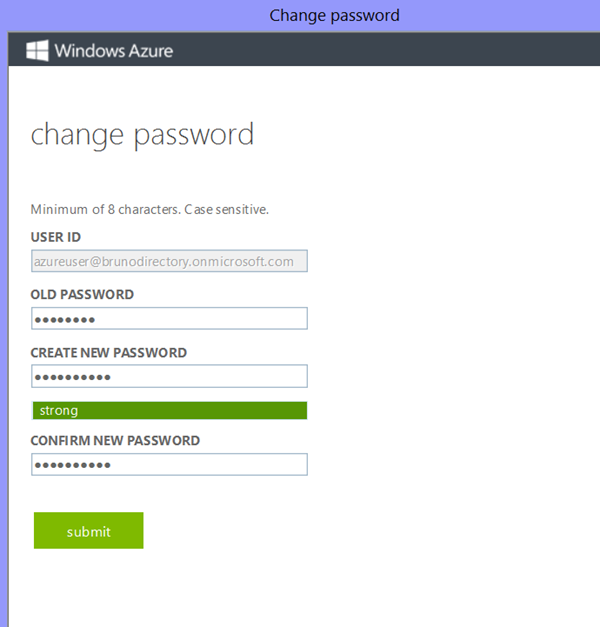
You will need to create a new password. You will need your old one to do so from the previous exercise.
Creating a new password
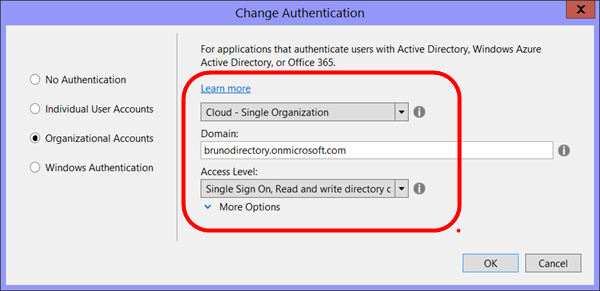
There are some important selections here. First choose organizational accounts from the options on the left. On the right pane indicate cloud - single organization, a domain of brunodirectory.onmicrosoft.com and an access level of single sign-on, read and write directory privileges. This will enable the logged in user (azureuser) to modify directory entries, not just read them.
Changing authentication for the MVC application
Task 2: Testing the entire process
This task is about testing the authentication mechanism to make sure it works. we may do a follow-up lab after this one to see exactly how the user can modify the directory graph. As you recall, the user we created had read/write privileges.
You will not test the login process. From the debug menu of Visual Studio click on Internet Explorer.
Testing your MVC authentication mechanism.
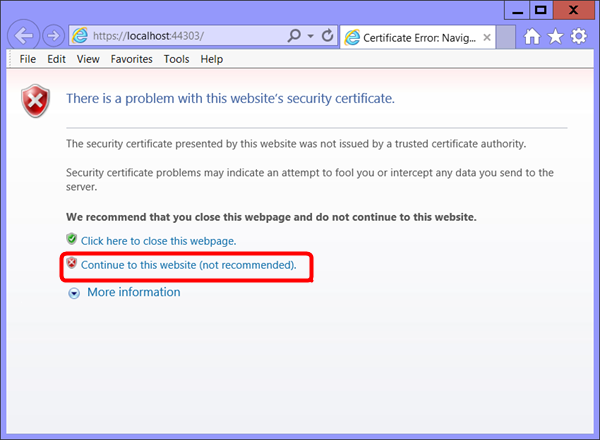
As you might expect you are asked to provide some security credentials to continue.
Continuing to the website to enter security credentials
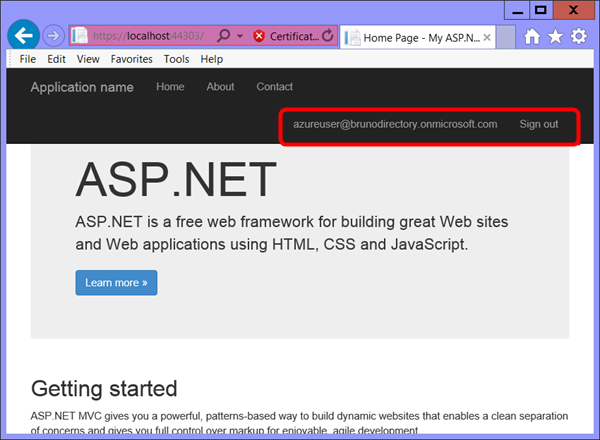
Notice that the user is logged in. Your MVC application has been authenticated using active directory. The currently logged in user can even modify the directory graph for this domain ( brunodirectory@onmicrosoft.com ).
Validating login
Summary
In this post we learned how to leverage directory services in Azure. we created an MVC web application that was able to login a user created at the Azure portal. In the next post we may discover that we can actually modify directory information assuming users were added having global administrative privileges.
