How to Export an On-Premises SQL Server Database to Windows Azure Storage
Overview
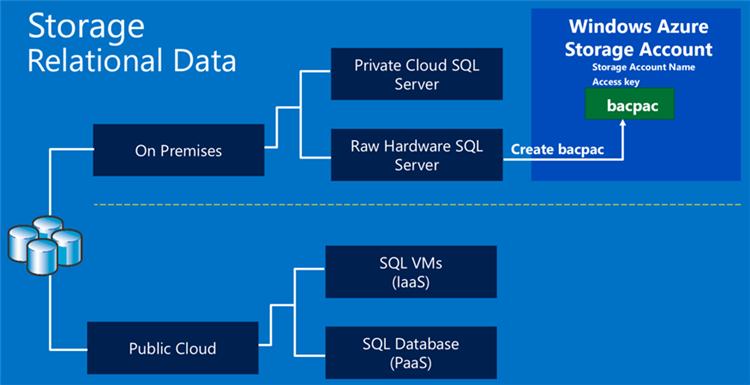
This lab is about exporting the on-premises database as a bacpac file and storing the bacpac file in Windows Azure Storage as a blob.
See my previous post here: How to create a Windows Azure Storage Account as a prerequisite for this lab.
Exporting to Windows Azure Storage
Once you create the bacpac file, you can import into a Windows Azure SQL Virtual Machine Database.
Objectives
In this hands-on lab, you will learn how to:
- Create a Virtual Machine with Visual Studio 2013 RC from the Windows Azure Management Portal
- Download and install SQL Server 2012 Express
Prerequisites
The following is required to complete this hands-on lab:
- A Windows Azure subscription
- An install of SQL Server 2012 Express or higher
- The MVC4Sample sample database (or some database you wish to migrate)
- How to create a Windows Azure Storage Account
Setup
In order to execute the exercises in this hands-on lab you need to set up your environment.
A set of database-oriented posts
This post is part of a set of posts that go together:
- How to create a Windows Azure Storage Account
- How to Export an On-Premises SQL Server Database to Windows Azure Storage
- How to Migrate an On-Premises SQL Server 2012 Database to Windows Azure SQL Virtual Machine
- How to Migrate an On-Premises SQL Server 2012 Database to Windows Azure SQL Database
- Setting up an Azure Virtual Machine For Developers with Visual Studio 2013 Ultimate and SQL Server 2012 Express
Exercises
This hands-on lab includes the following exercises:
Getting Started: How to use SQL Server Management Studio to create a bacpac file in Windows Azure Storage
In this section, you will log into the Windows Azure Portal and create an Azure Virtual Machine using the Windows Azure Gallery.
Task 1 – Exporting the on-premises database
This exercise is about creating a bacpac file and putting it in Windows Azure Storage. As you recall, in Exercise 1 we created a storage account for this very purpose.
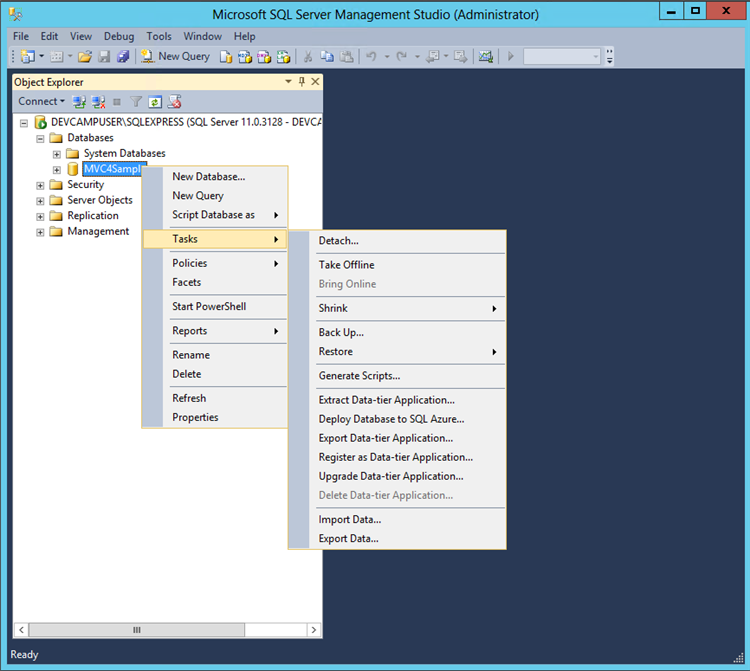
Right mouse click on MVC4Sample. Choose Tasks | Export Data-tier Application. You will be given the opportunity to name both the bacpac file and the container name. Recall that the Bacpac file is a blob file in Windows Azure Storage.
Exporting the data tier from an on premises database
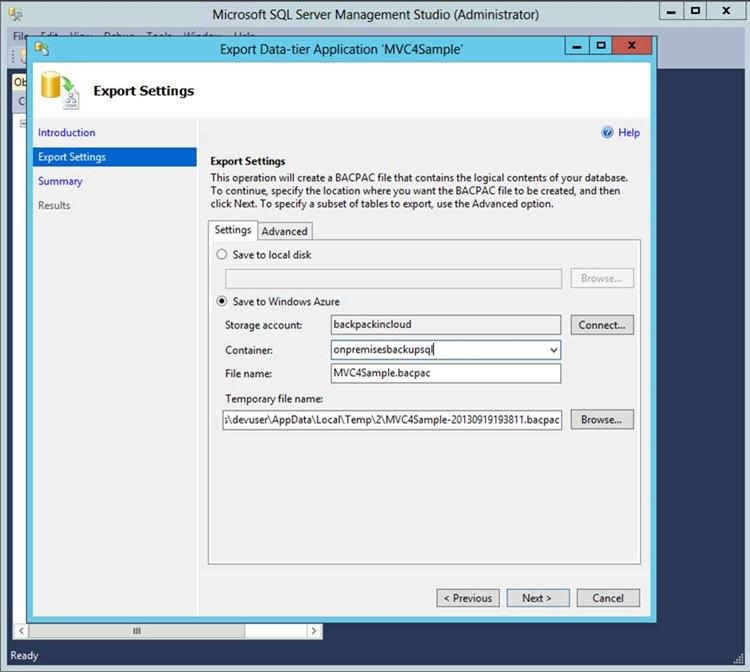
Select the radio button Save to Windows Azure. Next, click on the Connect button. You will be prompted with a list of storage account names. Select the storage account name you provided from Exercise 1. You will also have the opportunity to specify a container name. Click Next.
Specifying storage account name and account key
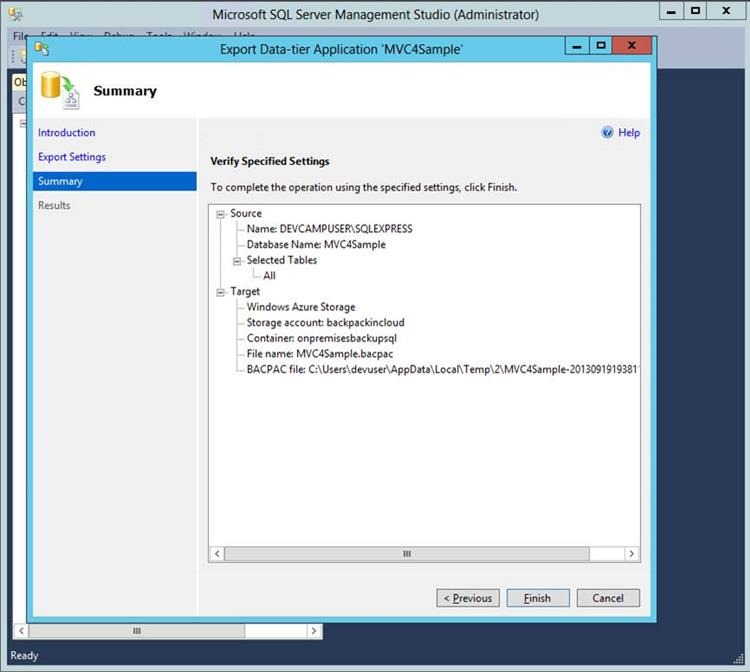
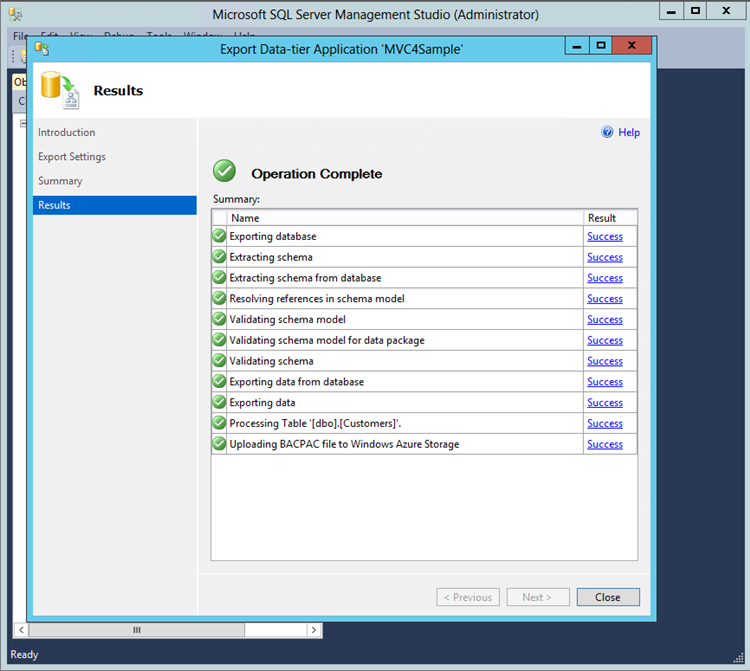
Click the Finish button. The bacpac file has now been successfully stored in Azure storage. confirming the correct export. Click Close to complete the export process.
Finishing the export
Click Close to complete the export process.
Confirming the correct export
Summary
You have now successfully exported the bacpac file to Windows Azure Storage. You are now able to leverage this blob or bacpac file and import into Windows Azure SQL VM. This will be described in a future post.
