Aspose.Cells - Embedding spreadsheet functionality in a cloud-based web application
Introduction
I frequently work with Excel. I’ve programmed all sorts of different types of applications. I think of Excel as the Swiss Army Knife of applications – it slices, it dices, and much more.
It is often necessary to programmatically change a spreadsheet. This typically means you need to have Excel installed and be able to leverage Visual Basic For Applications (VBA) or to write an Excel Add-in in C#.
There are a few challenges here with VBA and Excel Add-Ins. The first challenge is that you need Excel installed. This means that a server will probably need a copy of Excel. Not only does this introduce licensing headaches, but it also limits you to supporting one user at a time. Add-Ins also represent challenges, because they are somewhat challenging to setup and configure.
There is often a need to support Excel from the server. Think about modifying spreadsheets and allowing users to download them. Think about doing this at scale. Imagine installing Excel on all your servers. This article is about solving that problem.
Cloud Support
I do a lot of work with Cloud Technology (Windows Azure). There have been many scenarios where I want to manipulate a spreadsheet and make it available for download. Because my goal is often to manipulate the underlying spreadsheet directly without Excel installed, I thought I’d try working with Aspose.Cells, a product which allows me to conveniently manipulate the spreadsheet contents directly, such as cell formatting, data importing, or leveraging a variety of complex mathematical formulas – to name a few. For a complete product description, see this link https://www.aspose.com/docs/display/cellsnet/Product+Overview.
Excel was never intended for use on the server-side. Running Excel in the cloud is a problem because it is difficult to authenticate incoming requests, and may not protect you from unintentionally running macros. Excel running on a server is non-reentrant, STA-based Automation designed for a single client, offer little scalability as a server-side solution.
Desktop and Web Support
Aspose.Cells also provides a couple of controls, that allow you to embed a pseudo-spreadsheet directly into a web or desktop application. This can be very powerful because users typically understand how spreadsheets work. This makes it possible to provide a lot of functionality that is intuitive to a user, even for advanced data entry scenarios.
Setup
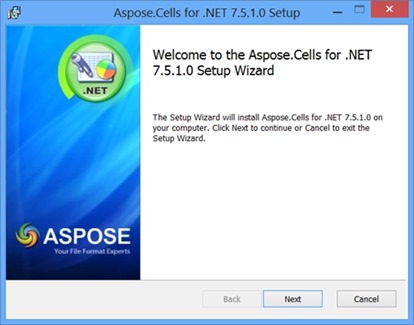
Setup just took a few minutes. Once I downloaded the .msi file, I simply ran it. In the next session I will demonstrate how I excercised some of the features of the product and my experience in doing so.
Creating A Cloud-Hosted, Web App
Create a new project
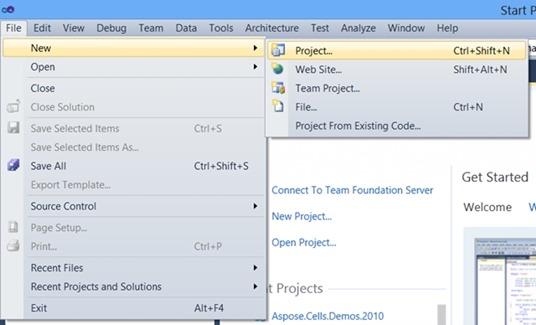
Let’s begin by creating a new cloud based project in Visual Studio. Start Visual Studio and select File, New, Project.
The assumption here is that you have a recent copy of Visual Studio as well as having installed the Windows Azure SDK.
You can download the Windows Azure SDK here, https://www.windowsazure.com/en-us/downloads/.
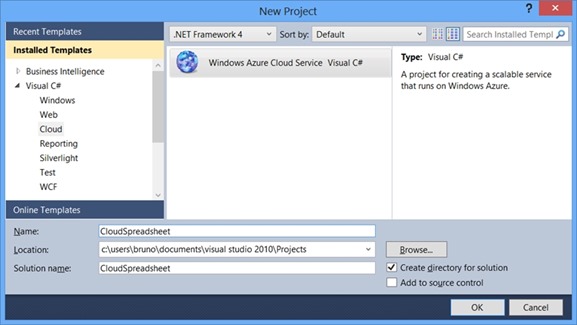
In the left side of the dialog box you can see that there is a selection called Cloud. In the middle pane, you will automatically have selected the Windows Azure Cloud Service. I will name my project, CloudSpreadsheet.
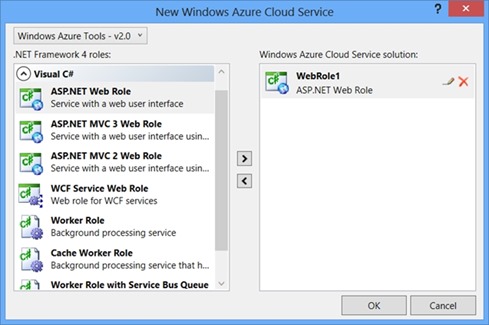
The next dialog box that appears allows you to choose the type of role for your cloud-based service. We will choose the first selection, which is the ASP.NET Web Role. Click the right arrow in the middle to add this web role to our cloud service solution, as seen below.
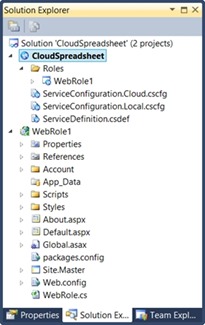
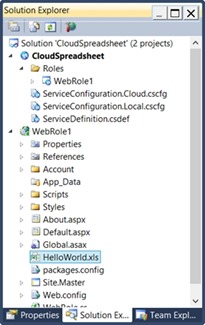
Solution Explorer below reveals to projects. The CloudSpreadsheet project is what allows us to configure the deployment of the cloud. Project. Below is the WebRole1 project, which is where we will define the web project that we are writing. It is in this project where we will add the Aspose.Cells spreadsheet to default.aspx. From there we will deploy the project in the cloud. We are now ready to start adding functionality to the generated project.
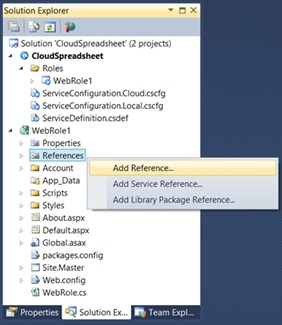
Adding references
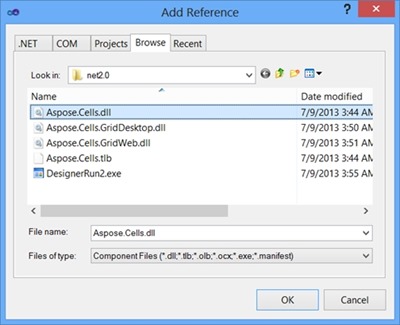
From there we will need to navigate to the folder which contains the DLL file (assembly) for the necessary DLL. The folder that you need to navigate to is:
c:\Program Files (x86)\Aspose\Aspose.Cells for .NET\Bin\net2.0\Aspose.Cells.dll
You will select Aspose.Cells.dll, version 2.0. This DLL gives you all the power to update spreadsheets and more.
Adding a spreadsheet to the project
In this section we will add the HelloWorld.xls spreadsheet to the project. This spreadsheet will be the one that we modified with code, courtesy of the Aspose.Cells software package.
This example spreadsheet was provided by the installation package for the Aspose product. It can be found here:
C:\Program Files (x86)\Aspose\Aspose.Cells for .NET\Demos\C Sharp\Web\Aspose.Cells\Designer\Workbooks\HelloWorld.xls
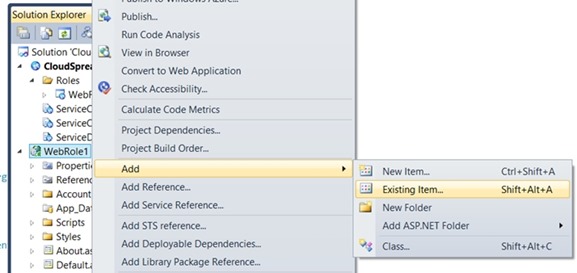
As you can see below, we simply right mouse click on WebRole, and choose Add/Existing Item from the pop-up menus.
Use the path to HelloWorld.xls provided previously. Your Solution Explorer should look like this:
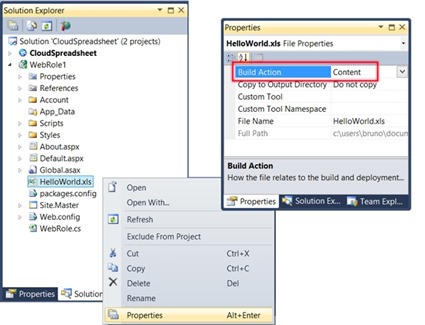
The next task is to alter the properties of HelloWorld.xls. By setting the Build Action to Content, and guarantees that the HelloWorld.xls file will be deployed along with the rest of the application.
Failure to complete this step will result in a runtime error, because the code will not be able to find the missing spreadsheet file.
Modifying the default webpage
We are now ready to begin the basic “hello world” demonstration. The goal of the demonstration is to open an existing spreadsheet (HelloWorld.xls) on the server, modify the spreadsheet, and allow the user to download it.
Return back to Solution Explorer and right mouse click on default.aspx. From the pop-up menu, select View Designer.
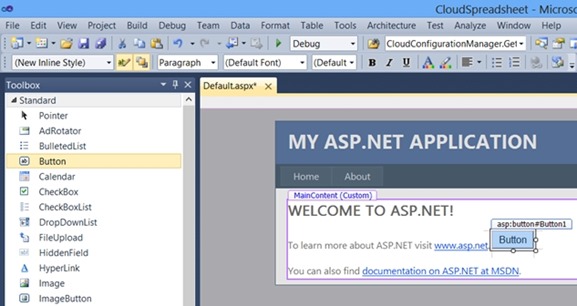
Once the designer is visible, we will drag a button from the toolbox onto default.aspx as seen below.
While in design mode. We will double click on the button, allowing us to add code behind. The code that we will add will simply open the existing spreadsheet (to be added next), and modify the contents of that spreadsheet. Once it has been modified and saved, it will be downloadable through the browser. This will represent a powerful capability that most developers will want when working with spreadsheets.
Once you click on the button in design mode, the code editor window will open. Before writing code for the click procedure, we will go to the top of default.aspx.cs and add a couple using statements, as follows:
| 12 | using Aspose.Cells;using System.IO; |
Here is the code for the Button1_Click() event. The purpose of the code can be summarized as follows:
| Open the hello world spreadsheet |
| Place the text “hello world” into cell A2 |
| Send the resulting spreadsheet back to the user through the browser |
| 1234567891011121314151617181920212223242526272829 | protected void Button1_Click(object sender, EventArgs e){ // Open template string path = System.Web.HttpContext.Current.Server.MapPath("~"); path = path.Substring(0, path.LastIndexOf("\\")); path += “HelloWorld.xls"; // Create a workbook object Workbook workbook = new Workbook(path); // Get the first worksheet in the workbook Worksheet worksheet = workbook.Worksheets[0]; // Get the cells collection in the sheet Cells cells = worksheet.Cells; // Put the string hello world into cell A2 cells["A2"].PutValue("Hello World from Bruno"); // Save file and send to client browser using selected format workbook.Save(HttpContext.Current.Response, "HelloWorld.xls", ContentDisposition.Attachment, new XlsSaveOptions(SaveFormat.Excel97To2003)); // end response to avoid unneeded html HttpContext.Current.Response.End(); } |
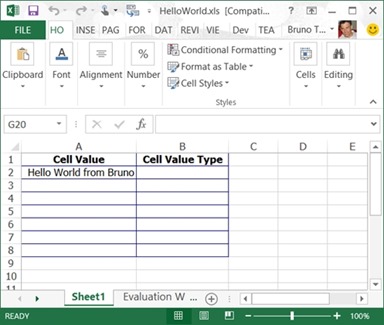
The result should be that a spreadsheet that will be downloadable from the browser. Once that spreadsheet is downloaded and opened, you will be able to see the text, “Hello World from Bruno” in cell A2.
Running the project
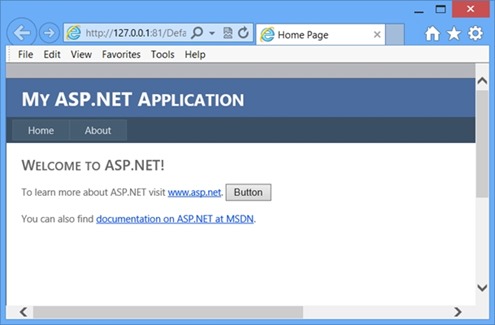
At this point we have completed all the necessary edits. Now it is simply a case of running the project and clicking on the button that we added. Once clicked, the code that we added will get executed.
To run the project, go to Visual Studio’s build menu and select rebuild solution. To run the project. Simply hit the F5 key.
Running it in the emulation environment
You may not realize this now, but we ran the project in the Windows Azure emulation environment. hen you install the Azure SDK. It also installs and emulation environment that lets you run your project locally, simulating what it would look like in the cloud. This can be very useful because you can do all your testing and development locally on your computer, without having to worry about the complexities of deploying to the cloud.
Deploying to the cloud
What makes the next section really compelling is that you can run this functionality at scale. You can support thousands and thousands of users by leveraging the capabilities of Windows Azure.
One of the things we need to do is remove the connection string in the web.config file. We are not using a database in this sample so that connection string will generate an error once we deploy to the cloud.
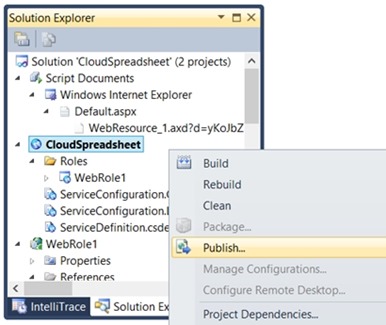
The tooling within Visual Studio makes it trivial to deploy this application to the cloud. By right mouse clicking on the cloud spreadsheet project, you can select publish. This will build a deployment package package and upload it to your Windows Azure subscription account. Naturally, this assumes that you have established an account with Windows Azure.
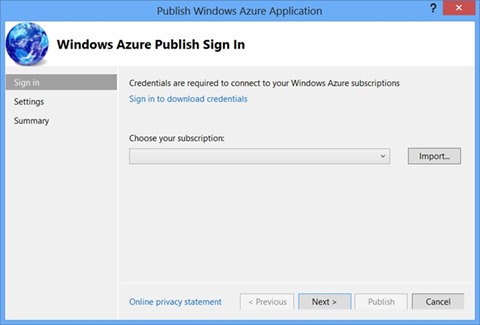
The following dialog box will appear.
Notice in the dialog box above that there is an opportunity to sign in, so that you can download your Windows Azure credentials, making your deployment possible.
So, select the text that reads “Sign in to download credentials.”
Once you sign in, the settings file can be downloaded.
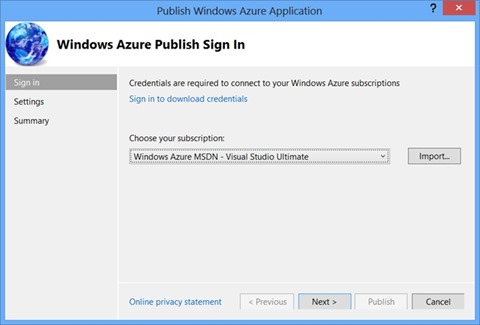
Click the Import button from the publish Windows Azure application dialog box. You can now navigate to the folder where you save the settings file from above. You will obviously import this file. This will Visual Studio to your Windows Azure subscription.
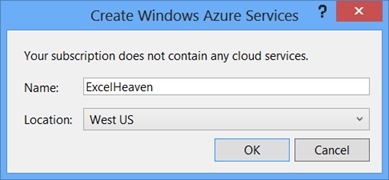
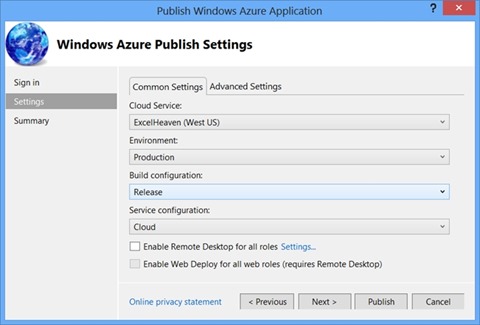
We will deploy our website to a cloud service, which is essentially a virtual machine running IIS, in the Microsoft data center. You can choose from numerous worldwide data centers. In this case we will choose Western United States. It will name a cloud service, ExcelHeaven.
The dialog box below allows us to validate the deployment before publishing it. If you agree with the settings, click the publish button towards the bottom.
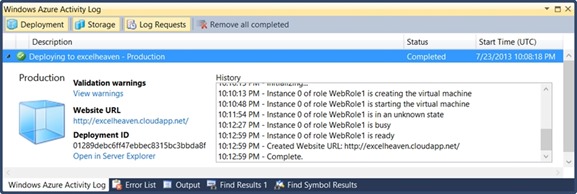
Visual Studio will display the Windows Azure activity log, which tracks the progress of our deployment. The deployment should take about 10 minutes. At that point, we will be able to run our web from the cloud service. And if we needed to scale this to more instances, it is a simple matter of changing a number at the Windows Azure portal. This process can also be automated with PowerShell scripts, in addition to other options that offer full automation.
Once deployment is complete, it will look like this:
Notice the website URL, https://excelheaven.cloudapp.net.
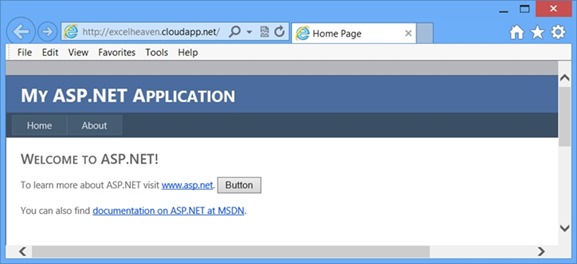
Open up a browser, using this URL and you will get the following session:
Conclusion
In this post we explore the ability to serve up Excel documents from the cloud hosted service. What makes this a compelling proposition is the fact that you don’t need to install Excel up in Windows Azure, and that you can scale the number of instances as needed, supporting an almost unlimited number of users. In addition, not having to install Excel frees you from the constraints of licensing issues. We only scratch the surface about what is possible with the Aspose.Cells product. We’ve provided a simple but through example of how you might get started. For more complete feature list, see this link, https://www.aspose.com/docs/display/cellsnet/Product+Overview.
