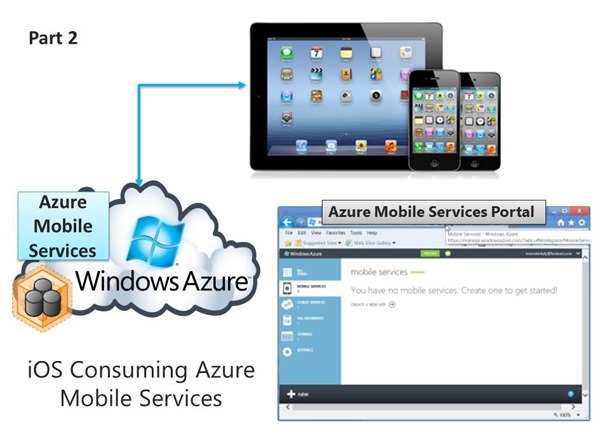
Part 2 of 5: Introduction to Consuming Azure Mobile Services from iOS
- This post is about adding data to the database
- This is the second of 5 parts. The goal is simple here.
- The goal here is to show you how the portal can be used to add data to our database.
- You could use another to learn to do the same thing, like SQL Server Management Studio.
- All the tooling you are familiar with we'll work with the database in Azure Mobile Services.
- That's because SQL database leverages the tabular data stream (TDS).
- This is the same protocol used by on premises SQL server.
Previous Posts
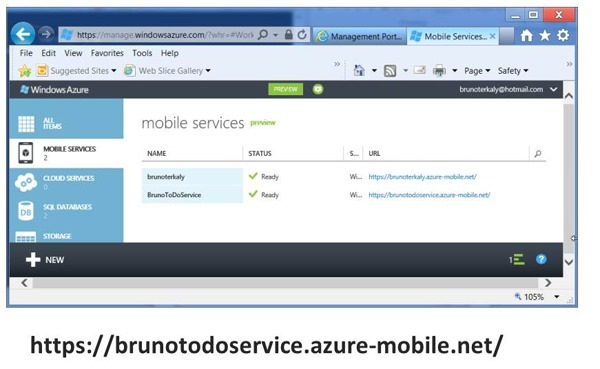
Here is where we left off
- Note the name of our created service
- Service Name
- BrunoToDoService
- URL
- Next Steps
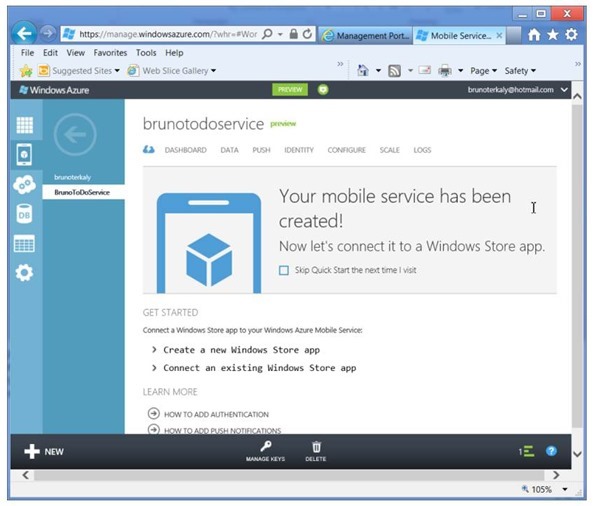
- Click on BrunoToDoService to prepare to have client applications connect to it.
You will need a trial account for Windows Azure for these posts to make sense
- Please sign up for it here:
Managing Our Service (brunotodoservice)
- Do the following:
- Click on CREATE A NEW WINDOWS STORE APP
- This will be just a way to see how data can be added
- Click on CREATE A NEW WINDOWS STORE APP
- A future release will provide direct support for iOS and Android.
- We're going to craft a solution by hand, not relying on any wizards.
- Better support for iOS and Android will come soon
Getting the APPLICATION KEY
- Perform the following:
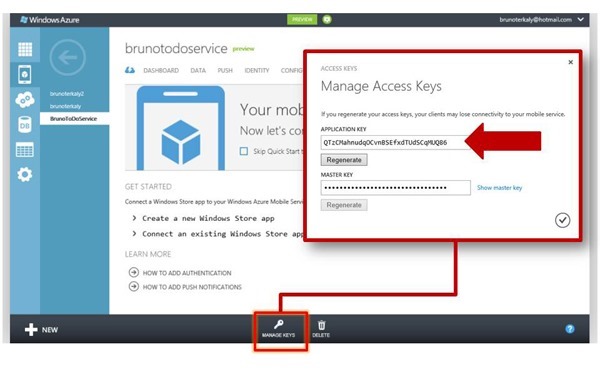
- Click on MANAGE KEYS
- Copy the APPLICATION KEY somewhere safe
- You will use it inside of Fiddler (Debugging tool) and inside your iOS application.
Application Creation Wizard (will create a table in the previously created SQL Database)
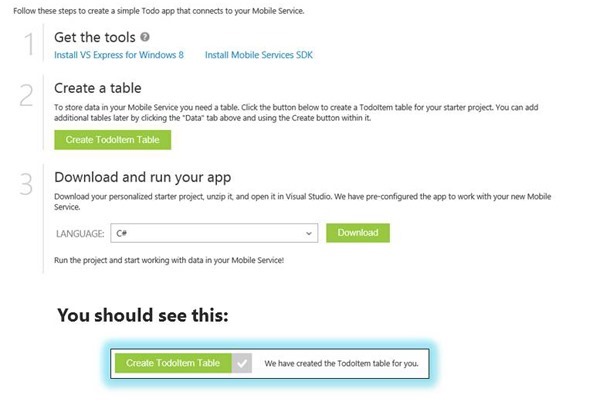
- The screen presents 3 steps
- Step 1
- For Windows Devs (get the developer tools and SDK)
- Since we are writing code in Objective-C for iOS, this step isn't needed
- For Windows Devs (get the developer tools and SDK)
- Step 2
- This step creates a ToDoItem table in our previously created database
- This is the only step we will run
- Step 3
- This step creates a sample project for Visual Studio and Windows 8.
- Since we are writing code in Objective-C for iOS, this step isn't needed
- This step creates a sample project for Visual Studio and Windows 8.
- Step 1
- Do the following:
- Click on CREATE A TODOITEM TABLE
- The next step
- We should add some data to our TODOITEM table
Adding Data (the table and database already exist)
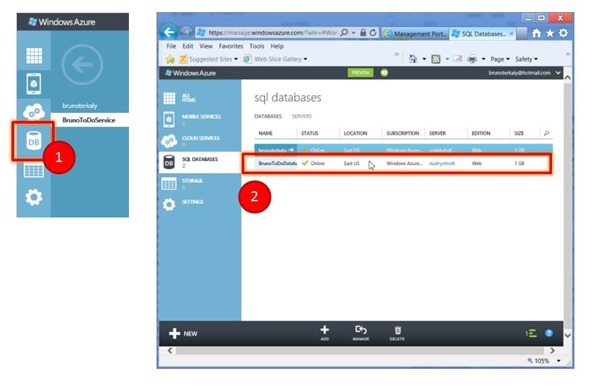
- On the left side of the screen you should see a database icon
- This will allow us to add some data
- Step 1
- Click on the DB icon
- Step 2
- Click on our recently created database and server
Preparing to add data to our TodoItem table
- You could use SQL Server Management Studio to manage the database
- But we will use the built in tools at the Windows Azure Portal
- Perform the following:
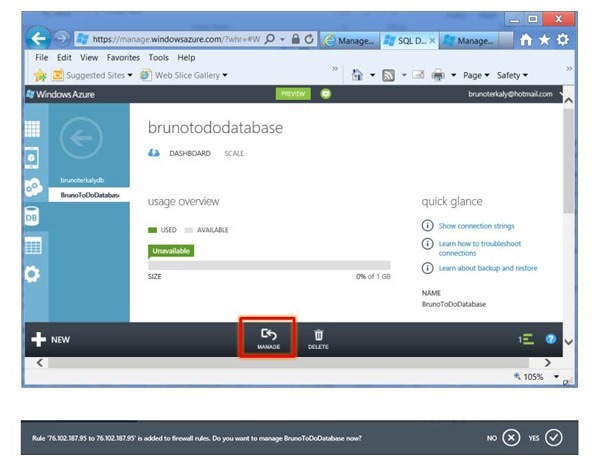
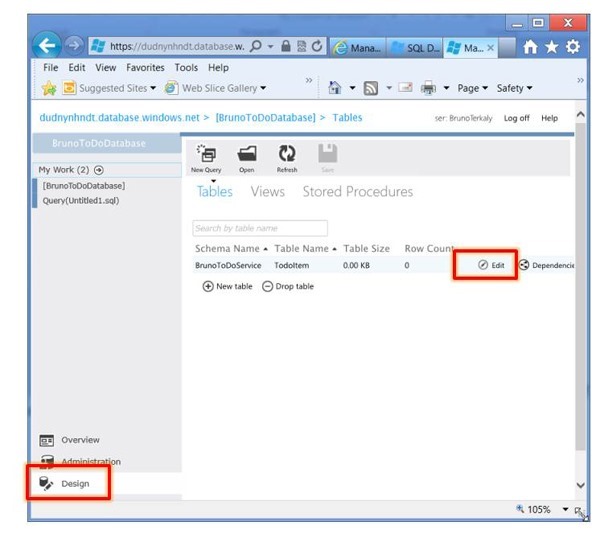
- Click on MANAGE
- You may be asked to add your current IP address to the firewall engine so that you can successfully connect.
- Click on MANAGE
Looking at our table structure
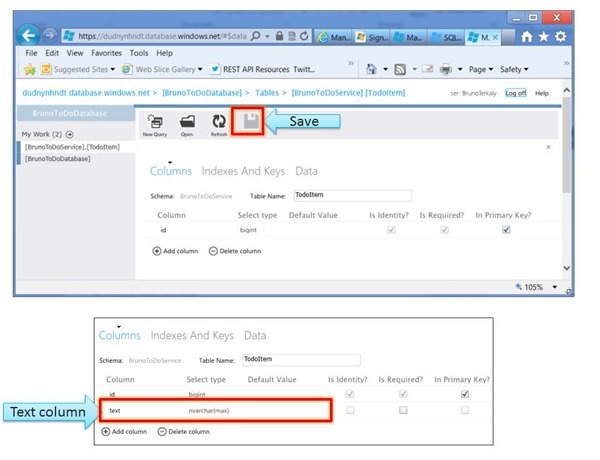
- We are going to add a column
- There is just one column here now
- That column is the ID column
- We will add a TEXT column.
- To add the column, perform the following:
- Click on DESIGN
- Click on EDIT
Looking at our table structure
- We are going to add a column
- Perform the following:
- Click on ADD COLUMN
- Add a column called text
- Click SAVE at the top
- Next we will add some data.
Two rows have been added
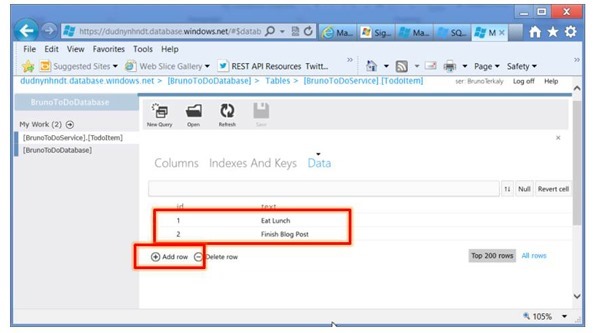
- There will only be two rows for now
- But you can add as many as you like
- We added:
- Eat Lunch
- Finish Blog Post
You will need a trial account for Windows Azure for these posts to make sense
- Please sign up for it here:
Next Post..
The next post is about using Fiddler.
By using Fiddler, you can understand clearly how http can be used with Azure Mobile Services.
The next post will give you some insight about how the underlying service really works .
You can use this insight to interact with Azure Mobile Services from virtually any client that’s capable of http.
Fiddler is an amazingly powerful tool.
