How To Take Photographs From Windows 8 Applications And Automatically Upload Them To The Cloud–Part 6 of 6
Modifying Windows 8 application to point to the deployed web service in a Microsoft data center
- At this stage, we're just about finished with both applications.
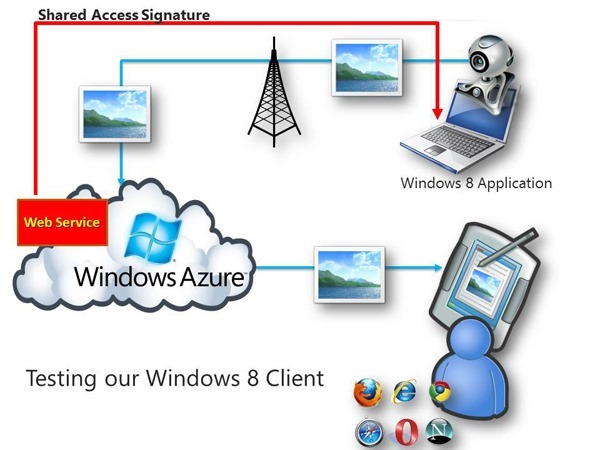
- To the final step is to point the Windows 8 application two are freshly deployed web service in the Microsoft data center.
- This simply means we need to change the URL used by the Windows 8 application.
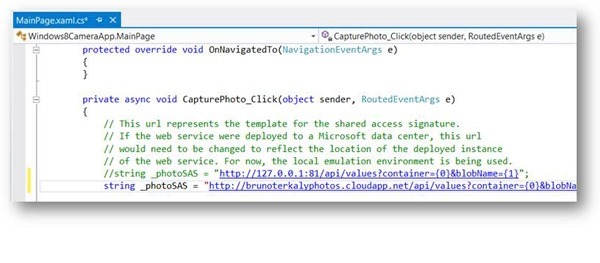
Changing one line of code - Changing the shared access signature URL
- Return back to your Windows 8 application in Visual Studio.
- Open MainPage.xaml.cs
- Simply change the URL as seen in Figure above. Notice that we commented out the URL corresponding to the storage emulator, and replaced it with their real URL pointing to a Microsoft data center, has described previously.
- We will edit the file Mainpage.xaml.cs.
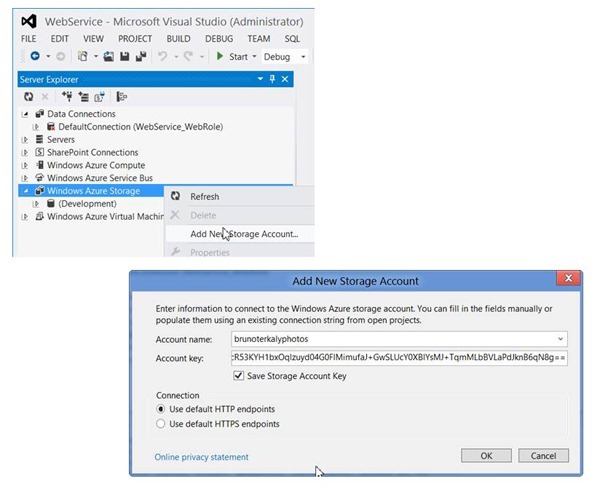
- Notice server explorer above. You can see that I've attached to our storage account in the cloud, courtesy of Visual Studio.
- Key point:
- On line 8 you cannot use brunoterkalyphotos. That is my personal account.
- You need to sign up for an azure test account. See end of this post for instructions.
Using Visual Studios storage explorer to view the file
- At this point you could connect Visual Studio to the newly created storage account. From there you would be able to retrieve the URL corresponding to the photo that you just uploaded .
- Return to Visual Studio and the web services project.
- From the view menu select a Server Explorer.
- Right mouse click on Windows 8 azure storage as seen in the figure above.
- You can see that we've added the account name and access key.
- AccountName=brunoterkalyphotos
- AccountKey=eTzHRURU6vVoSX7hY2cR53KYH1bxOqlzuyd04G0FlMimufaJ+GwSLUcY0XBlYsMJ+TqmMLbBVLaPdJknB6qN8gSeSelect add new storage account
Getting the URL for our recently uploaded photo
- View Server Explorer.
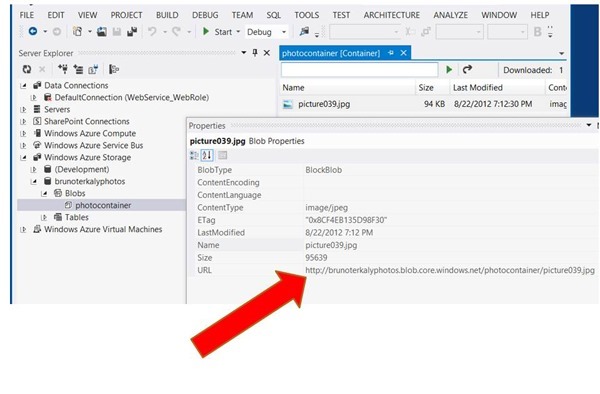
- Right mouse click on n photocontainer in Server Explorer, and choosing Properties, you can get to the underlying url of your uploaded blob (picture).
Using Visual Studio to view your uploaded photograph
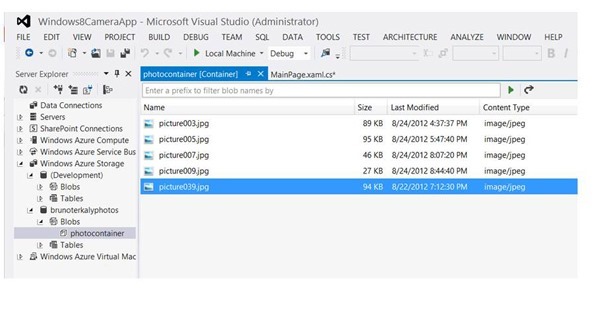
- Once you select photocontainer in Server Explorer, you can see the list of blobs inside the container (photocontainer).
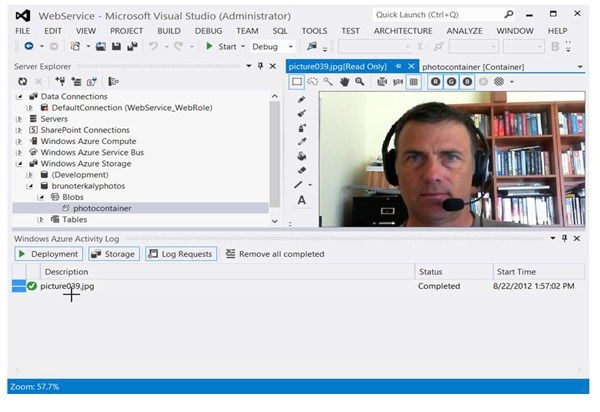
- You could double click on picture039.jpg to view it. In effect, Visual Studio is downloading for you.
Using Visual Studio to view your uploaded photograph
- That's all there is here
- The point is that you can view uploaded blobs with Visual Studio and with a browser.
| MainPage.xaml.cs | |
| 1 2 3 4 5 6 7 8 9 10 11 | private async void CapturePhoto_Click(object sender, RoutedEventArgs e) { // This url represents the template for the shared access signature. // If the web service were deployed to a Microsoft data center, this url // would need to be changed to reflect the location of the deployed instance // of the web service. For now, the local emulation environment is being used. //string _photoSAS = "https://127.0.0.1:81/api/values?container={0}&blobName={1}"; string _photoSAS = "https://brunoterkalyphotos.cloudapp.net/api/values?container={0}&blobName={1}"; try { |
Re-running the Windows 8 application
- Now that we have successfully deployed our web servers to the cloud, we're ready to run the Windows 8 application to test its ability to upload photos. There's no need to run the web services project from Visual Studio since it has already been deployed.
- Return to Visual Studio and the Windows 8 application.
- We have finished with the data connection string
- Run the application and Capture Photo
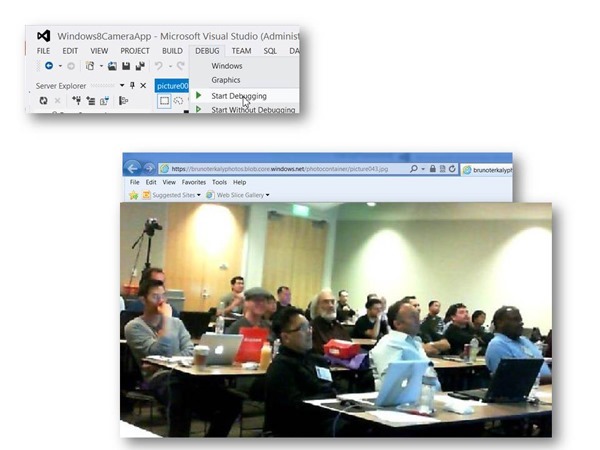
- Within seconds of taking the photo, it has been uploaded to the cloud and is ready for public viewing.
- The photo above demonstrates the publicly available image. In fact, you could go to it now.
Source Code
- Download all source code here.
- Future Posts
- Stay tuned!
- Download the free trial
- You will need a trial account for Windows Azure
- Please sign up for it here:
- You will need a trial account for Windows Azure
Thanks..
I appreciate that you took the time to read this post. I look forward to your comments.
